Practice Makes Perfect
Drawing is a skill that anyone can develop. Once you have a strong foundation of the fundamentals of observational drawing, then practice is what should follow. The more that you practice, the better you will get at drawing.
Unfortunately too many people believe that drawing mastery requires talent. But if you ask any accomplished artist what makes them great, they’ll likely tell you that it’s a combination of knowledge and practice.
Making time for practice can be the real challenge for most of us. That’s why it’s important to make drawing practice a part of your daily routine. Even just a few minutes each day will make a big difference.
In this timed sketching exercise, we’ll create a sketch of an eagle on toned drawing paper.

Materials for this Sketching Exercise
For this exercise, we’ll use graphite and white charcoal on toned drawing paper. There’s nothing fancy about this paper. It’s simply toned recycled sketch paper by Strathmore. You’re welcome to use any drawing media that you wish and any surface that you prefer.
The graphite applications are made using a combination of 2B and 4B graphite. The 2B pencil is used for most of the applications, while the 4B is used to darken the shadows and broaden the range of value. The white charcoal is used for the highlights and lighter mid tones. We’ll allow the gray tone of the paper to show through in areas, working to help us create a full range of value in a short period of time.
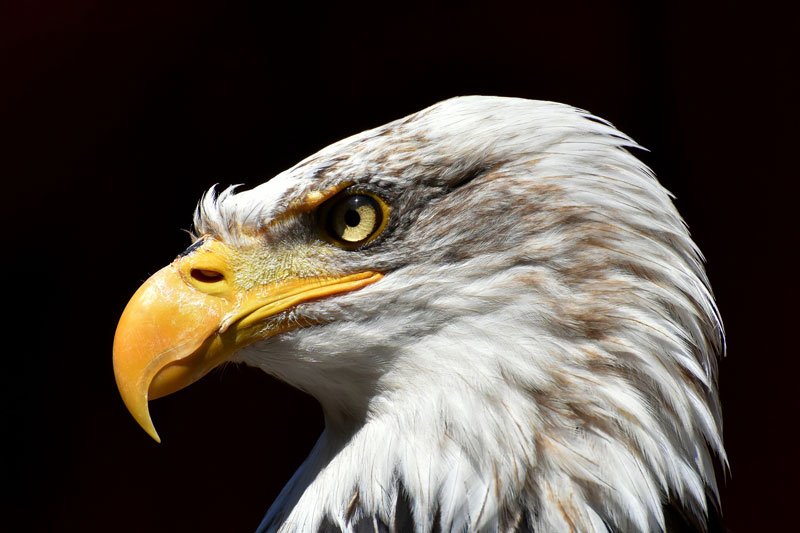
Photo Reference
The photo reference that we’re working from comes from pixabay.com.
Here’s a look at the photo reference of the eagle…
How to Sketch an Eagle – Step by Step
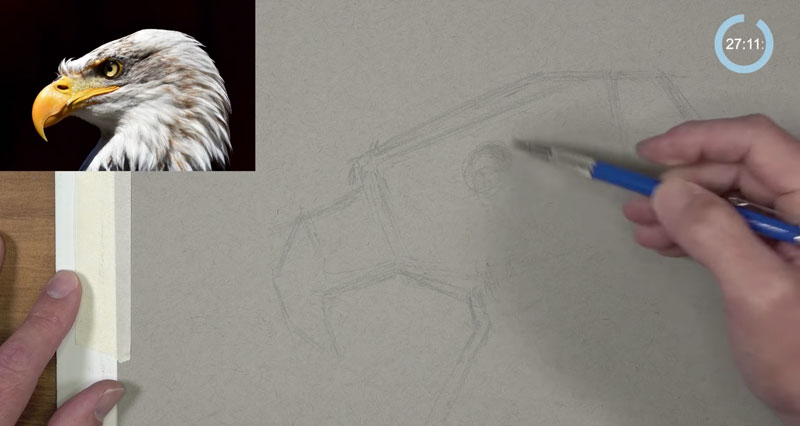
We’ll begin the drawing with the 2B graphite pencil, sketching in the basic shapes. We’re simplifying the form of the eagle down into the most basic shapes. We can piece these geometric shapes together to describe the overall larger shape of the eagle. This approach to drawing is called construction.
See also: Drawing Basics – Construction
Looser, light lines are used to develop each of the shapes. As we become confident with the shapes that we’ve pieced together, we can develop some of the details and define the contours (outlines) with a little heavier pressure placed on the pencil.
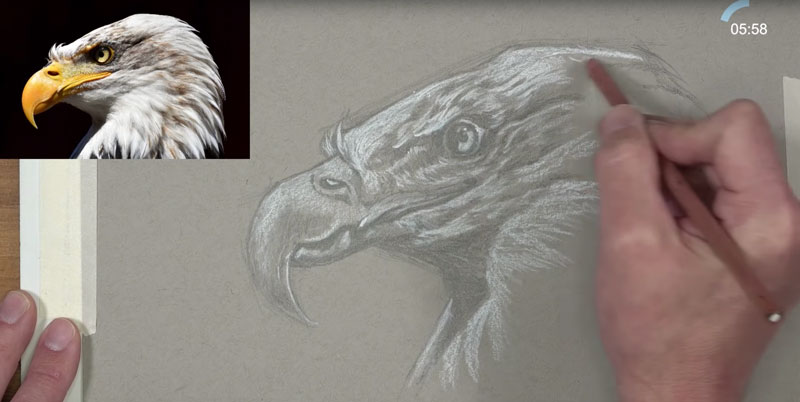
With the contour lines in place, we can begin developing the darker values. Sticking with the 2B pencil, we’ll begin adding the darker tones using directional strokes that mimic the form of each section. For the beak, circular strokes are applied. For the head, strokes are pulled in the direction that the feathers grow.
By darkening the values with directional stroking, we begin to develop a sense of the texture.
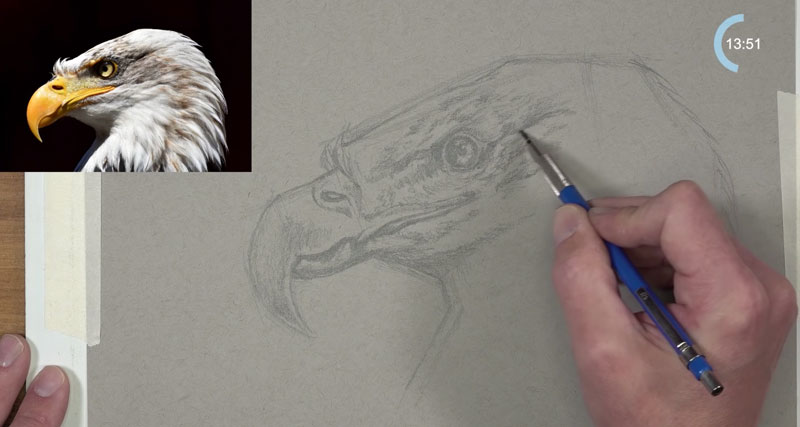
Once we have developed the locations of darkest value, we can begin addressing the lighter values and the highlights. Since we’re working on gray toned paper, we can allow some of the tone of the paper to work as midtones.
The gray paper also allows us to add the lightest values with a white drawing medium. If we were working on white paper, we would have to preserve these areas, working around them with our graphite. In this case, white charcoal is added. If you don’t have white charcoal, you can substitute a white colored pencil or pastel pencil.
See also: 6 Reasons to Draw on Toned Paper
Since our light source in this scene originates from the upper left, most of these lighter values are found on the top and left sides of the eagle. However, a strong area of cast shadow exists right underneath the beak where a shadow is cast.
With most of our light values in place, we can begin to darken up some of the areas of strongest shadow. We’ll switch over to the darker and softer, 4B graphite pencil to do this. We don’t want to cover all of the applications made with the 2B pencil. We simply want to make the darkest shadows a little darker.
As this pencil is applied, we broaden the range of tone and increase the contrast. By increasing the contrast, we bring out more of the textures and make the light a little stronger.
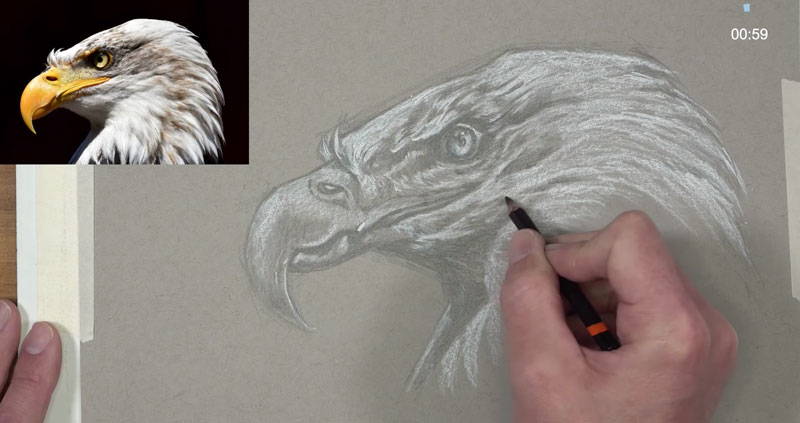
We can then go back and forth with the 4B pencil and the white charcoal to broaden the range of value even further. We can make refinements to the drawing as our 30 minute time constraint is nearly up.
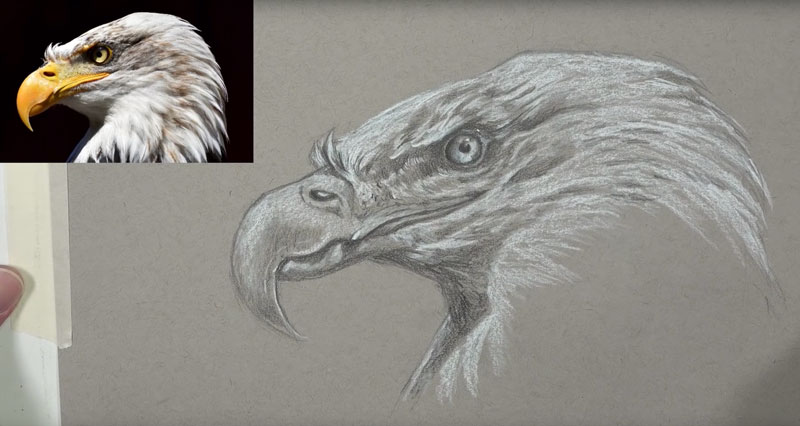
Using a kneaded eraser, we can now erase any remaining stray pencil lines and clean up the sketch.
Here’s a look at the completed sketch of an eagle, completed in just under 30 minutes…
Conclusion
I hope that you tried this exercise and were pleased with the results. Remember, as artists, we’ll all see things a little differently. We’ll also apply the mediums that we use differently as well. It’s ok if your drawing looks a little different. The point of this exercise is practice. And although we want our drawings, even our sketches, to be as accurate as possible, it’s ok to notice inaccuracies. If we were creating a finished drawing, we wouldn’t be working under a time constraint and we would correct any mistakes as we worked. It’s fine to leave those little “mistakes” in your sketches. This is all about practice. And the more that you practice, the better you will get.
If so, join over 36,000 others that receive our newsletter with new drawing and painting lessons. Plus, check out three of our course videos and ebooks for free.