Sketching Practice with Charcoal
Many people mistakenly believe that you must have talent in order to draw well. While there are people out there that can sit down and create drawings with relative ease, the truth is that drawing is a skill. And just like with any other skill, it requires practice. Daily practice is best, but we all know that finding time to practice is often difficult.
Sometimes it’s helpful to set a time constraint on your practice. If you know that you’re only going to spend a set amount of time on your practice, you’re more likely to start. And starting, as you may know, is the hardest part. But once you’ve started, and you know that your drawing practice has a set end time, then you’re more likely to see the sketch through to completion.
So, grab your drawing materials and let’s get into a little practice. In this timed sketching exercise, we’ll create a quick and loose drawing of a gorilla with charcoal. If you don’t want to work with charcoal or if you don’t have any at your disposal, you can still draw along side with any drawing medium that you wish.

Materials for this Sketching Exercise
In this drawing, we’ll use vine and compressed charcoal. Vine charcoal is softer and lighter and is used for the beginning stages of the sketch. Compressed charcoal is harder, but creates a darker mark. It is best suited for the finishing touches and for making the values darker. The “white charcoal” that is used isn’t really charcoal at all. It’s called white charcoal, but it’s more closely related to a material called “conte”.
For more on the different forms of charcoal and the basics of drawing with charcoal see: How to Draw with Charcoal
The surface we’ll use for this exercise is gray charcoal paper by Strathmore. This paper features a laid textured pattern. The texture of this surface helps to keep the powdery charcoal in place on the paper, but also aids in any blending that we decide to do. All of the blending in this drawing is accomplished with a finger, but you’re also welcome to use a blending stump.
Of course, the surface that you choose to work on affects the results that you achieve. Drawing mediums behave differently on different surfaces. It’s important to have a good understanding of how the medium will behave on the surface that you choose for any drawing that you create.
Learn more about drawing surfaces: All About Drawing Papers
We’ll also have at the ready a kneaded eraser. A kneaded eraser is soft and pliable and works by lifting the material off of the surface, rather than removing through friction. This means that we can preserve the texture of the drawing without marring it with a rubber eraser. (I don’t use the eraser in this quick sketch, but it was sitting at the ready in case I kneaded needed it.)
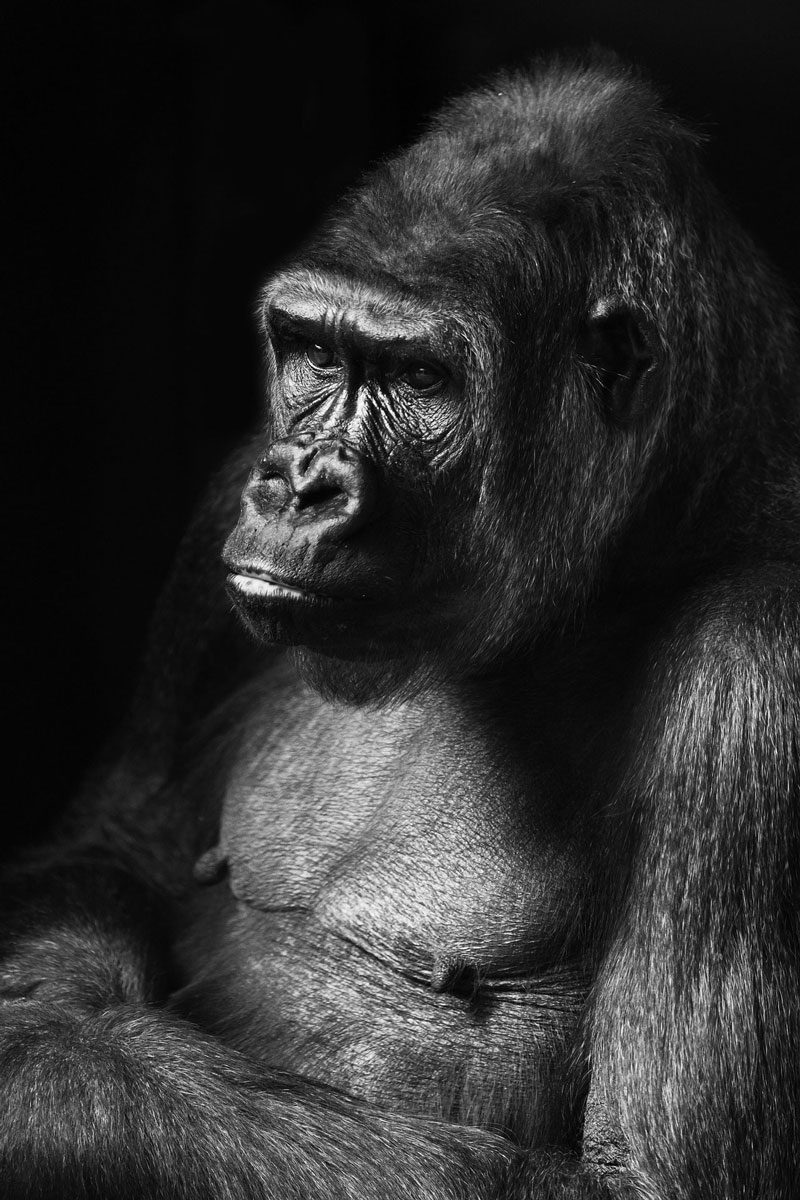
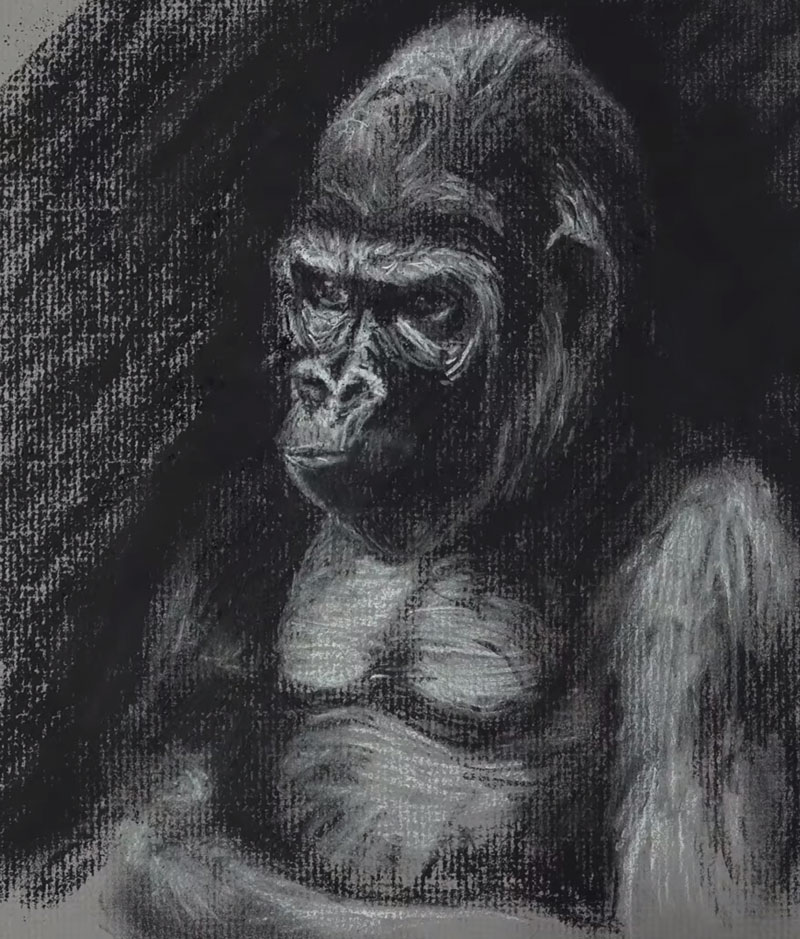
Photo Reference
The photo reference that we’re working from comes from pixabay.com. This site features tons of reference material submitted by wonderful photographers from all over the world. In this case, I edited the photo only slightly, reversing the pose with Photoshop.
Here’s a look at the photo reference of the gorilla…
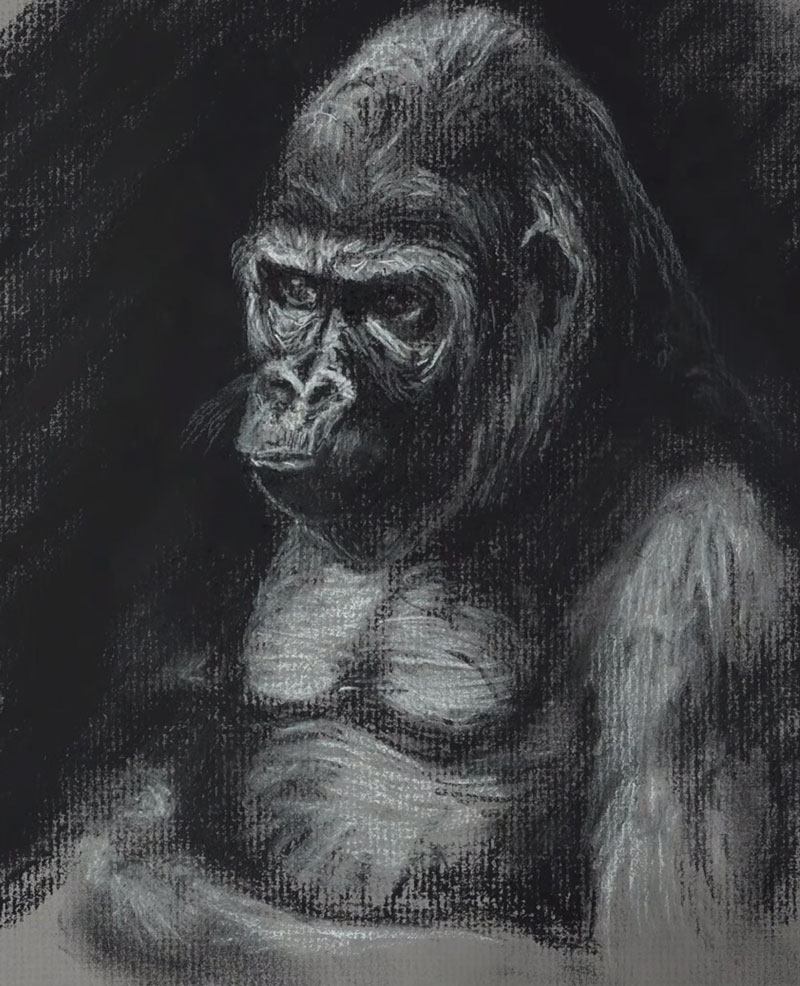
How to Sketch a Gorilla – Step by Step
We’ll begin with loose shapes that define the form of the gorilla using the softer, vine charcoal. It be helpful to keep your arm moving while you make these marks. Don’t worry about making the drawing perfect. This is only a sketch and is designed for practice. Try to get the proportions as accurate as possible, but don’t obsess over them. Remember, we’re working against the clock.
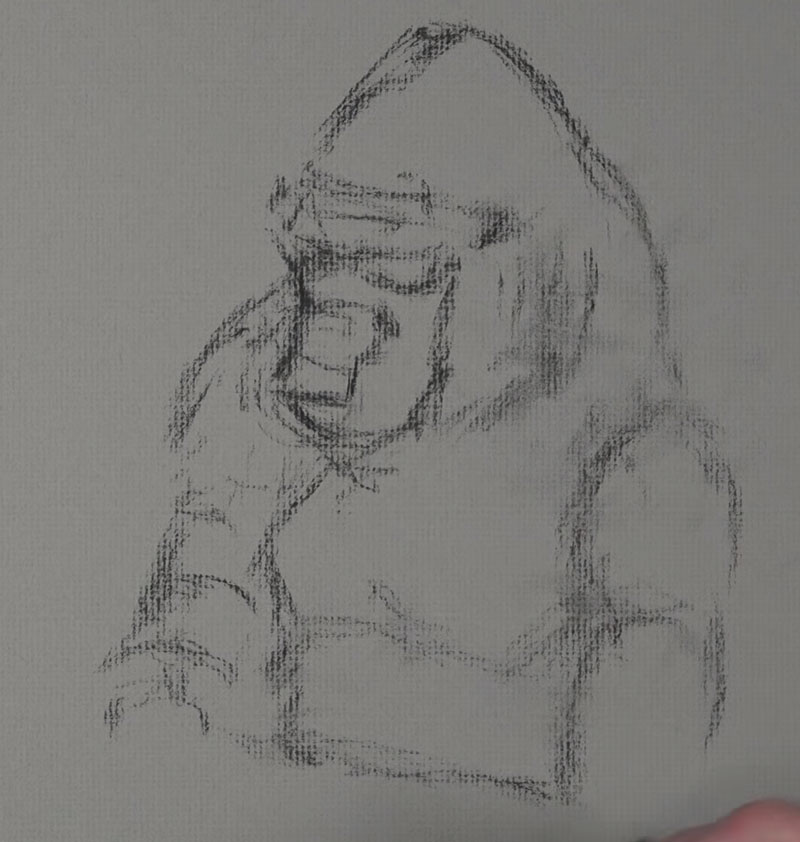
Once our basics shapes are in place, we can begin adding some of the darker values. We’ll continue with the vine charcoal stick to do this. Look for the basic shapes that the darker values make and try to draw those shapes.
This image is high in contrast, so it should be fairly easy to see them, but if you find it difficult, you may try squinting at the reference. This can make it easier to discern the darks and the lights.
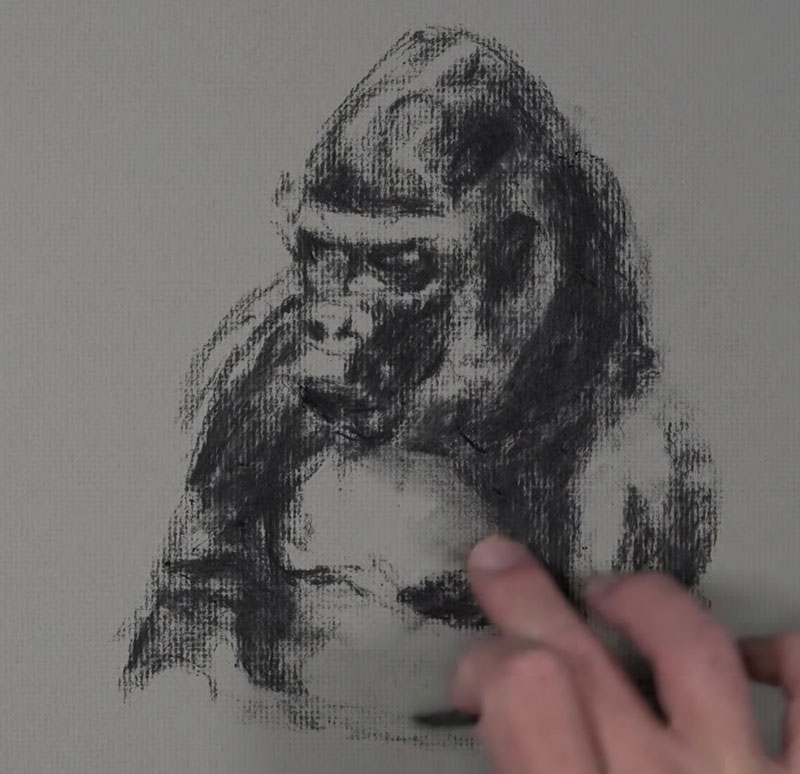
You may use your finger or a blending stump to work some of the material into the surface texture of the paper. You don’t have to do this, but it helps keep the powdery vine charcoal in place on the surface.
Then we’ll grab our compressed charcoal pencil and begin darkening the darkest values even further. While we do this, we’ll also define a bit of the texture, fur, details, and contour lines. Keep your lines loose and gestural.
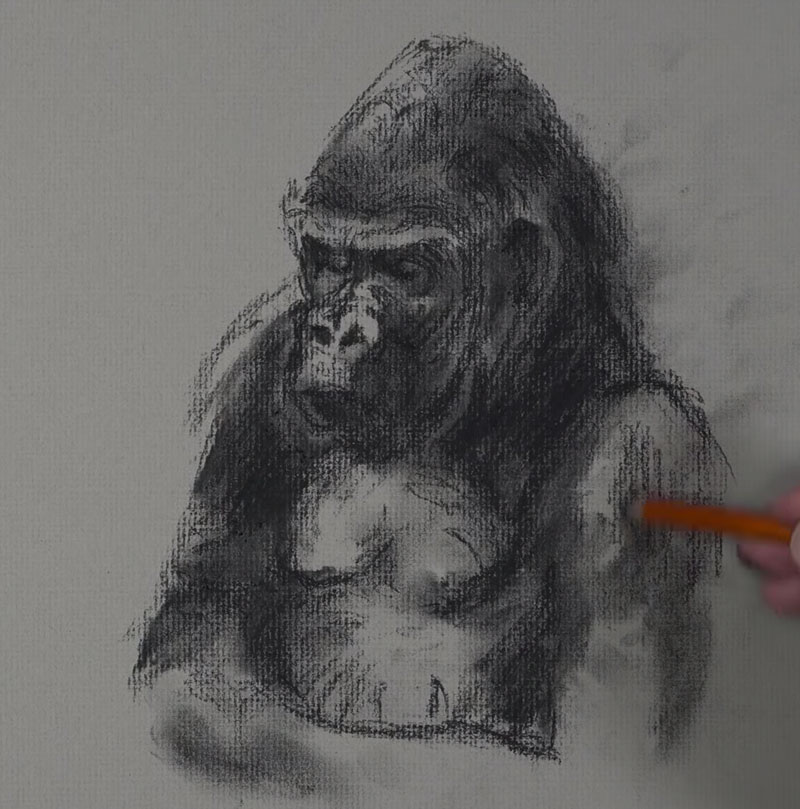
Now we can begin to address some of the lighter values. Since we’re working on gray paper, we can add the highlights and lighter tones with the “white charcoal” pencil. The light source in this scene originates from the left side. This means that most of our highlights exist on the left side of the body of the gorilla.
Using strong defined lines, we’ll add the highlights that we observe, starting with the head and face.
As these highlights are added, we start to develop a full range of value and tone. This increases the contrast, makes the textures more believable, and adds to the illusion of form.
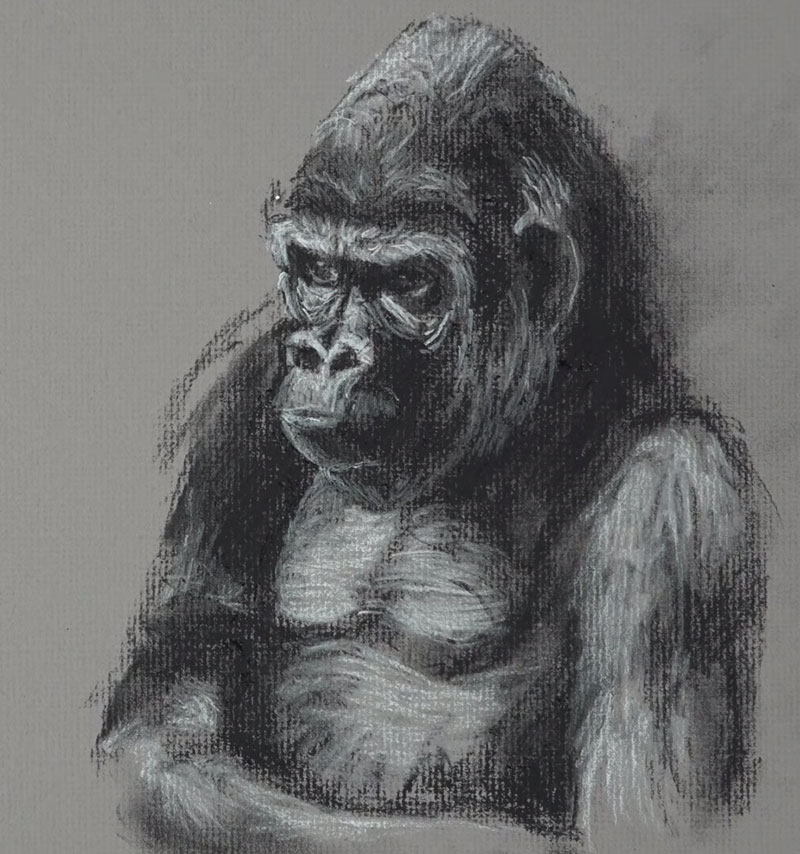
At this point, we could leave the sketch as it is since the gray of paper works well to frame the subject. But, we’ll go ahead and add the dark background and refine the edges of the gorilla further.
Using compressed charcoal, we’ll add the darkest tones in the background and blend the applications with a finger (or blending stump) to complete the background.
Then it’s back to the white charcoal, adding a few finishing touches. We can also revisit areas with the compressed charcoal to strengthen shadows and add additional hints of texture.
Conclusion
It’s okay if you didn’t finish this drawing exercise within the time constraint. Any type of practice will contribute to your drawing improvement. Remember, this is not a completed drawing. This is a sketch and an exercise. If you attempted this exercise, your drawing won’t look just like the photo and this is okay. Sketching exercises are designed for practice. Drawing is a skill and most of it is mental. The more that you practice training your brain to see, the better you will get at drawing.
If so, join over 36,000 others that receive our newsletter with new drawing and painting lessons. Plus, check out three of our course videos and ebooks for free.