Flamingos are also masters of balance. They can stand on one leg for several hours! During that time, another leg is tucked close to the body. It is supposed that such a pose helps to conserve heat, as flamingos spend much time feeding in cold water. A more recent hypothesis is that standing on one leg may require less effort, allowing the birds to support the bodyweight without any muscle activity.
The coloration of flamingos’ feathers varies from pink or orange to wonderful reds. It comes from the carotenoid pigments that are found in the birds’ food. A wild flamingo’s ration includes shrimp, algae, and plankton. Captive flamingos are fed a diet that helps to preserve their coloration.
However, not all flamingos can boast of such bright plumage. Some birds are grayish or white. The typical coloration of young birds is also less saturated.
In this drawing tutorial, I’ll show you an easy way to draw a flamingo with wonderful pink feathers. We’ll start with a graphite pencil outline. Then we’ll add some watercolor. At the finishing stage of the process, we’ll work on textures and finer details using colored pencils.
Art Supplies for this Drawing
Before we dive into the process, let’s take a look at the materials we’ll use.
Paper and Pencil
We’ll need a sheet of watercolor paper. (Mixed media paper is also an option.) My paper is a standard A4 size. The paper is quite heavy, 280 gsm, and has a subtle texture. Keep in mind that papers with a very rough, textured surface make it more difficult to create details.
See also: All About Drawing Papers and Surfaces
In most cases, drawing an object from scratch is a back-and-forth process of estimations and adjustments. During this stage, we’re making our sketch more and more precise – and also removing the unnecessary lines. Excessive erasing can damage the delicate surface of watercolor paper.
That’s why I’m going to create an initial graphite pencil outline on a sheet of ordinary printer paper. Then I’ll transfer the main contours of our flamingo to the watercolor sheet using carbon paper.
However, starting with the printer paper is completely optional. Feel free to jump straight to your final surface. Just be sure that you’re erasing as little as possible. Also, limit the number of graphite marks.
We’ll need a graphite pencil (H or HB type) and a soft eraser.
Watercolor and Brushes
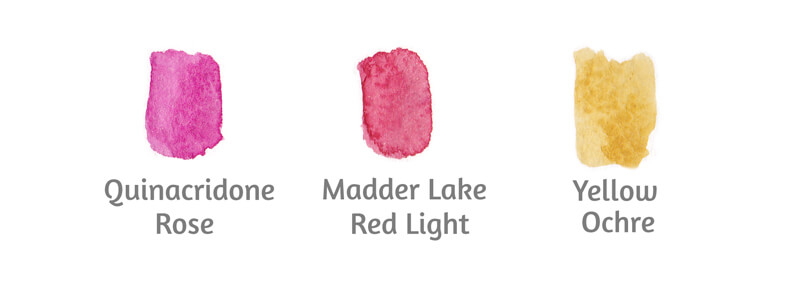
My watercolor paints are White Nights by Nevskaya Palitra. I’ve chosen a deep Madder Lake Red Light and a red-violet Quinacridone Rose.
Feel free to work with watercolor of any brand. The colors are up to you too. Just pick a couple of reds – a warmer and a cooler one.
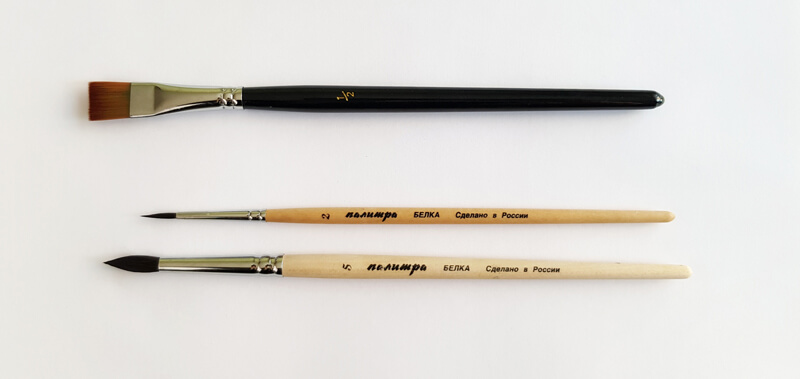
I’ll be using two round squirrel brushes (sized 2 and 5) to apply paint.
See also: All About Artist Paint Brushes – Hair Types, Shapes, Marks, and Parts
The larger brush allows us to work with relatively broad strokes. It can wet a considerable area of the paper’s surface with a single touch.
The smaller brush can be used to control and guide the watercolor. Some areas, such as the neck, legs, and the edges of the flamingo’s body, require accuracy and precision.
A generic bristle brush will help us to create expressive watercolor splashes.
We’ll also need a container for water. Keep a paper towel or a soft clean cloth at hand. It will help to collect the excessive moisture from your brushes.
Colored Pencils
My colored pencils are Faber-Castell Polychromos. You’ll find the swatches in the image below.
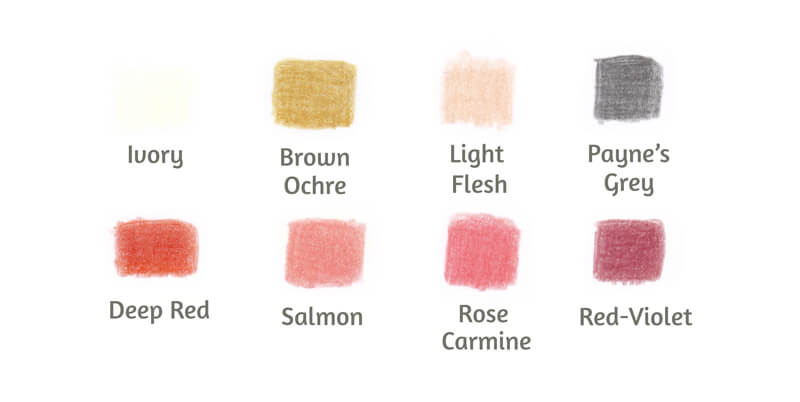
The number of pencils can be limited. The variety of reds in this range is based on difference in value and color temperature.
I recommend choosing at least three reds that present a simplified value scale – light, medium, and dark. In addition to this, pick at least one warmer or cooler variation that is supplemental to your reddish midtone.
Keep a pencil sharpener at hand. A sharp pencil point is required to create crisp details.
Drawing a Flamingo with a Graphite Pencil
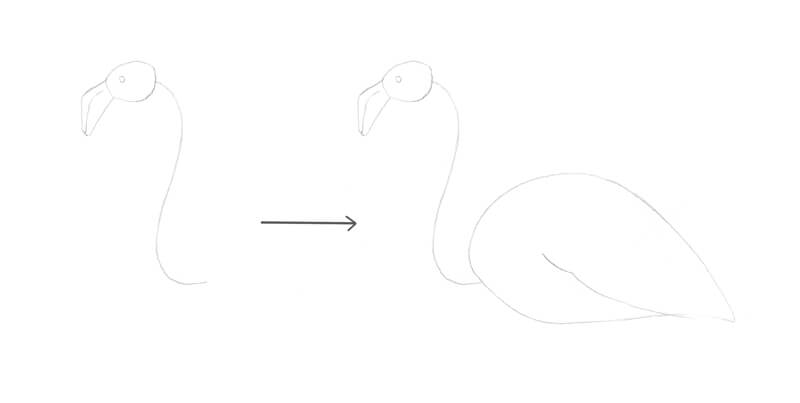
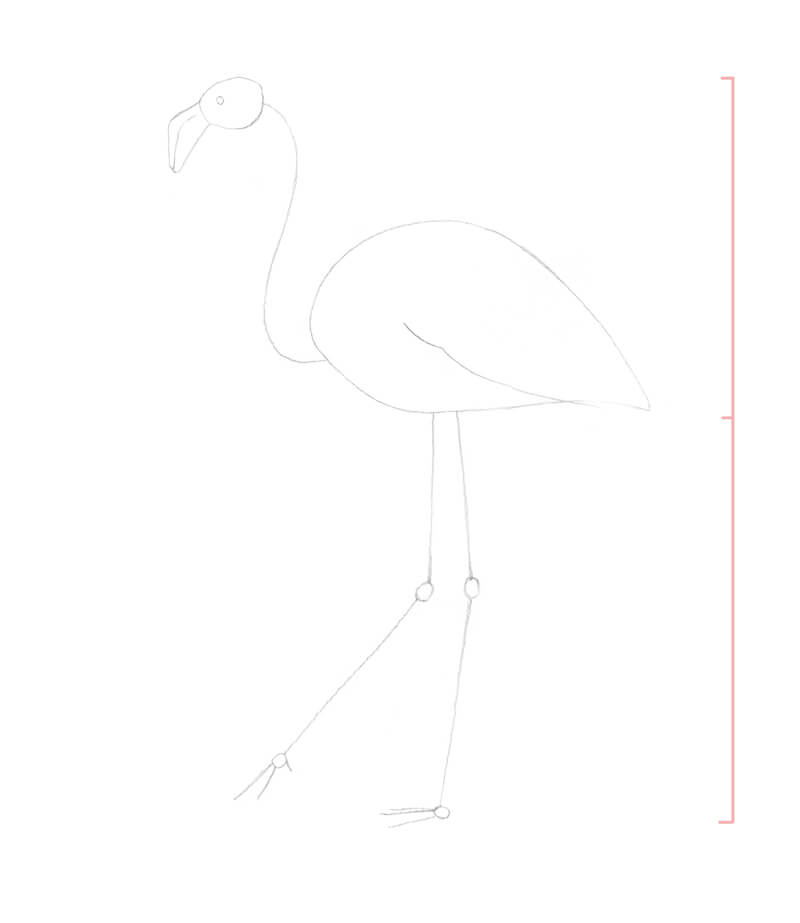
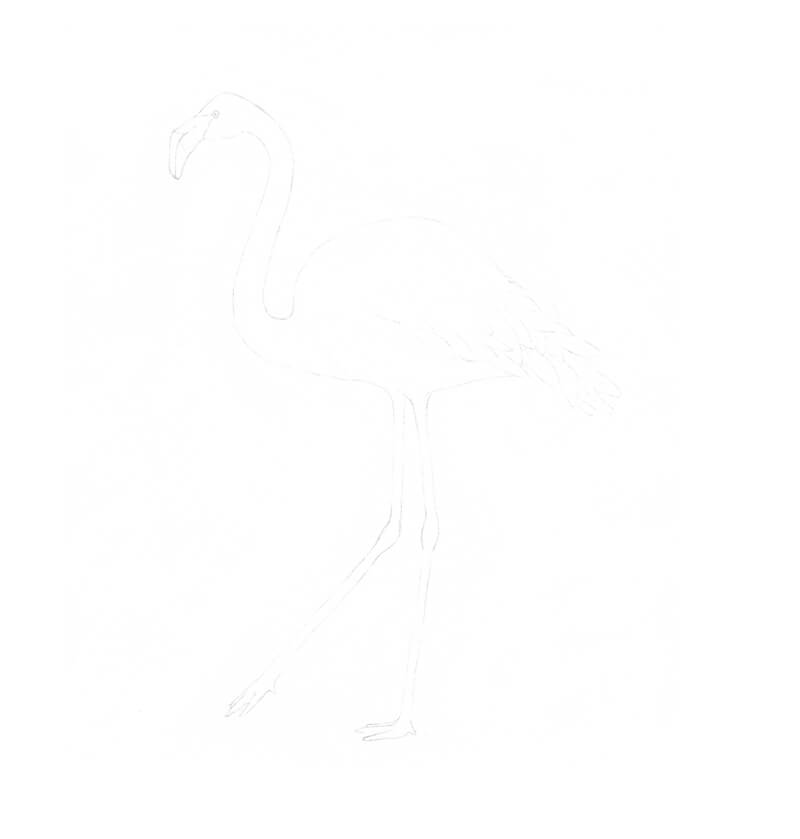
I start with a graphite pencil on a sheet of thin printer paper. We’ll create a simplified framework of the flamingo’s body.
First, I draw the round shape of the bird’s head. Then I add the shape of the small eye. It is located on the upper part of the head, closer to the beak.
The bill is large and curved down. I add its rough shape.
I mark the direction of the neck with a long line that resembles the letter “S”. This part of the flamingo’s body is very flexible. When a flamingo is in the mood to preen its feathers, its head and neck easily go backward. While feeding, the bird’s neck is bent downwards with the same grace and simplicity.
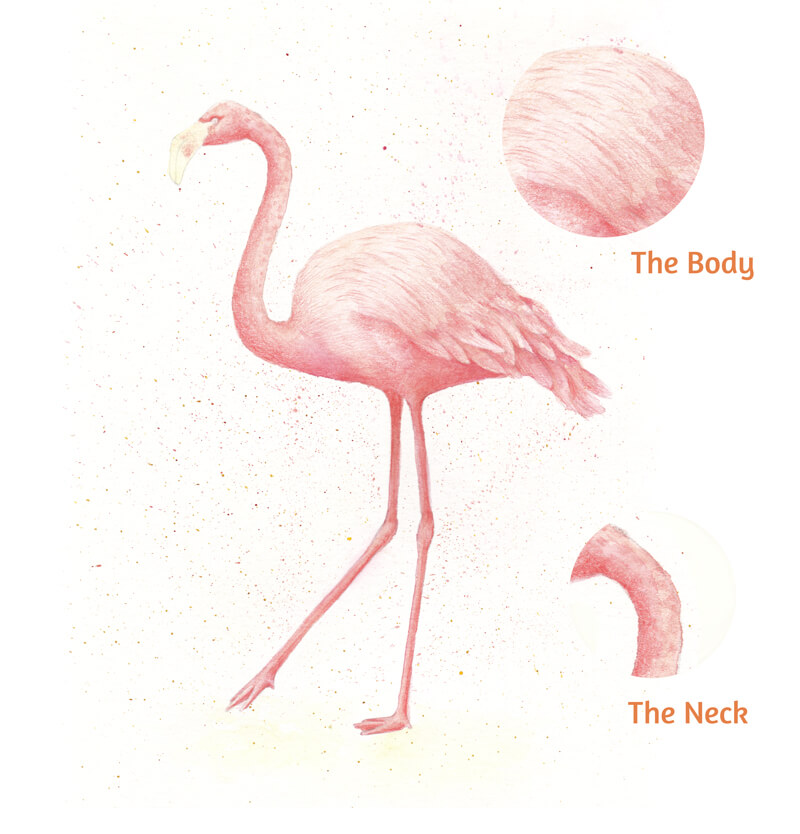
The body of a flamingo has a massive coating of feathers. They can be divided into groups, depending on their sizes and textures. In a simplified manner, the typical body contour looks like a teardrop that is lying on its side. The head is quite small in comparison with the body.
I also mark the edge of the folded wing.
I add the framework of the legs. The joints are marked with small circles.
There are three forward-pointing toes. Some flamingo species have a small hind toe and others don’t. As we’re depicting a collective image, it’s up to you to decide on the number of toes.
By the way, the flamingo’s backward bending “knee” is really the bird’s ankle. The actual knee is very close to the body and is not visible through the plumage.
The legs are very long. Considering the pose, they take up more than half of the overall height of the figure. A vertical line in the image below helps to evaluate this proportion.
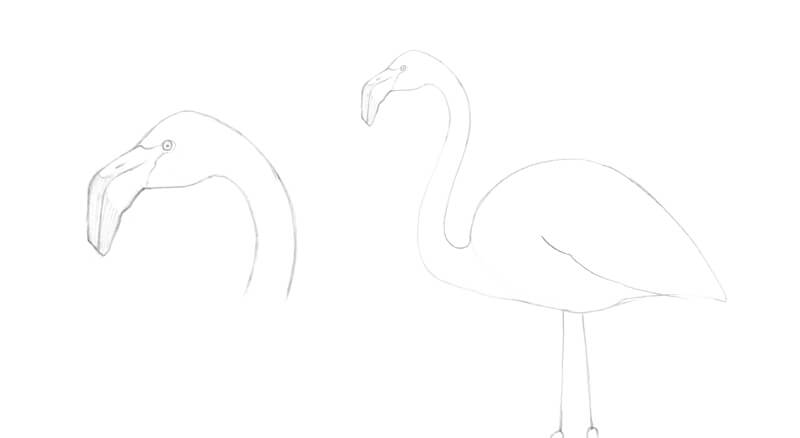
I refine the head. The lower part of the bill is larger than the upper one. I darken the tip of the beak with light graphite marks.
There is a nostril at the upper part of the beak. I add it too. Then I mark the borders between the beak and the head’s plumage.
I outline the contours of the neck and erase the subsidiary core line.
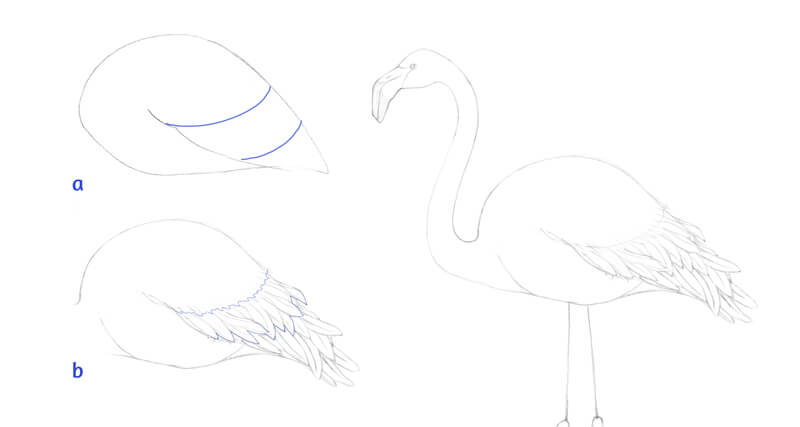
The wings of a flamingo are large. Even in a folded state, they look fairly voluminous. The wings’ feathers keep the bird warm. They also allow it to swim and fly.
I mark the prominent contour of the wing in the lower part of the body.
We’ll draw the feathers of the wing and tail. To simplify the task, I divide the wing area into three sections. (Pay attention to the blue lines in the image below, illustration a.)
The feathers above the top line are soft, delicate, and fluffy. I leave this area untouched – refining this texture doesn’t make much sense now. Feathers of this area overlap the underlying plumage.
The feathers between the blue lines have a more pronounced, discernible structure. I give them some variation in shape and direction.
The feathers in the lower section are the longest ones. They are located beneath the elements of the previous group.
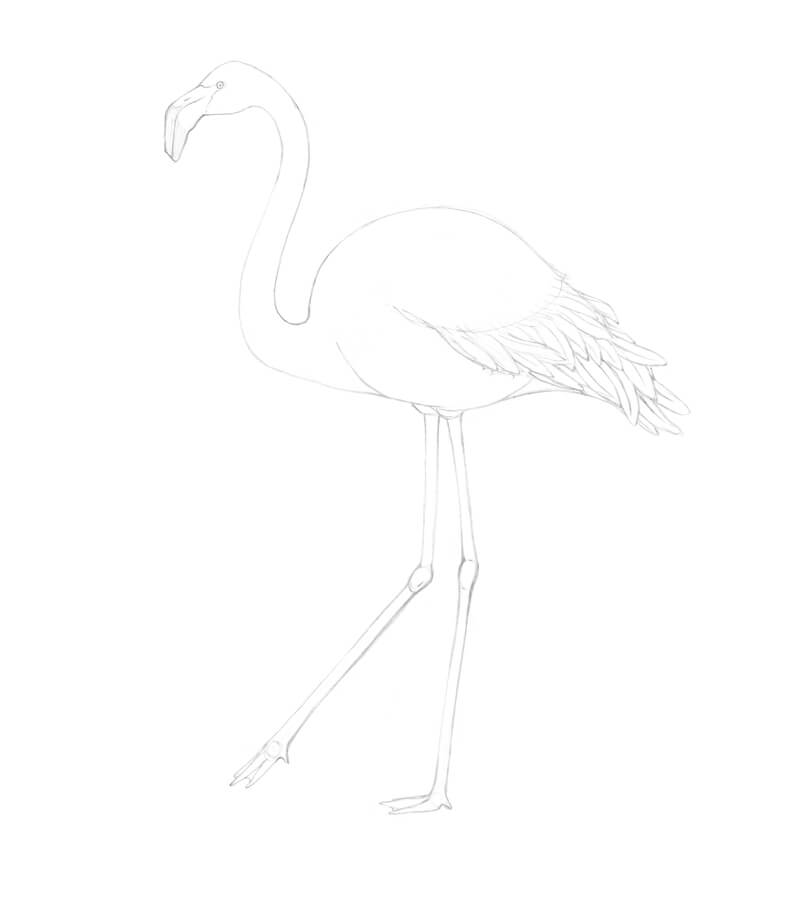
I outline the contours of the legs and feet. The front toes are webbed.
Now we can erase any unnecessary lines and the preliminary drawing is complete!
Transferring the Drawing
Unless you’ve drawn your flamingo directly on the watercolor paper, it’s time to transfer the preparatory sketch to the final drawing surface.
I usually trace the contours while holding the papers up to the window. However, in this case, the watercolor paper is too thick. It doesn’t let the light come through easily, so I have to use carbon paper to transfer the drawing.
Normally, I avoid carbon paper because it can create marks that are difficult to erase. And yet, sometimes this option is the most convenient one.
If you use carbon paper, keep a light touch with your tracing tool. (It may be a pencil or a pen with an empty refill.) Working in such a manner, you’ll get very light, barely visible lines.
Also, try to limit the quantity of the traced marks. Your preliminary sketch may stay with you during the entire creative process. Refer to it if you need help regarding the details.
Here is what my traced image looks like (it is very light)…
Applying the Watercolor
We’ll use colored pencils to enhance colors and refine details. We’ll use the watercolor as an underpainting. So, let’s continue next to watercolor.
Creating a Color Base
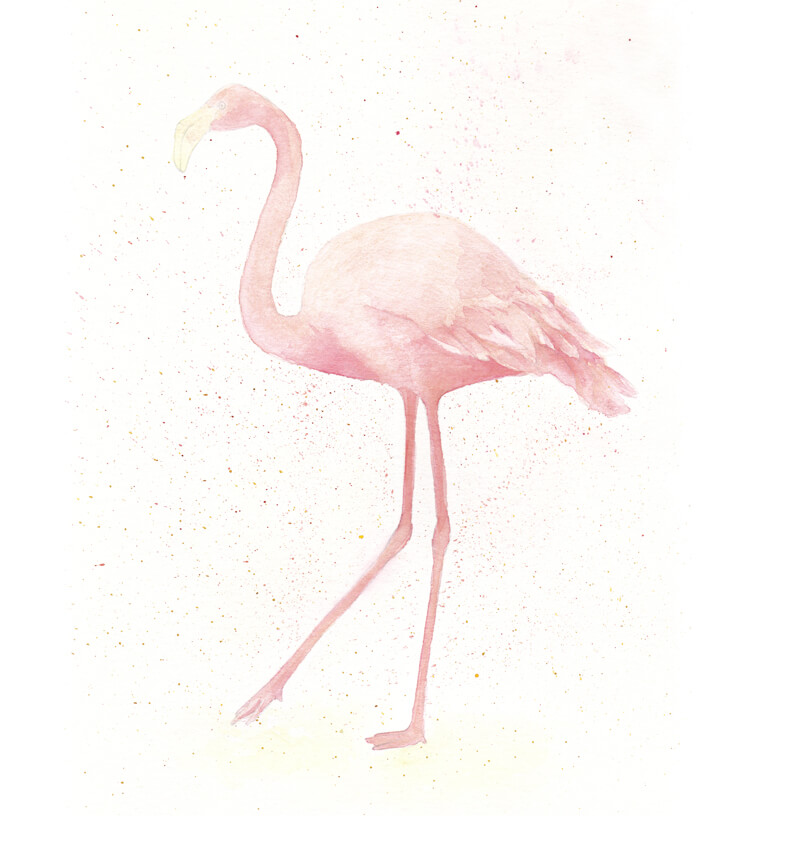
Let’s add some beautiful painterly washes!
With round brush #5, I moisten the area with clean water before applying the paint. Note that watercolor is heavily diluted. You can use a palette or a spare piece of paper to try the intensity of your colors before making marks on the final surface.
The type of paper affect the result. My paper has some percentage of cotton in its structure. It’s no wonder that the applications of watercolor will look significantly faded after drying.
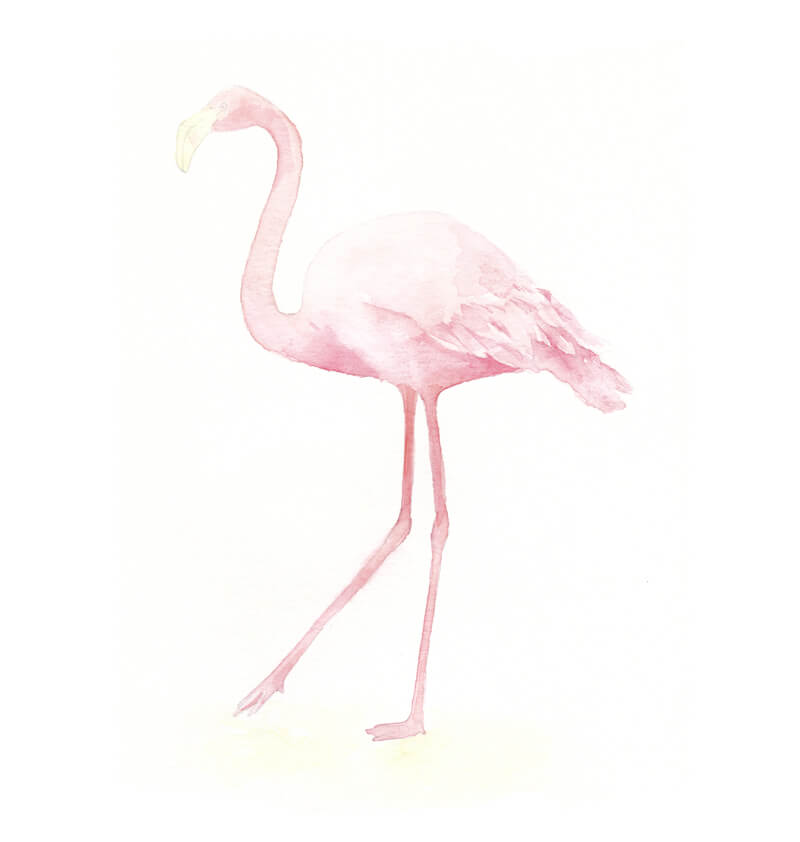
I add Madder Lake Red Light mostly to the upper part of the bird’s body, including the head and neck.
Quinacridone Rose is applied to the legs and the lower areas of the wing. These areas would normally get less light from the environment. This wonderful red-violet color accents the subtle transition to shadowed areas.
I use a smaller brush #2 to paint the head, neck, and legs of the flamingo.
I apply an additional layer of watercolor to the darkest parts, such as the upper legs, the area under the wing, and the gaps between the feathers.
Pigments tend to consolidate into harsh edges near the contours of the figure. I use the smaller brush to push the pigments away from the edge while wet, without any pigment loaded in the brush.
I also add some diluted Yellow Ochre to the beak. Flamingos can be found at a beach, so I’ve decided to create a hint at sand under the bird’s feet.
First, I moisten the area with a clean brush. Then I apply the watercolor.
Creating Splashes
Now we’ll add some watercolor splashes to make the artwork more vivid and expressive.
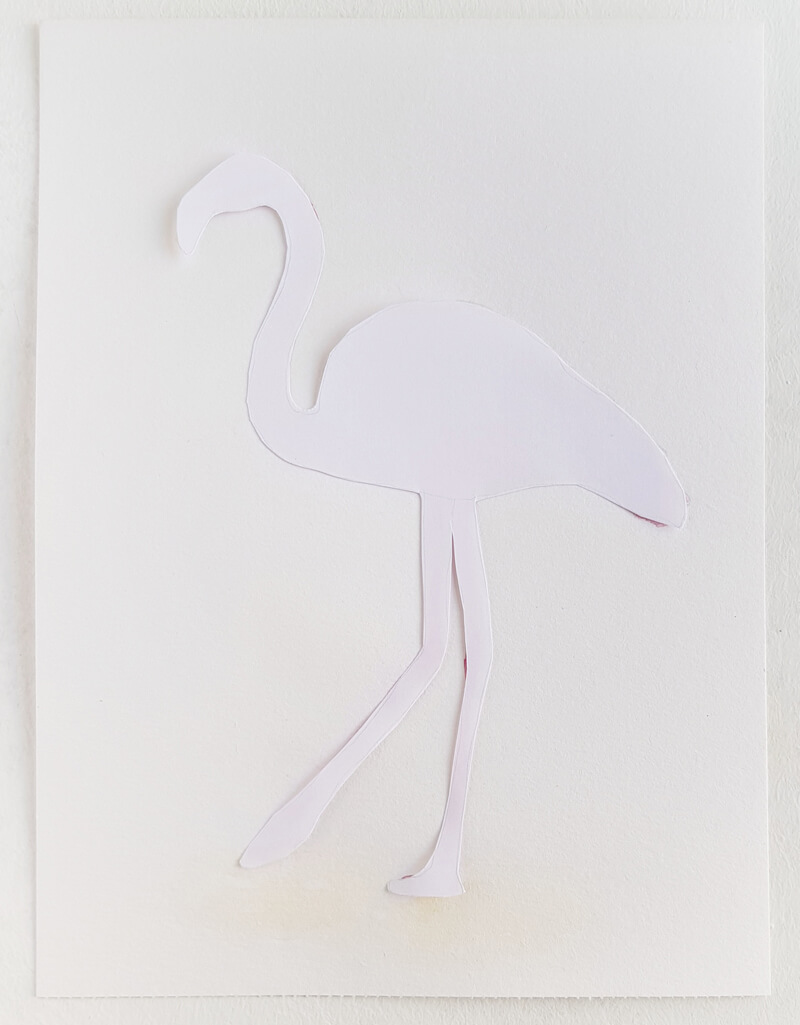
But first, we have to make a protective stencil. It should repeat the shape of our bird. The stencil will cover the flamingo, allowing the splatter to go all over the negative space.
Here’s the easiest way to make a stencil…
Put a sheet of thin paper on top of your painting. Such paper has some level of transparency – especially if you place it against a light source. You’ll be able to see the silhouette of your artwork through the upper blank layer.
I outline the rough contour with a pencil and cut it out. Then I put the stencil on top of the bird.
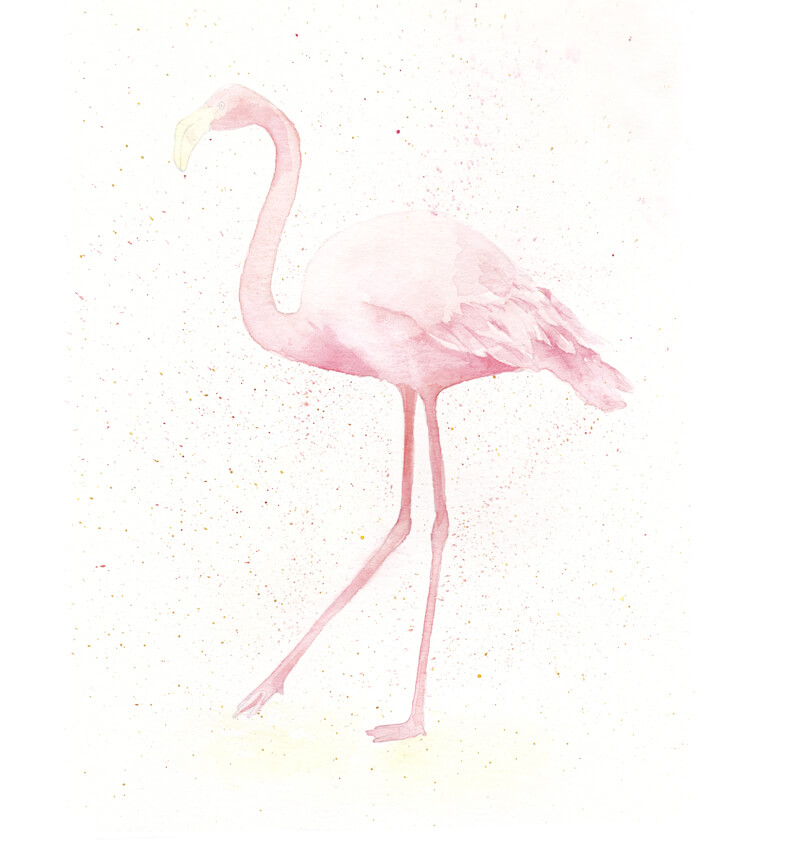
I dip my bristle brush into the paint. I’ll be using all three colors one by one.
The wetter your brush, the bigger stains you can get. It may be a good idea to try this method beforehand – create some splatters on a spare piece of printer paper.
Press on the top edge of the bristles with a finger and push them aside. Feel how the bristles are trying to spring back. As soon as they are released, the paint will fall onto the surface beneath the brush.
Create as many stains as you wish. Let the artwork dry completely before proceeding to colored pencils.
Drawing a Flamingo with Colored Pencils
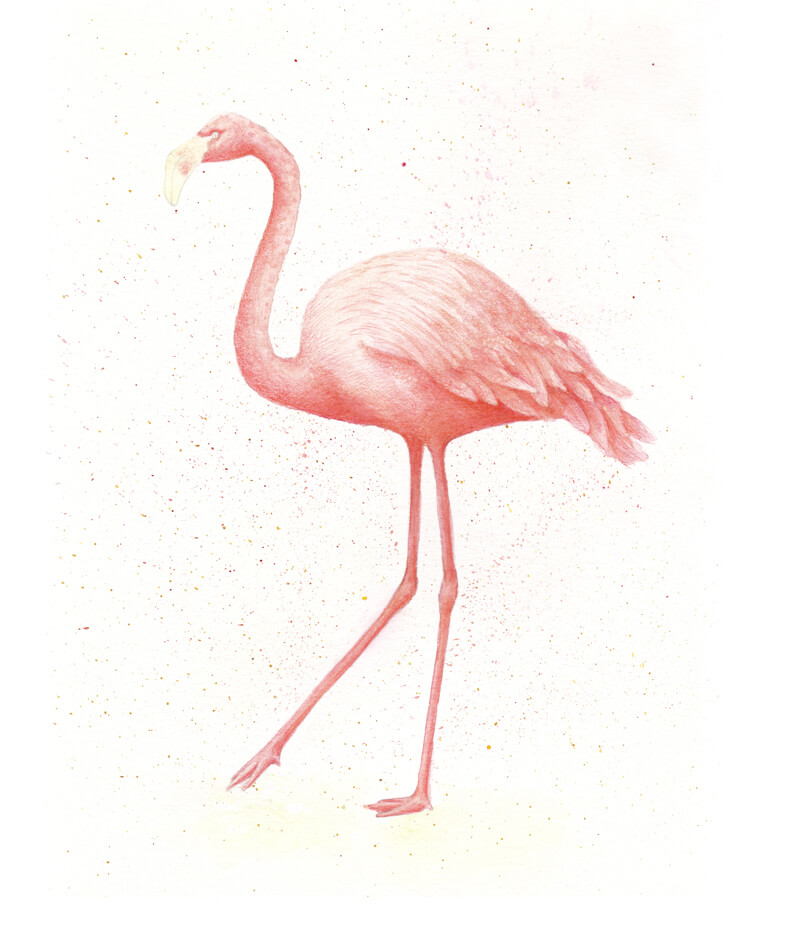
With Light Flesh, I cover the whole figure of our flamingo, including the legs and the lighter areas of the beak. My pencil moves in small circles. Directional lines are also an option.
See also: Colored Pencil Techniques: A Practical Guide
The pressure on the pencil is light.
The application of this tint doesn’t change much in our artwork. It rather creates a base for further colored pencil applications. There is just a minor shift in the color temperature – the colors have become warmer.
I add Rose Carmine to the darker areas, applying it as a solid layer. Such areas include the lower parts of the head and body. I deepen the shadows between the wing feathers. The pressure is slightly increased.
Also, I mark out the legs by making their right sides a bit darker. Soft shadows help to differentiate the toes visually. I work on the neck, following a similar approach.
The upper part of the body is lighter, so I use this color to reveal some basic details of texture. I apply long lines that conform to the contours of the bird’s body. They imitate long, fluffy feathers.
When I’m working on such details, I always make sure that the tip of the pencil is sharp.
I add groups of short directional hatches to the lighter parts of the neck. They create the illusion of texture.
There is a soft pink spot on the flamingo’s beak, so I add it. I also darken the area near the eye.
In the image below, you’ll find a couple of samples of texture.
With Deep Red, I make the colors even warmer. I strengthen the core shadows, including the lower part of the bird’s body, the side of the neck, and the legs.
I leave some gaps in the covering. They let the underlying applications of watercolor show through, creating a pleasant variation in color temperature.
I add long, thin lines to the lighter parts of the bird’s body. They repeat its contours and strengthen the illusion of texture.
I apply Ivory on top of the lighter areas, including the beak, the lower parts of the legs, and feet. The pressure on the pencil is increased and the lines repeat the contours of the bird’s body.
As I move the pencil tip, I move the pigments found on the paper’s surface. The covering becomes smoother and more unified.
I work on the midtones in the same manner, using Salmon. I also polish the darker areas to unite the applications visually.
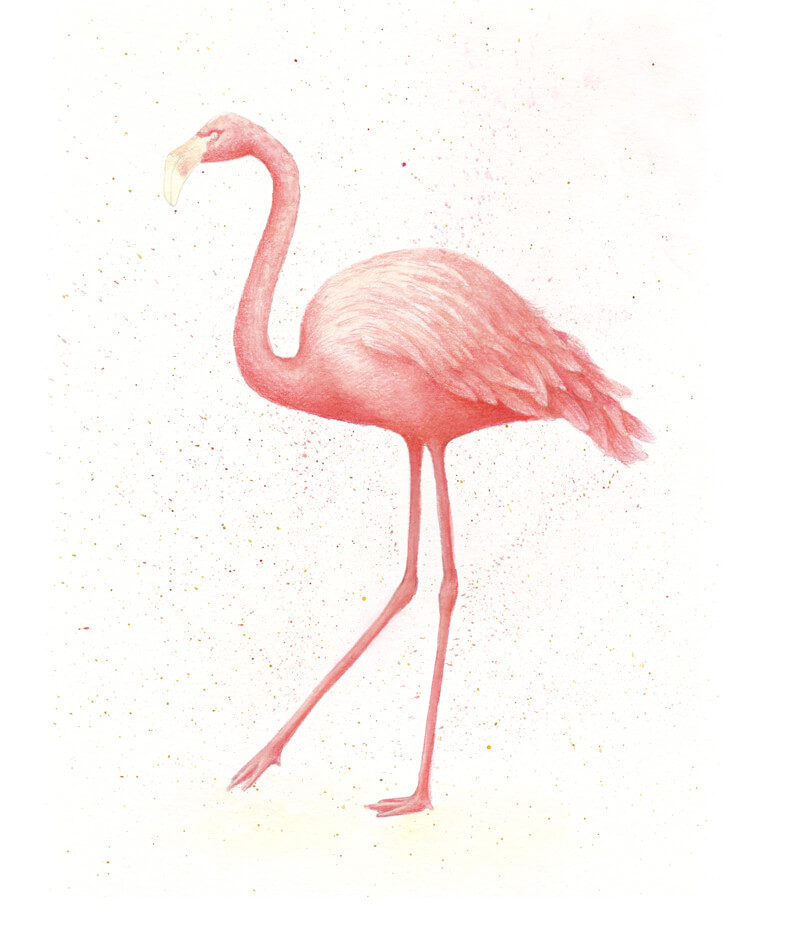
With Brown Ochre, I create nice subtle nuances in the plumage. I add dots and short strokes to the legs and feet, creating the illusion of texture there.
This color is also applied to the area near the bird’s feet. The pencil moves in small circles at very light pressure. The edges of the resulting shape are very soft and blended.
With Red-Violet, I accent the darkest parts of the drawing, increasing the contrast.
I also draw the pupil. The pencil point is very sharp!
I use Payne’s Grey to shade the tip of the beak. I also darken the area of cast shadow on the sand that is beneath the flamingo’s feet.
We can include this gray into the darkest parts of the drawing, but keep the pressure as light as possible.
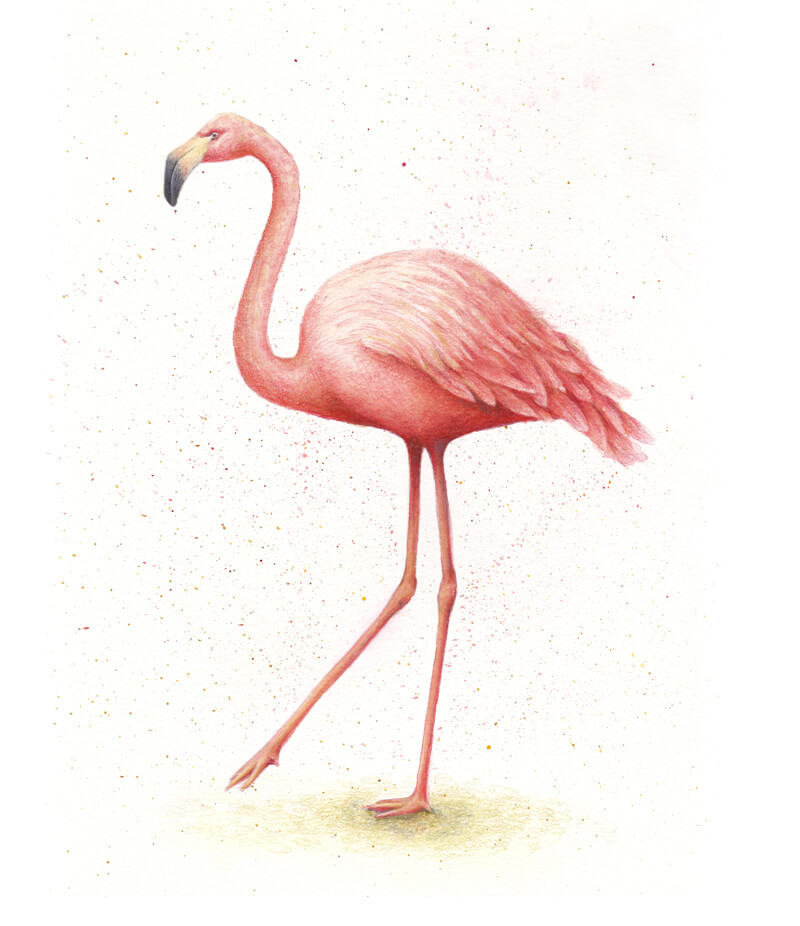
Drawing a Flamingo with Watercolor and Colored Pencils – Conclusion
Congratulations – we’ve created a beautiful artwork! Thank you for being with me on this creative journey. I hope that you’ve enjoyed the process of working with watercolor and colored pencils.
I wish you much inspiration for your future projects!
If so, join over 36,000 others that receive our newsletter with new drawing and painting lessons. Plus, check out three of our course videos and ebooks for free.