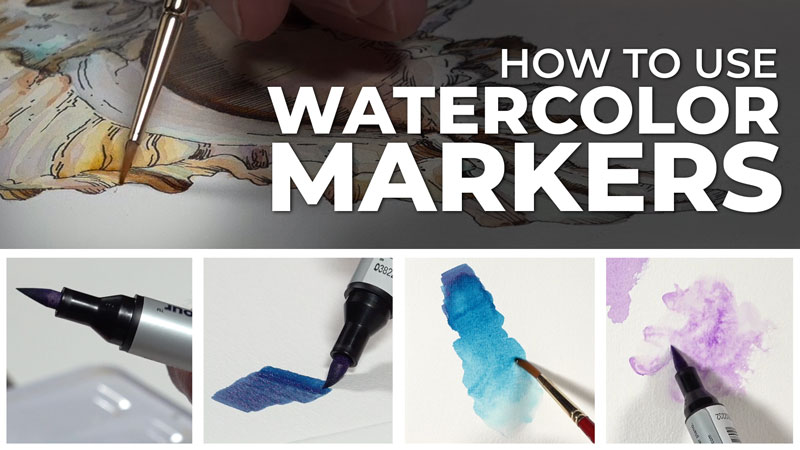
What is Line and Wash?
Line and wash is an art-making process that typically refers to the combination of a fluid painting medium and a linear drawing medium. In many cases, this means the combination of watercolor and pen and ink, although it could refer to any linear drawing medium and fluid painting medium.
In this lesson, we’ll look at the process of combining watercolor with pen and ink. This combination of media has been popular for many years but has recently become even more popular thanks to a new interest in a form of plein air painting dubbed “urban sketching”.
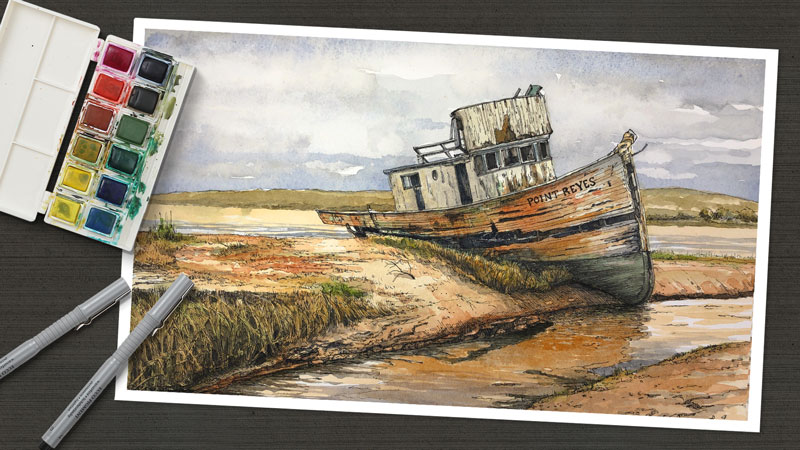
This lesson is designed to be simple so that even a “brand new” beginner to line and wash can be successful. Here’s a look at the image we’ll create…
In many cases, art mediums are combined to take advantage of the strengths of one of the mediums and/or to make up for the weaknesses of the complimenting medium.
Pen and ink is a rigid medium that is suited for hard edges and intricate details. However, it is difficult to create smooth transitions of value and color with pen and ink.
Watercolor, on the other hand, is looser and fluid. It is suited for expressive shapes of color and value and softer edges. However, some may find it difficult to define intricate details and strong contours with the medium.
But, when we combine the mediums of pen and ink and watercolor, we benefit from the strengths of each. The strengths of each medium make up for the “weaknesses” of the other.
Materials and Surface
We’ll use fairly basic materials for this lesson which can all be purchased at your local art store or online. You are free to substitute as necessary. (The following links are affiliate links which means I make a small commission if you purchase at no additional cost to you.)
Drawing the Bird with Pencil and Ink
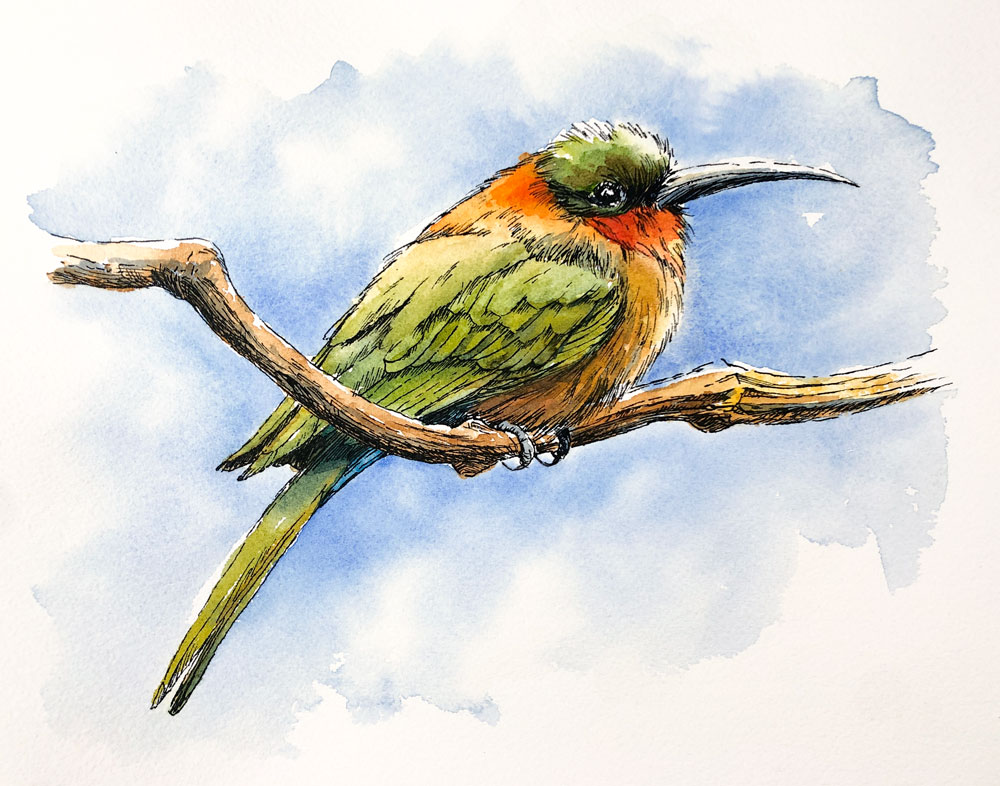
We’ll work from a photo reference for this work, which comes from Pixabay.com. The bird we’ll be painting is the European Bee Catcher. Here’s a look at the reference image…

There are different approaches you can take to create a line and wash image with watercolor and pen and ink. Some artists prefer to develop the ink drawing first and then apply watercolor, while others prefer the opposite approach. It doesn’t matter which approach you decide to take as both will produce similar results.
For this work, we’ll begin with the ink and then layer washes over the ink drawing. But before we begin with the ink applications, we need to start with a light graphite drawing.
In this case, the drawing is developed with a light and loose application of 2H graphite. Some of the important details, such as the overlapping feathers, talons, and eye are all included in the initial sketch. The remaining details are developed during the inking process.

Once the loose graphite sketch of the bird is in place on paper, we can begin with pen and ink applications. For this image, we’ll begin with the eye of bird and work outward. Be sure to leave open areas within the eye to create the impression of highlights.
Working outward from the eye, we’ll gradually develop the texture and some of the darker tones with directional stroking and hatching. Notice that the outer contour of the bird is described with looser strokes instead of a defined contour line.

We’ll continue to work outward from the head and the eye, gradually moving down the picture plane. The upper wings and the bulk of the body are developed next.

As is the case with most art media, it’s important to work slowly and take your time with your pen and ink applications. Ink is not forgiving, so it’s best to be deliberate with your applications. Consider each stroke, taking care to not get too dark with your marks. We can always make an area darker, if needed, by adding more ink to the surface. However, it is difficult to make areas lighter if we go too dark, too quickly.

Applying Watercolor Washes to the Bird
Once the pen and ink drawing is complete, we can erase away any remaining graphite marks in preparation for the watercolor washes. Once the pencil marks have been removed, we can begin applying watercolor.
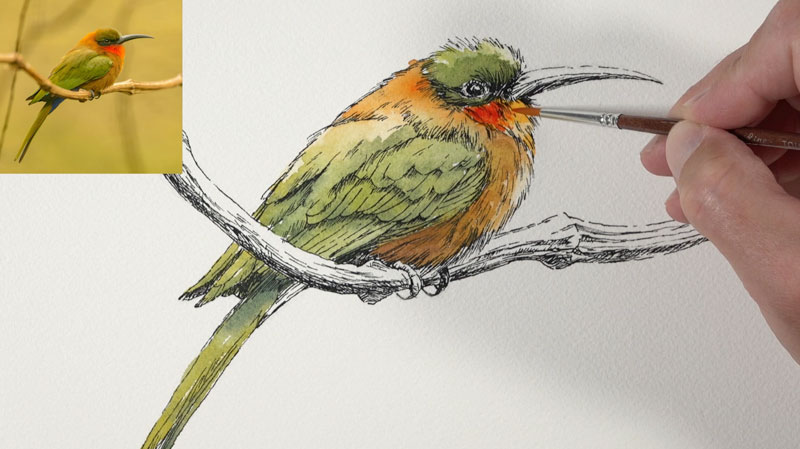
We can begin with our washes anywhere we wish. In this case, I’ve decided to begin with the head. A mixture of Sap Green and Cadmium Yellow is applied to the head and just underneath the eye. This color can be made darker with a bit of Ultramarine.
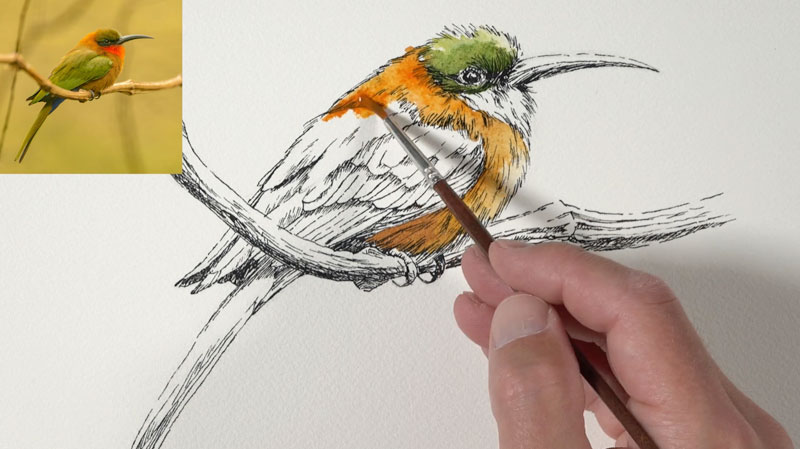
A mixture of Cadmium Orange and Cadmium Yellow is used for the sections underneath the head. Some bleeding of the colors is acceptable. A bit of Burnt Umber is used to darken the value of this color.

Next, we’ll return to the top and address the bright red and orange section under the head. Here, our Cadmium Orange mixture is applied first. While this area is still wet, a touch of intense red (Cadmium Red) is applied to the corner of the shape and allowed to bleed.
As the painting continues, we can return to areas and intensify the colors where necessary. You may find that you prefer a “light and airy” appearance. If this is the case, then intensifying colors with additional layers of watercolor isn’t necessary.
Touches of blue on the underside of the body are added with a bit of Cerulean mixed with Ultramarine. These small areas are easily overlooked, but help to create more contrast and interest.
Next, we’ll address the beak. A minimal amount of color is used here since the top of the beak is left open in order to communicate a highlight. On the underside of the beak, a mixture of Payne’s Grey and Ultramarine is applied. While this area is still wet, a touch of Yellow Ochre is applied to create a more natural appearance. This same cool gray is used on the talons as well.

Now it’s time to turn our attention to the branch that the bird is resting upon. We’ll use our orange mixture with a bit of Burnt Umber here, leaving open areas on the top of the branch to indicate highlights.
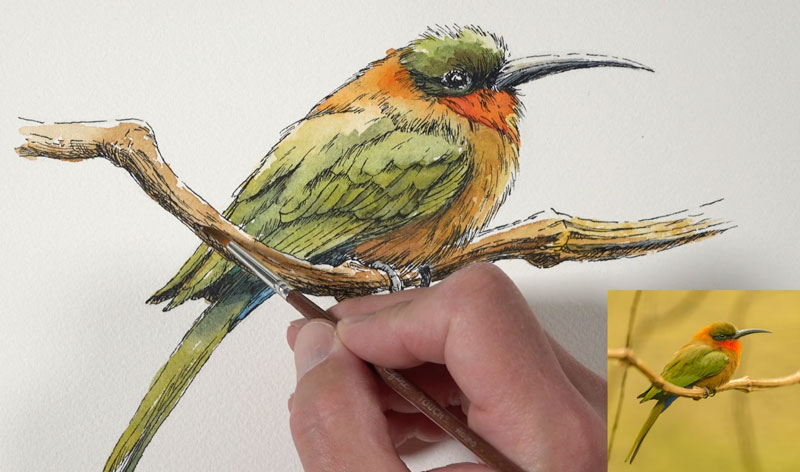
Once our initial application of watercolor has dried on the branch, we can darken the shadows with a light mixture of Payne’s Grey and Ultramarine.

Lastly, we’ll add a touch of color around the bird. In this case, we’ll create the impression of the sky with a fluid and light field of blue. To develop a softer look, we’ll first apply a liberal amount of clean water to the open areas.
While this area is still wet, we’ll add strong touches of color, in this case Ultramarine. The water that we applied pulls the color, resulting in soft transitions in the intensity of color. This gives the viewer the impression of airy clouds among a blue sky.

Once the watercolor is dry, our image is complete. Here’s another look at the completed drawing/painting…
Easy Line and Wash Lesson for Beginners – Conclusion
As you can see, pen and ink works exceptionally well with watercolor. Each one of the mediums compliments the other. This lesson is considered an introduction to this form of mixed media. Keep in mind that this combination of media can be used to create highly developed images as well as works that are wonderfully simple. There’s plenty of room for stylistic choices and an endless number of possibilities.
If so, join over 36,000 others that receive our newsletter with new drawing and painting lessons. Plus, check out three of our course videos and ebooks for free.