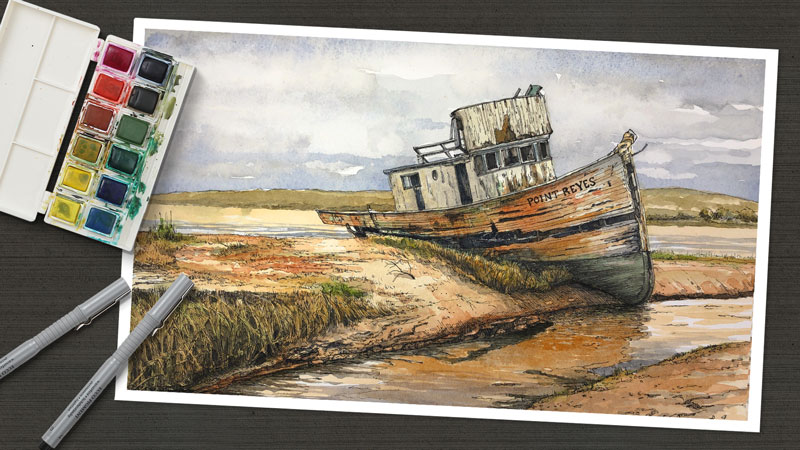
Watercolor Markers
In this lesson, we’ll take a look at using watercolor markers, a relatively new art making medium on the market. We’ll explore a few techniques and then create an image of a seashell that combines watercolor markers and pen and ink.
Watercolor is one of the most popular painting mediums. It is accessible, cleans up easily, and travels well. However, this doesn’t mean that watercolor is easy to use. In fact, I would argue that watercolor is one of the most challenging mediums to work with. This doesn’t stop the masses as many new to art gravitate to it thinking that it is a beginner’s medium.
In many cases, people quickly realize that watercolor, in its traditional form, is quite challenging. Manufacturers of art products know the challenges of watercolor and are also aware of its popularity. Considering this, it’s no wonder that there is a myriad of watercolor products on the market designed to make watercolor painting “easier”.
See also: How to Use Watercolor Pencils
This is why we see products such a water brushes, watercolor pencils, water soluble graphite, water soluble ink pencils, and watercolor markers. The purpose of these products, in my opinion, is to make watercolor “easier to use”. And in many cases, they do just that. But are watercolor markers worth adding to your tool box?
Let’s take a close look at them and find out.
Watercolor Marker Techniques
On the surface, watercolor markers appear similar to alcohol-based markers. The markers I experimented with in this lesson are the Promarker Watercolour markers by Winsor and Newton. There are many brands out there, but Winsor and Newton is a trusted brand in the art world.
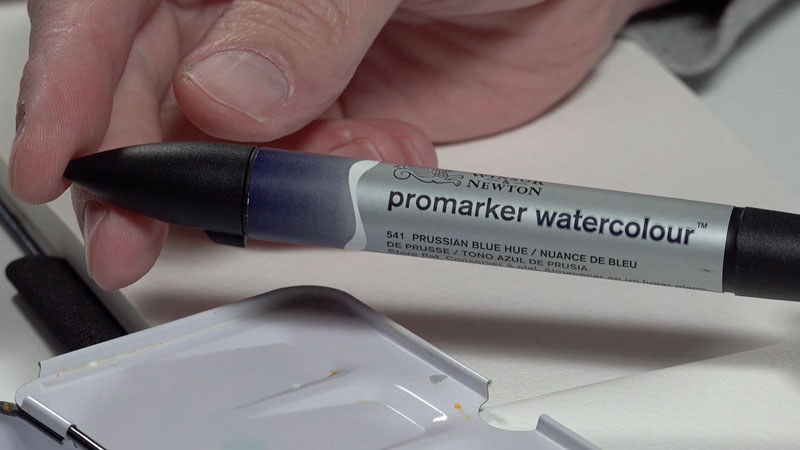
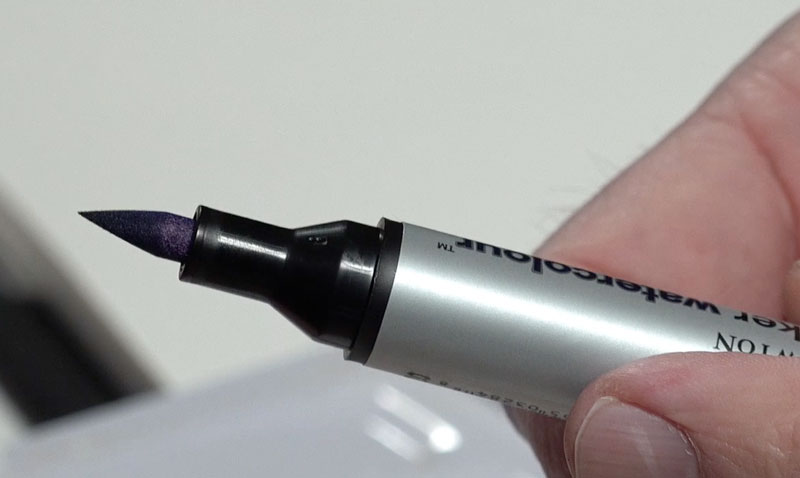
Like alcohol-based markers, these markers feature two district tips. One tip is stiff and narrow and clearly designed for precision or writing. The other tip is tapered like a brush and is softer. This is the tip that I preferred.
You can pick up Promarker Watercolour Markers by clicking on the link below. This is an affiliate link which means I make a small commission if you purchase at no additional charge to you…
Buy Promarker Watercolour Markers
Direct Application and Activation
Before discussing each technique, it should be mentioned that watercolor markers are designed to be applied to the same surfaces as traditional watercolor. This means that traditional watercolor papers should be considered.
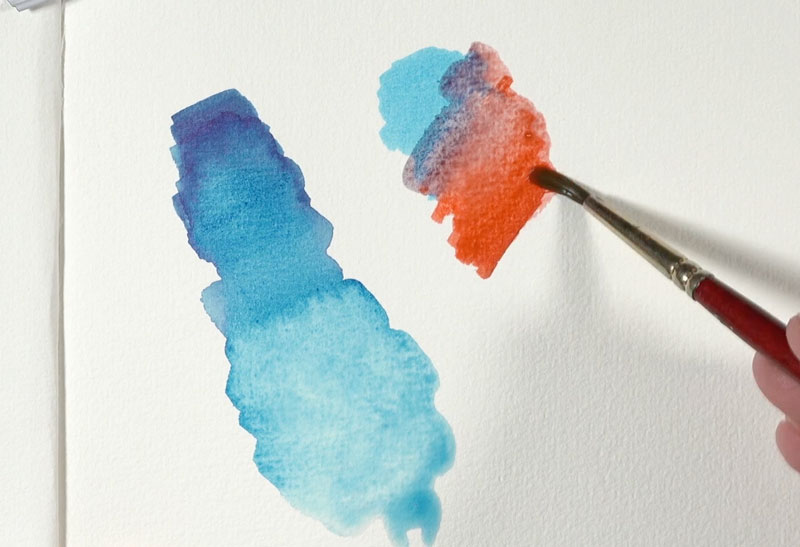
Perhaps the most obvious technique is to apply the watercolor marker directly to the surface. Without activation, the marker behaves like any other marker. But when water is applied (activated), the marker comes to life and behaves just like watercolor.
The pigment can be thinned with additional water and lifted with a paper towel. It can be manipulated and pulled around directly on the surface. But work quickly – once dry, the marker applications are difficult to manipulate.
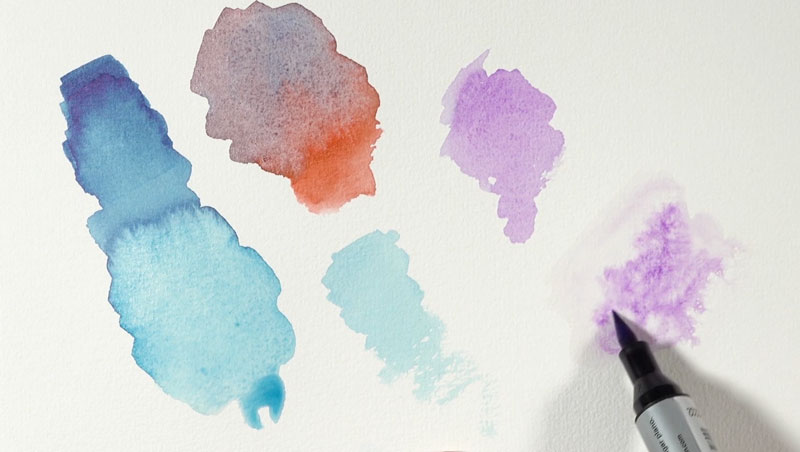
Mixing Colors with Watercolor Markers
Mixing colors with watercolor markers can be achieved in different ways. The most direct method of mixing occurs when two colors are applied to the surface and then activated with water. While this method is the most direct, it also comes with a bit of uncertainty.
A second method of mixing involves applying two or more colors to a water resistant palette with a marker and then bending the colors together to create a new one. This method produces a more predictable mixture but is more involved and requires a mixing palette.
Applying the Marker to a Palette
As alluded to above, watercolor markers can be applied to a water resistant palette. With a brush and a touch of water, the pigment can be lifted from the palette and applied to the painting surface. This technique produces lighter, but more controlled washes.
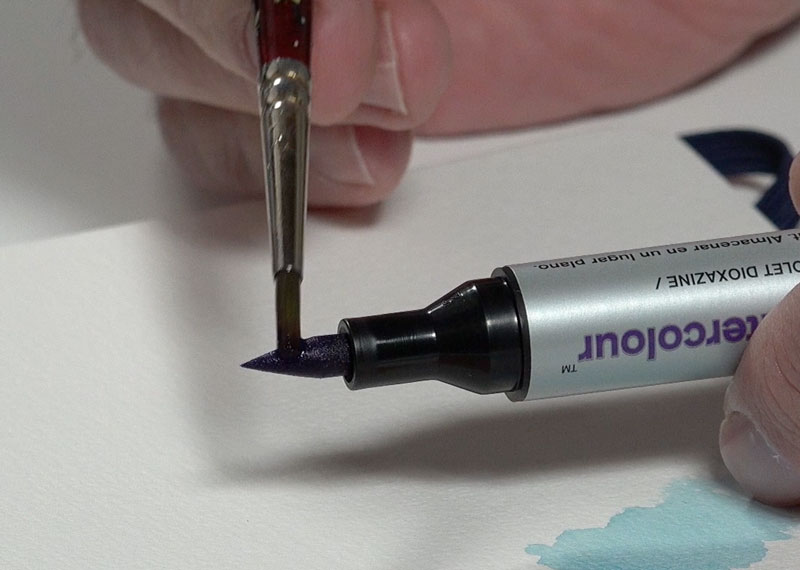
Applying Watercolor Markers from the Tip
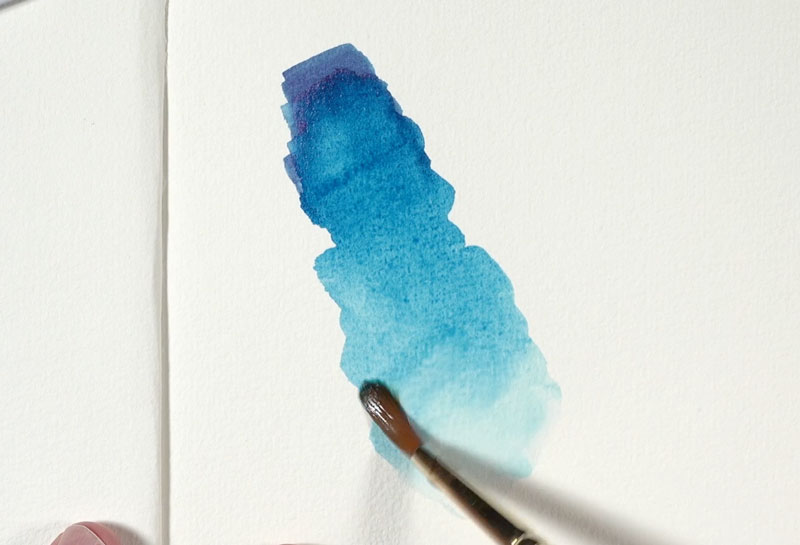
One technique used with watercolor pencils is to lift color from the tip of the pencil with a wet brush before applying the color to the painting surface. This technique can also be used with watercolor markers. Simply add a touch of water to your brush and touch the tip of the brush to the tip of the marker. Then proceed to apply the “loaded” brush to the painting surface. This technique also results in applications that are less intense, but you do have more control over the application.
Applying Watercolor Markers to a Wet Surface
One of the appealing aspects of watercolor is the effects you can create with wet into wet applications. While these effects cannot be fully duplicated without using traditional watercolor, they can be somewhat replicated. To produce similar results, simply wet an area on the painting surface with water. Then apply the marker directly to the areas that are saturated with water.
Watercolor Markers – Step by Step Painting with Pen and Ink
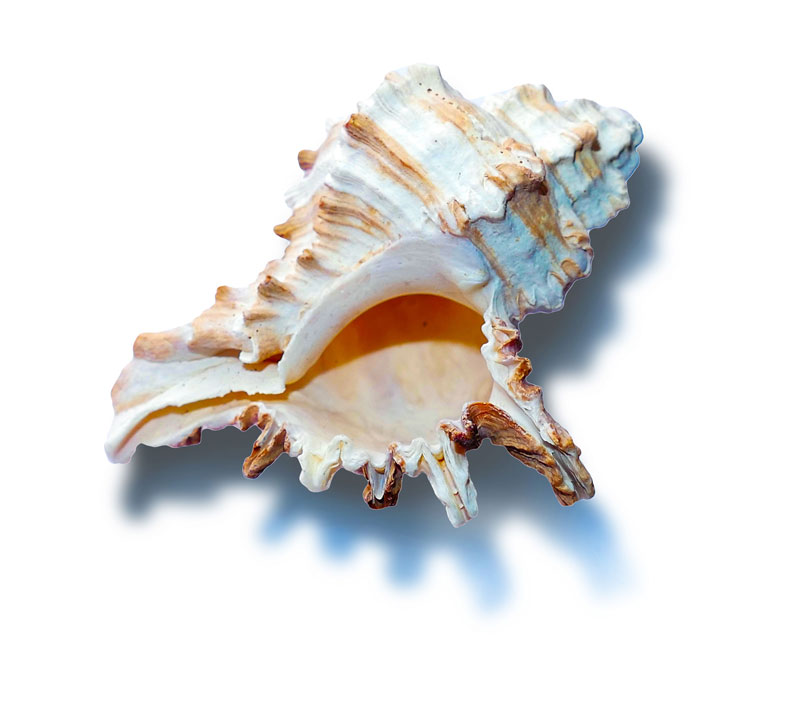
Let’s take a look at using watercolor markers by creating an image of a simple seashell. (I’m not sure if this would considered a painting or a drawing.) Traditional watercolor works exceptionally well when combined with pen and ink and watercolor markers seem to be a good fit as well.
Creating the Pen and Ink Drawing
We’ll begin on 140 lb. hot press watercolor paper with a light sketch with 2H graphite. Since we’ll be applying pen and ink to the drawing, hot press watercolor paper provides a smooth surface for line work.
Here’s a look at the photo reference of a seashell we’ll be working from…
Once the loose pencil sketch is in place, we can begin with pen and ink applications. For this image, I used Staedtler Pigment Liners for the pen and ink applications.
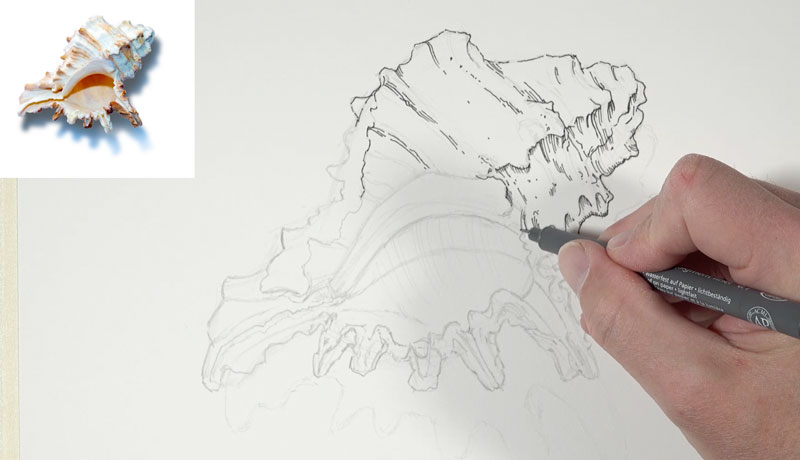
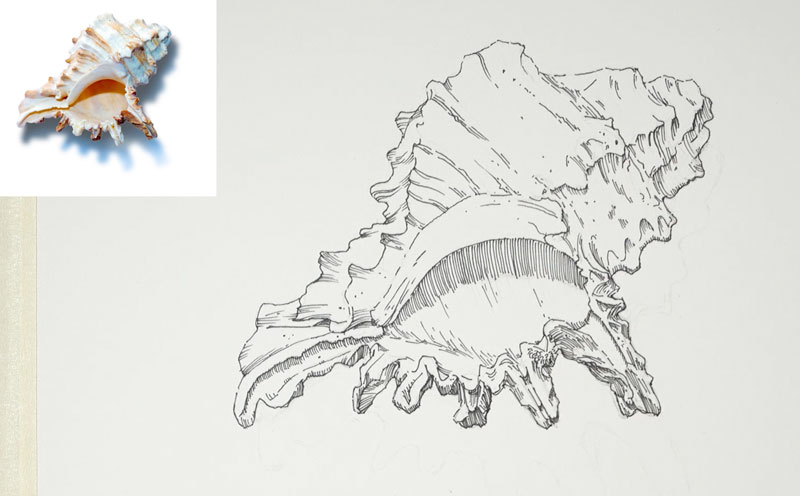
Our initial drawing with pen and ink focuses mainly on the contours with a few bits of shadow added through hatching. A few indications of the texture is also developed. It’s important not to “over do it” with the pen and ink, keeping mind that we are to add the watercolor markers. The watercolor marker applications will affect the values and we want to be sure we don’t get too dark with the pen and ink. We can always return with the pen and ink after the watercolor markers are applied.

Applying Watercolor Markers to the Pen and Ink Drawing
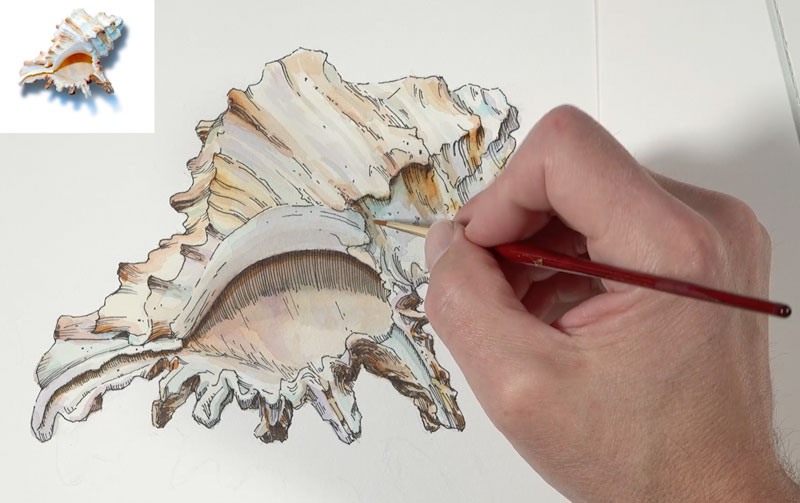
Just like with traditional watercolors, we must rely on the “white” of the paper to produce our highlights and also to affect the lighter values. This means we must be cautious of getting too dark with our applications too quickly. For this reason, we’ll start with less intense applications of color and work our way up to more intense applications.
To help control the intensity of the color, we’ll pull the color from a palette. After applying the watercolor marker to the palette, we’ll lift the pigment with a lightly loaded brush and apply it to the painting surface. We’ll begin with Yellow Ochre, covering the entirety of the shell. This is followed by applications of additional warm colors such as Burnt Umber and Cadmium Red Hue.
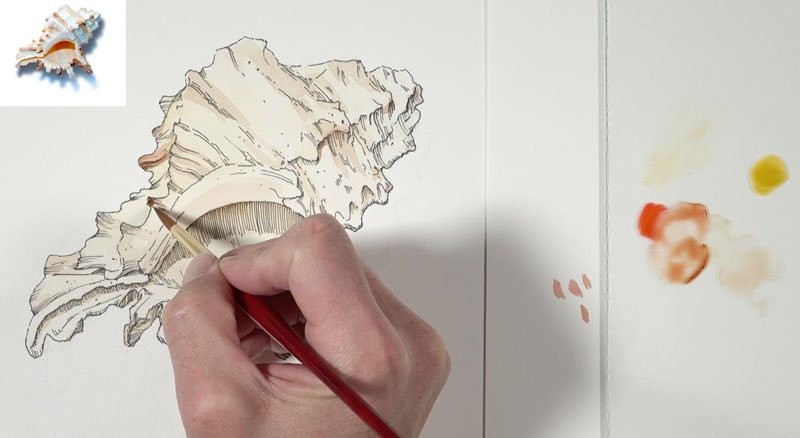
We’ll continue to slowly build up the intensity of the color and range of value by layering additional applications of these colors and mixtures of these colors.
Although the bulk of the seashell consists of warmer colors, we’ll begin adding some cooler colors for the shadows. This will create more contrast between the highlights and shadows and result in a more colorful seashell. Diaoxazine Purple and Cerulean Blue Hue are applied in the shadowed areas.
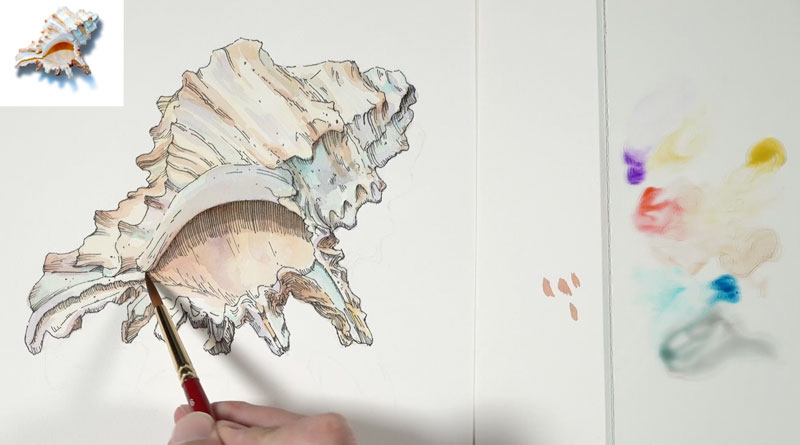
Gradually, we can begin increasing the contrast. As the contrast in vale is enhanced, the form of the seashell begins to make more sense. A touch of black is used in the darker areas to bump up the shadows.
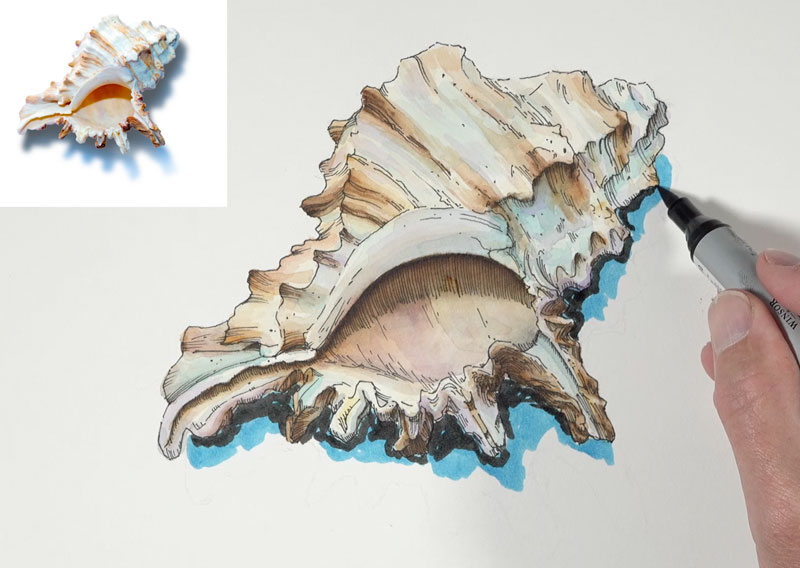
To push the contrast even further, we’ll next apply the marker directly to the surface and then activate with water and a brush. To do this, we’ll return with some of our initial warm colors – mainly with Burnt Umber and Yellow Ochre.
These more intense, darker applications are applied sparingly in selected areas.
After building up a range of value and color on the shell, we’re ready to address the cast shadow underneath. In this case, I wanted the cast shadow to be fairly strong so I started with direct applications of the watercolor markers directly to the surface. Cerulean Blue Hue is applied first, followed by Ivory Black.
As I began activating the colors on the left side of the shadow, the mixing was predictable. But I as moved across to the right side of the shadow, I noticed that the markers had begun to dry and activating and mixing became difficult. It became clear that watercolor markers, unlike watercolor pencils, had an “activation period”. This means that there is a limited amount of time that one can activate the watercolor markers before they dry. Once they are dry, they are very difficult to activate.

As you’ll notice in the image above, the left side of the shadow gradates as expected. But on the right side, the blue and black are segmented and there is little gradation.
To alleviate this, I decided to go back over the shadow with hatching. This harmonizes the image and helps to soften the lack of gradation of color and value. And as an added bonus, it strengthens the shadow as well.
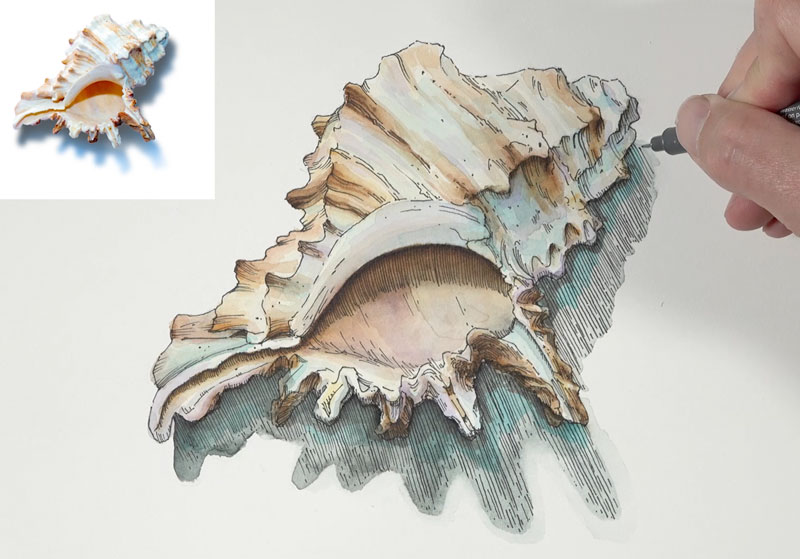
To further soften the transition, I also went over the shadow with a bit of black, taken directly from the tip of the marker.
To finish the image, some of the lines are strengthened and made slightly larger with the pen and ink. This subtle variety in line quality adds more weight to the seashell.

Watercolor Markers – Conclusion
Watercolor markers are an interesting medium. Some will find them an exciting addition to their collection of art materials. I can see the appeal and I enjoyed using them to create this lesson and the image of the seashell. It’s clear that the results are very similar to what we see with traditional watercolor, but in some cases extra steps must be taken to use them in this manner. They do travel well and can be used without the need to carry around watercolor pans or tubes. This makes them excellent for sketchbook work, which is what I see as their most appealing characteristic.
If so, join over 36,000 others that receive our newsletter with new drawing and painting lessons. Plus, check out three of our course videos and ebooks for free.