Drawing an Iguana with Pen and Ink
In this lesson, we’ll create a pen and ink drawing of an iguana on hot press watercolor paper. Now, why are we creating this drawing on watercolor paper? Well, it’s because we’re going to eventually add watercolor applications over the top – but in this lesson, we’re going to complete the pen and ink drawing.
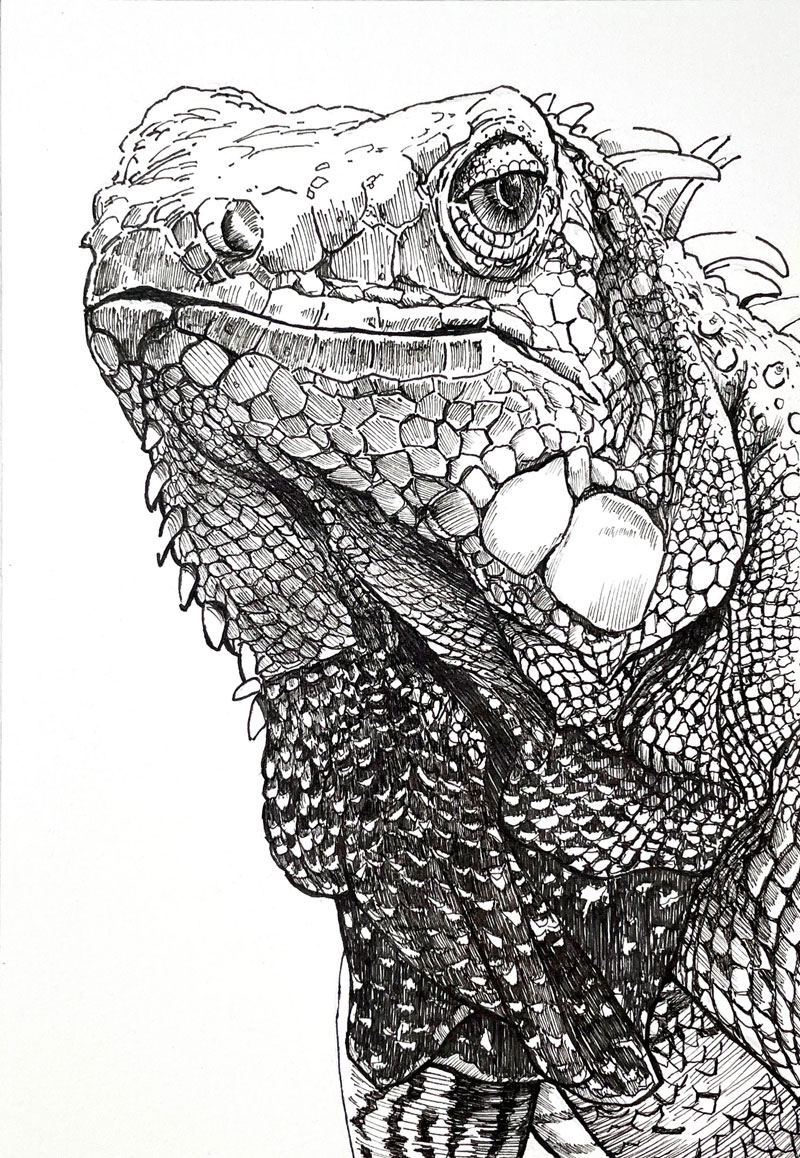
Here’s a look at the completed pen and ink drawing…
Materials for Drawing an Iguana with Pen and Ink
We’ll work on Canson Heritage hot press watercolor paper which is a smoother watercolor paper. It’s different from cold press watercolor paper. This paper is suitable for pen and ink applications since it is so smooth.
See also: All About Drawing Papers
I’ll sketch the drawing with a 4H graphite pencil. From there, we’ll move on to the pen and ink applications. Two different pens, by different manufacturers are used – a Staedtler 0.1 pen (a fairly thin pen) and a 003 Micron pen, which is a super thin pen.
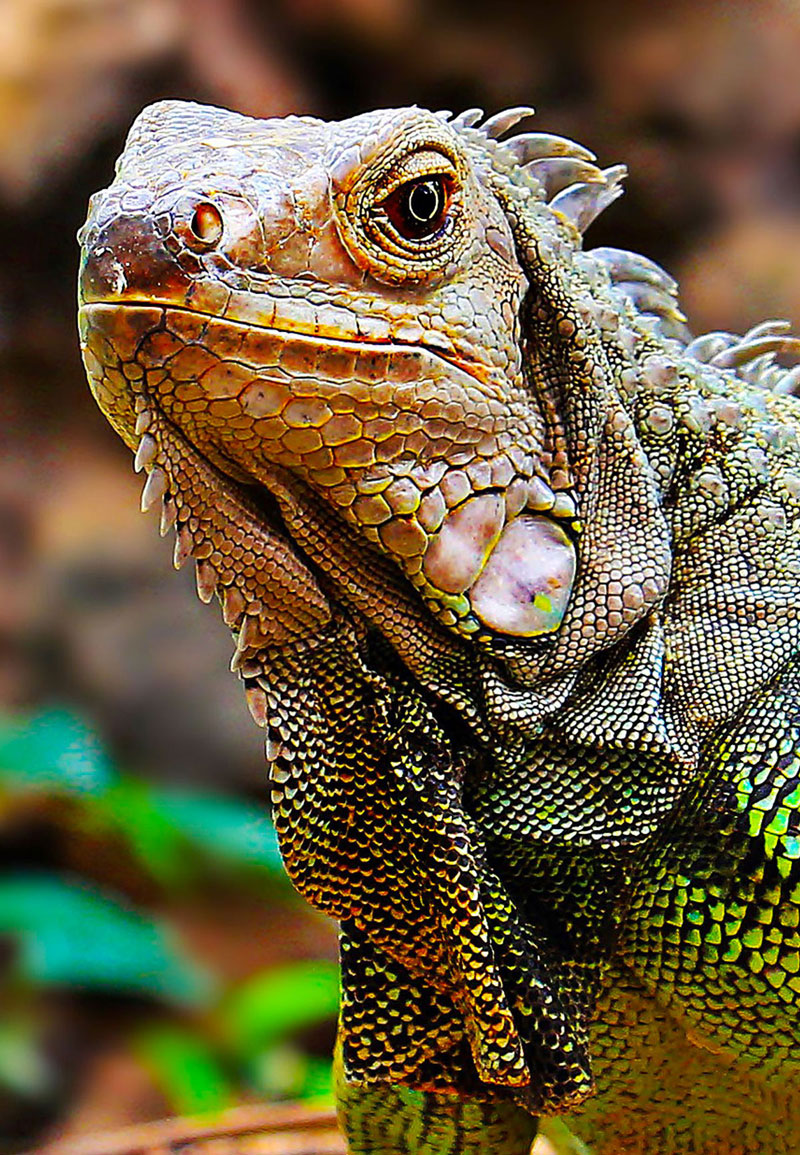
A photo reference is used for this drawing. This reference comes form Pixabay.com and has been edited for composition and color. Here’s a look at the photo reference…
Sketching the Iguana with Pencil
We’ll begin here using a 4H graphite pencil. I’m using this lighter pencil so that the graphite lines that I apply are easily erased and not noticeable in the final pen and ink drawing. I’m using a fairly light touch here to loosely sketch out the outer contours and the basic shapes of the iguana.
I’m using sketchier lines at first but as I become a bit more confident with the lines that I have in place, I’ll gradually apply more pressure to the pencil. When using a harder pencil like this 4H pencil it’s important not to press too hard because you can put grooves or indentations in the surface of the paper, which may be visible in the final image.
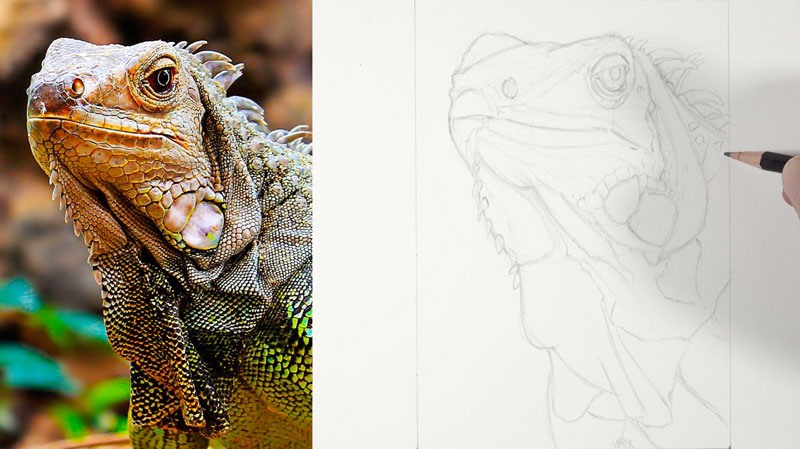
I’m just basically drawing lines here where I see contrast in value. When we see these folds overlap on top of other sections, a shadow is produced and this creates some contrast. I’m simplifying that contrast into easily understood lines.
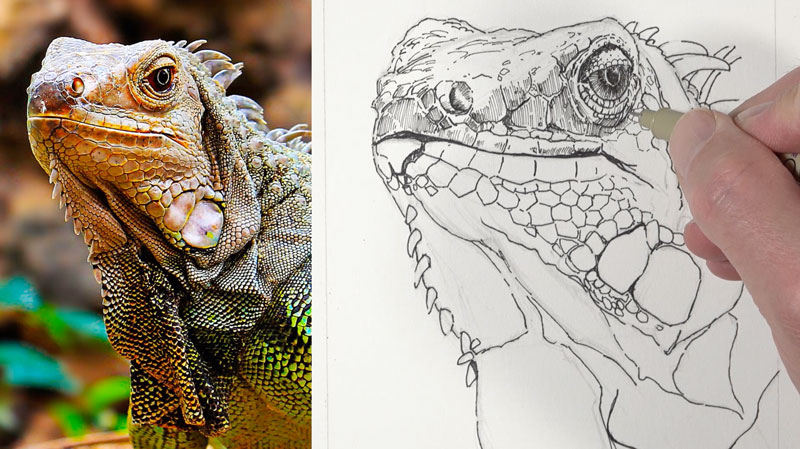
Pen and Ink Applications
Once we have our graphite drawing in place, we’re ready to start with the pen and ink applications. I’m going to start with the larger of the two pens – a 0.1 pen by Staedtler. This pen is going to make a slightly larger mark than what we see with the Micron pen that will follow. At this point, I’m basically more concerned with the contour lines or the outlines in the areas where I see some dark shadow or some of the larger shapes that we see on the iguana.
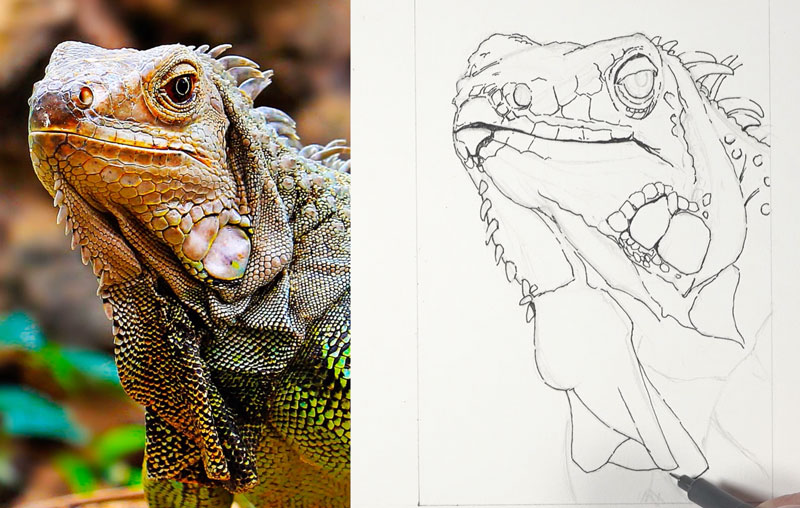
I am considering and thinking about the line quality, which I like to refer to as the thickness or thinness of a line. I’m starting with some of the larger lines here initially. Throughout the process, you’ll see that I also add smaller lines and go back and beef up some of the lines here and there, ensuring variety. Variety is one of the eight principles of art and it’s important to include in our work.
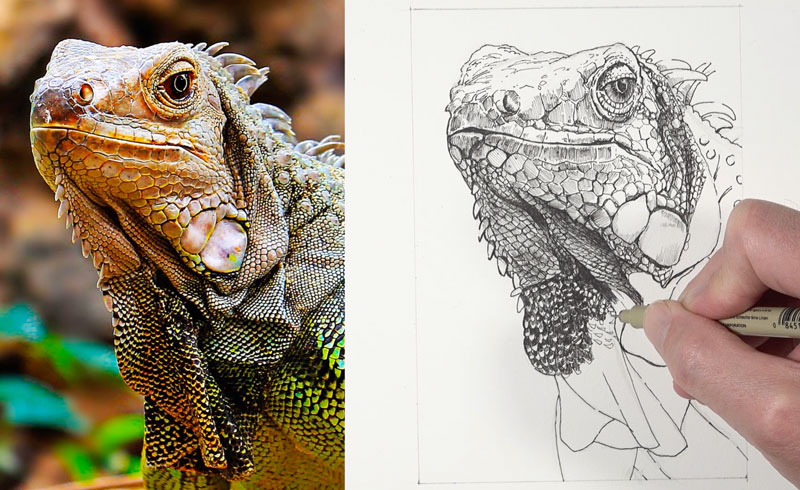
Developing Texture, Shadow, and Form with Pen and Ink
With much of the contour lines established, we’ll move on to the smaller Micron pen. This is a 003 pen with super tiny tip. This is a relatively small drawing anyway, and I’m going to be using this pen mostly for developing the shadow in this drawing. I begin with the eye, adding lines coming out from the center of the eye to create darker value.
One of the things we need to watch out for in a pen and ink drawing is that we don’t go too dark, too quickly. It’s very easy to do, so it’s always a good idea to go a little lighter than you think you might need. You can always add additional applications of ink to make the value a darker, if needed.
The hatching marks that I make are going to change direction slightly. ‘m just trying to follow the plane that’s created in three dimensional space. This will not only help to develop the shading, obviously, but also help to communicate the form of the lizard as well.
I also want to point out that my lines are not perfect. I’m not really overthinking the lines as I’m adding them. I’m not putting too much pressure on the pen as well and my lines are a little sketchier than you might expect. The drawing will still look sharp and controlled in the end, but you can allow yourself a little bit of freedom with your mark making and not get too overly obsessed with making the perfect mark.
What’s important to note here is that this pattern is made up of irregular shapes and sizes. I’m just basically using my photo reference as a guide as to determine where the shapes are larger or smaller. I’m not getting obsessed with matching everything exactly. Instead, I’m just focusing on the patterns that I see, and I’m trying to replicate that pattern as best as I can.
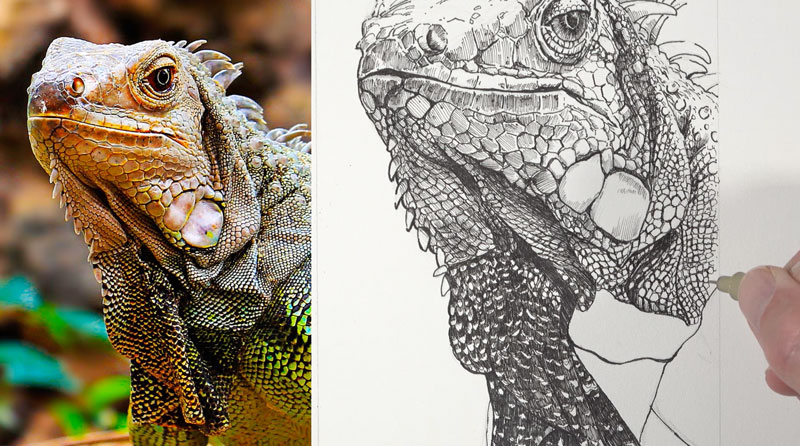
As we work down the body of the iguana, the pattern changes and values become darker in areas. When you’re creating a pen and ink drawing, you’re interpreting what you see in reality into lines. We’re all going to interpret what we see a little bit differently. As a result, the marks and patterns that we make on the drawing surface may be different from one artist to the next. And this is perfectly acceptable. Don’t think that you have to interpret things exactly the way another artist might interpret them in order to be successful. We all have our own artistic vision and we interpret things differently.

Finishing Touches to the Drawing
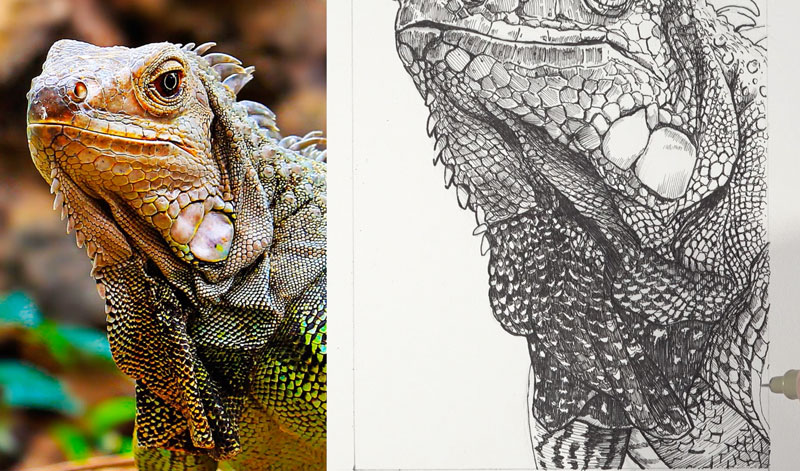
We’ll move on down to the leg and the body of the iguana, which is pretty much what we’ve got left here. You can see that the hatching marks I’ve used here curve slightly to communicate the form of the leg because it curves as well. You can see the methodology I used to create a lot of the patterning on the body of the iguana. I basically just drew guidelines and then filled in those guidelines with the repeating shapes.
After the ink is dry, a kneaded eraser is used to erase away any remaining graphite lines, revealing only a pen and ink drawing…
Drawing an Iguana with Pen and Ink – Conclusion
After we’ve covered the graphite drawing with pen and ink and we’re happy with the relationships of value, our drawing is complete. In this case, our pen and ink drawing of an iguana could stand on its own as a completed piece of art. However, I later add watercolor to this drawing to add color and interest. We’ll cover this process in the next lesson.
If so, join over 36,000 others that receive our newsletter with new drawing and painting lessons. Plus, check out three of our course videos and ebooks for free.