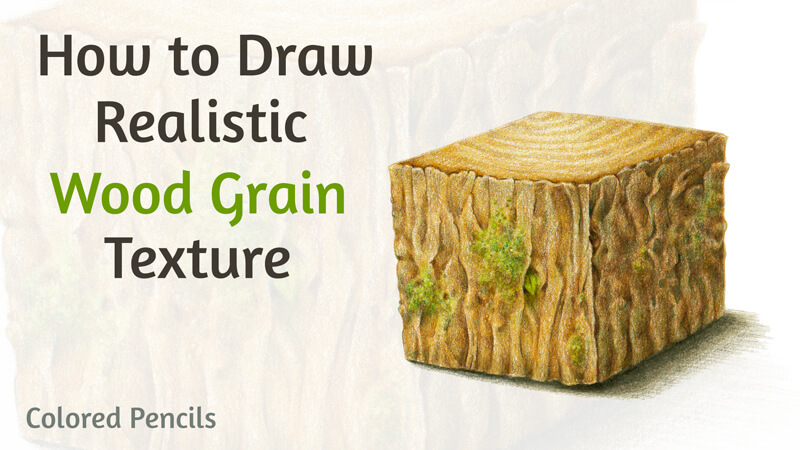
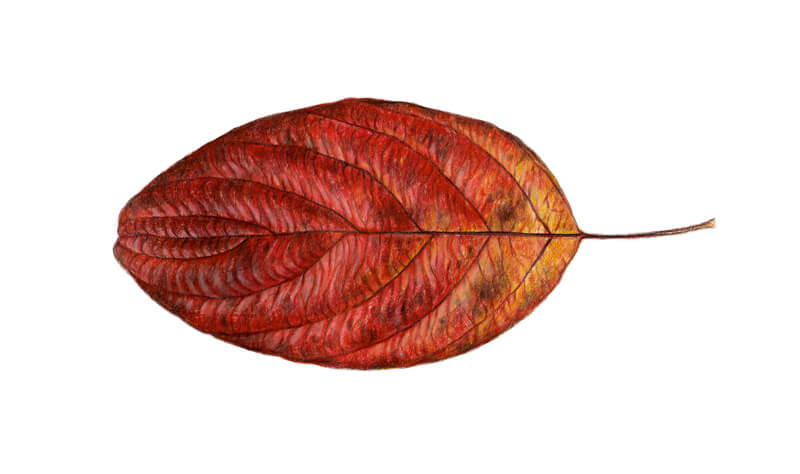
In September, leaves turn into the warm colors of red, orange, and yellow. They represent a variety of shapes and textures. Why don’t we celebrate the start of this beautiful season with a themed colored pencil drawing?
For this colored pencil lesson, I recommend that you choose a real leaf as a model. Drawing from direct observation allows you to see details that may be missed in a photo. Also, it gives you the opportunity to learn more about the subject matter. You can rotate the object, study it from different angles and notice all the nuances.
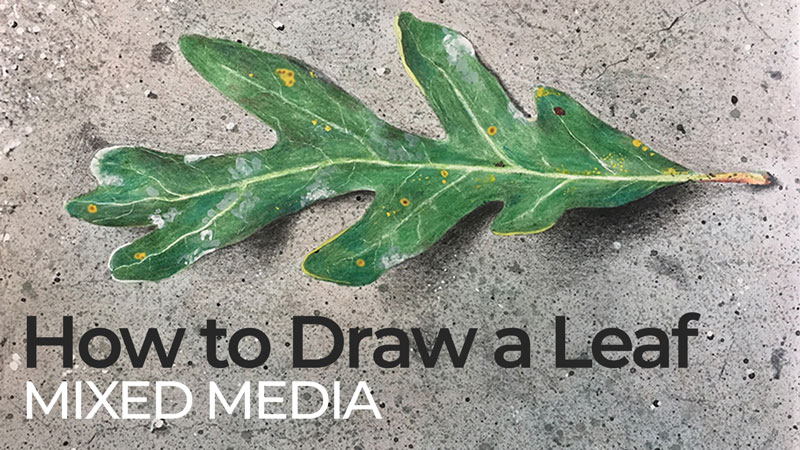
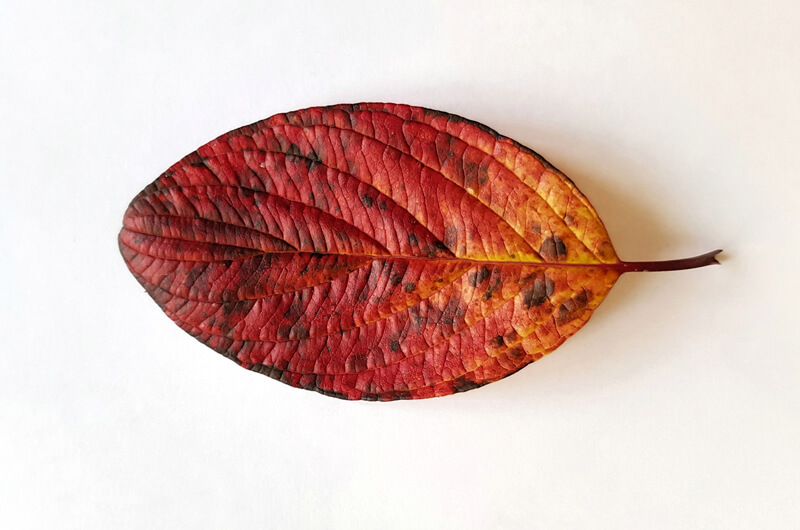
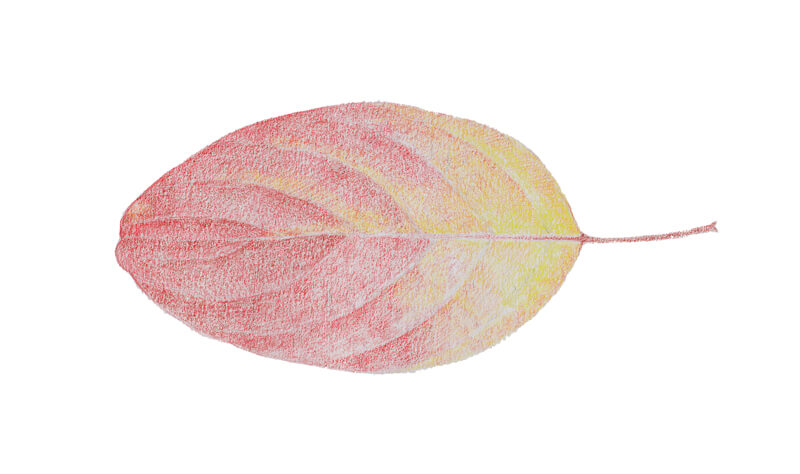
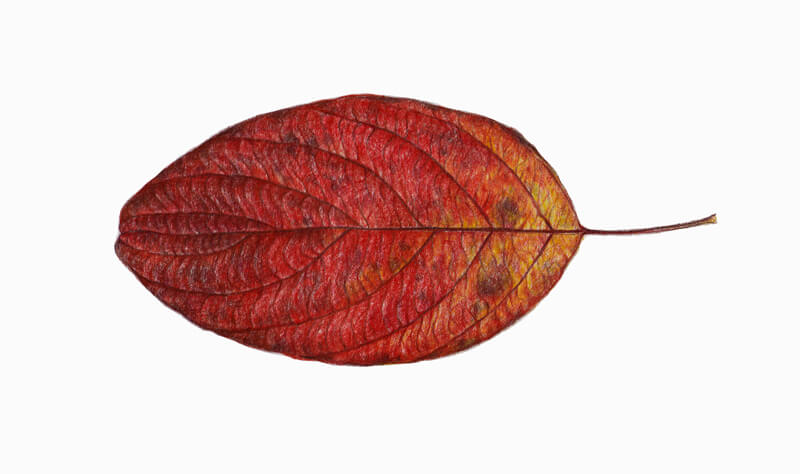
Or, feel free to use my photo (below) as a reference. I’m going to keep the main features of the leaf and present them in a slightly stylized manner.
Consider this project as a study. I’ll show you my way to analyze the model, its structure and texture. The resulting conclusions and experience may be applied to larger, more ambitious artworks.
It’s up to you to decide how much time to spend on this project. In my case, the drawing that you see here required about seven hours to complete. If you strive for greater realism and more detailed elaboration, you may need to invest even more time in the process. Colored pencils are a rather slow medium, so be deliberate and patient. In any way, the investment of time will pay off.
Depicting a fragile botanical object may be challenging. Fallen leaves are no exception – they crumple and fade quickly. To save your model without any substantial changes in form or color, use a simple trick. Moisten the leaves that you gathered outside, but make sure that they are just slightly wet.
Then, interlay the individual leaves with a paper towel, just as you would do if you intended to dry them in a flat state. The leaves should be smooth and straightened. Cover the upper and lower ones with a piece of paper towel, too.
Now, put the resulting arrangement into a freezer. The leaves will keep their initial colors and texture for a long time – enough to create dozens of botanical drawings. In my experience, frozen foliage saves its artistic value for up to seven months.
Colored Pencils and Materials
I’m going to use Faber-Castell Polychromos colored pencils to create this botanical study. The only exception is the Chinese White pencil from a Derwent Drawing set. This pencil creates a strong and solid white covering. However, don’t feel pressure to purchase any special tools. Just work with the pencils that you have or prefer if you wish.
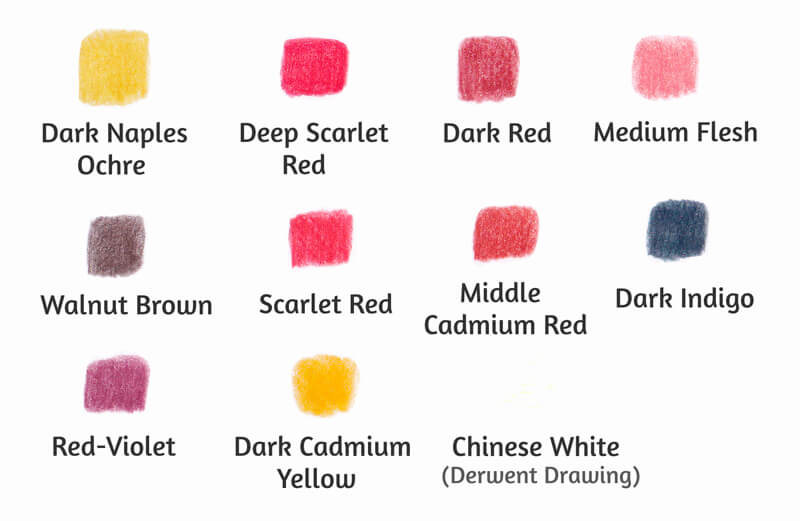
Please note that the range of colors can be reduced. In the image above, you can find four reds that are relatively close in value (Deep Scarlet Red, Dark Red, Scarlet Red, Middle Cadmium Red). Using them together gives you more options in creating subtle color nuances. However, if your set of colored pencils is not that varied – no problem. Use two reds instead – for example, Dark Red and Middle Cadmium Red.
Follow your artistic gut – it is much more important than the number of pencils that you own.
My paper is heavy enough to accept multiple layers of colored pencil applications. Its surface is rather smooth. I don’t recommend using paper with a heavy tooth for this drawing. On a coarser surface, it may be difficult to achieve the desired detailing. However, feel free to experiment!
See also: All About Drawing Papers and Surfaces
We’ll also need a graphite pencil to create an underdrawing. I recommend an H or HB. Keep a pencil sharper and an eraser at hand.
Analyzing the Structure and Texture of the Leaf
Before we start drawing, let’s observe the leaf close up. (In the image below, illustration a.) If you’re using a real leaf as a model, you can follow this process of analysis with your subject.
Now, pay attention to the midrib, or the primary vein that divides the leaf into two halves. Observe the veins that diverge from it and notice the pattern that they create. Do you notice the symmetry? As you can see, the secondary veins of my leaf don’t share their starting points.
Also, note that the veins are not just perfectly straight lines. There are soft twists along the entire length.
For your convenience, I’ve marked the midrib and the secondary veins with a bright green color. See the illustration b in the image below.
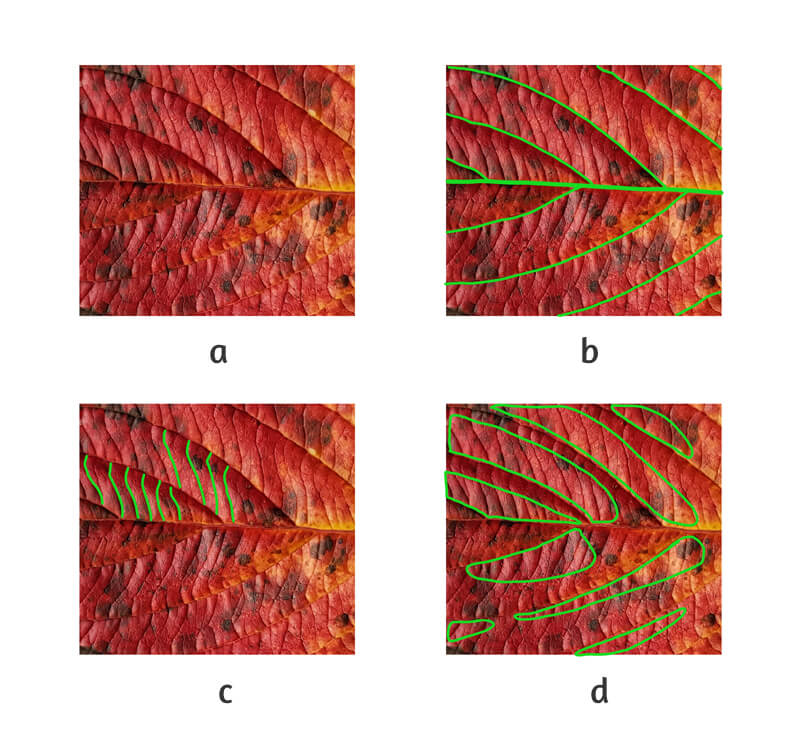
Now observe the tertiary veins that fill in the space between the secondary ones. The pattern is quite complex, so try to find a rhythm. Imagine drawing repeating lines in your mind that mimic this pattern. (Illustration c in the image above.)
Put aside the spots on the leaf’s surface – just mentally, of course – and find the lighter areas. Try to see them as simplified shapes. Is there any consistency in this pattern? (Illustration d)
As a final step, evaluate the texture of the leaf. Is it smooth, soft, velvety, or slightly glossy? Try to describe it.
Now we’re ready to pick up a pencil and start drawing.
Drawing a Leaf with a Graphite Pencil
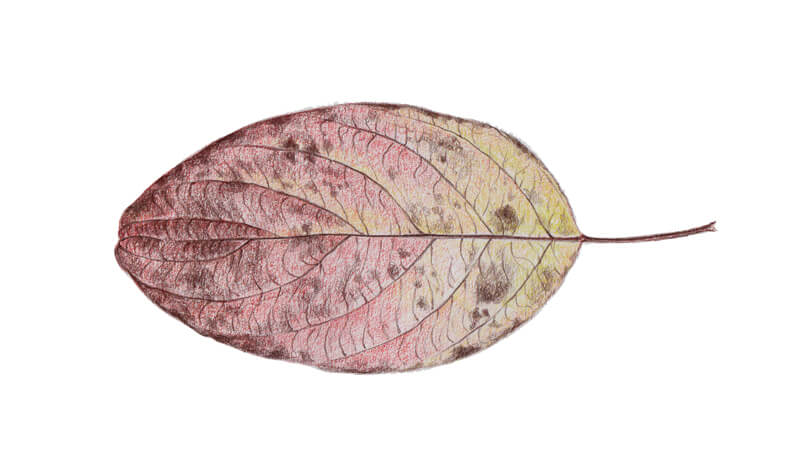
I start with a rough sketch of the leaf with a graphite pencil. The goal is to find and record the general shape of the object.
At this step, keep your lines as light as possible. I’ve intensified the graphite marks in my drawing for your convenience.
See also: 7 Drawing Techniques For Accuracy
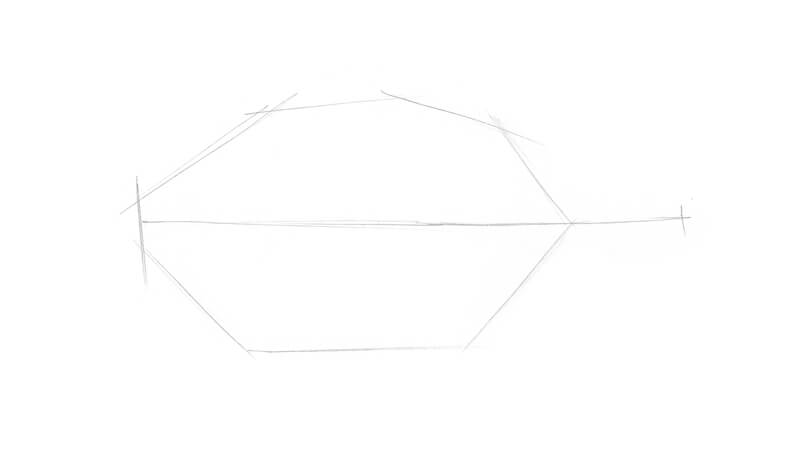
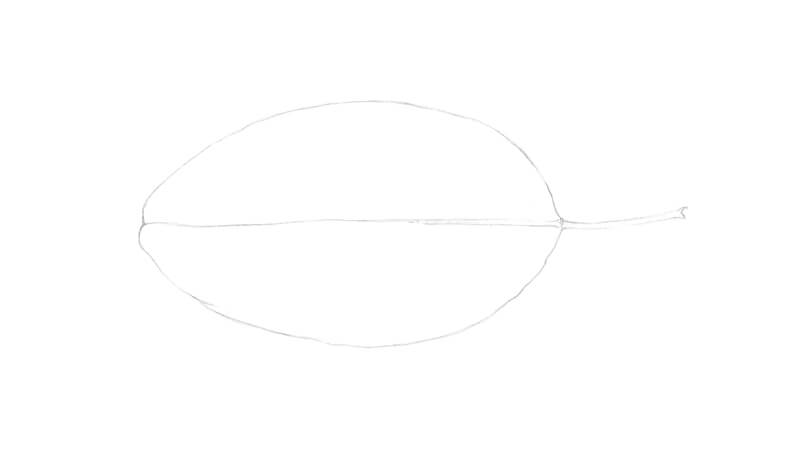
Next I refine the main contour of the leaf, the midrib, and the petiole (the stalk of the leaf.)
My model is right before my eyes and I observe it carefully.
I add the secondary veins that branch from the midrib.
The leaf’s halves are inconsistent in the veins’ starting points. Some pairs begin almost from the same spot on the midrib. Others have a relatively large gap between the veins’ foundations.
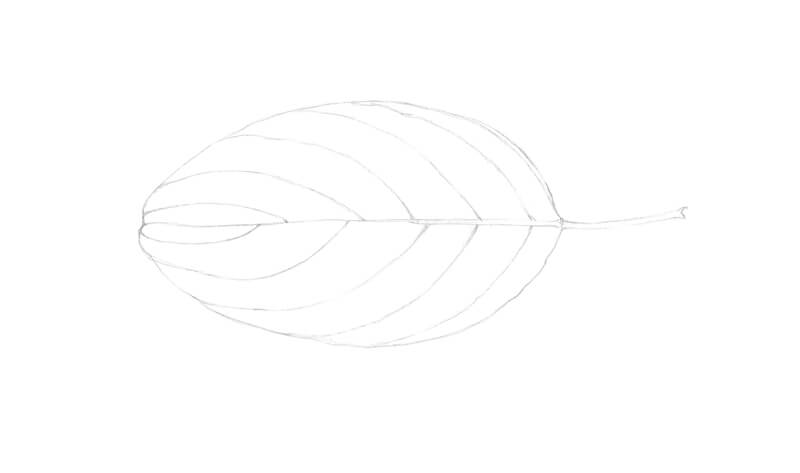
I add the tertiary veins, stylizing and simplifying the pattern of the real leaf. Our goal is not to create an accurate botanical illustration, so we have some room for interpretation.
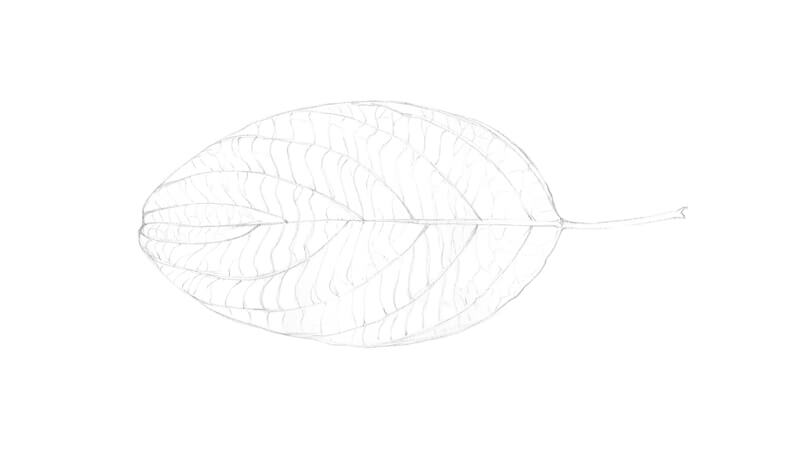
Don’t try to add all the tiny details unless it’s something that you want to do. We’ll start the next part of the process by softening the lines with an eraser. Excess graphite may contaminate the colored pencil applications, so we should make sure it’s removed. There is a risk that some of the slightest marks will be lost completely.
Drawing A Leaf with Colored Pencils
As was mentioned above, our first step is softening graphite marks with an eraser. A kneaded eraser is the best option, but if you don’t have one, an ordinary soft vinyl eraser will work just fine. The graphite lines should be barely visible.
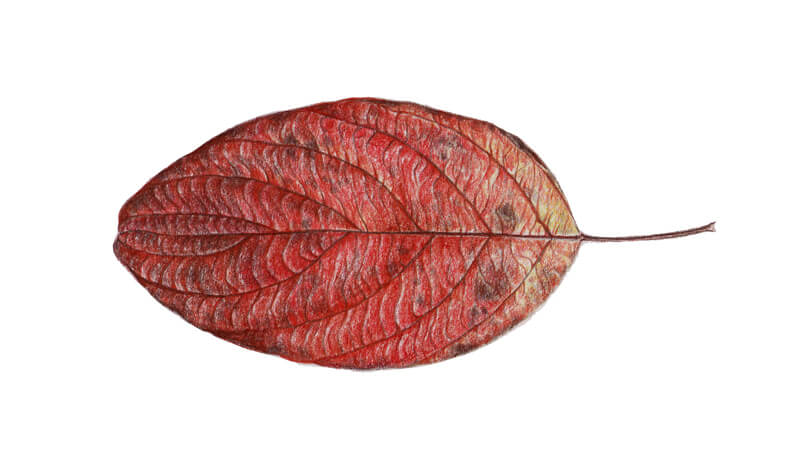
Let’s create a base of colored pencil applications. I use Dark Naples Ochre for the yellowish areas. Deep Scarlet Red and Dark Red help to cover the red areas. The latter pencil is used to accent the darker areas of the leaf.
My pencil moves in small circles, but using directional lines is also an option.

I ignore the darker spots that we see on the model at this point. The goal is to create an even underlayer of local colors. The applications of different pencils can overlap each other.
I recommend that you keep light pressure on your pencils. By pressing too hard too soon, it’s possible to wear off the paper’s tooth before you get enough layers of pigment.
With a sharpened Walnut Brown, I draw the veins and the petiole. Keep in mind that the midrib and the long secondary veins are not perfectly straight lines. Let them be more natural and organic.
I also add the darker spots using a circling technique. The spots have blurry edges and intense cores, so I vary the pressure and the number of layers to build these areas.
It’s time to deepen the colors. I cover the lighter areas of the leaf with Scarlet Red, and the darker ones with Middle Cadmium Red. A small area of yellow that is close to the petiole remains untouched.
Also, I leave thin segments within the red areas uncovered. This is done to create a hint of light hitting the surface of the leaf and imitate the unique texture of tertiary veins.
I work within the sectors created by the secondary veins. Avoid smudging these important lines with a pencil tip. The necessity to be accurate makes the process more time-consuming, but the result will be worth the effort.
With a sharp Red-Violet, I accent the midrib and the secondary veins. Then I add more details, such as a few new tertiary veins and small spots. I apply this shade to the existing spots too.
The darker areas will also benefit from the inclusion of this color.
To liven up the yellow areas of the leaf, I cover them with Dark Cadmium Yellow.
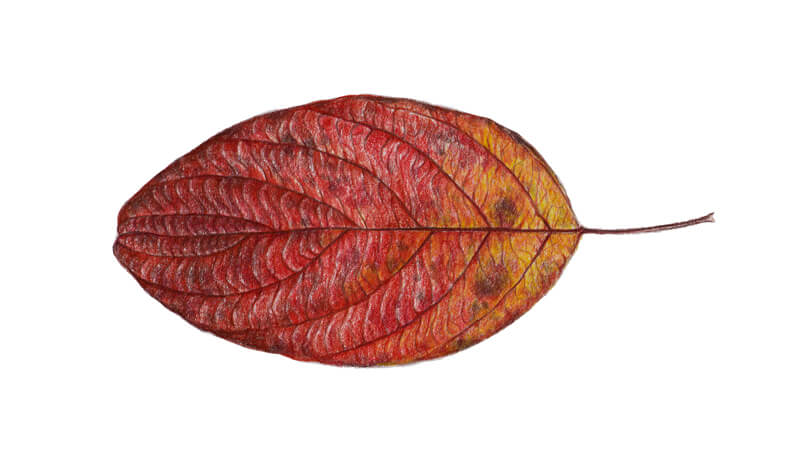
I cover the leaf with additional layers of Scarlet Red and Dark Red. The goal is to make the colors appear more solid. Also, we need to remove the majority of small specks of white paper that are still showing through.
Please note that it’s much easier to access and cover these tiny white spots if your pencil is sharp.
I add Dark Indigo to the darkest sections of the leaf. The spots and some of the veins become accentuated. It’s possible to add new speckles to make the texture more interesting.
To achieve a more natural look in these areas, apply Walnut Brown over the dark blue strokes.
I burnish the red parts of the leaf with Medium Flesh. Again, avoid smudging the veins with a pencil. I also use Dark Naples Ochre to work on the yellow areas.
My pencil moves in small circles with a medium pressure. At this stage of the process, the majority of white spots (the signs of untouched paper) should disappear.
As the pencil develops a whitened tint of red, some areas may become slightly lighter.
I use Chinese White from Derwent Drawing set to create the highlights. The shapes of the highlighted areas follow the shapes of the smaller veins. Together, they form long areas of light that are adjacent to the secondary veins.
Squint your eyes and look at your drawing. Are you be able to identify the lighter areas?
I also use Middle Cadmium Red and Dark Red to strengthen the darker parts of the leaf. This makes the relief of the leaf more prominent. This also increases the contrast in our drawing.
I observe the leaf again. The goal is to find the parts of the leaf that require some additional applications of white or red.
As a finishing touch, I intensify the dark spots by adding another layer of Walnut Brown. (Red-Violet is also an option.) I accentuate the edges of the leaf in some areas.
If you start and complete this project within the same drawing session, I strongly recommend taking a break before you call this artwork completed. Come back with fresh eyes. Chances are that you’ll find something that you can improve. For example, it may be a good decision to increase the contrast or additionally burnish some areas.
As for me, I decided to add Dark Naples Ochre to some red parts of the leaf, especially the lighter ones.
Bonus – Changing the Background
I enjoy the magnificent, vintage style botanical illustrations. Usually, the subject is presented on a tinted background of some warm color. Our leaf is drawn on a sheet of white paper, but it doesn’t mean that we can’t change the color of the backdrop. Graphics editing software is at our disposal!
I usually use Adobe Photoshop for such actions. If you are a beginner interested in learning more about this program, check out this course:
The process that I describe below isn’t complicated. And yet, basic knowledge of this editor’s tools will help you to achieve the same results. It’s best to start this bonus part with at least some experience with Photoshop under your belt.
First, we need a scanned and edited version of the leaf. Scanners usually distort the color and contrast of the original image, so it’s necessary to make some adjustments. Unfortunately, no one can point out what specific tweaks are required without seeing your image, bit to make the necessary changes, put the original drawing before your eyes and try to reconcile the scanned image with the desired result.
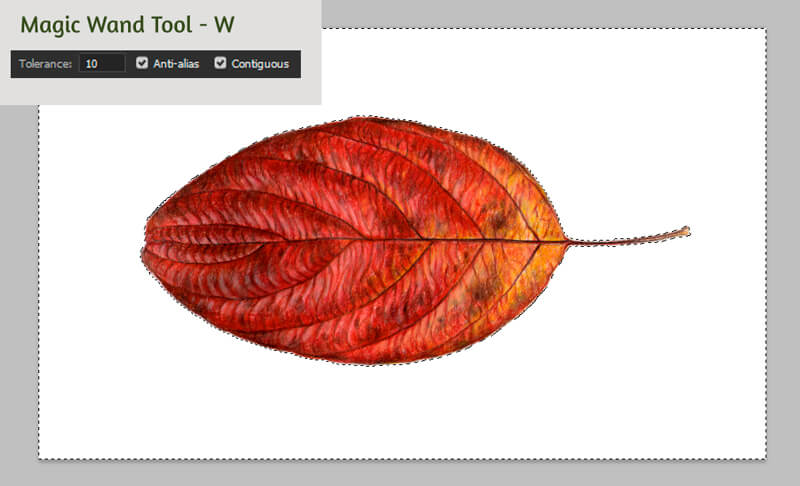
I create a new file and paste the edited version as a new layer.
Then I choose the Magic Wand Tool (it’s shortcut key is W on the keyboard) and click anywhere on the white space that surrounds the leaf. Make sure that the Contiguous checkbox is on. You’ll find my settings in the image below.
A glowing border of selection will appear around the leaf and on the perimeter of the artboard.
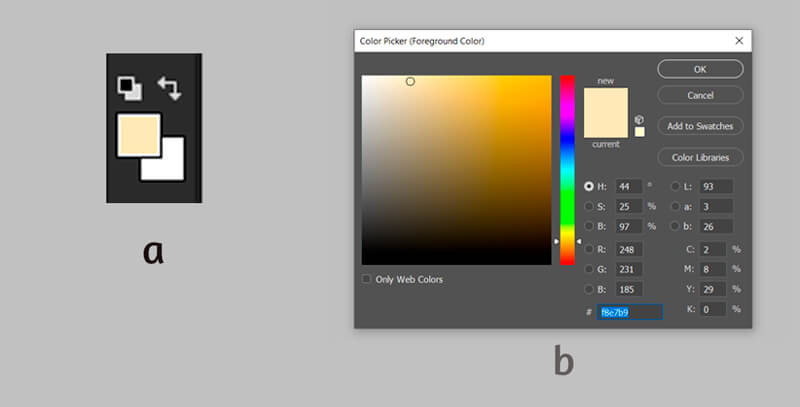
Next, choose a foreground color in Color Picker. It can be found on the left vertical toolbar. (See a in the image below.)
The Color Picker will open a window (b) where you can set the new color for the image’s background. My choice fell on #f8e7b9.
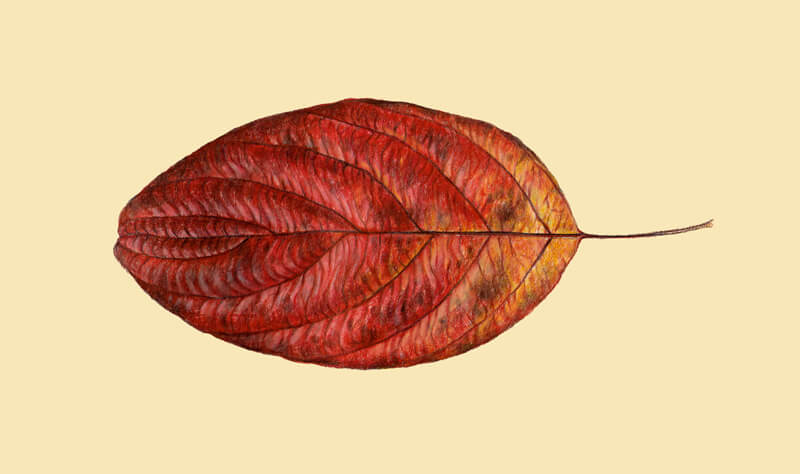
With the selection still active, I hit the G key to access the Paint Bucket Tool. I click with my left mouse button anywhere within the selected area. Now the color of the background is changed.
Ctrl + D will deselect the area. The image is complete – don’t forget to save it!
Drawing a Leaf with Colored Pencils – Conclusion
Congratulations – we’ve created a wonderful colored pencil drawing! I hope that the process was fun and interesting to follow. I wish you much inspiration for your future nature-inspired projects!
If so, join over 36,000 others that receive our newsletter with new drawing and painting lessons. Plus, check out three of our course videos and ebooks for free.