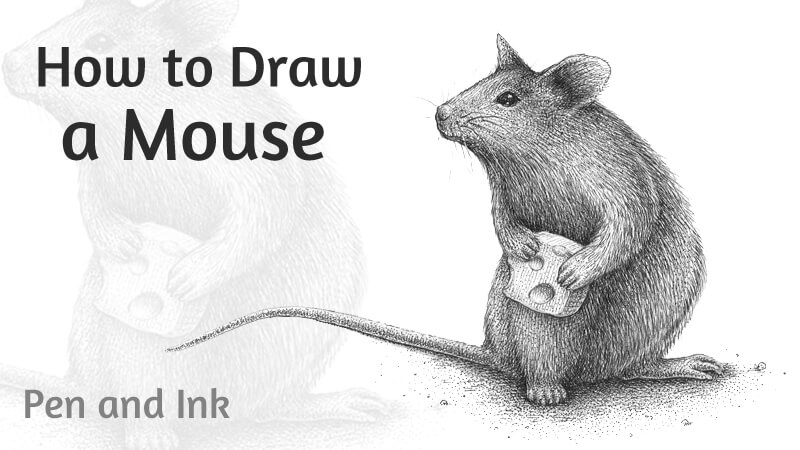
In this drawing tutorial, we’ll create an ink drawing of an adorable mouse. Also, we’ll discuss the distinctive features of these animals and, hopefully, learn a couple of fun facts about them.
For this drawing, I’ll be using just one ink liner of 0.1 width number. The paper is standard A4. Please feel free to use any inking tool that you prefer – a nib pen instead of a liner will be a great option.
Also, we’ll need a graphite pencil and an eraser to create the underdrawing.
How to Draw a Mouse with a Graphite Pencil
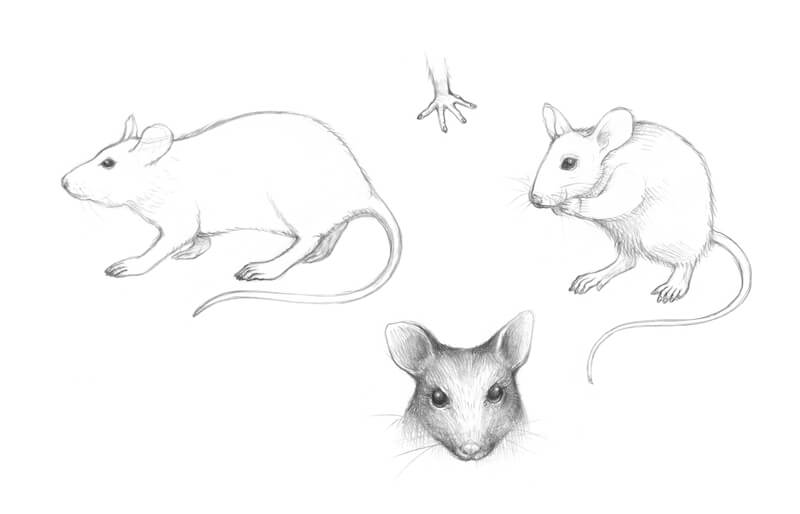
What do we know about this animal? A mouse is a small rodent with 30 different species. A typical mouse has a pointed snout, relatively large ears and eyes, and a long tail.
Mice are social animals. They have facial expressions that are used to communicate with other mice and express their mood.
Whiskers found on the snout allow sensing smooth and rough edges, breezes and temperature changes.
Mice have soft feet with nails on each of their toes. Nails enable the mouse to climb well as it can wrap its feet around things. A mouse has five toes on its back feet and four toes on its forelimbs. A greater number of toes on back feet gives the animal more stability while standing on them.
Mice also range in color. There are examples of coat colorings from white to light brown, dark brown, grey or black.
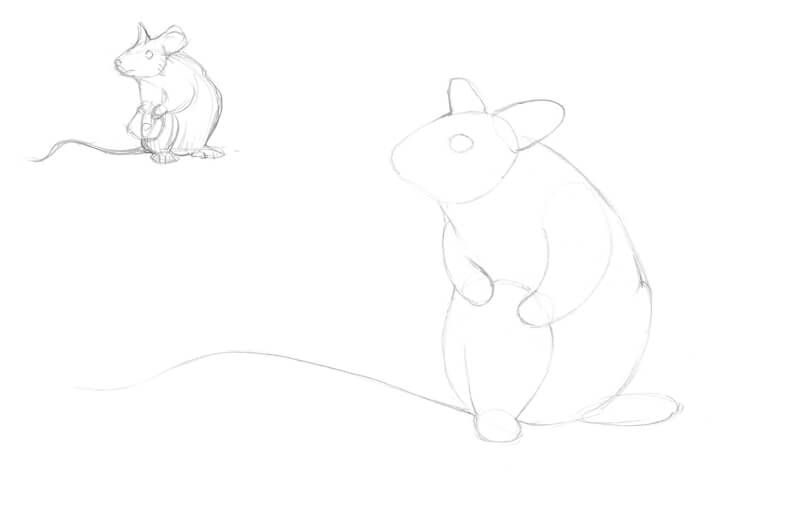
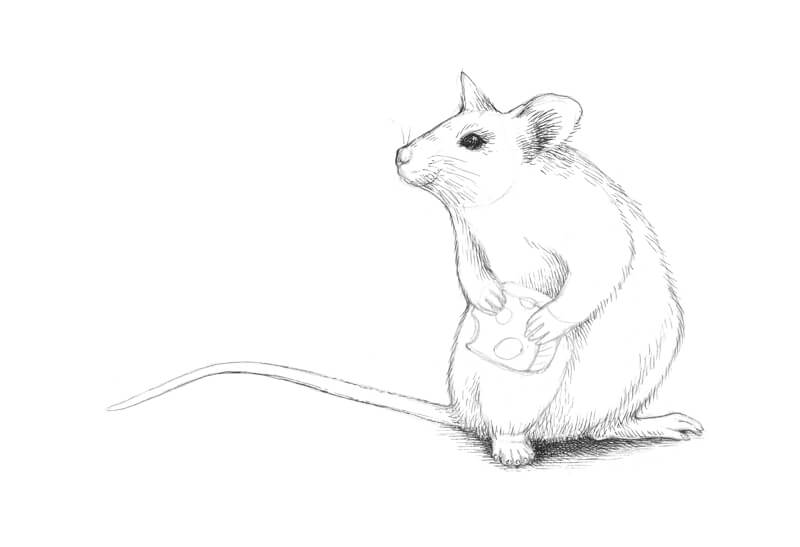
I start with a miniature sketch. It may be rough and stylized. The goal is to define the animal’s pose and develop the general concept. You’ll find my small sketch in the corner of the image below.
I decided to create a drawing with a hint at a story. What if we put a small bit of cheese in the “hands” of our mouse? Chances are that our drawing will resemble an illustration from a fairy tale. Let’s go for it.
Interestingly, real mice don’t like cheese — it’s a myth. They even actively shy away from certain types of cheese that have strong or specific odors.
I draw the mouse in simple shapes, starting with the rough contours of its head and body. Then I add stylized shapes of ears, eyes, and all four limbs. Don’t forget about the tail! A long line marks its direction. I think this tail position adds interest to the composition — there is plenty of room in front of the animal’s snout (enough space for its “look”).
See also: Drawing Basics – Construction
We’ll draw the cheese in the next step. For now, I leave some space for it.
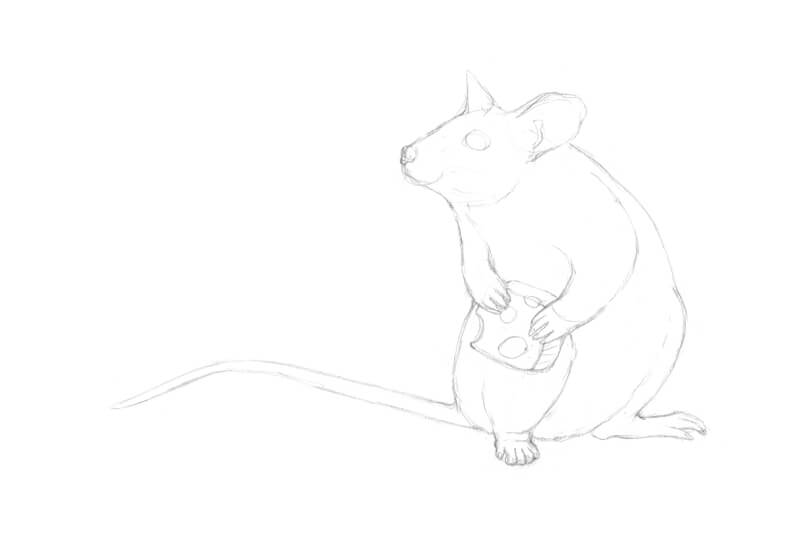
I refine the contours of the head. Then I add the nose, whiskers and the details of the ear’s opening.
The tail gets some thickness, transforming from a single line into a shape. Also, I refine the limbs and add the toes. (There are four toes on front limbs and five on back ones.)
The upper parts of the limbs will be covered with short fur. We’ll deal with this texture in the next part.
As a final touch, I draw a small cube of cheese and add some random holes to it. However, the pattern of holes and hollows should look harmonious.
How to Draw a Mouse with Ink
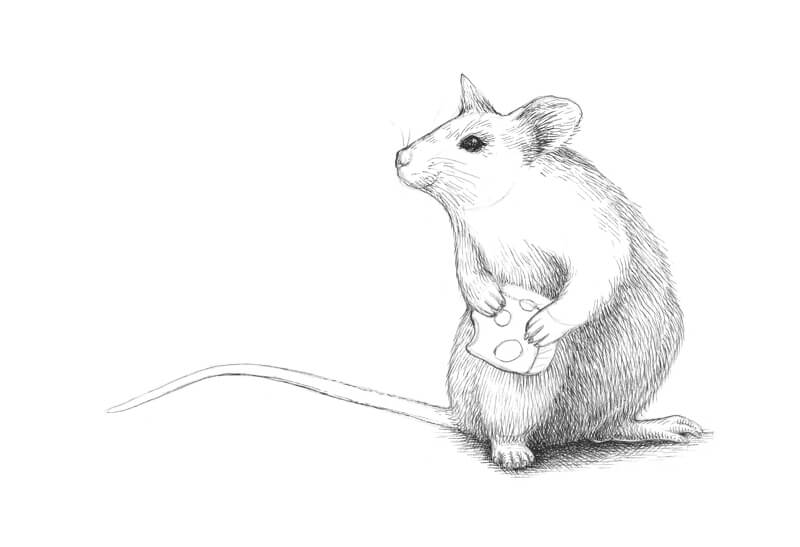
The eyes are very important — the character’s look defines the overall mood of the artwork. That’s why starting with the eyes seems to be a sensible idea. I darken the visible eye with short, dense, rounded hatches, leaving a small highlight in its upper part.
As I mentioned, the mouse is covered with fur. That’s why we can’t use a solid line to create the contours as it will look unnatural.
I mark the contours of the animal’s body with short ink lines. Their direction and character imitate the flow of hairs. The tail is nearly hairless, so I draw it with a broken line supported with short hatches.
Also, I apply this hair-like hatching to the darker areas of the drawing, such as fur under the front legs, the ear opening, and the belly area.
I create a base for a deep cast shadow under the mouse.
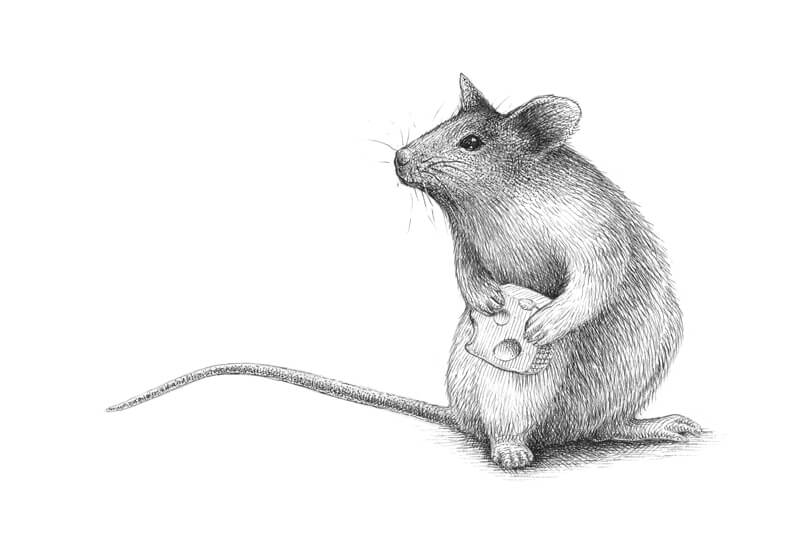
With relatively long ink hatches, I create an illusion of fur in the lower part of the mouse body. This area needs particular attention. According to my vision, it gets less light compared to the snout and the upper part of the body. The more layers of hatching we apply, the darker the area will be.
Also, I apply ink hatching to the limbs. The direction of rounded lines conforms to the contours of the form.
See also: Pen and Ink Drawing Techniques
I outline the contours of the cheese cube and mark the holes.
I work on the upper part of the animal’s body, using hair-like hatching that is already familiar to us. The direction of lines may vary which will make the drawing more natural.
I evaluate the drawing as a whole system at each step, applying ink hatching to the areas that don’t seem dark enough.
I start adding short rounded hatches to the tail. The lines repeat the contours of this body part, giving it more volume. I apply the same type of hatching to the ears and right under the snout to give the mouse more volume.

I continue working on the tail. If short hatches seem too heavy for these thinner areas, it’s possible to use dots instead. I leave a subtle line of reflected light near the bottom contour of the tail.
I add long parallel lines to the cheese, keeping light pressure on the pen. The direction of these lines accent the position of each particular plane of the cube. I decided to create a crust pattern on the side of the chesse.
There are subtle shadows inside the holes. I mark them with rounded ink lines.
I apply some dots to the head of our mouse. A few stippled marks create the illusion of soft fur. When it comes to making a smooth value transition and deepening the shadows, this technique is a great help.
In a similar manner, I add dots to the remaining body parts, aiming at the gaps between the lines. If this process seems too time-consuming, stippling can be replaced with hatching that imitates flowing fur, or cross-hatching.
I deliberately create an intense shadow around the cheese. Strong contrast will attract the viewer’s attention to this area.
I apply dots and short hatches to the “hands” and “feet” of our mouse.
Also, I add some small dots to the cheese to create visual unity.
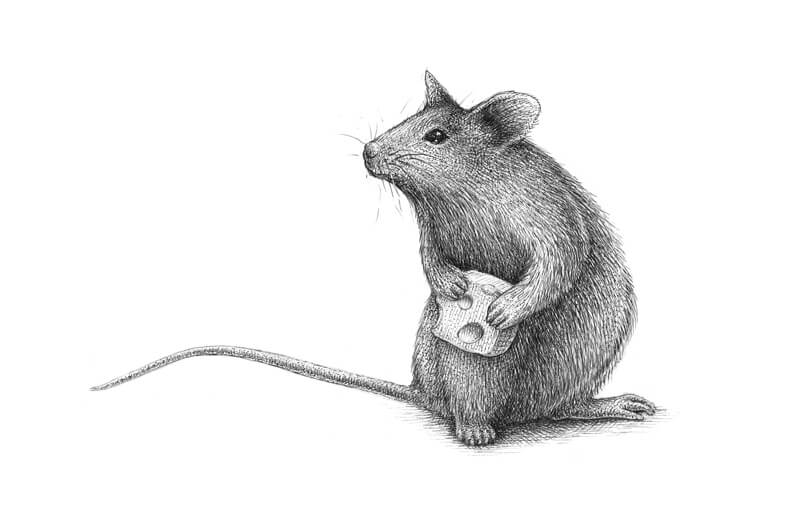
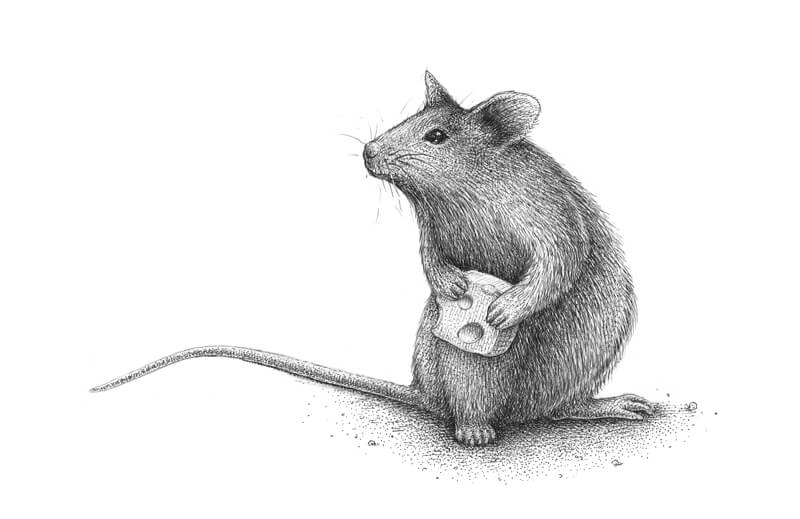
I strengthen the bottom contour line of the tail to make the mouse look more stable. However, I leave the contour of its tip almost unchanged because we don’t want to distract attention from the facial expression of the mouse. The main story happens there, closer to its “face” and “hands” that hold the cheese.
As a final touch, I extend the cast shadow, using both stippling and hatching. I also add some rounded shapes that imitate large particles of sand or soil (or bread crumbs as another option).
Drawing a Mouse with Pen and Ink – Conclusion
Congratulations! We’ve done a great job. Now we have a wonderful ink drawing of an adorable mouse holding a bit of cheese.
I hope you enjoyed every step of the process, and wish you much luck with your future creative projects!
If so, join over 36,000 others that receive our newsletter with new drawing and painting lessons. Plus, check out three of our course videos and ebooks for free.