Combining Different Forms of Charcoal
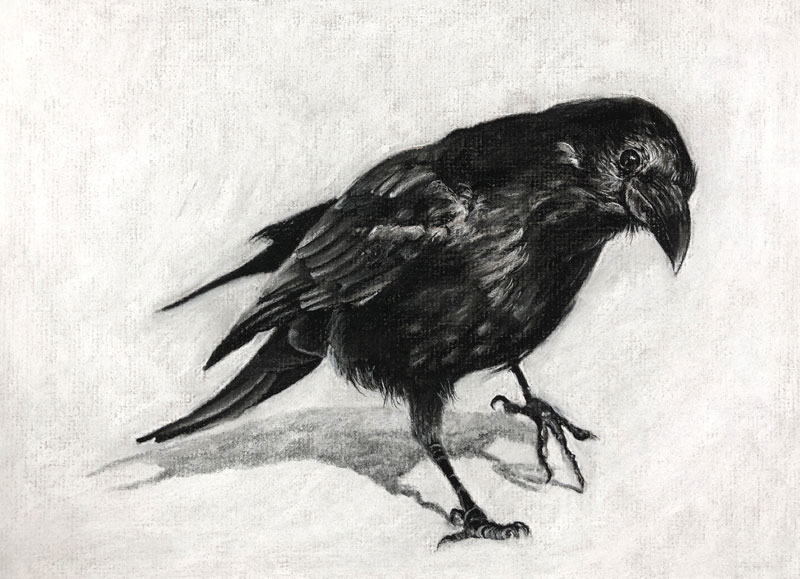
In this charcoal drawing lesson, we’ll combine vine, compressed, and white charcoal to create a drawing of a Raven on gray charcoal paper. We’ll begin with looser applications and slowly build up the details while expanding the tonal range.
Patience is important since charcoal can be a difficult material to control – if you’re not used to it. But you’ll see that while charcoal is dusty, it can be controlled and shares characteristics with opaque painting mediums.
Materials for this Drawing
Charcoal is considered a foundational drawing medium. In virtually every introductory, college-level class, you’ll find yourself working with charcoal. Charcoal is very forgiving and is a natural transitional medium for anyone interested in painting.
In this lesson, we’ll use a variety of forms of charcoal to complete the drawing. Vine charcoal, compressed charcoal (charcoal pencil), and white charcoal are all used. Blending stumps and a kneaded eraser are also used.
See also: Charcoal Drawing Techniques
(The following links are affiliate links which means that I make a small commission if you purchase without an additional cost to you)…
The Drawing Surface – Gray Charcoal Paper
Charcoal paper is a drawing surface specifically designed for drawing with charcoal. The surface features a distinctive laid pattern that is designed to lock the powdery medium in place, making it suitable for pastel drawing as well. The paper is very thin and delicate but is one of the best surfaces for drawing with charcoal. Most charcoal papers are colored buff (slightly off white), but can also be found in an assortment of colors and tones.
See also: All About Drawing Papers
Gray charcoal paper may be difficult to find. Most art stores do carry it, but you’ll likely have to purchase in larger sheets and cut it down to size if necessary. Look for it in the speciality papers section of the art store.
The Photo Reference
A photo was used to complete the drawing, but was edited before making marks. In this case, I used the camera raw filter in Photoshop to adjust the exposure, contrast, and to remove color.
Here’s a look at the photo reference used in this drawing…

Loosely Sketching the Raven
The drawing begins with a loose sketch using vine charcoal. Vine charcoal is very powdery and smears easily. Lifting it and erasing is a breeze, making it suitable for sketching. The basic shapes of the raven are sketched out using quick motions while holding the charcoal stick between the thumb and forefinger.
It’s okay for the sketch to smear slightly and lack details. We’ll clean up and refine the drawing as we layer compressed charcoal applications later in the process.

Once the basic shapes of the raven have been defined, we’ll use the vine charcoal to begin establishing the darker tones and middle grays. Vine charcoal is applied over the majority of the body and then softly blended using a broad blending stump.
See also: Do You Really Need Blending Stumps
This is not dissimilar to the process of painting in a solid shape of color with an opaque painting medium like acrylics or oils.
Details and Value
Over the blended vine charcoal, we’ll begin layering compressed charcoal using charcoal pencils. We’ll begin with the eye since it is a natural focal point, applying white charcoal with a pencil.
Here, the highlights in the eye and the small feathers are highlighted.

We’ll then begin working our way down the body towards the tail, taking care to keep the palm out of the way. We’ll gradually develop a broader range of value as we add both dark and light applications. A blending stump is used to soften the texture produced by the paper as we go. This also produces areas of gray where the white and dark compressed charcoal mix.

Patiently, but loosely, we’ll continue this process. Details gradually emerge as we push the tones lighter and darker. We don’t have to spell out all of the details as the relationship of the different values often provides enough information for the viewer.
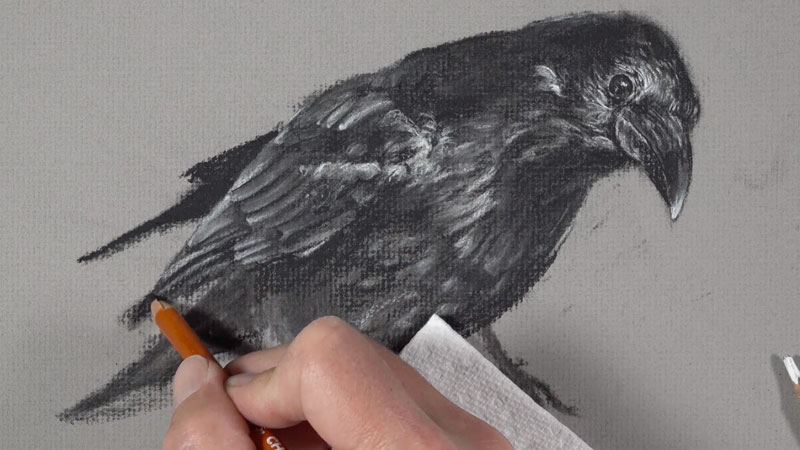
Due to the forgiving nature of charcoal, we can layer white charcoal over darker areas to make them lighter if desired. The same is true if the opposite is required. This versatility is similar to what we see with opaque painting mediums.
Defining the Background and Refining the Edges
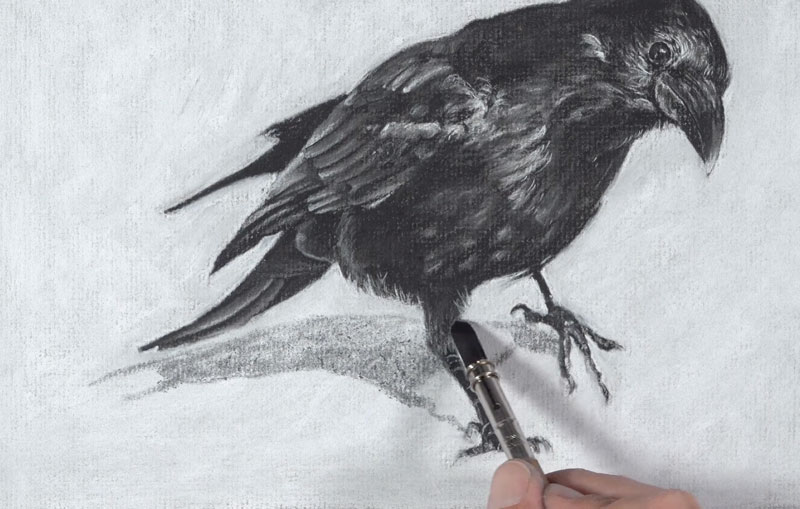
After adding highlights and shadows to the legs and talons of the raven, the bird is mostly complete. At this point, the contrast is not quite strong enough and the edges of the drawing are loose and undefined. We’ll use white charcoal to both clean up the edges of the raven and to define the background.

A white charcoal is pencil is used first around the edges of the bird. The pencil provides the precision that we need, but is too time intensive to use for the entire background. Instead, a white charcoal stick is used to fill in the remaining parts of the background.
Adding a Cast Shadow Under the Raven
Now our drawing is a bit cleaner, but our raven is floating. We’ll add a cast shadow underneath the body with vine charcoal to ground the subject. Light to medium pressure is used as the dark, soft charcoal is applied right over the white charcoal. A gentle blend with the blending stump makes the cast shadow appear more natural.
Finishing Touches
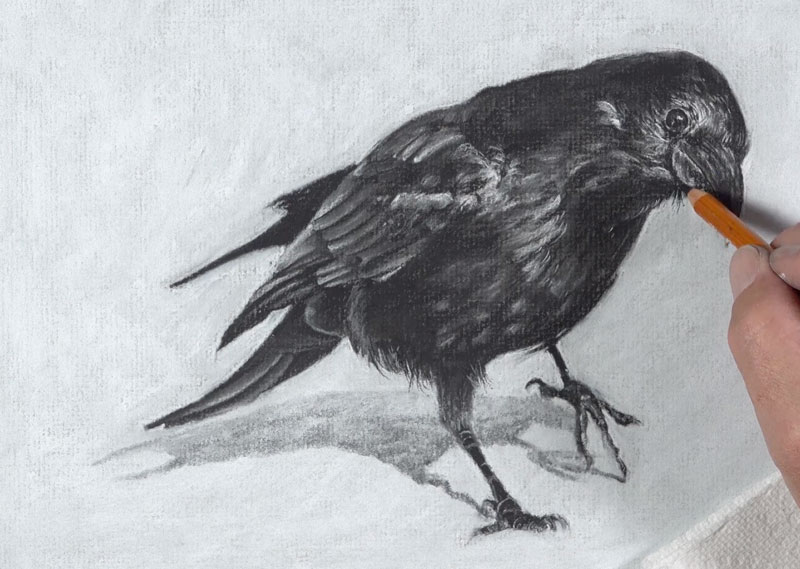
With a sharpened black charcoal pencil, we’ll revisit the outer edges of the bird, adding a few stray feathers. It’s okay to exaggerate these lines a little.
Drawing a Raven with Charcoal – Conclusion
Now our drawing of a raven with charcoal is complete.

There are a few things we can learn here. The first is that charcoal is a forgiving medium. It’s quite easy to push values darker or lighter. The second thing to note is the similarities that charcoal shares with opaque painting mediums. Charcoal is easily layered and covered by subsequent applications, making it a versatile drawing medium. The third take away is that we don’t have to be overly detailed with a charcoal drawing. As long as the shapes of values and their relationships are somewhat accurate, then our drawing will likely be successful.
If so, join over 36,000 others that receive our newsletter with new drawing and painting lessons. Plus, check out three of our course videos and ebooks for free.


