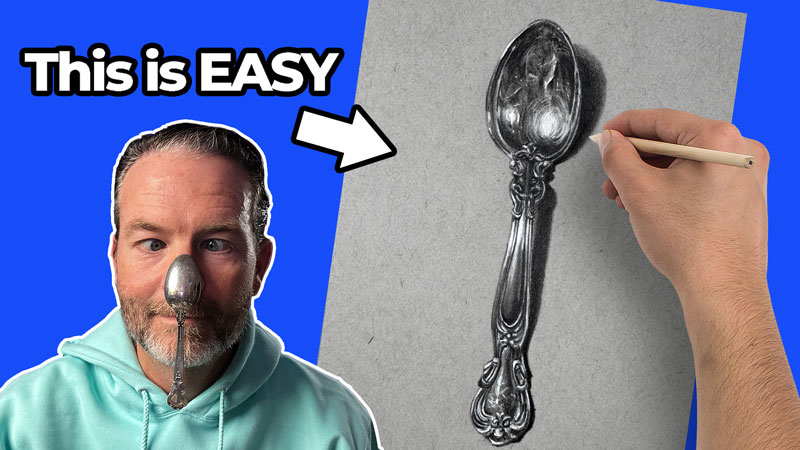
Success with Pencil Drawing
Graphite pencils are usually the very first medium we reach for when we first begin drawing. This makes this medium a comfortable choice for many artists. But if you want to use the medium to its fullest potential, there are few secrets to keep in mind. Implementing the strategies that I’m going to share in this video will greatly improve your pencil drawings. Let’s dive in.
Secret #1 – Use a Variety of Grades of Graphite
Graphite comes in many forms, but most of use are most familiar with graphite pencils. The graphite in each pencil is graded based on the softness or hardness of the pencil. Pencils with an H are harder and thus produce a lighter mark. B pencils are softer and produce a darker mark. The higher the first number on the pencil, the more intense the hardness or softness.
Accomplished graphite artists use a range of pencils to create their drawings. H pencils are mostly used for preliminary sketching, while B pencils are mostly used for shading. In order to create a full range of tone and value in our drawings, we must use pencils that are dark enough to create dark tones.
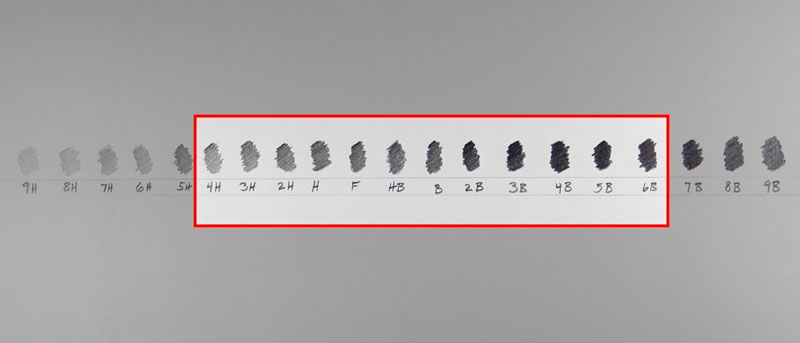
You don’t need every pencil ever made. I recommend having just 3-4 grades. Typically I work with an H pencil, a 2B, a 4B, and a 6B. This usually gives me the range I need to create a fully developed graphite drawing. Using just one pencil limits the range of value that you can create, so use several grades for better pencil drawings.
Secret #2 – Work on Paper that Has a Slight Tooth
The paper that you use to create your drawings plays a major role in your success. All papers have a texture associated with them that is usually referred to as “tooth”. Papers with a heavy tooth produce a grainy effect, while smoother papers produce a smoother texture.
See Also: All About Drawing Papers
With graphite drawing, smooth papers have a limited amount of material they can receive. Working on a smoother surface can enhance graphite shine, which is something we want to avoid. Heavily textured papers have too much tooth and result in an overly-textured appearance.
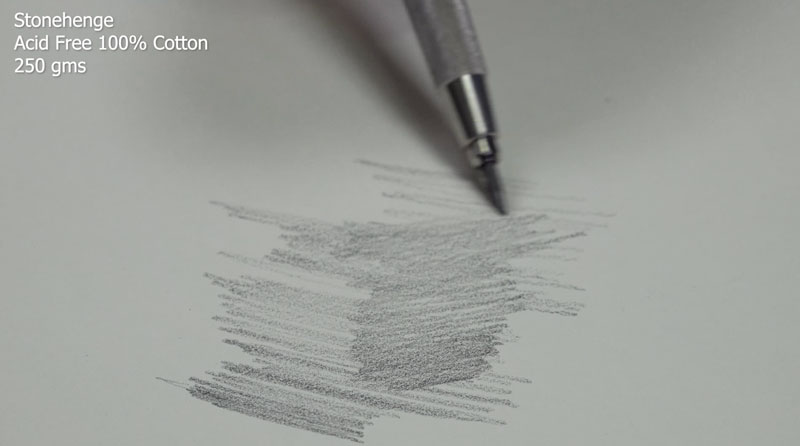
To be successful, we should strive to work on papers that feature a light tooth. Papers such as Stonehenge paper, provide a soft touch with ample texture – suitable for blending and controlled applications. Other papers suitable for graphite drawing include Bristol Paper with a vellum surface and many hot press watercolor papers.
Secret #3 – Use A Blending Stump
Many beginning artists use a finger for blending and smudging. While this can create a smoother appearance, it does more to mar the surface. When you blend with your finger, you introduce the oils produced by your hand to the graphite material. This makes erasing and controlling the graphite more difficult.

Instead, use a blending stump. A blending stump provides precise control over the material and prevents the oils of your hand from mixing with the graphite. Blended areas can be erased easily when a bending stump is used and you have considerably more control over the material.

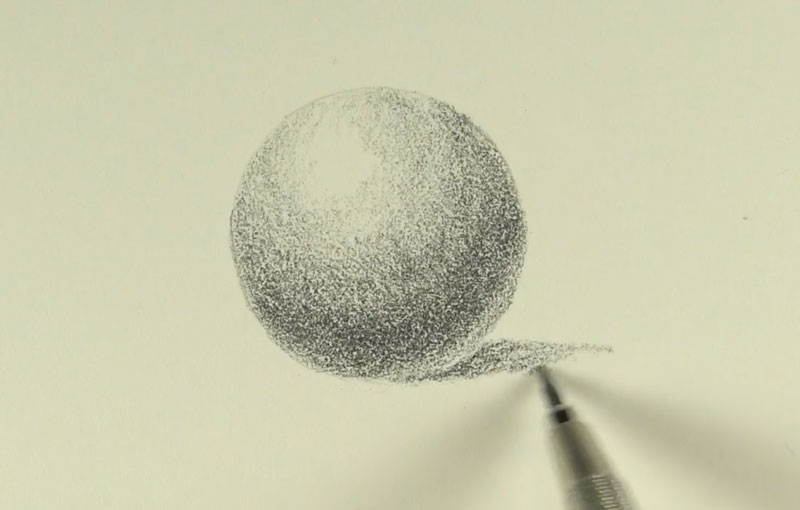
Secret #4 – Use the Circling Technique
You don’t have to use a blending stump to create soft, smooth transitions with graphite. Once technique I like to use, that I call “circling”, is one in which you make small circular strokes with the graphite pencil. You’re not making circles per se, but instead moving the pencil in a circular motion. With a slightly duller pencil, you can create smooth applications of the graphite, without visible pencil strokes. You have to work very slowly to make this work, but with some practice, you can control the graphite even more so that with a blending stump.
Secret #5 – Gradually Build up Applications to Avoid Graphite Shine
Graphite is a shiny medium. There’s no getting around this. But we can minimize graphite shine by carefully thinking about our applications. Graphite shine is more pronounced when the tooth of the paper is flattened. New artists have a tendency to reach for a 6B pencil when an area is dark and put heavy pressure on the pencil. When you do this, you flatten the tooth of the paper which results in a shiny appearance.
Instead, work your way up to your darkest pencil. In dark areas, start with a 2B pencil and use medium pressure. Then, go over this section with a darker pencil, like a 4B, again using medium pressure. Lastly, add the 6B, again with a medium pressure. By working up to the darkest application, we preserve more of the tooth of the paper, while still achieving a dark value – just without as much shine.
Secret #6 – Use Your Eraser as a Mark Making Tool
Many people believe that the eraser is just for fixing mistakes. While the eraser is obviously great for this, it’s not its only function. The eraser can be used for mark making as well. Use your eraser to remove portions of graphite to create texture and details. By adding and subtracting the graphite material, we have full control over the drawing. I like to use an electric eraser for extra power to remove the graphite completely when needed. For a lighter touch, consider using a kneaded eraser to lift the graphite from the surface without sacrificing texture.
See Also: Erasers For Drawing
Secret #7 – Work Slowly
When we start a new drawing, we can’t wait to see the finished result. If we are too impatient, then we tend to rush through drawing. Not only can this lead to mistakes, but it can also lead to drawings that are below our potential. Slow down and take your time. Be patient and take breaks often. Draw much slower than you usually do and see what happens. Take the time to closely analyze the shapes and values that you see. Often, when you work much slower than you usually do, you’ll find that you’re more skilled than you thought.
See Also: Realistic Drawing Hack
If so, join over 36,000 others that receive our newsletter with new drawing and painting lessons. Plus, check out three of our course videos and ebooks for free.