How to Draw a Rose
Like all of our live “Gettin’ Sketchy” episodes, the goal is to create a quick sketch of a challenging subject within a 30 minute time constraint. Sometimes, we get the drawing finished within this time frame, and sometimes we don’t. In this sketching exercise, we went a little over. The entire sketch took just under 45 minutes to complete – so just a little longer than 30 minutes.
But the time constraint and creating the drawing within it is not really the point of this exercise. The true mission is to help you develop your drawing skills and encourage you to develop a regular sketching practice. Even if we create a quick sketch of a subject, we’re still using the same “artistic muscles” that we would if we created a drawing that took 20 hours.
With this rose, we begin the process in the same manner that we would if the drawing was to be finished in a more complete way. We start by locating general shapes and draw these loosely with rougher marks. Once these simple shapes are in place, we can refine the drawing by adding smaller shapes and then begin adding the contour lines. If we begin with just the contour lines, we’re likely to notice some distortion in the drawing.
By starting with the shapes, we have a better chance of capturing the rose as we see it. We add the contour lines or outlines after we’ve established the basic shapes and can use them as a guide.
Regular sketching practice should be a part of your artistic development. If you just spend a few minutes everyday in your sketchbook, you’ll notice improvement. For many of us, just getting started is the tough part.
Gettin’ Sketchy is designed to provide you with a little drawing instruction through a fun drawing challenge. If you missed the previous episodes of Gettin’ Sketchy, you can check out the last three episodes here…
- Gettin’ Sketchy – Sketching a Boat on the Water
- Gettin’ Sketchy – Sketching a Crab
- Gettin’ Sketchy – Sketching a Bird
Here’s the step by step process for drawing the rose…
- We begin with a general, rigid shape for the outer boundaries. Within this shape, we can draw a smaller shape that is somewhat like a cone.
- From there, we can continue to build out progressively smaller, more detail-oriented shapes.
- Once we have the simplified shapes in place, we can draw in the contour lines and begin focusing on the details that are observed.
- Lastly, we add a range of value using directional stroking with the graphite pencil. The directional strokes should flow over the form of each petal. These types of strokes are called cross contour lines. This not only develops the value but also further helps to define the form of the rose.
We use only basic drawing supplies for this exercise. A simple pencil (2B) and drawing paper is required. A kneaded eraser is used, but not required.
- Staedtler Mechanical Drawing Pencil (2B Graphite)
- Drawing Pad
If you’re looking for photo references, you may check out Pixabay.com. I picked up this reference image from there. I slightly edited this image in Photoshop by taking out the color and brightening it a bit. If you want to draw along, check out the reference photo below…

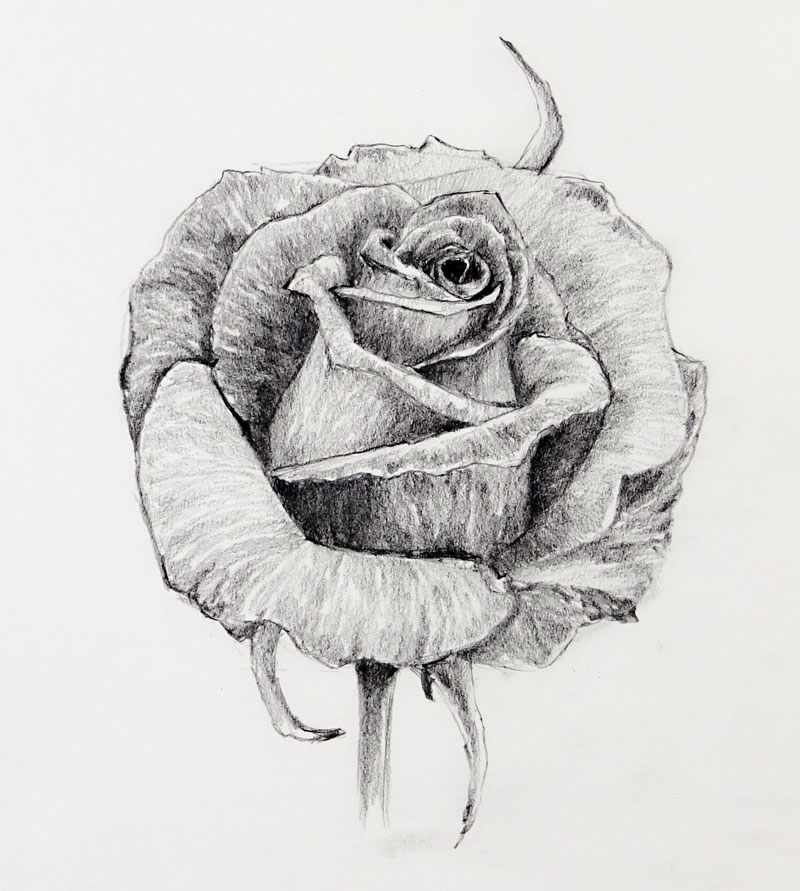
Here’s a look at the finished sketch of the rose with graphite pencil…
If you enjoy this kind of thing, be sure to join us live. We’ve made “Gettin’ Sketchy” a semi-regular event. We broadcast live on YouTube (whenever possible) on Wednesday evenings somewhere between 8:00 PM EST to 8:30 PM EST.
Make sure that you’re a subscriber to the YouTube channel so that you won’t miss an episode. You can subscribe here.
If so, join over 36,000 others that receive our newsletter with new drawing and painting lessons. Plus, check out three of our course videos and ebooks for free.