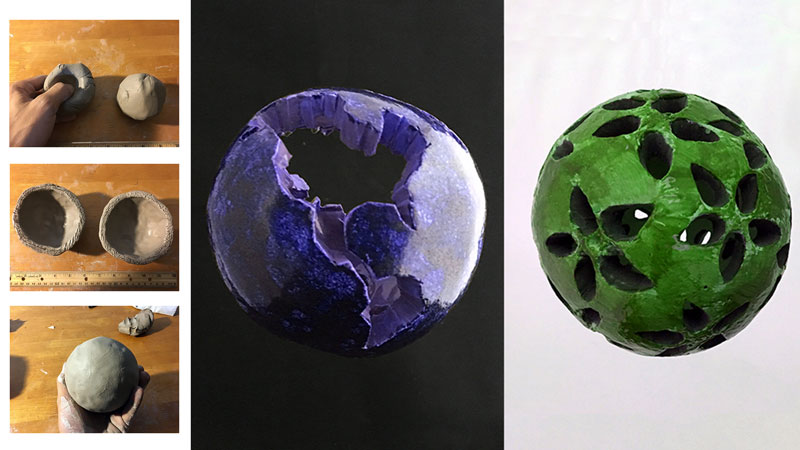
This lesson outlines the steps to create one of those exciting sculptures that begin with a pinch pot . . . or two. If you’ve never made a pinch pot, then now is a good time to give it a try.
This project is flexible in that there is plenty of room to “make it your own”.
Depending on the direction you choose to take your sculpture, the material you will use may vary. Below are both required and optional supplies:
- Earthenware clay
- A hobby knife
- Other clay tools (optional)
- A dish of water or clay slip
- Access to a kiln (or use air-dry clay)
- Ceramic Glazes (optional)
- Acrylic Paint (optional)
- A nylon brush (optional)
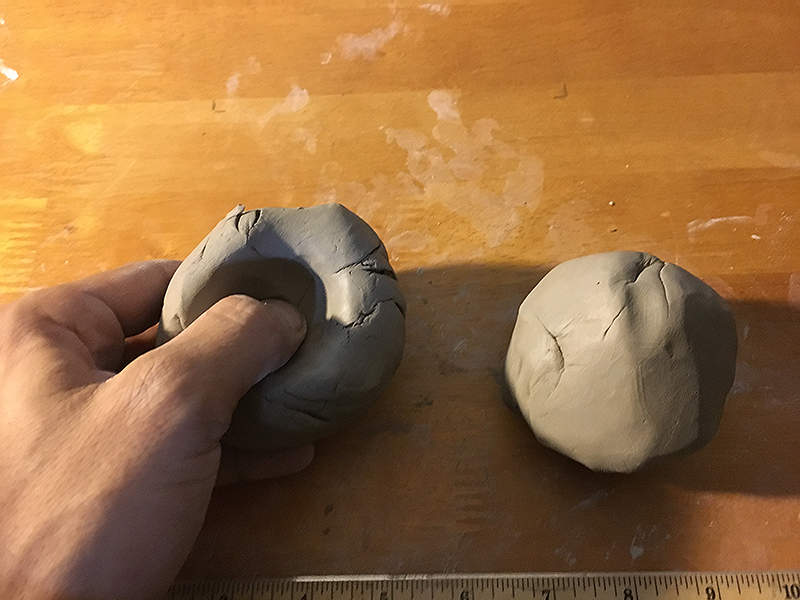
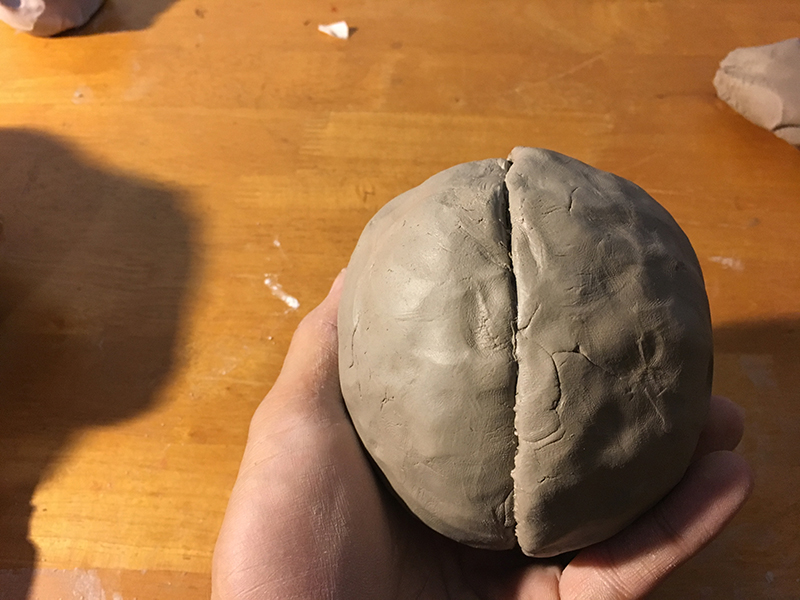
Step One – Roll Out Two Balls of Clay
Without creating any air pockets, roll two balls of clay in your hand so that they are approximately the same size. The two solid clay balls below are about two and a half inches in diameter. They will make a sculpture that is between 4 and 5 inches wide. Your project could be larger or smaller.

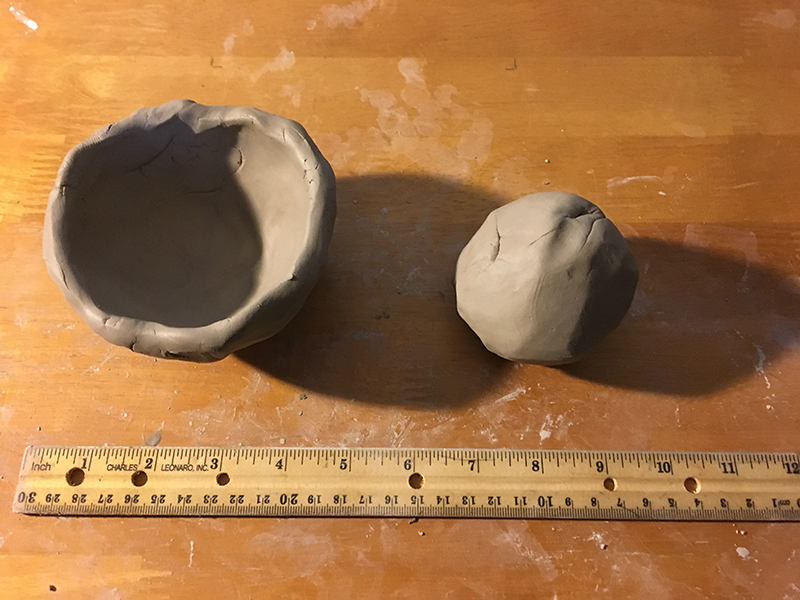
Step Two – Pinch and Shape the Clay Balls
Begin pinching out two half-spheres by inserting your thumbs into the top of the clay balls. Gently squeeze while turning the spheres in your hands.
Continue doing so until the thickness of each pinch-pot is approximately one-fourth of an inch thick. Work and bend the clay so that the pinched-out forms are half spheres and not shallow bowls. Check one against the other to make sure they are close to the same size.
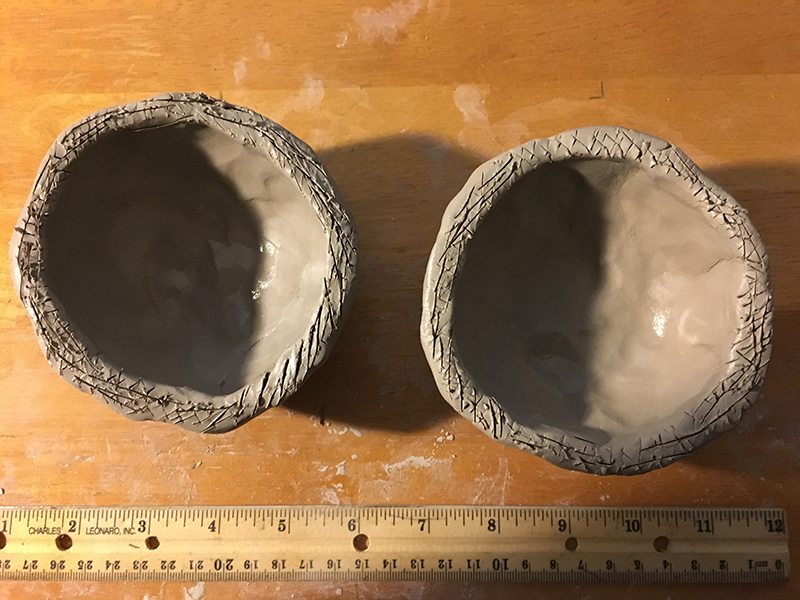
Step Three – Score and Slip Each Edge of the Clay
Gently press the rim of each bowl onto a table’s surface to flatten and level the rims of the bowls so that they will meet flush when put together. You don’t want drastically high and low spots along the rim. After doing so, it is time to “slip and score”.
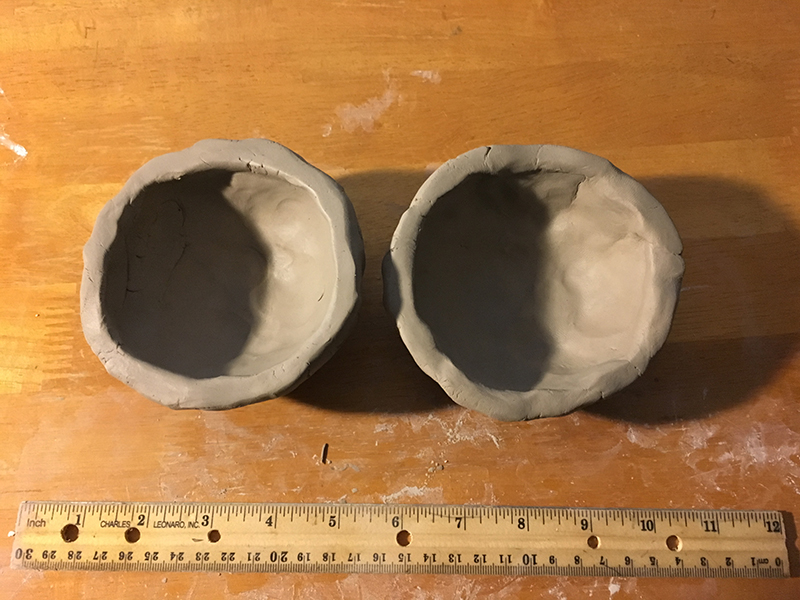
Use the hobby knife or another clay tool and score (rough up) the surface of the flattened rims. Do so by cross-hatching into the clay until your see a fine texture. The rough surface helps the two pieces to grab and hold one another.
Before pressing together, apply slip (liquid clay made with just clay and water) with your brush or, if your clay is very fresh and soft, you can just apply some water. If using only water, then score the clay again after applying water to the rims. Doing so essentially turns the surface of the rims to slip.
Step Four – Connect and Attach the Clay Bowls Together
Now put the two halves together to form a hollow ball. Chances are, the edges will line up pretty well but with some variation. This is a good thing.
Wherever one pinch-pot extends slightly past the other, drag the high spots over the seam to permanently secure the two halves. Do this all the way around. You can use your fingers, a flat clay tool or a plastic credit card (I used a library card). Try not to squeeze the ball any more than necessary.
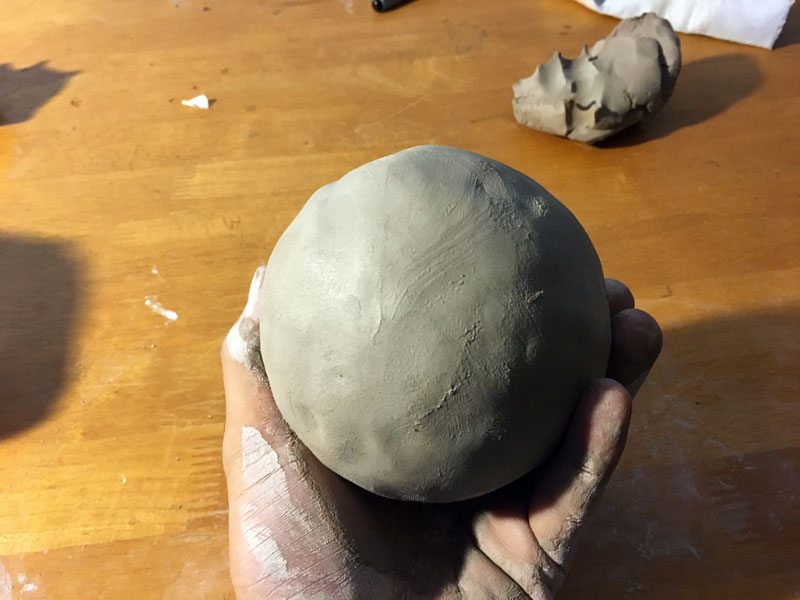
At this point, the clay needs to harden some. Leave it in the open air for a up to a day.
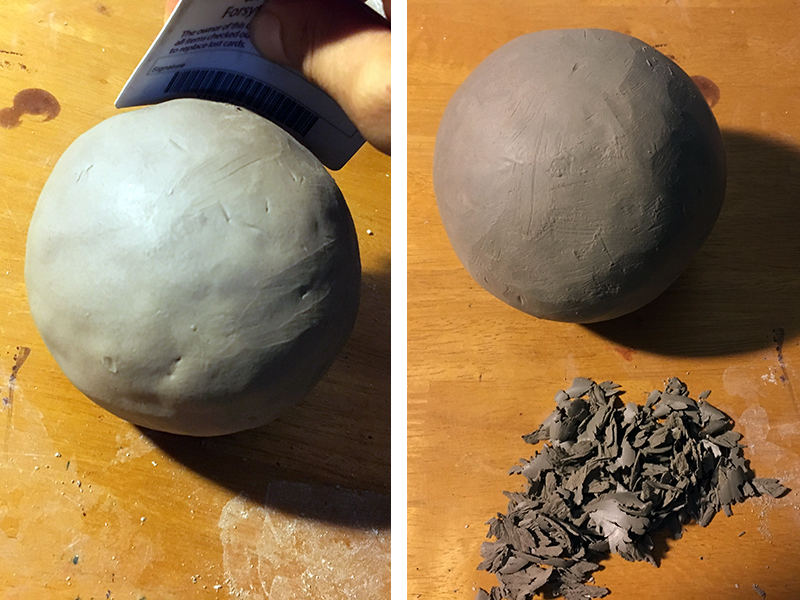
Step Five – Carve and Shape the Clay Ball
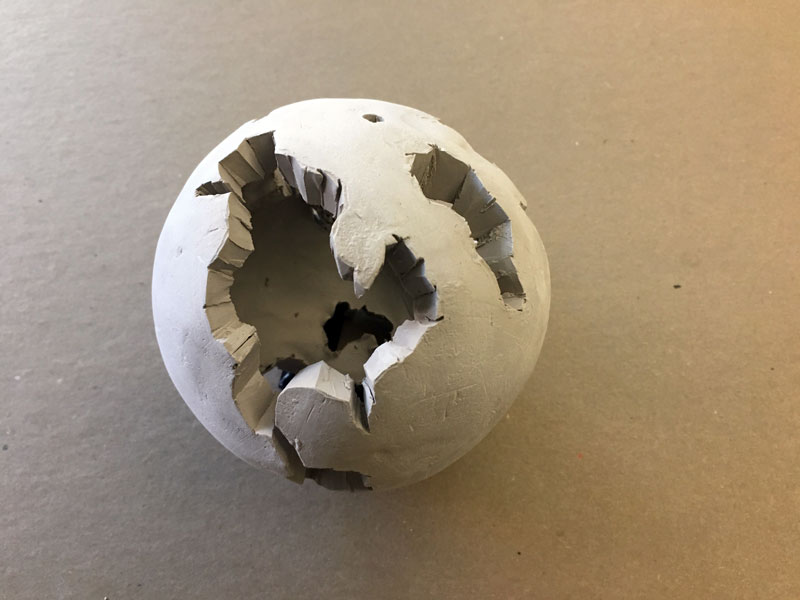
Once your clay ball is leather hard (cold to the touch but no longer flexible) you can scrape its surface to remove any noticeable bumps. Again, a plastic card works well if you do not have clay tools. I bent my card into a curve while scrapping (see image below). Once you’re satisfied, it’s time to begin carving. Leather hard clay cuts and carves easily.
Step Six – Carve Out a Pattern or Design
Any design or pattern is suitable for carving into and through the surface of your sphere. I chose to carve out a simplified version of the earth. I removed the shape of continents with a hobby knife, leaving only the oceans since the oceans are all connected.
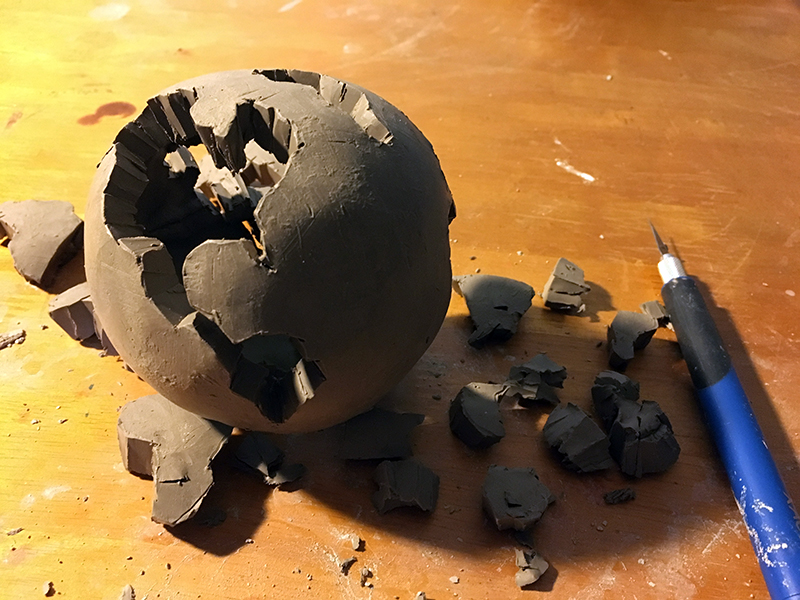
Though I used only a hobby knife to remove clay, you can use other tools. Be creative – drill bits work well too. You don’t even need a drill if your clay is in a leather hard state. Just twist the bare bit into your sphere.
Don’t forget to make a small hole either in the top or bottom of your piece. Doing so will give you the option to either hang your piece or mount it to a base once you’re finished.
Step Seven – Dry and Fire the Sculpture
Let the sphere dry out completely. Three days in the open air should suffice. Fire the ball in a kiln. Most schools have kilns so if you’re an art teacher, then it’s not a problem. If not, then you may be able to have your piece fired anywhere ceramic classes are offered or by a ceramic artist in your area.
Step Eight – Apply a Finish
Assuming the firing was successful, you have a few options. You can just leave your piece in a bisque fired state and paint it with acrylic paint. Or, you can glaze it and fire it a second time. I want to hang my sculpture outside in a tree so I’ll need a durable finish. The most durable finish is glaze. So, my sculpture will have to go into a kiln a second time.
If you choose to glaze your piece, be sure to read the label of your glaze. Many low fire glazes require three coats while high fire glazes offer a variety of finished surfaces depending on the number of coats you apply. Don’t use both low fire and high fire glazes together.

Conclusion
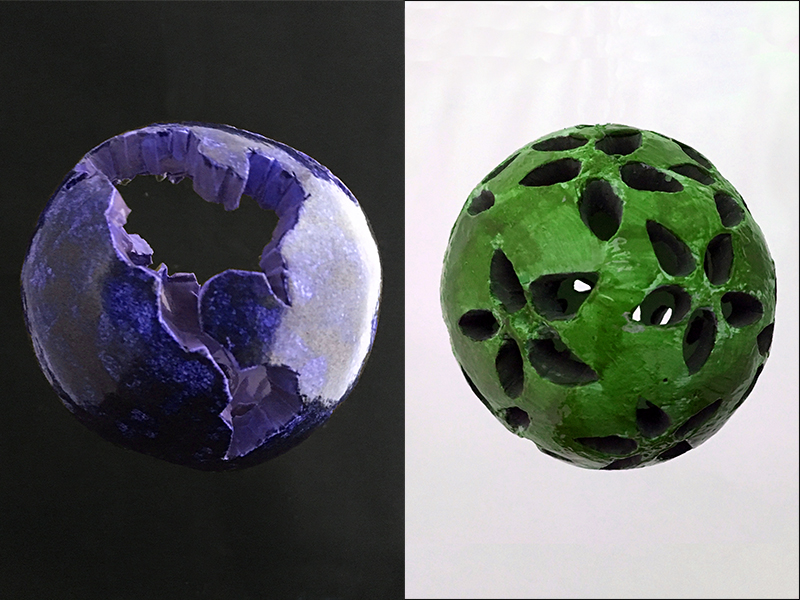
This clay sculpture project idea is not limited to planets of course. You can carve geometric patterns and designs (see above). Be sure to carve into but not through your sphere. Paint imagery around your sphere, either with paint, ink or glazes instead of carving. Spheres can be any size. They display nicely alone or in a grouping. Hang them under a porch, from a tree or anywhere you choose. Get creative.
If so, join over 36,000 others that receive our newsletter with new drawing and painting lessons. Plus, check out three of our course videos and ebooks for free.