In this mixed media drawing lesson, we'll create a drawing of a Great White Shark. We'll use a variety of drawing media including ink, charcoal, and markers to complete the drawing.

This drawing is created using a variety of media but the order of application is somewhat important. We begin the drawing fairly loosely with ink applications before beginning the process of refinement with charcoal and graphite applications.
The surface used in this demonstration is atypical. Gray mounting board by Cresent is chosen simply because of the strong support it provides, the tonality of the surface, and the smooth texture.
(Some of the following links are affiliate links which means we earn a small commission if you purchase at no additional cost to you.)
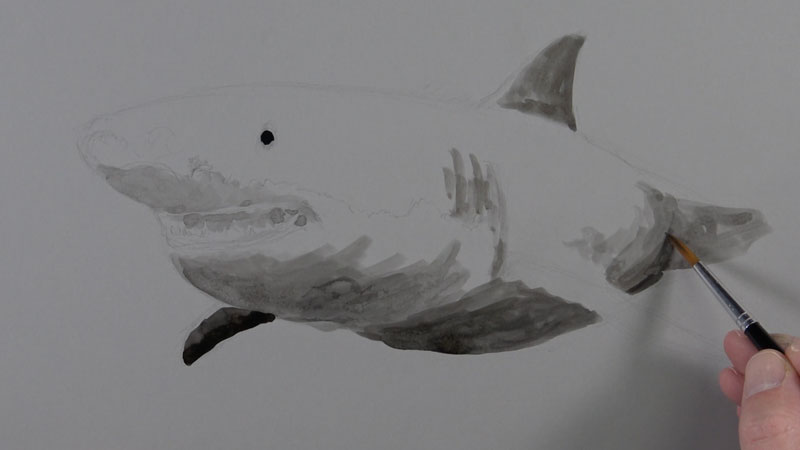
The drawing begins with a loose contour line sketch of the shape of the body along with a few minimal details. Once the body is defined, we can quickly switch over to applying the ink.
Black India ink is applied in the areas of darkest tone. To adjust the value, a bit of water is mixed in, producing a middle gray. By applying multiple washes, we can slowly darken the value.
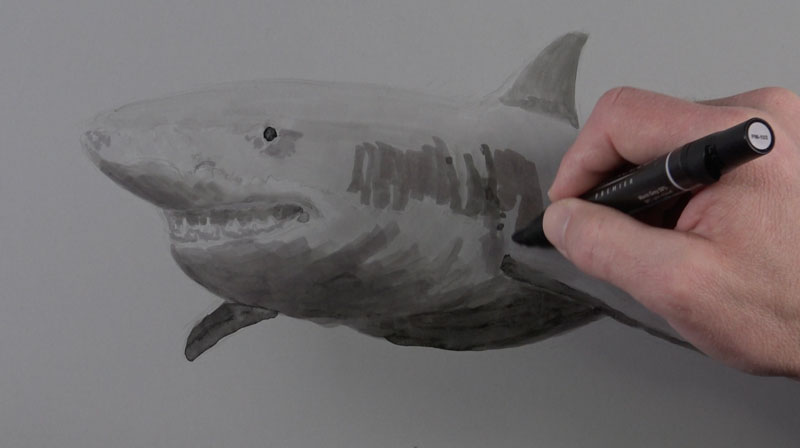
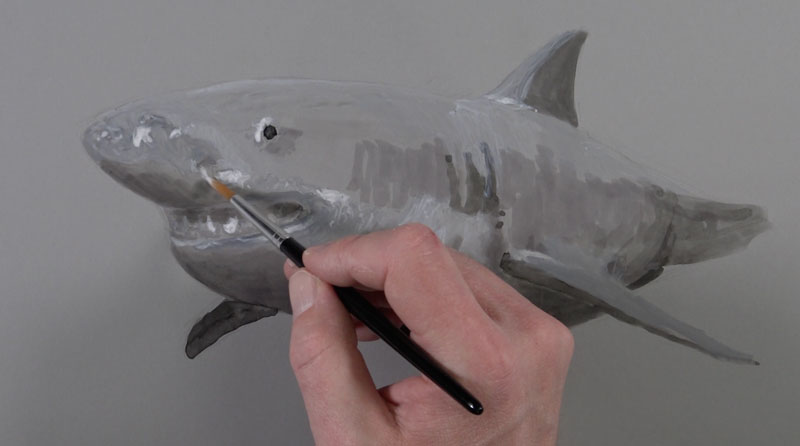
After a few minutes, our ink has dried and it's time to add marker applications. We start with an application of 20% Warm Gray with a Prismacolor Premier marker. Nearly the entire body is covered with this light gray application.
We can then darken the values where needed using a slightly darker, 50% Warm Gray marker.
We'll next add a few bits of lighter value to contrast the darker tones in place along with the nuetral gray of the paper. White India ink is applied on the locations of lightest value. The white ink can also be mixed with the black ink to produce a few grays. This application is rather loose since we are still just laying down values that will serve as an underpainting for the details that we'll develop over the top.
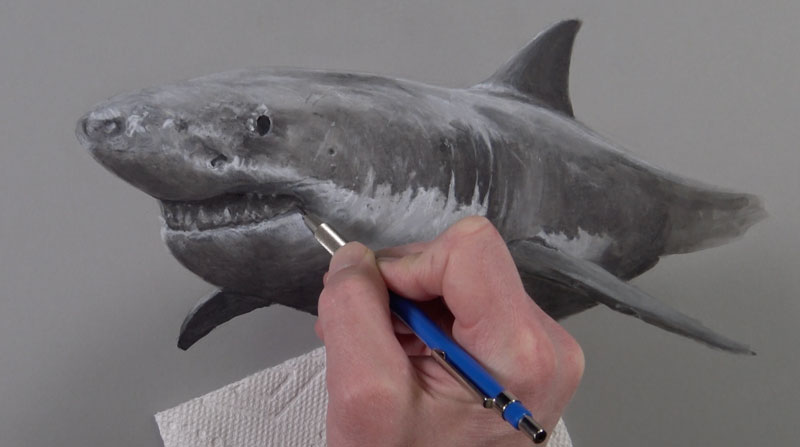
Now that we have some of the base tones in place, we can begin to refine some of the details and develop the texture of the skin of the shark with charcoal. We can apply both dark and white charcoal over the top of the ink and marker applications.
As we work the charcoal applications, we can use a blending stump to smooth the transitions of value and slowly pull out the details and the illusion of texture.


As marks are made and blended, we should consider the form of the body of the shark. Strokes should flow around the cross contours of the form. Strokes made on the top of the body are generally more horizontal while the sides are more vertical. Strokes made under the body should also flow in a more horizontal direction.
We'll continue working down the body of the shark towards the tail end, alternating between white and black charcoal. As these values are added, we'll blend the applications with a blending tool.

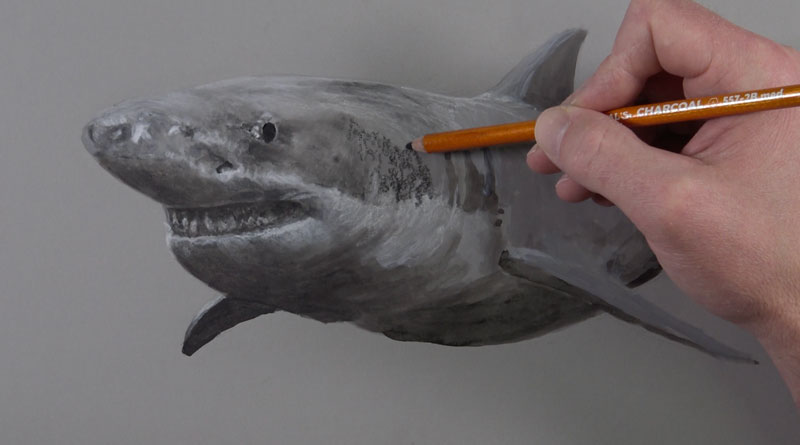
The nose of the shark protrudes towards the viewer. For this reason, we'll increase the contrast and add a few more details to further develop this illusion. We can go back to the front end of the shark and add a few more details with the white and black charcoal, increasing the contrast. A graphite pencil can be used to define some of the details, including the gray pattern along the side of the body. A 2B graphite pencil is used to darken and define areas within the mouth, making the menacing teeth stand out a bit more.
For the most part, we've kept our drawing clean and tidy. But if needed, we can erase any stray lines around the outside of the body with a kneaded eraser, finishing the drawing.