Recently I completed a graphite portrait and wanted to share with the you the step by step process in a video demonstration. Most of the videos on this site are short and explore the basic techniques involved in a specific medium or a particular art technique. This portrait took me a total of 15 hours, so it was not practical to record the entire process on video. Instead, I took snap shots of the process as I worked, and in the following video, I explain the steps and thought process behind the drawing.
The featured video chronicles the process of completing the drawing.
In this drawing, I used a regular "HB" pencil and a "4B" pencil on cold press illustration board. I began by choosing my reference photo and edited it in Photoshop by making some of the background areas darker. I did this because I wanted to increase the contrast and make the image more dramatic. Here's a look at the finished drawing...
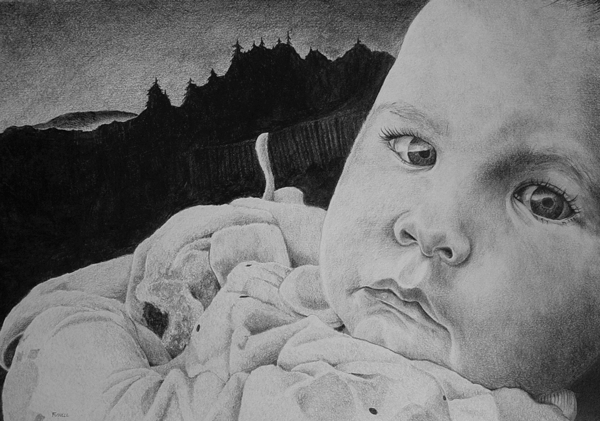
I experimented with a new technique in this drawing as well. I have always chosen not to blend a graphite drawing with a blending stump. I guess this is just a personal choice. With this drawing, however, it became clear to me that using my typical technique would not translate as skin texture. I experimented with several techniques and arrived at using a vinyl eraser to burnish light layers of graphite to create accurate skin texture. The actual tool I used is called an "erasil", which is comprised of a vinyl eraser material encased in a pencil.