
What Kind of Texture are We Talking About?
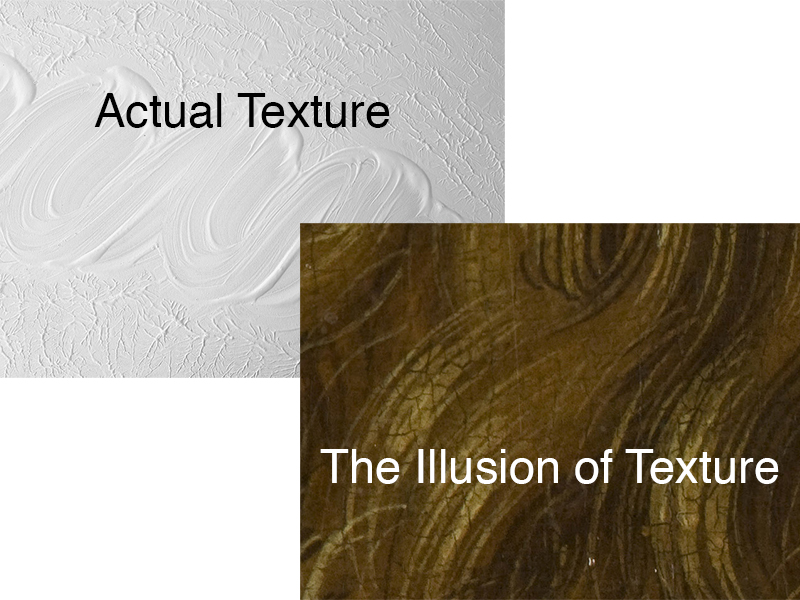
In terms of painting, texture refers to either the way something looks as if it may feel or to the actual surface of the paint. This article is about the former and not the later, although using brush strokes in relief can also add to the illusion of a subject’s texture.
Problems with Painting Texture
Some problems are fun to solve. Texture is one of those problems. Each texture is unique, requiring a fair measure of creativity to work through.
Painting texture is really about mark-making. The illusion of texture is created through a frequent alternation between light and dark marks.
The marks used to paint a wispy field of grass are different from those used to paint a rocky canyon wall. Each texture is its own painting experience, challenging even with the most practiced artist. The artist must find new ways to make marks for each texture. Some artists vary their hand motions with brushes to achieve the variety of marks needed to differentiate between textures. Other artists find or make painting tools that produce the character of marks they desired.
Most textures are represented through the application of an uncountable number of marks. Painting texture requires patience, time and a keen eye.
Approaches to Texture in Art History
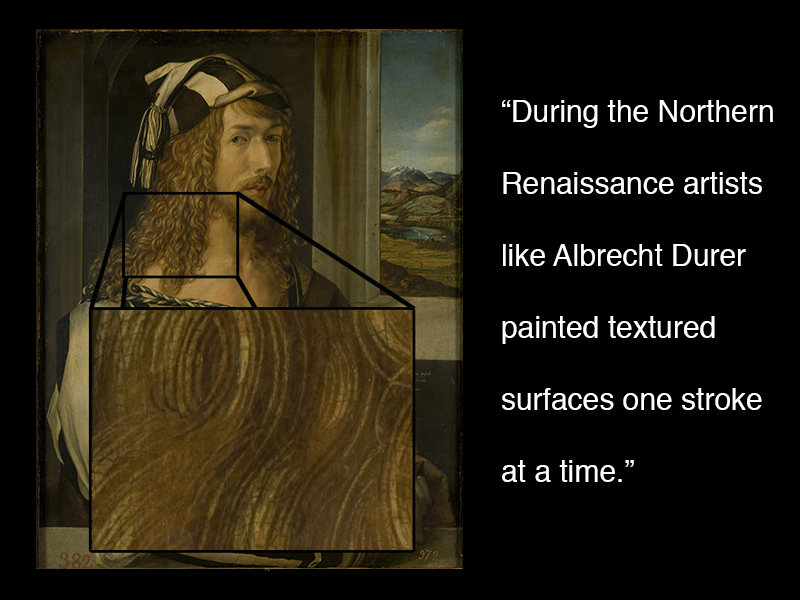
Before the Twentieth Century, artists seem to fall into two general categories regarding texture. Some artists laboriously worked to capture observable textures through the application of many careful brush strokes. During the Northern Renaissance, artists like Albrecht Durer painted textured surfaces one stroke at a time. In Durer’s Self-Portrait, he first painted the hair a general color. Then he worked in layers, alternating between lighter and darker strokes, until finally reaching the desired complexity of texture. No part of the hair is spared from Durer’s relentless rendering of texture.
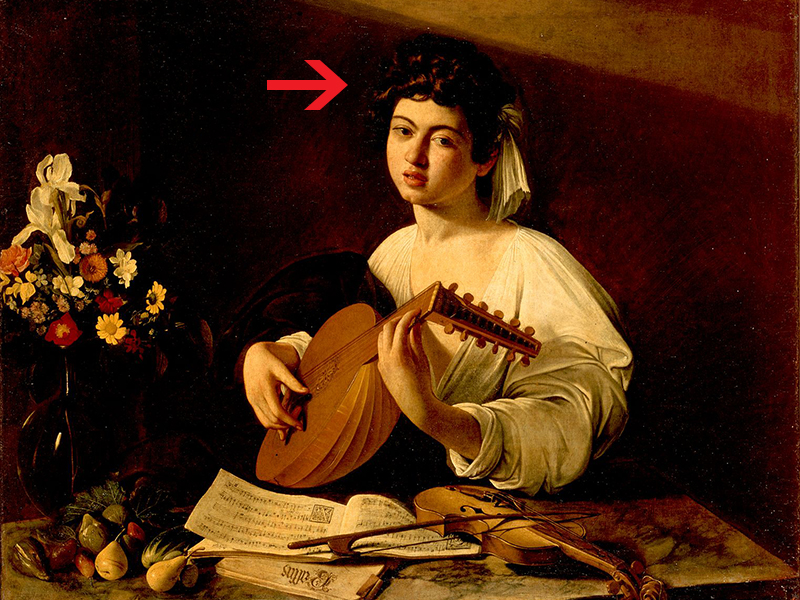
Contrarily, Caravaggio, an Italian Master from the Baroque period only suggested texture when necessary, instead focusing on form and color to bring his subjects to life. In The Lute Player, Caravaggio uses only a few strokes to suggest the texture of hair. The entire right half of the hair is just a solid color.
Painting A Texture
Unfortunately, there is not a single process used to paint all textures, since each texture is unique. There are, however, some general steps I take to create most textures.
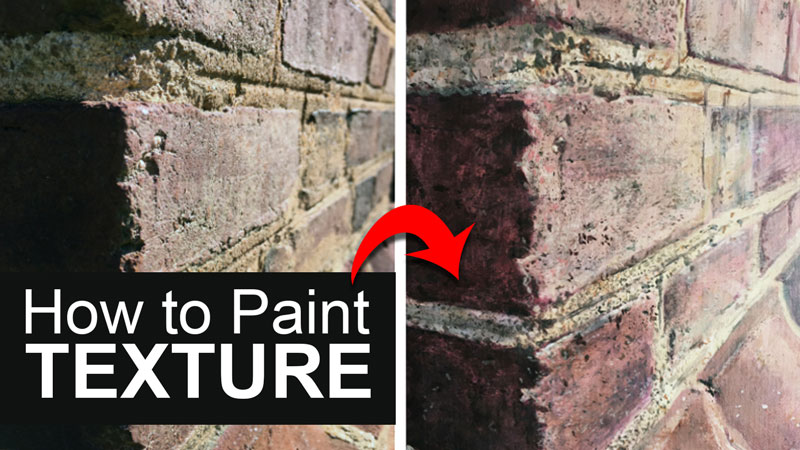
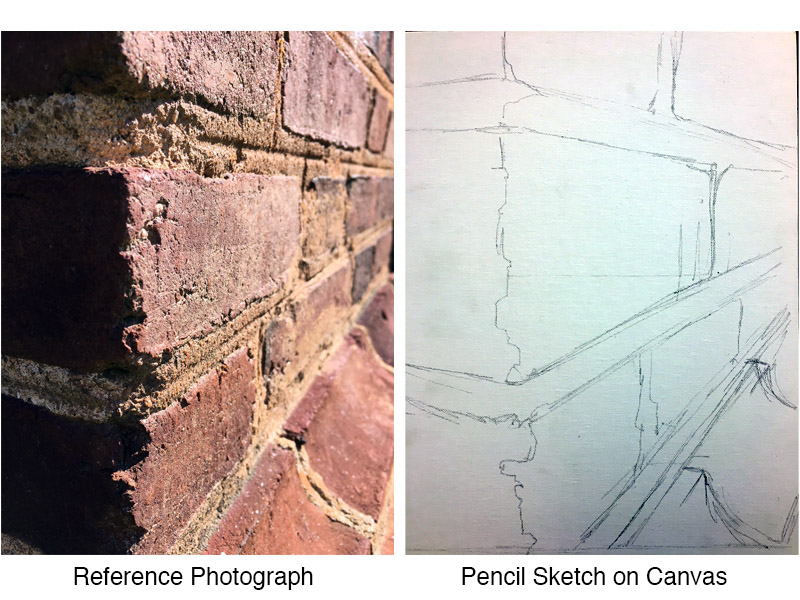
For this article, I’ve selected a corner of bricks as my subject. I’ll share my thought process as I work through this texture.
Painting a Texture – Step One
Scale – Scale, in this case, refers to the size of an artwork. Since textures are often rendered with small marks I like to work larger than life whenever possible. I could never make marks as small as those that I can observe in my subject. By enlarging my subject I’ve enlarged the size of the marks I’ll need to paint as well, giving me a better chance of success.
Step Two
Paint Selection – Like Albrecht Durer’s rendering of hair, I plan to build up several layers of small marks. I prefer to use oil paint. However, the fast drying-time of acrylic paint is advantageous when building up layers of marks. With acrylics, I can paint several layers on a given day instead of having to wait as many as two days between each layer, greatly speeding up my process.
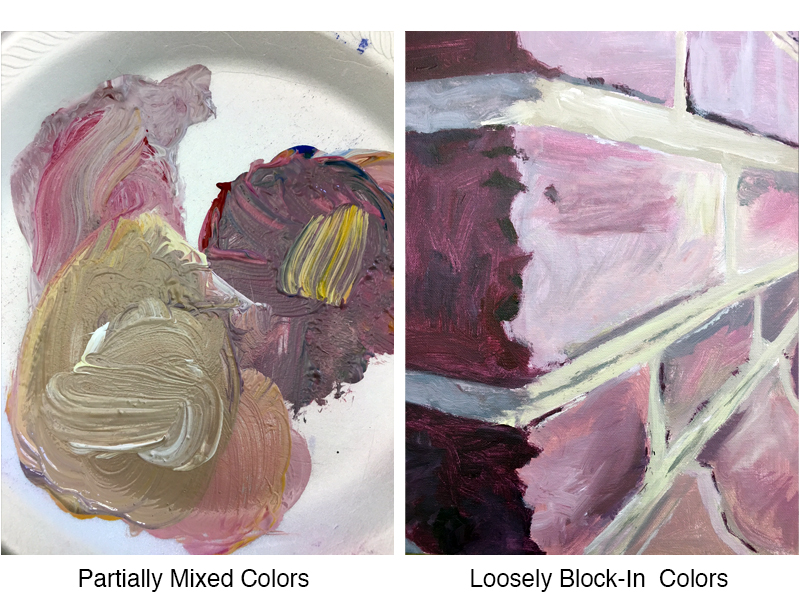
Step Three
Paint Mixing – Variety is a principal of art and a hallmark of texture. I try to show variety in a texture from the first brush stroke onward. When I mix colors for a textured subject, I do not completely mix the paint. This allows for some unplanned, random variance of color.
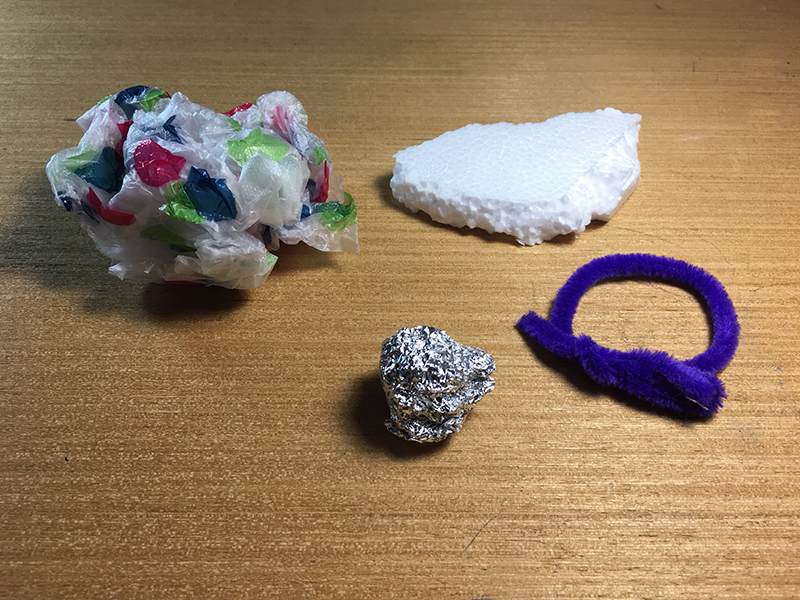
Step Four
Painting Tools – Brushes may not be the perfect tool for making all marks-types of a certain texture. It is fun and creative to find and make tools specific to certain textures. It almost feels like cheating when I find just the right tool. I often use wads of paper, tissue, foil and cloth. Painting texture with a texture just makes sense. For the bricks, I mostly relied on the textures of broken Styrofoam and crinkled aluminum foil.
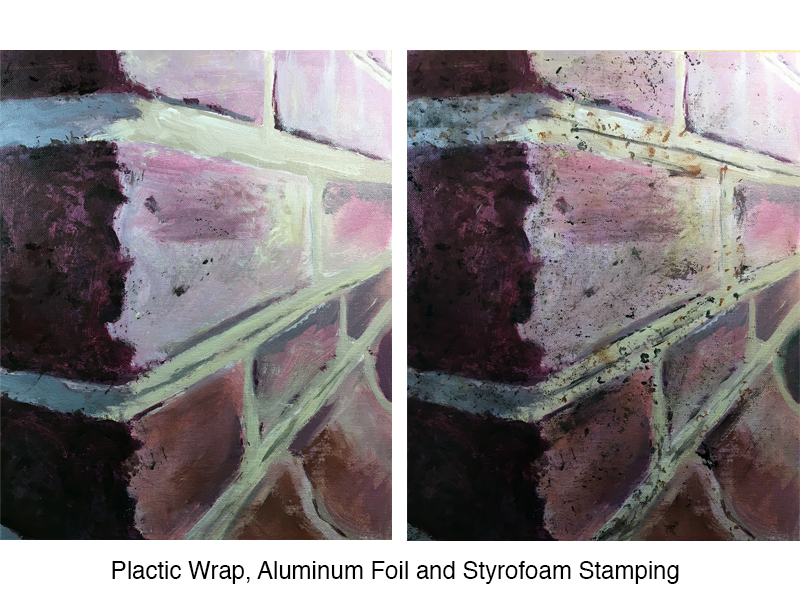
Step Five
Speed – If my marks need a lot of variety I work faster. If I need more uniformity to my marks I work slower. For the bricks, I built up marks quickly, using non-traditional tool. I made marks deliberately but not carefully in an effort to create the random quality of marks that I observed in my subject.
Step Six
Finding Order – After feverishly applying random marks across my canvas, I need to go back to the brush and bring some order to the chaos. In this step, I look for places to clarify the shapes of light and dark. I also identify marks that are not working and paint those marks out.
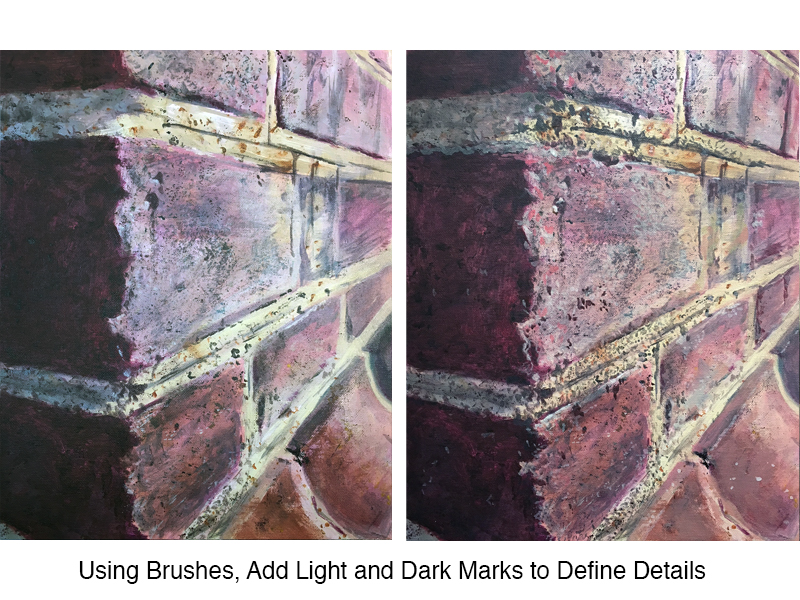
During this stage, I slow down and focus on the areas where light and shadow meet. These areas reveal the most about a texture.
Step Seven
Color Correction – Sometimes the color gets away from me while I focus on texture. Applying a colored glaze (thinned, transparent color) over my texture will do two things.

First, it gives me a chance to “fix” the color of my subject. Notice that my painting was too cool in terms of its overall temperature. By applying an orange glaze over the entire surface I’ve brought the temperature more in line with my reference photograph.
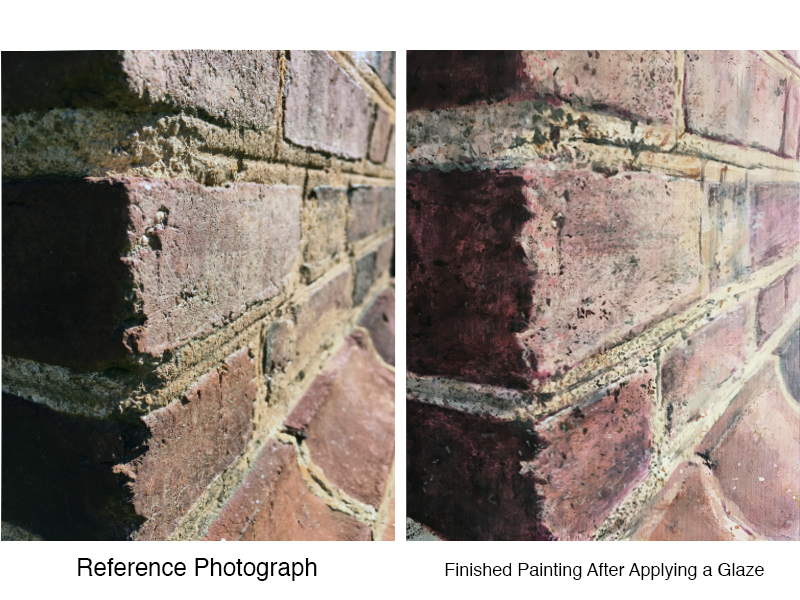
Second, it unifies my paint marks. Sometimes, the thousands of marks used to build a painting have a feeling of disconnectedness with each mark being separate from the next. A final glaze of color pulls these marks together, giving them a quality of oneness or unity.
Summing It All Up
There are an endless number of methods that we as artists can use to create textures in a painting. Sometimes, creating the right texture for your work requires a little “outside of the box” thinking and some experimentation. Texture boils down to the relationships of values and the marks that you make. How you make these marks and create these relationships of value are where your creative powers come into play. So get creative and start making some texture magic happen in your paintings.
If so, join over 36,000 others that receive our newsletter with new drawing and painting lessons. Plus, check out three of our course videos and ebooks for free.

Lesson Discussion
Comments are closed.
Matt,
Thank you. I work in watercolor, pen/ink, color pencil, pastel and still found this very helpful. I’m a new member and working hard to develop an art program for a rec center in Michigan. I’m goal is to make it affordable for all and at the same time have quality projects and classes that artist will benefit from. I have students of all ages and levels. I have been working at this for 10 plus years and still am learning and loving it. I have found your site very helpful. I have student who have never drawn or painted before to artists that are showing their work in venus around Ann Arbor and Ypsilanti, MI. I teach 11 classes a week. Once a month I have a visiting artist come and do a workshop for my students. If you or any other artist you know how would like to give a workshop, let me know. Visiting Artist get 70% of what the center takes in for the workshop. Thank you for developing virtual instructor program. I know how much work you must be putting in to this. If you have any words of wisdom to a hard working artist, please pass them along.
Tina Hotchkiss
Hej Ashley,
thanks for an excellent tutorial – I’m painting abstracts but it helped me adding depth to my paintings.
I would love to see a video of you working with it.
BR Michael