

When we exercise, whether it be physical or mental, we become stronger. You can’t expect to become better at drawing without actually drawing.
Over three years ago, I posted a list of drawing exercises. And while this list is very short, it proved to be one of the most popular posts here on the blog. People are simply hungry to improve. So, here’s an updated look at some drawing exercises that are sure to help you improve.
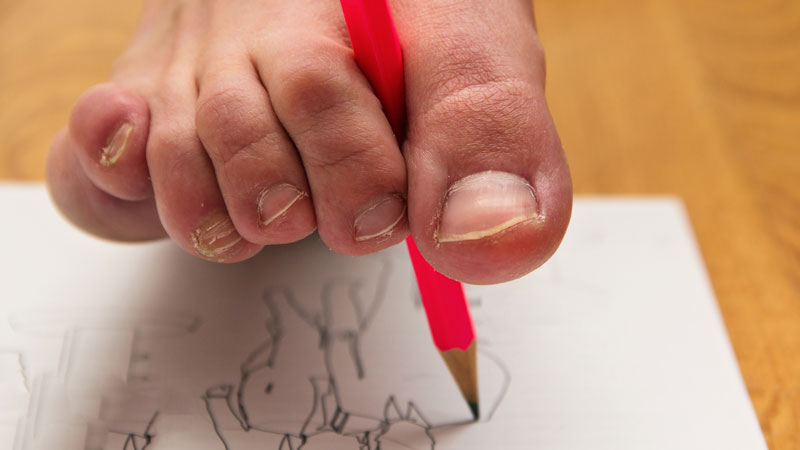
Drawing Exercise #1 – Draw Your Hand From Different Angles
Your hand is always with you, just hanging out there at the end of your arm. Why not draw it? In fact, draw it several times.
Many people believe the hand to be one of the most difficult subjects to draw. This makes it all the more appealing as a challenging subject. (The fact is though, hands aren’t hard to draw. Hands can be broken down into easy to draw shapes – no matter what position they are in.)
Challenge yourself here further and set a timer. Give yourself five or ten minutes to draw your non-dominant hand. Perhaps hold a few items to add to the challenge. Stay focused and make several drawings – perhaps an hour’s worth. You’ll be mentally exhausted at the end – but it’s worth it!
Drawing Exercise #2 – Drawing a Reference Upside Down
Drawing on the Right Side of The Brain by Betty Edwards is the most widely used drawing instruction book. It has sold more than 1.7 million copies. I remember my instructors using it years upon years ago. One of the exercises in this book really had an impact on me regarding drawing. The exercise is to draw an image from a provided reference both “right-side up” and then “upside down” and then compare the results.
Typically the image drawn upside down is considerably better.
The goal of the exercise is help students recognize that drawing is about observation. When we focus purely on observation, and remove any notions of “what we are actually drawing”, we are successful.
The exercise in the book is simply a line drawing, but we can apply this exercise to more complicated images like photographs.
No need to draw it “right-side up”, instead complete the entire drawing from a photo reference upside down. This exercise will help your brain “get in the habit” of seeing lines, forms, shapes, textures, and values when you draw. Practice it often, and you’ll be surprised how you start seeing the world around you – truly as an artist.
Drawing Exercise #3 – Speed Drawing
Many artists want to be able to draw faster. We’ve all seen artists that can quickly make a few marks on the surface and almost magically, an incredible image starts to manifest itself.
Of course drawing quickly happens as a result of practice. The key to drawing quickly is allowing yourself to make what many people consider to be “mistakes”. (Often, these stray marks aren’t really mistakes at all anyway.)
Set up a timer for about 10 minutes. Then, draw as many different items around you within that time frame.
Since you have to draw quickly, you’ll find that you draw more with your whole arm and less with just your wrist. You’ll also find that you are looking at the object that you are drawing almost just as much as you are making marks.
Drawing Exercise #4 – Non Traditional Drawing Tools
There are more ways to draw than with the traditional drawing pens and pencils that we are all accustomed to. Why not try something different?
Grab a container of black India Ink and few items around your house or from your yard. Sticks, rocks, feathers – whatever will transfer the ink to the surface.
Create a drawing by dipping these items onto the ink to make marks on a drawing surface.
This exercise will really make you focus on the textures and lines that are created with these tools. You might find that you really like drawing in this manner too!
When you go back to using traditional tools, you’ll find that you consider your marks a bit more and may focus on making them more interesting.
If so, join over 36,000 others that receive our newsletter with new drawing and painting lessons. Plus, check out three of our course videos and ebooks for free.

Lesson Discussion
Comments are closed.
wow