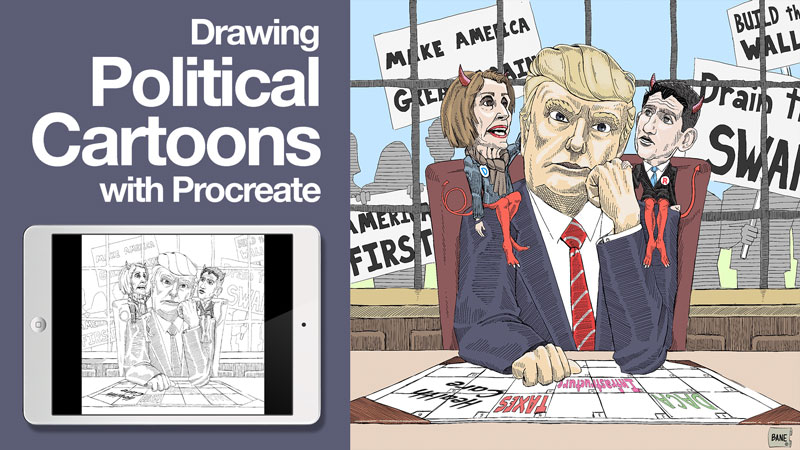
I remember the world before Photoshop, iPads and digital cameras. It was an analog world – cassette tapes and Cable TV were kings. Pencils and paint brushes were my tools. I was first exposed to an early version of Photoshop in college and at the time, it seemed unsuited to traditional drawing and painting media.
All of that has change inside of two decades. I’ll admit, I was resistant to digital drawing and painting at first. I worried about the viability of “virtual” artwork.
I was wrong.
Whether you are a professional illustrator or you draw for fun, there are many advantages to drawing on a tablet. Let’s first consider those general advantages and then take a look at a specific application, Procreate. Designed for the iPad, Procreate offers a slick and intuitive drawing experience.
4 Reasons To Draw Digitally
1. Mistakes
To draw well, you must embrace the fact that erasing happens. Erasers have a bad habit of leaving marks and marring the surface. Of course, nothing erases as completely as a pixel. When you work in Procreate there are no eraser marks. Besides erasing, you can undo numerous steps in most applications. Procreate allows you to “undo” every mark you make because it stores your sequence of marks in memory, from start to finish.
2. No More Photographing Drawings
When I was an art student, I had to learn how to photograph artwork well. Good quality photographs improved your chances of getting into art shows or selling cartoons. Today, most editors review illustrations digitally, even when they are meant for print. If your art is digital to begin with, you can cut out the photography step – saving time, money and effort.
3. Create Multiple versions
Cartoons created for the internet are often in color. However, many publications only print in black and white. Working digitally, you can duplicate a file (drawing) midway through the process. Finish one version in color and the other in black and white. This time saving trick allows the cartoonist to submit the most appropriate version of their cartoons to each publisher.
4. Work Anywhere
Artists have been working outside of the studio for sometime now, carrying essential drawing tools with them – paper, pencils, pens, markers, etc. Drawing digitally (especially using Procreate) lets you go a step further and take your entire studio with you, not just the essentials. Of course, an iPad with Procreate is not only a portable studio but a portable office. Make and sell your art all in one place or in any place.
Using Procreate to Create Drawings
The remainder of this article focuses on Procreate only. There are many applications built for artists that share some of the features of Procreate but, in my experience, Procreate has everything I need and none of what I don’t. It is a powerful drawing and painting platform. Let’s look at some advantages to using Procreate, then we will go through the process of creating a political cartoon, step-by-step.
Why Procreate?
Familiarity – At this point many in the art and design industry are familiar with Photoshop. But you don’t need to be an expert in Adobe Photoshop to use Procreate to it’s fullest. However, if you have experience with Photoshop you will be up and running almost immediately since there are similarities. For example, if you are accustomed to using dozens of layers to build your images or you use masks to isolate individual elements, you can still do these things in Procreate.
Cost – For the cost of one sketchbook or canvas you can have Procreate forever. That’s a great value. Of course you have to buy a touch sensitive iPad and Apple Pencil first (It’s worth it, if you’re wondering).
File Size – I used to draw with Brushes, a program that is available for the iPad. It is a simple program with many limitations. For one, the file size/resolution matches the screen size. This limitation prevented me from doing serious work in Brushes. Using Procreate, I can make a canvas as large as 16,000 pixels wide! For cartooning I like to make my files double the intended print size.
Customizable – You will probably find all of the tools that you’ll need built in to Procreate. My favorite brushes came pre-installed. However, on the off chance that you can not find a tool that makes the mark you want, you can create/upload your own brushes as well, giving your work a unique look. You can also visit the Custom Brushes Board on Procreate’s forum to download more FREE brushes and brush sets.
The Cartooning Process
NOTE: As an example, I have drawn a political cartoon that is rather innocuous, poking fun at both the left and right sides of the political spectrum. It was my intention to create an example and not to make a strong political statement or to alienate you, the reader, with a divisive position.
The following process is a logical approach to cartooning using Procreate. Should you choose to cartoon using Procreate you will likely develop your own process. One goal of this article is to give you a framework to begin your own path of discovery. This article is, by no means, a definitive explanation of Procreate’s utility.
Related: First impressions of the app, Procreate
Step One – Create A Canvas
Open Procreate and select a canvas size or customize a canvas size and proportion by selecting “New Canvas”. Many single-panel cartoonist use a 24 X 19 pica rectangle which converts to 384 X 304 pixels. I double those dimensions to 768 X 608 pixels.The example herein makes use of a square panel.
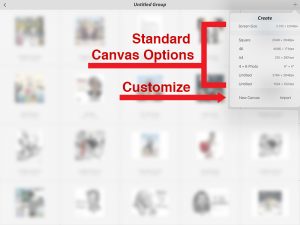
Selecting “New Canvas” offers the options pictured below.
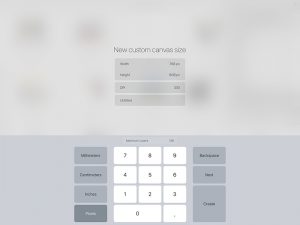
Step Two – Create A Sketch
Time to draw. Begin by choosing a tool that gives you a desirable mark. I like to use the studio pen for it’s range of line quality. You can adjust the pen size on the right edge of your screen (left side for left handed artist). Create a layer and begin a loose sketch. Don’t draw on the “background” layer.
Sometimes, I make my sketch on paper beforehand. Using the iPad camera, I’ll photograph the drawing and import the photograph into Procreate. In the example video, the sketching step was done entirely in Procreate.
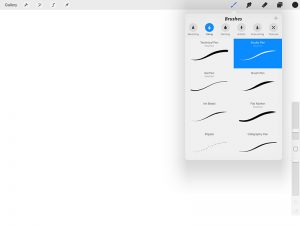
Step Three – Contour Lines
Create a new layer above your sketch layer and, at the same time, reduce the opacity of the sketch layer to about 30 percent. Now you can carefully make a clean, detailed contour line drawing over your sketch layer. Once complete, delete the sketch layer. You no longer need it. As you create layers, be sure to name them to avoid drawing on the wrong layer in subsequent steps. Sometimes I use several layers to make a clean contour drawing, giving me the option to move or resize individual elements of the composition until I am satisfied.
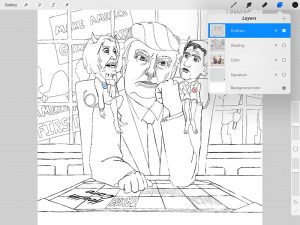
Step Four – Line Work
One hallmark of political cartooning is extensive line work. Hatching and cross-hatching are common techniques used to create value with pen tools. Create a new layer below your outline layer. Name it “shading” or something similar. Now you can work up the value in your drawing and make edits to your shading without affecting the contour drawing layer.
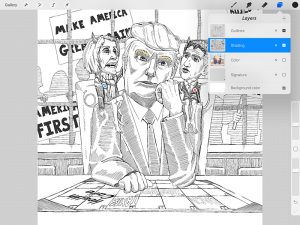
Step Five – Color
Not all political cartoons use color. If you plan to work in color open a new layer under all other layers (except background) and name it “color”. Sometimes I have several color layers that I later “merge” into one. Start in the background and forward. Zoom-in as you add color to ensure that your colors bump right up against the outlines of the contour layer.
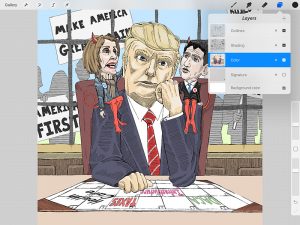
Step Six – Sign Your Work
Of course you have to sign your artwork. Create a signature on a separate layer. You can then copy your signature from one drawing and paste it into another to guarantee consistency. You may also add a web address to your signature to help others find your artwork. If you start cartooning for a specific publication, your signature may include the publication’s name instead of a web address.
Step Seven – Export and Share
Procreate automatically saves your progress as you work. Once complete, export your work as a JPEG, PDF, PSD (preserves layers) or PNG file. You can also export the entire process as a movie file! Share your work on social media or sent it via email to appropriate publishers for review.
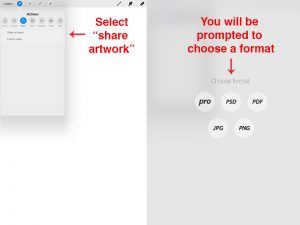
Bonus Tips
Shading With Color
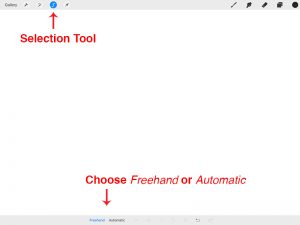
Some artists prefer to shade with color instead of lines or in addition to lines. You can use the selection tool (set to automatic at the bottom of your screen) to isolate an element in your composition. Then, using a large, soft airbrush tool, shade that element without getting any color/value on the surrounding imagery. This keeps the process neat and controllable.
Adding Text
Whether you intend to add words below your cartoon or in your cartoon, they must be legible and consistent. You can carefully write your words but this is time consuming. As an alternative, type the text using Pages (Apple’s word processing application). Once complete, simply take a screenshot and import the words as an image into your cartoon. The selection tool will isolate the words from the white space around them. Delete the white space and you now have words without a background. Move and resize them to fit the intended space.
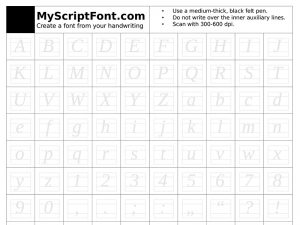
It gets better. There are several websites that will walk you through the steps to create your own hand-written font. I recommend calligraphr.com (previously know as myscriptfont.com). Just write your letters into a downloadable template (partial sample below), then scan and upload your new font to calligraphr.com. They generate a font file that you can then import into Pages. Now you can type your handwriting, saving loads of time.
If you like cartooning, give Procreate a try. I’m sure that you’ll find it to be worthy investment in your artistic arsenal.
If so, join over 36,000 others that receive our newsletter with new drawing and painting lessons. Plus, check out three of our course videos and ebooks for free.
Lesson Discussion
Comments are closed.

How do we create cartoons with pencils instead of photoshop? I am interested in creating cartoons.
Thanks,