by Matt Fussell
In this lesson, we'll take a look at creating a small oil painting with water-mixable oil paints. We'll keep the painting small - measuring just 7" by 5". Although the painting is small, the details are easily developed with a smaller brush. We'll work quickly, layering the paint while it is still wet. Although a loose under painting is developed, the bulk of the work is applied Alla Prima. This allows us to develop the colors and values directly on the canvas.
(Some of the following links are affiliate links which means we earn a small commission if you purchase at no additional cost to you.)
A blank white canvas can be intimidating, but it also can make developing values a bit more difficult. When we start with a white surface, we must work a little harder to push values. This is because we are comparing values to "white" as they are added in the early stages of the painting. But if we start with a toned surface, we can make better decisions about the values and colors as they are added. The contrast is not as strong.
For this reason, we'll begin by adding a bit of color to the canvas. This can be any color that you like. You may choose a contrasting color for additional contrast or an analogous one for more harmony. In this case, we'll start with a neutral color mixed with Raw Umber and Titanium White. This color is thinly applied with acrylic paint since it dries very quickly.
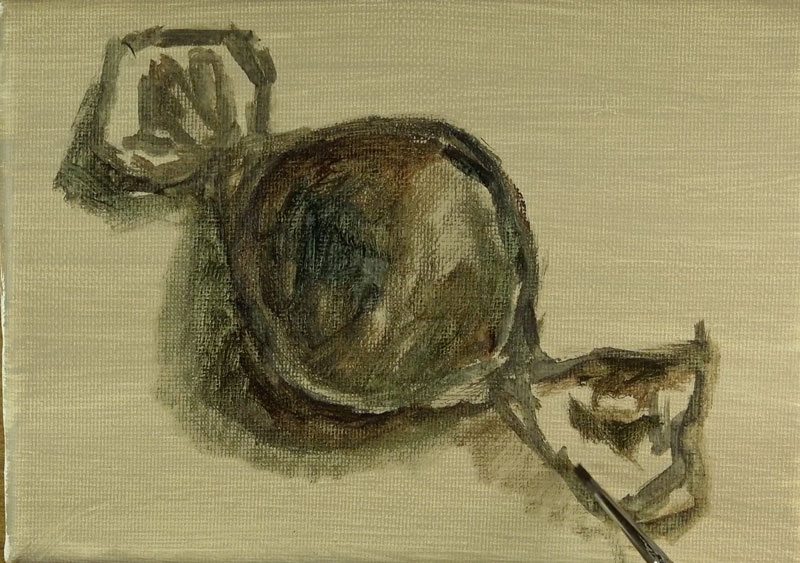
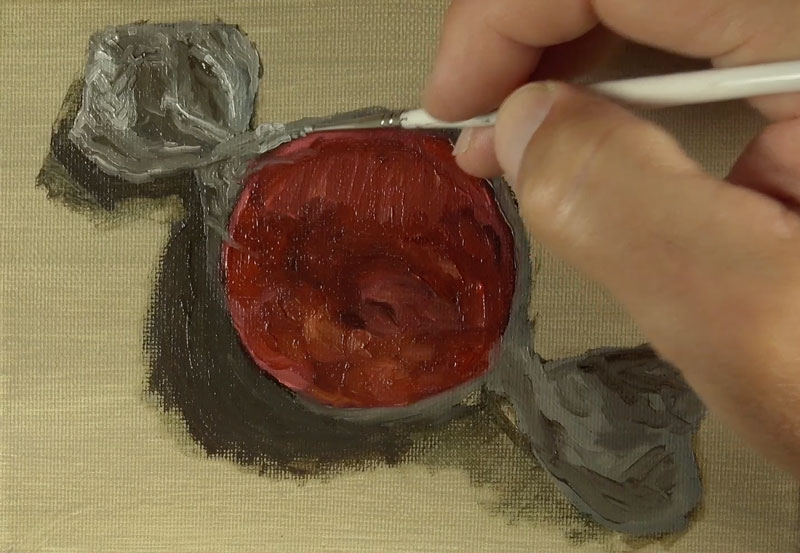
We'll begin by sketching out the shape of the candy and wrapper with a small flat brush. A dark mixture of Burnt Umber and Prussian Blue is used and thinned with a bit of water (use a paint thinner if using traditional oils). We're not too concerned with the color here. We just want a color that contrasts the background. We can develop some of the information regarding the darker values. Like the initial sketch, the darker values are loosely blocked in without much regard to the details.
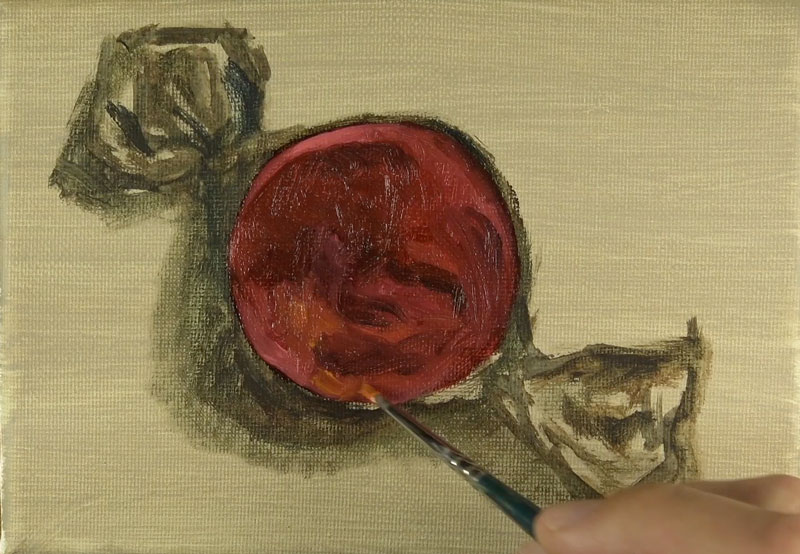
Over the top of the sketch, we can begin adding the local color of the candy. (Local color is the observed color of the subject.) Our piece of candy is red, so a mixture of a cooler red (Alizarin Crimson) and a warmer red (Cadmium Red Hue) is applied. Since the paint is applied wet over the wet under painting, some of the darker tones in place mix with the colors applied over the top. This results in darker reds on our piece of candy.
We can then begin developing the relationships of colors and values. By adding a bit of Titanium White, we can create light values for the highlights. A touch of Cadmium Yellow is mixed in as well to add a bit of variety and depth to the color. Since the subject is red and the background will be blue, a touch of yellow will complete a color triad of a primary color scheme.
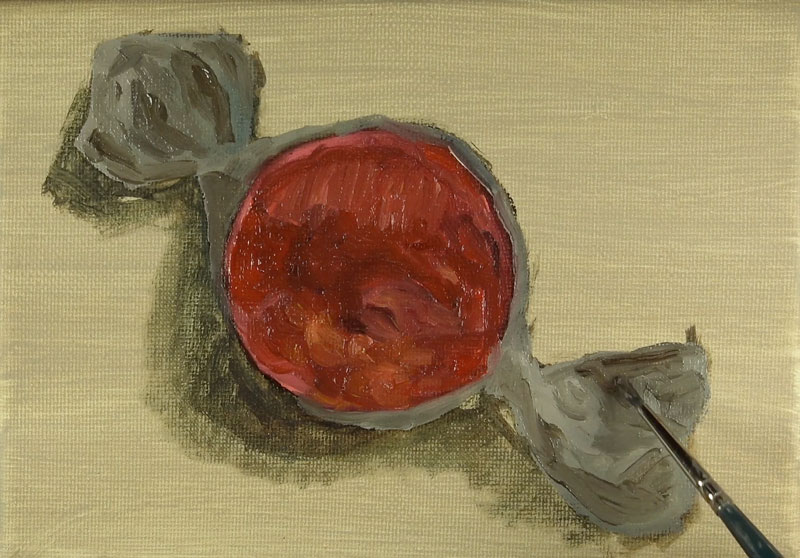
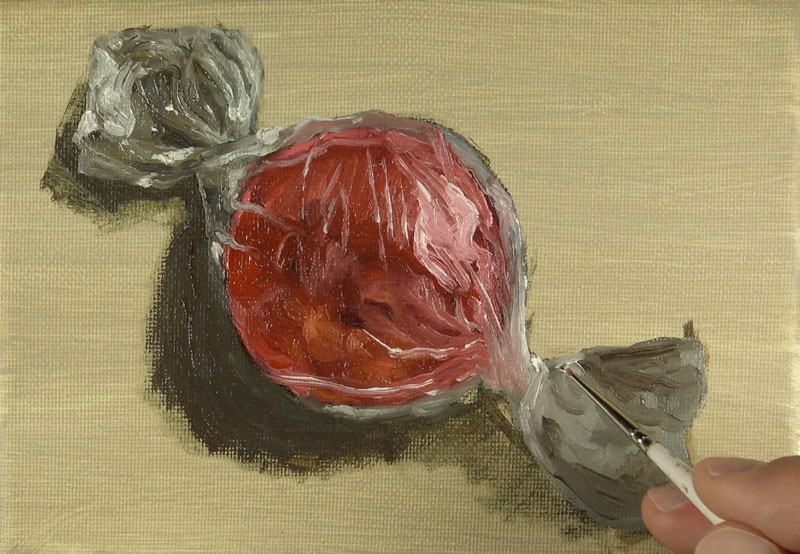
We'll next move on the wrapper. The initial color is blocked in with a gray mixed with Burnt Umber, Prussian Blue, and Titanium White. If a warmer gray is desired, more Burnt Umber can be used. For a cooler gray, Prussian Blue can dominate the mix. Our gray is mixed here with a brown and a blue since it creates more variety in the color. Using a black and white is acceptable, but limits the variety of color which may lead to a flat appearance.
After the initial shapes are defined with gray, the values can be addressed. A darker mixture of Burnt Umber and Prussian Blue is used for the darker tones.

By adding a healthy amount of Titanium White to our gray mixture, we can begin addressing the lighter values and highlights. Since the wrapper is shiny and reflects light, these highlights are quite strong and can be found right next to darker values. Shiny or reflective surfaces typically feature high contrast in value, without much gradation. In other words, darks can be found right next light values.
We'll continue painting highlights over the body of the candy. These strokes are applied directly over the wet color which causes some of the color to mix with the lighter values. This is acceptable since it helps to create the illusion of reflected light from the candy.
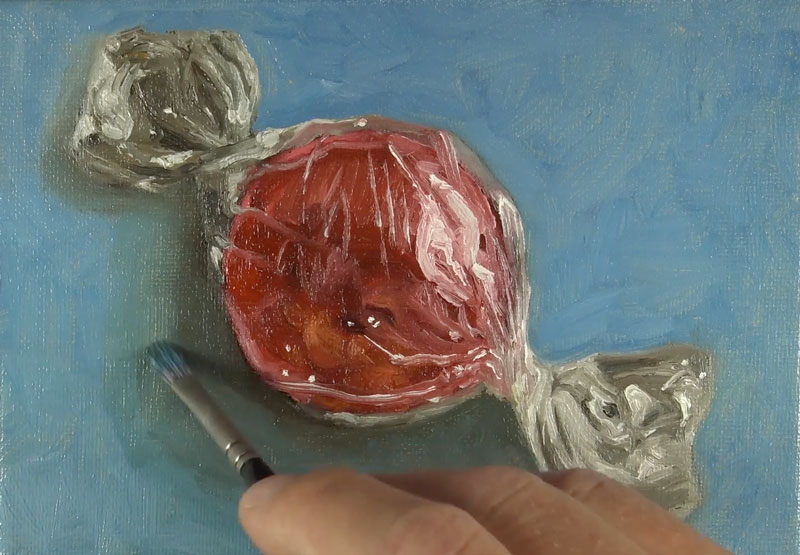
With the bulk of the candy and wrapper complete, we can fill in the background color. Blue is chosen since it creates a primary color scheme with the reds and subtle yellows. French Ultramarine is mixed with Titanium White to create a light blue which contrasts the candy in color and value.
Since the cast shadow behind the candy is still wet, the light blue applications mix with the darker tones already in place. This creates a natural looking shadow. The outer edges of the shadow are softened with the brush, creating a gradation of tone.
The edges of the wrapper are softened with a clean brush to create a more natural appearance and touches of blue are added in areas within the wrapper. A bit of light blue is used to clean up the shape of the cast shadow at either end of the wrapper.
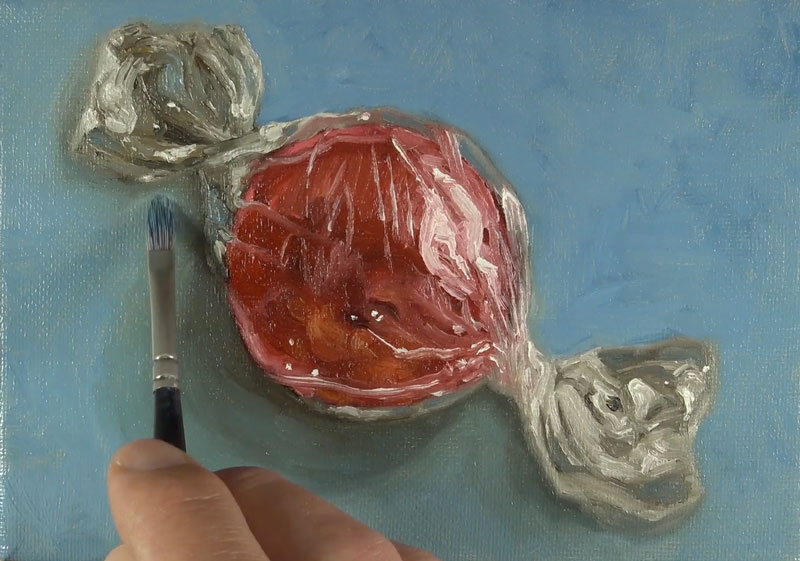
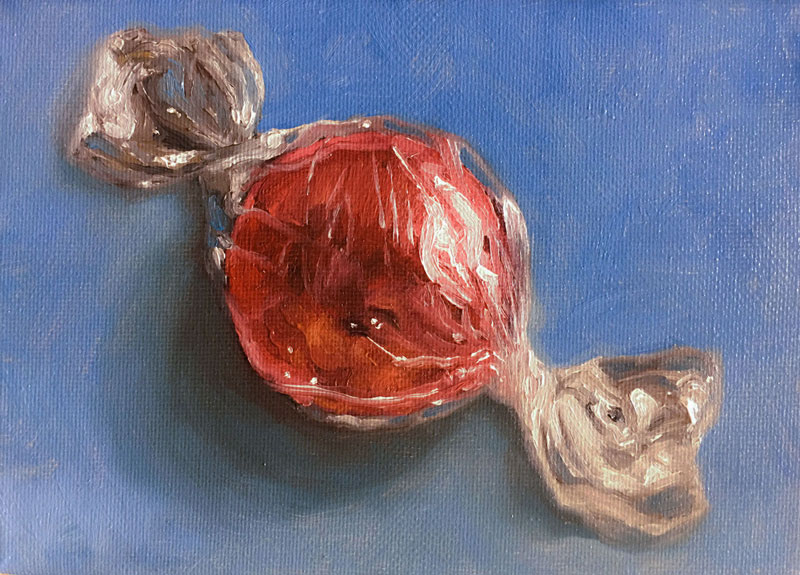
The finished painting is small and tidy but not devoid of interest and brush work.