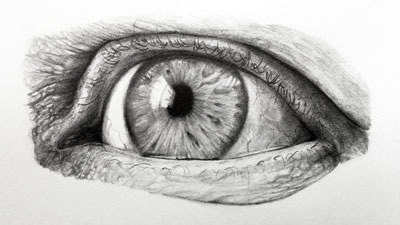
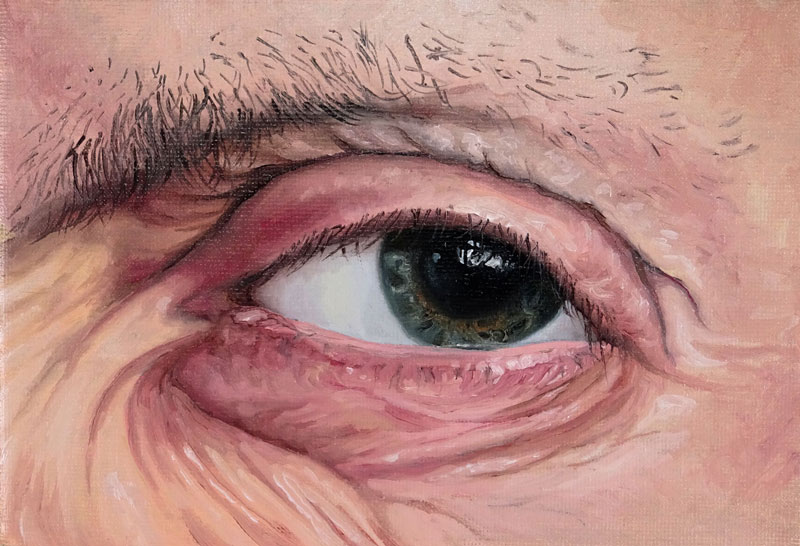
In this lesson, we’ll take a look at how to paint a realistic eye using water mixable oil paints. Although we are using water mixable oil paints in this demonstration, the techniques applied here can be used with any opaque painting media.
We will take full advantage of the characteristics of oils, which dry dramatically slower than water-based media such as acrylics. This allows us to work the paint applications, adjusting the values and colors while the paint remains wet on the surface. This gives us full control over the details that we develop and the relationships of the colors and values.
Water mixable oil paints are real oils. But unlike traditional oil paints, water mixable oil paints can be thinned with water instead of traditional paint thinners that produce fumes. Water mixable oil paints can be used in combination with traditional oils and mediums. They are an excellent choice for those wanting to take advantage of the benefits of traditional oils but may be turned off by the fumes produced by paint thinners.
In this lesson, most of the colors used are Artisan paints by Winsor and Newton. The only exception is the flesh tone which is made by Reeves. Here’s a list of the colors that are used in this demonstration:
A variety of brushes are used in this lesson. For larger areas, a hog bristle brush is used. For smaller detailed areas, a synthetic sable brush is used. For blending, it’s a clean dry sable brush and for the eyelashes - a nylon rigger brush.
Water mixable oil paints can be used on any surface that accepts paint applications. For this lesson, a small stretched canvas is used but other acceptable surfaces include paper, wood (masonite), linen, or burlap.
Initial applications are made by thinning the paint with water. But as we begin to refine the details, we’ll switch over to using medium with the paint. The medium used in this demonstration is 50% linseed oil and 50% paint thinner.
Medium allows us to adjust the viscosity of the paint, making it easy to spread over the surface. This gives us more control over our brushstrokes and the option to use translucent glazes, if desired.
We’ll create a small painting measuring just 7" x 5”. This canvas has been primed using a combination of Raw Umber and Titanium White with acrylics.
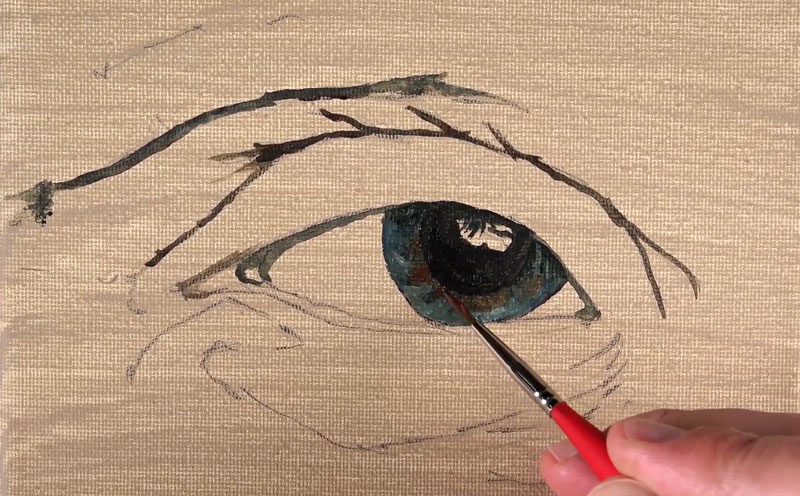
We’ll start with the darkest area of the pupil and use a mixture of Burnt Umber and Prussian blue. This will create a more natural black and help us to establish some of the darker tones early in the painting.
To aid in increasing the viscosity of the paint at this early stage, a touch of water has been added to the paint. We can start adding some of the colors for the iris - here again, we’ll use a mixture of Burnt Umber and Prussian Blue. This mixture is heavily concentrated with Prussian Blue. We can then start adjusting some of the values, adding a bit of white with the mixture and also introducing a new color - Burnt Sienna. At this early stage, we’re just establishing some of the initial colors.
Adjusting the values is where the magic happens. We’ll gradually start adding a bit of white to lighten up some of the tones and also continue to add a bit of the Burnt Sienna in areas. We can begin gradually getting lighter, increasing the contrast and also bringing out some of the patterns of the iris.
We can continue pushing the contrast even further by adding additional areas of darker value, again with a mixture of Prussian Blue, Burnt Umber, and a touch of Olive Green. As we go, we’ll consider the brushstrokes that we make. In some areas, we’ll pull the strokes outward from the pupil towards the outer edges of the iris. In other cases, the lines that we see in the iris may actually flow horizontally.
It's important not to rush this process. Be patient and allow the contrast between values to develop. Ultimately this will create the illusion of the details that we see. We’ll continue to push the contrast, again adding darker areas as well as lighter ones.
With a smaller brush, we can add some of the small details within the iris. We’ll continue going back and forth with our Burnt Sienna, which is found mainly around the outer edge of the pupil.
Going back to our pupil, we can add another layer of our mixture of Prussian Blue and Burnt Umber, this time adding a heavy application.

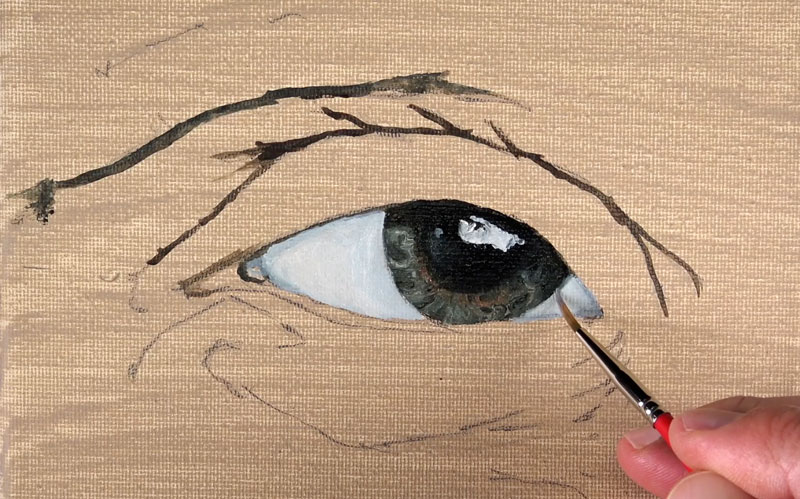
Next we can begin addressing the white parts of the eye. The white parts of the eye are usually not white. In most cases, there is quite a bit of variation within these sections. First, we’ll cover the area with an application of Titanium White. Some of the darker tones that we added initially will naturally mix with this application.
To make the white parts of the eye appear more natural, we'll add a bit of Flesh and a touch of Cadmium Yellow to the Titanium White.
We will also add a strong highlight over the pupil. We'll refine this shape in a moment, but for now we'll just get it in place.
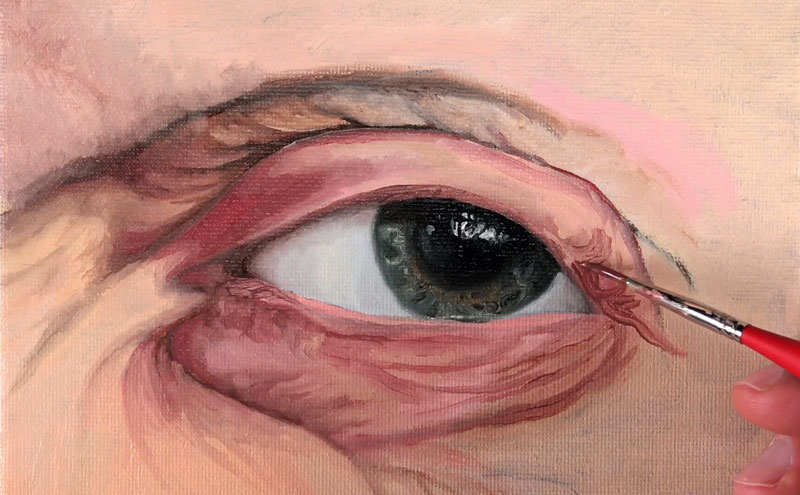
Using a combination of Alizarin Crimson and Burnt Umber, we'll address the tear duct in the left corner. This darker tone is also pulled underneath the upper eyelid to create a slight indication of shadow. We should expect some blending and mixing to occur with the white applications. To smooth these transitions, we'll use a soft, dry sable brush to blend the wet paint.
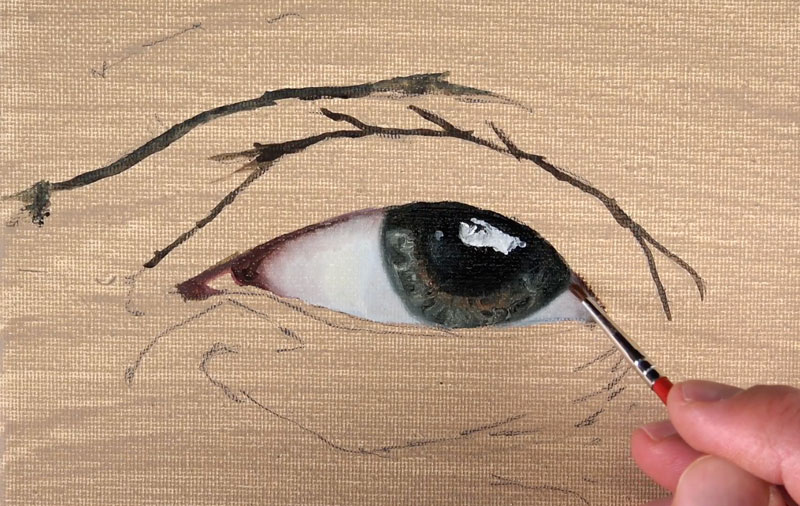
We can then refine the highlights on the pupil by adding a bit of our mixture of Burnt Umber and Prussian Blue. The brushstrokes applied with this mixture reflect the shadows produced by the eyelashes. We can also add a slight highlight to the left side of the pupil. This highlight should be very subtle and blended in with the darker tones of the pupil.

Next, we can begin quickly filling in the larger shapes of skintone around the eye. The value and hue of the skintone changes in different sections around the eye, but the same combination of colors is used. The mix of colors used here include Flesh, Burnt Umber, Cadmium Red, Alizarin Crimson, Cadmium Yellow, and Titanium White. We can adjust the value and the hue by changing the concentration of the specific colors used. For darker tones, more Burnt Umber is used. For lighter ones, more Titanium White is applied.
We will be sure to use a darker value underneath the upper eyelid. This will create the impression that the eyelid is three-dimensional with a slight shadow underneath.

We'll continue to adjust the values and the hues to develop the details and wrinkles found in the skin around the eye. The forms around the eye protrude and recede. To create this illusion, we'll pull brushstrokes in the direction of each form. This means that the brushstrokes should flow over the cross contours of each form. In the areas that have wrinkles, the direction that the brushstrokes should flow are fairly obvious.
By adjusting the value relationships, we can gradually develop the illusion of each of the wrinkles and the details. We will add darker values using a combination of Burnt Umber and our mixed skintone. We can then go back and add lighter values in between, using a mixture of our skintone and Titanium White with a touch of Cadmium Yellow.
It is important to be patient throughout this process. But as we continue to develop the value relationships, our wrinkles and the form of the face around the eye begins to take shape.
As we develop the values and colors, we can go back with the clean soft sable brush and blend transitions of color and value. In many cases, softening the transitions will lead to a more realistic image.
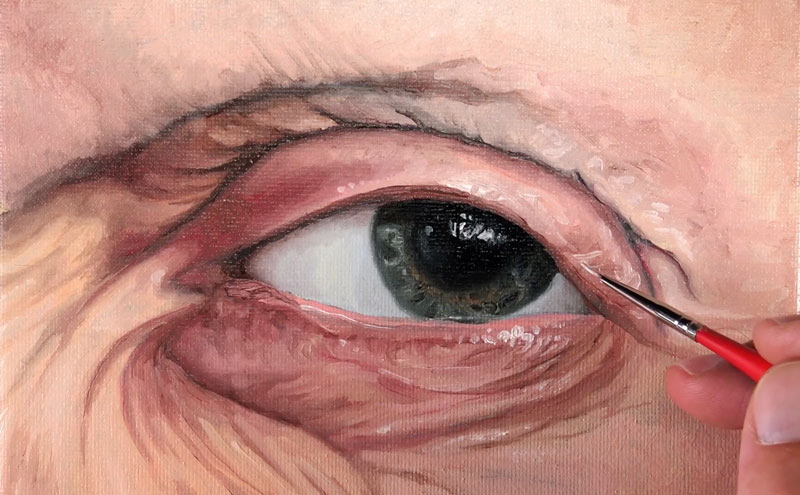
After blending, we can continue to add dark and light values. Some strong highlights are added on the bottom portion of the eye just underneath the bottom eyelid. We will also add a strong highlight in the center of the upper eyelid, where it protrudes the most. If these applications are too strong when added, simply blend them using the soft sable brush.
Subtle changes in value are added in various locations around the eye using the smaller brush. This gives a subtle indication of imperfections, which are found on any face. Including subtle imperfections increases the illusion of realism in the painting.
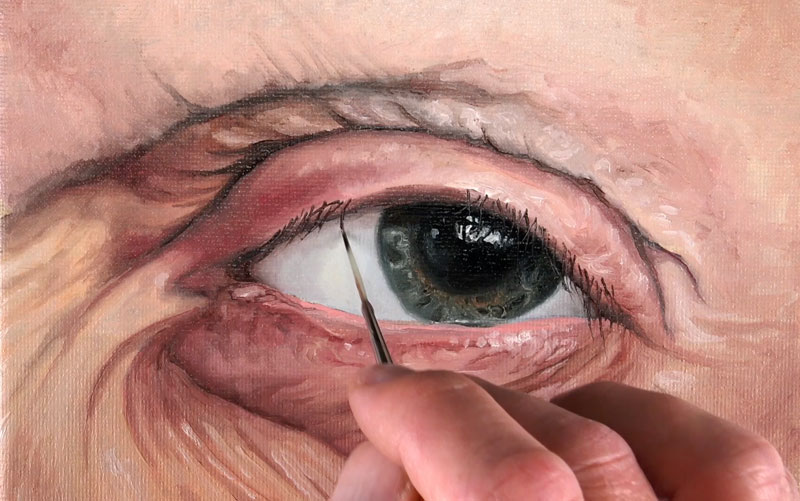
Once the skin has been developed, we can begin adding the eyelashes. Since we need to be precise with our brushstrokes, we will use a rigger brush (script liner) to apply the color. This brush holds an ample amount of pigment but allows us great control in producing defined lines.
A dark mixture of Prussian Blue and Burnt Umber is used to produce a more natural black. Quite a bit of medium is used with this mixture to increase the viscosity and aid in the flow of the paint over the canvas.
Our brushstrokes should be deliberate. We can pull them out just as they grow from the upper lid. Be sure to include some variety in your stroke, allowing some of the strokes to turn slightly. Each eyelash will vary in length and direction.
Many times, we can add the eyebrow with just a few simple strokes. In this particular subject however, the eyebrow is quite sparse. Because of this, we will address the eyebrow in the same manner that we addressed the eyelashes. We will simply pull out strokes as the hair grows from the browline. We'll use the same mixture of Prussian Blue and Burnt Umber for the hairs of the eyebrow.
As the eyebrow extends out on the right side, the hairs become more sparse. For this reason, shorter strokes are used. It is encouraged to include a bit of variety in the length of stroke and the intensity of the color used.
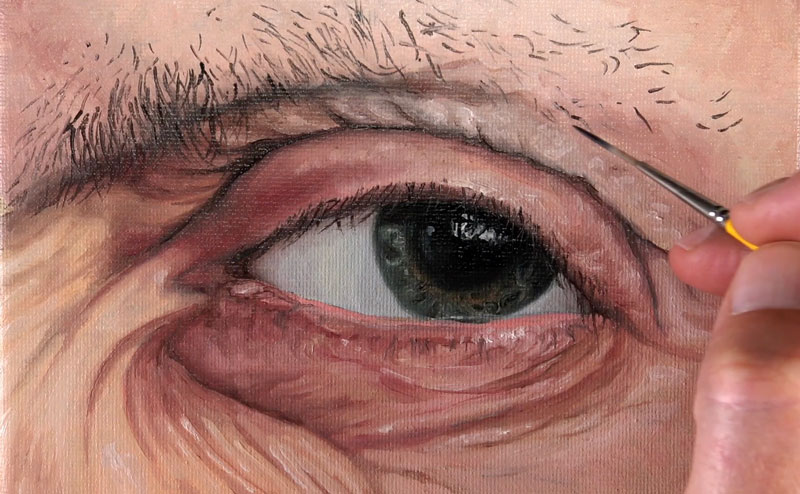
After making a few adjustments to the bottom eyelid, darkening the value slightly, our painting of an eye is now complete.
Like with most painting and drawing media, painting a representational and realistic image - no matter the subject - requires patience. Take your time, and allow the value relationships to gradually develop. Remember, working with oils is quite forgiving. If you make a mistake, it can be easily adjusted and fixed.