Graphitint pencils are a unique medium for creating drawings. They are, by definition graphite pencils, but are tinted to provide color. Not to be confused with colored pencils, which feature a waxy or oil-based binder, Graphitint pencils feature colored graphite encased within a pencil.
Another unique characteristic of these pencils is the ability to become activated with water, making them perform in a similar fashion as watercolor pencils. The resulting effect on the surface is a bit more controlled than what you may expect with watercolor pencils. Colors do not seem to bleed as easily, and require a bit more work to spread.
A noticeable limitation are the colors that are provided. Since the pigment is added to graphite, which is naturally gray in color, this limitation is expected. Colors that you would expect to find in most art sets are noticeably absent. For example, there is no red, nor yellow. Most of the colors lean toward earth tones however, making them perfect for landscapes and other organic subjects such as animals.
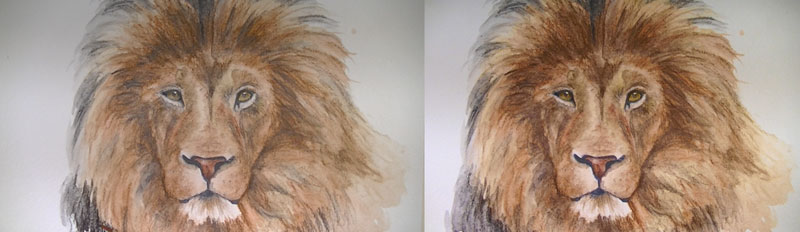
Having been away from using Graphitint pencils for a while, I thought it would be best to revisit them by creating a sketch of a lion. I receive many requests for animals, and I do agree that the collection of tutorials could be expanded to include more of them.
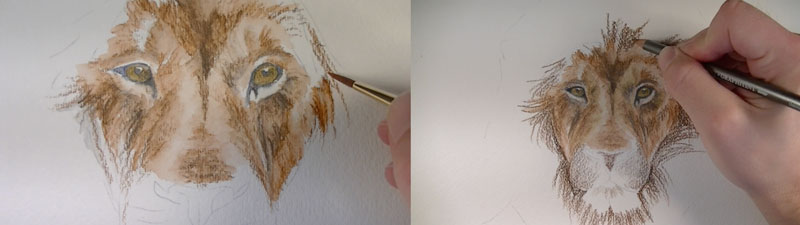
The contours are first drawn lightly with graphite or transferred to watercolor paper. Starting with the eyes, the first applications of color are added. To create a more natural black, Dark Indigo is layered over with Cool Brown in the pupil and in dark spaces around the eyes. Sage is used for the color of the iris. This application is then "activated" by applying water with a nylon brush. The color becomes "fluid" and is allowed to move around on the surface filling in the tooth of the paper.
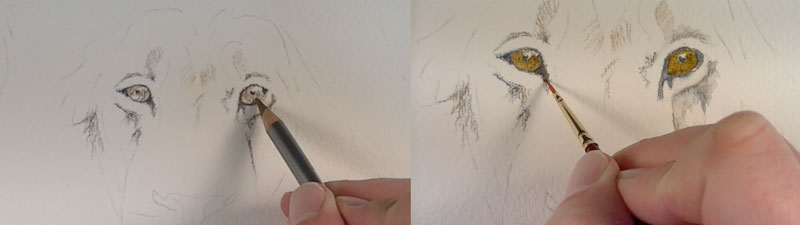
Colors around the eyes are developed next using Chestnut. Strokes are made with the pencil to produce the illusion of hair by pulling them outward. A few areas are made darker with an application of Cool Brown before being activated with water. Strokes are pulled with the brush to help further the illusion of hair. A bit of Midnight Black is applied to push the darker areas a bit further and then activated. Autumn Brown is added to the end of the snout in order to produce a "red". Chestnut is also added to either side of the front of the snout. Next, work can begin on the mane, applying Chestnut with broad strokes.

After darkening the "blacks" around the snout with Dark Indigo and Cool Brown, activation of color occurs.
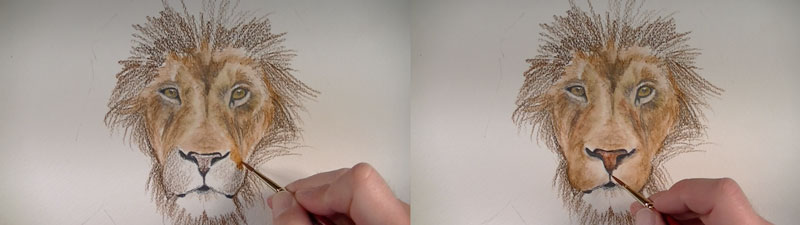
We'll continue activating the colors in the mane, again pulling outward with the brush. Russet is then applied around the outside of the mane to add a bit of depth to the color. This color will translate as a yellow when activated.
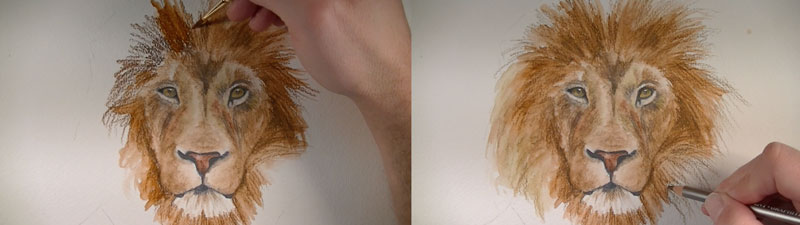
A bit of Midnight Black is added to darken areas on the mane. Midnight Black is also applied around the outer edge of the mane as well and then activated with water. The lower portion of the mane is extended using the color Chestnut and then activated. The color is allowed to bleed or fade into the background.
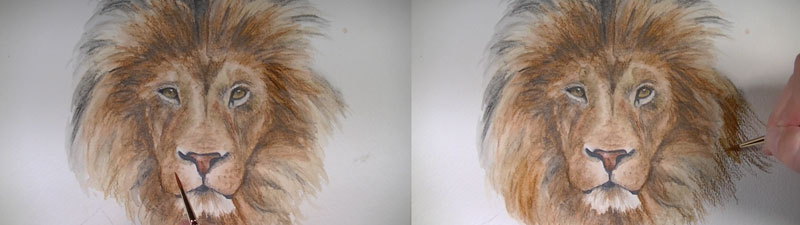
A final application of Midnight Black is applied to the lower portion of the mane and then activated to complete the sketch.