Let's face it, it's much easier to create details in drawings that are larger. Clearly, this is no secret as most highly representational drawings are large. Some are very large. It's just plain easier to develop those crucial details when you have more room to work.
Working larger, and scaling up your work, can be quite impactful as well. We are naturally drawn (no pun intended) to large things - they demand our attention.
But what if we try the opposite? What if we scale down our drawings? And what if we try to do this without sacrificing detail and realism? Can they be just as impactful?
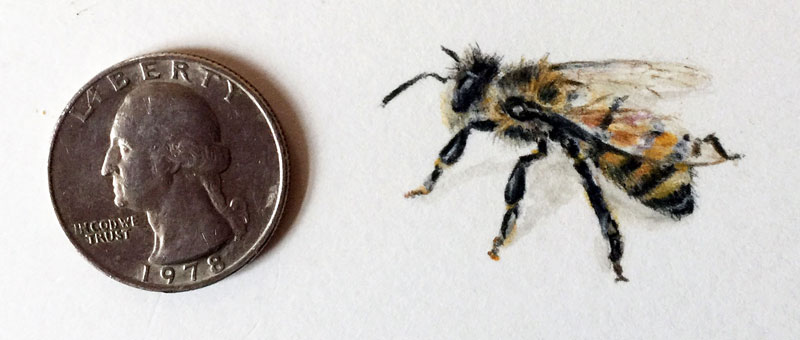
A member shared with me a fascinating artist named Lorraine Loots who creates what she calls "Paintings for Ants". These highly realistic watercolor paintings are truly tiny. The combination of scale and skill in her paintings is incredible and inspiring.
In fact, these tiny paintings inspired me to give it a try. I found the process to be a unique challenge that was quite enjoyable. I also discovered that there is a big advantage to creating tiny drawings. (Aside from what you save in art supplies.)
We should constantly be challenging ourselves as artists. It's how we grow. It's how we improve. The minute that we stop challenging ourselves, we stop growing. For this reason, we should seek out challenges that will test our limits and try things that may look intimidating at first. Sometimes we fail, but sometimes - we surprise ourselves. But every time, we grow.
Drawing on a much smaller scale presents a number of challenges on multiple levels. We are much closer to the limitations of the medium. After all, a brush can only be so wide and a pencil can only be sharpened so much.

Benefit #1 - Better Control Over The Medium - Working on a small scale forces the artist to have greater control over the application of the media. There is literally no room for error. Clearly, this practice benefits the artist when they return to a larger scale, when there is exponentially more room to work.
Benefit #2 - Implied Details - We see the world as a collection of lines, shapes, forms, values, etc. When we create drawings, we create an illusion by arranging these elements. A tiny drawing is no exception.
However, it seems that this concept is magnified when the scale is so small. Because of the limitations of the medium, we must rely on this concept and concentrate a bit more on the marks that are made and the illusion that they create.
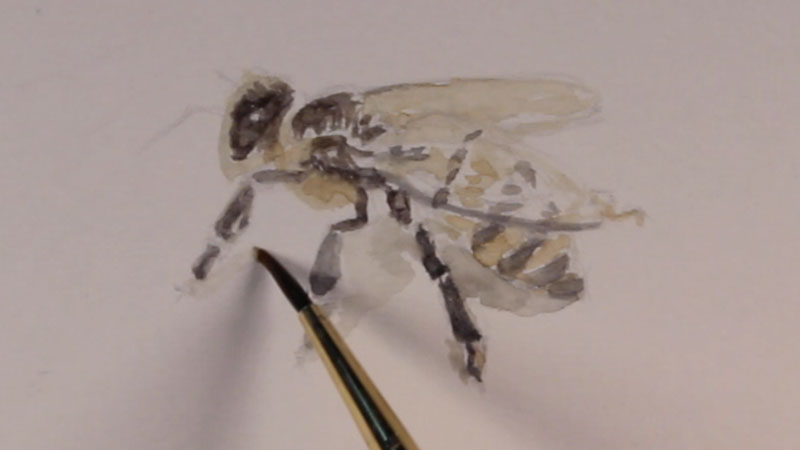
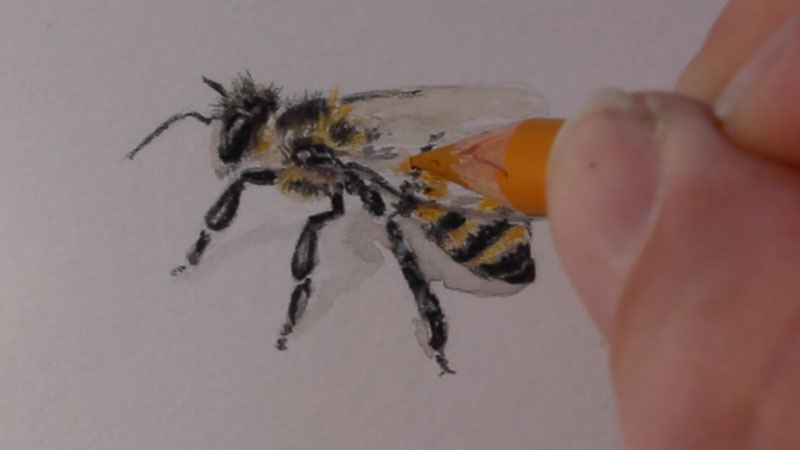
In this example, I choose to work on Bristol paper (vellum surface). This surface is very smooth, but still features a slight tooth (or texture). It is a bit heavier, allowing for light washes of wet media, but accepts colored pencil applications quite easily.
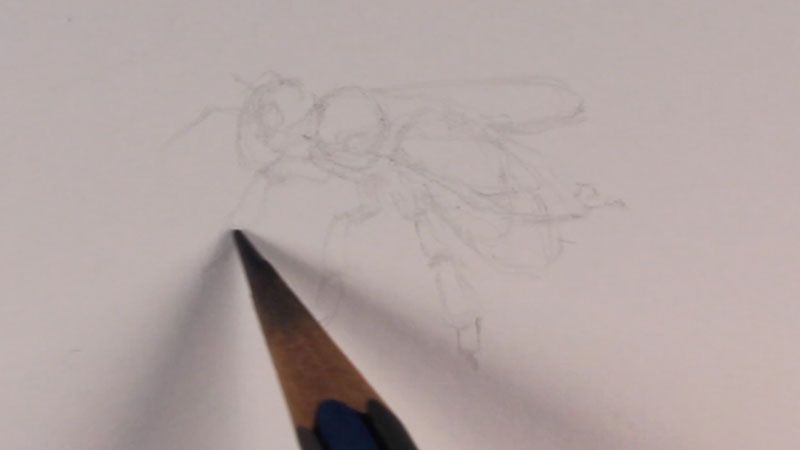
The process begins with a very light sketch of the basic shapes and contours of the subject. A "6H" pencil is used simply because a very precise and sharp point is required. Care is taken to avoid putting too much pressure on the pencil which would create undesirable grooves in the surface of the paper.
A light wash of watercolor is added to the pencil sketch using a very small round nylon brush. This wash will act as an underpainting for subsequent applications of colored pencils.
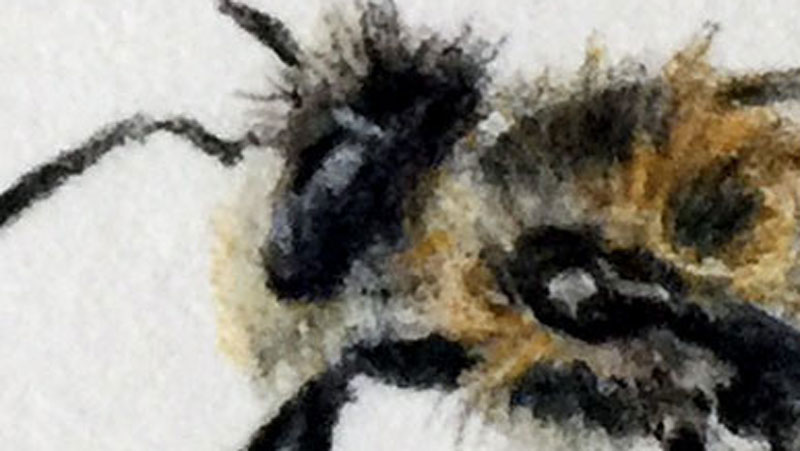
A combination of blue (Ultramarine) and dark brown (Burnt Umber) is mixed to create the black. Yellow Ochre is used in the yellow areas. Care is taken to preserve areas of highlight on the eye, legs, and wings.
After the initial watercolor washes are completely dry, colored pencil applications begin.
Mostly, Prismacolor Premier pencils are used for these applications. However, the black areas are addressed with a Derwent Studio "black". This particular "black" is a bit more natural. "Yellow" areas are addressed with Yellow Ochre and Goldenrod. Light burnishing occurs as white is layered in areas.
The wings and bottom portions of the legs are addressed with an application of Raw Umber. Only a few of the observed lines are added in the wings, leaving areas for reflected light.
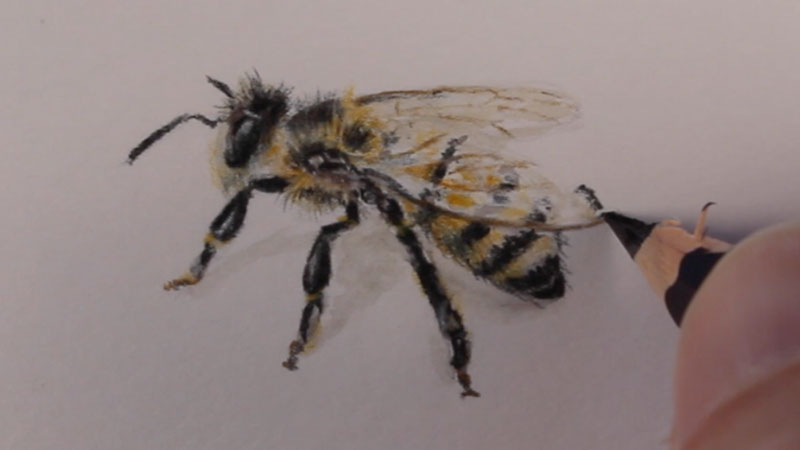
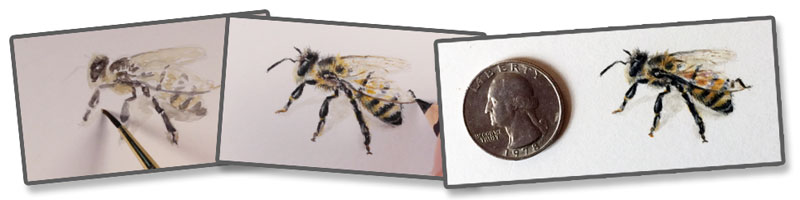
The completed drawing is quite tiny. It makes an impression on a large sheet of paper. (Well, relatively speaking anyway.)
Creating a small drawing or painting is a great exercise. It doesn't take much time and it definitely doesn't use a lot of material. Not only is it fun to create, but it's also a great challenge that will improve your skills and handling of the medium. I can't wait to create another one.