by Matt Fussell
In this oil painting lesson, we develop a portrait using water mixable oils on gessoed panel. Although water mixable oils are used, traditional oils will behave exactly the same and the results would be similar.

Water mixable oil paints are quite the "modern marvel". They behave in a similar manner as traditional oils but dry faster and water can used to clean the brushes and thin the paint. These unique characteristics mean that people that are sensitive to the harsh fumes of traditional oils are able to enjoy the slower drying times of this medium without all of the strong chemicals.
Although they can be mixed with water, these paints are still fully oil paints. The paints dry faster than traditional oils but also give the artist plenty of time to work areas while still wet. Most pigments dry to the touch within a couple of days and are fully dry within a week.
Traditional oil painting mediums such as linseed oil or custom blends can be used with water mixable oils. In this lesson, a minimal amount of water is used and Winsor and Newton's Oil Painter's Medium is used to slightly thin the paint. This medium is also used for the final glazes.
(Some of the following links are affiliate links which means we earn a small commission if you purchase at no additional cost to you.)
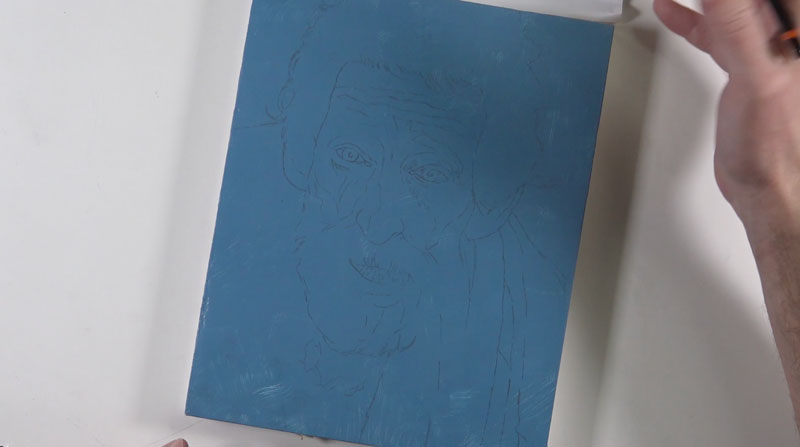
We'll begin by first establishing a tone on the surface. Although we could paint directly on the white gessoed surface, a tone provides a nice starting point. With a color on the surface, it is a bit easier to judge values and contrast as we begin to paint. The color chosen for a base color will vary depending on the subject and the desired mood of the painting. In this case, a blue base tone is chosen for a couple of reasons.
The first reason for a blue base deals with shadows. Some of the blue is allowed to show through the completed painting. If we allow some of the blue to show through in shadowed locations on the face, we can create the impression of natural, cool shadows. These cooler shadows should contrast nicely with warmer skin tones.
The second reason deals with mood. The subject of this painting is a homeless man. The expression on his face exudes a sense of sadness. Since we associate the color blue with sadness, we can use it to help create the mood of the painting.
The blue base is applied with acrylic paint since it dries very quickly. A mixture of Prussian Blue and Titanium white is used to cover the entire surface of the gessoed panel.
With the panel prepared, we can draw or transfer the subject to the surface. To save time and to ensure accuracy, the contours of the subject are transferred using a graphite transfer. You could also draw the subject free hand or use a griding technique.
Some people may consider this step to be a form of cheating. However, the subject and the painting must be completed over the contour line drawing and many of these lines will be covered up during the process.
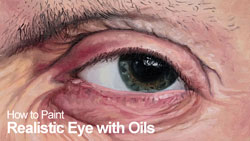
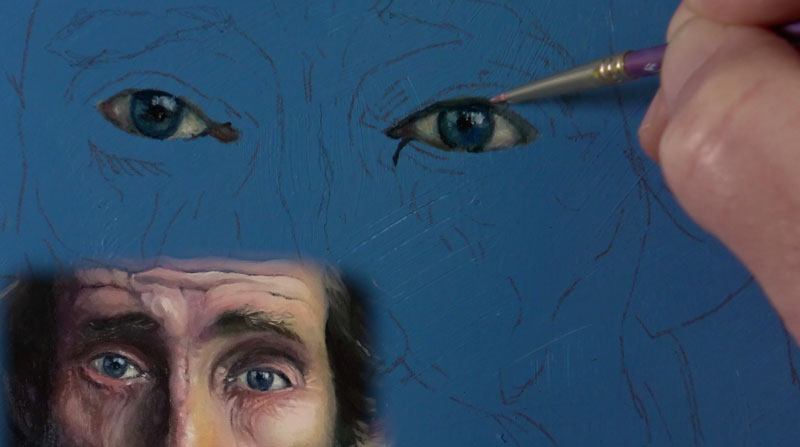
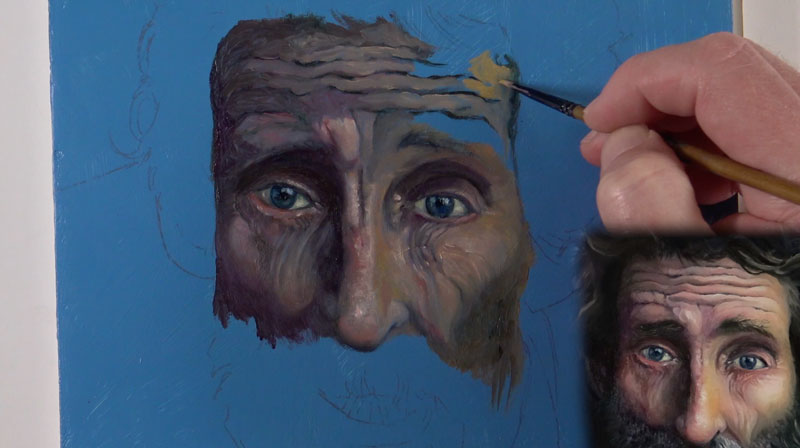
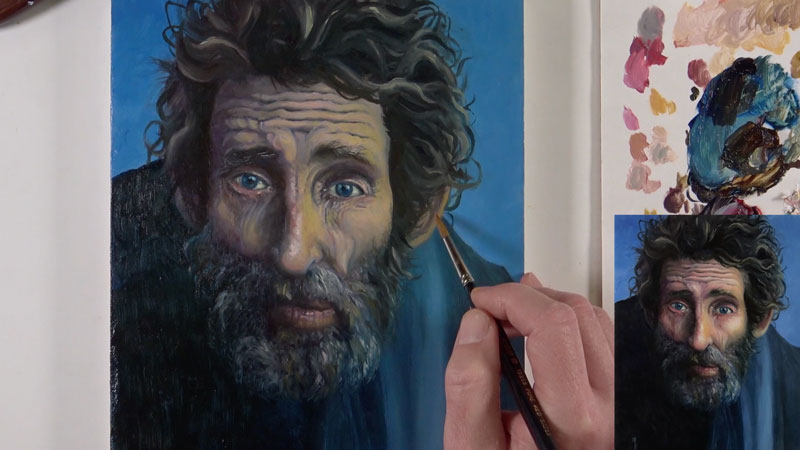
We'll start by developing the eyes and then work outward from there. The eyes are naturally a focal point. By starting here, we'll instinctively spend a bit more time and develop this area a bit more than the others. As we work through the process, we can return to this area and make adjustments.
A mixture of Titanium White and a touch of Yellow Ochre is applied first. Prussian Blue and Burnt Umber are added to adjust the shadows within the "whites" of the eyes.
The iris and the pupil are developed with a mixture of Prussian Blue and Burnt Umber. The pupil may appear black, but it is instead a mixture of these two colors. This mixture of black will appear more natural than a pre-mixed black from a tube.
Highlights are worked in over the top with Titanium White. These applications naturally mix with the wet Prussian Blue, creating a more natural highlight.
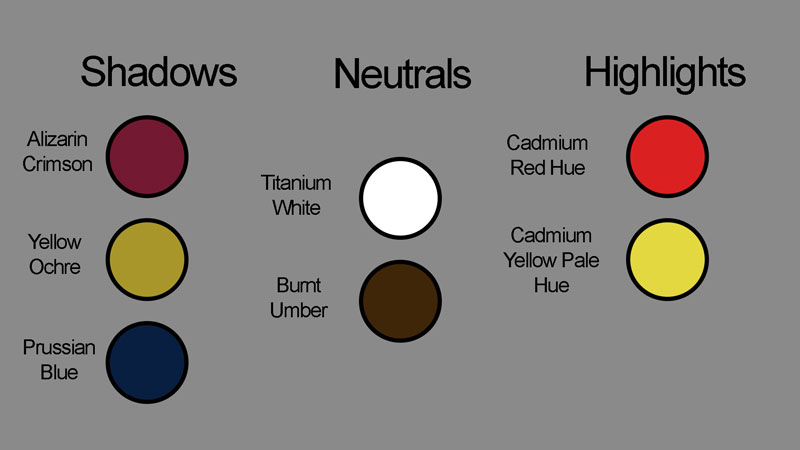
I like to tell my students that we can mix any skin tone by using brown, yellow, red, and white. I even use a little rhyme... "Red, yellow, brown, and white - that's how you make your skin tones right." Skin tones are a little more complex than this of course, but it's a good place to start. Blues, greens, and purples are often involved beyond the colors from the rhyme.
Of course, paint colors are made by pigments. Each pigment is different from the next. This means that one red mixed with one blue will create a different purple than a different red mixed with a different blue. Each mixture will still create a purple, but the purples will be different from each other.
In this example, we want the shadows to feel "cool" so we'll stick with cooler pigments of the Primaries. In the shadows, we'll use Alizarin Crimson, Yellow Ochre, and Prussian Blue. For the highlights, we'll stick with the warmer pigments, Cadmium Red Hue and Cadmium Yellow Pale Hue. To adjust values, we'll use Titanium White and Burnt Umber.
We'll begin addressing the areas around the eyes by blocking in the darker values using a mixture of Burnt Umber, Prussian Blue and a touch of Alizarin Crimson. We want the Prussian Blue and Alizarin Crimson to dominate. The Burnt Umber is used primarily to darken the value.
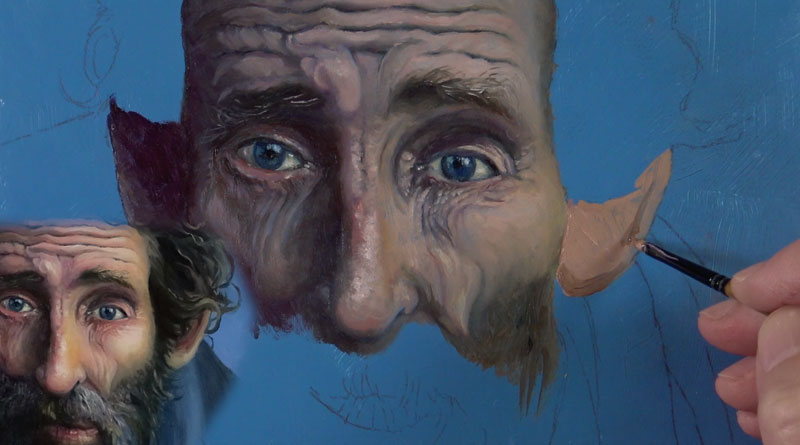
Over the top, we can gradually begin building up the lighter and warmer tones. Since the right side of the face is closer to the light source, more warmer tones are used here.
Once our initial applications are in place, we can go over the top with a clean and dry sable brush. The soft sable brush smooths the transitions of color and tone and produces a surface texture that more closely communicates that of the face.
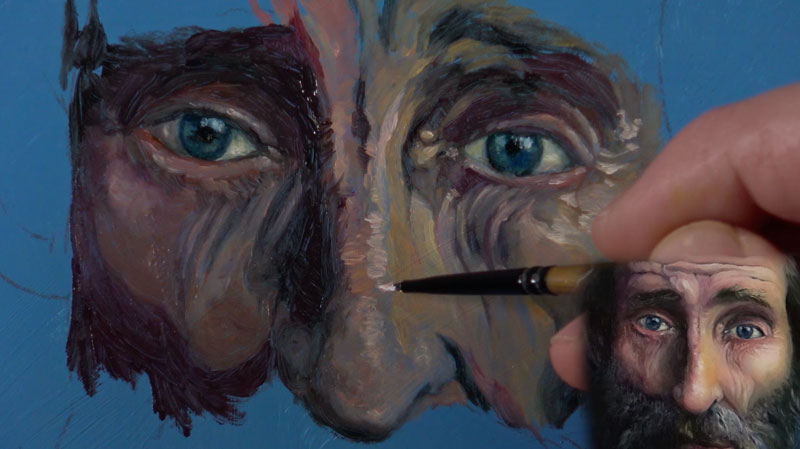
We'll now continue working outward and work our way up to the forehead. Here again, we'll start by defining the darkest values first. Over the top, we'll gradually get lighter and slightly warmer.
After initial applications of color are in place, the sable brush is again used to blend the wet paint. We can also go back to the eyes and areas around them to make adjustments as additional colors and values are added to the painting.
We'll add a couple of basic shapes for the ears. The ears on this subject are mostly covered by the hair which we'll add in the final stages. For now, we'll add a cooler ear on the left side of the face using our cooler skin tones. The ear on the right side of the head is closer to the light source and is blocked in using the warmer skin tones.
With basic shapes and tones of the ears in place, we'll next turn our attention to the mouth. The process remains the same. We'll first block in the darkest values with a dark cool mixture. We'll then add basic shapes of warmer tones over the top, gradually modeling the shapes to match the subject. A sable brush is then used to soften the strokes and blend the transitions.
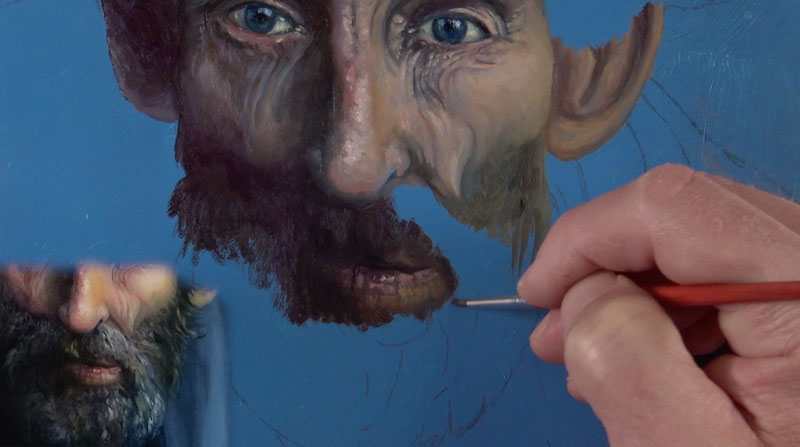

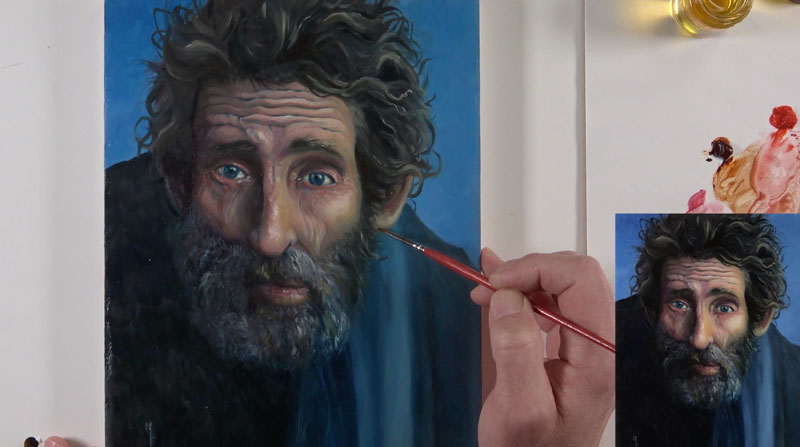
With the details of the mouth defined, we can block in the shape of the beard. A dark purple is used for the majority of the shape. Before developing the details of the beard, the clothing, background and the basic shape of the hair is defined.
The clothing is left without much detail so that the focus remains on the face and the eyes. A variety of values of Prussian Blue are used for the clothing and the background. In the darkest areas, the mixture is strong with Burnt Umber but still dominated by Prussian Blue.
The shape of the hair is developed using the same combination of colors, however the mixture is dominated by Burnt Umber, making it considerably warmer.
With the clothing, background, and the shape of the hair in place, we can return to the beard and develop the impression of the details. We'll gradually build up lighter values using a mixture of Titanium White, Burnt Ochre and even a touch of Alizarin Crimson. Strokes are pulled outward just as the hair grows. Like we've done in other areas, the strokes are softened with the sable brush. Many of the lighter values on the left side of the face are worked into the darker tones, making the contrast subtle.
The highlights of the hair are loosely added with warmer mixtures of Burnt Umber and Yellow Ochre. A touch of Titanium White is added to make a few highlights a bit stronger.
With the bulk of the tones and colors in place, we can go back and warm up the skin tones. To do this, we'll add a couple glazes over the top. A glaze is a translucent mixture of color that has been thinned with medium. Typically, glazes work best when pure pigment is used. In other words, the color should not be muted with a neutral. It's also a good idea to allow the colors underneath the glaze to dry a bit before adding the glaze over the top.
Since we want to warm up the skin tones, we'll start with a glaze of Cadmium Yellow Pale Hue. This glaze is applied with a soft sable brush in the areas of highlight only. When it is added, we can see how much the contrast increases between the purple shadows and the warmer, yellow highlights.
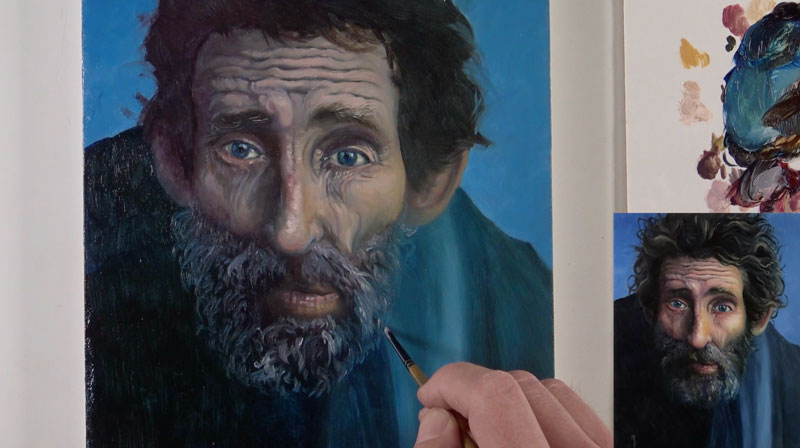
Even with the yellow glaze, the skin tones are still too cool. We need to bring a bit more life to the subject with an additional glaze. After our first glaze has dried, a second glaze of Cadmium Red Hue is applied. This glaze is again applied over the warmer midtones and highlights. The addition of this glaze brings the right amount of warmth while still retaining an overall cool and melancholy feeling in the painting.
The finished painting brings focus on the eyes and areas around them and conveys a feeling of sadness. Even though a feeling of sadness exists, the character of the subject is maintained and feeling of hope is present.