In this lesson, we'll take a look at creating a small portrait painting with acrylics. Acrylics can be applied with smooth gradations of color and value or with more deliberate, visible brush strokes. (Of course application techniques are not limited to these two approaches.)
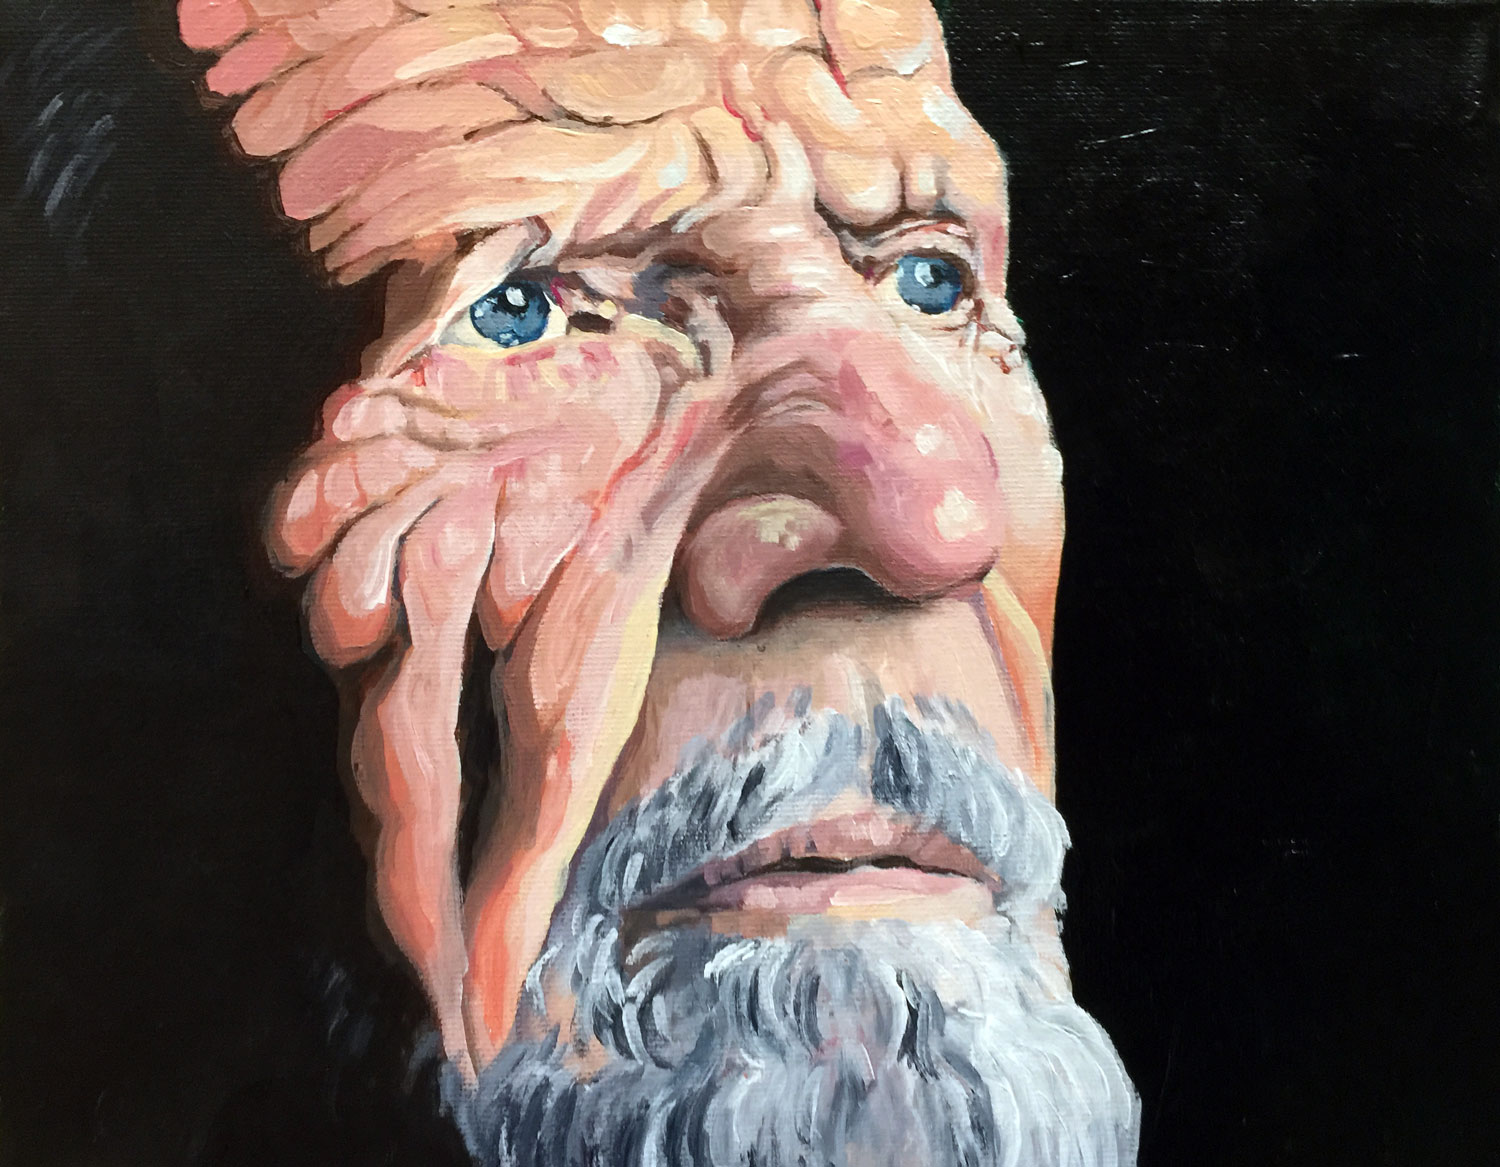
In this tutorial, we take the approach of creating strong brush strokes, allowing them to create shapes of differing colors and values. The goal is to develop brush strokes that add "character" to the painting while communicating the subject clearly.
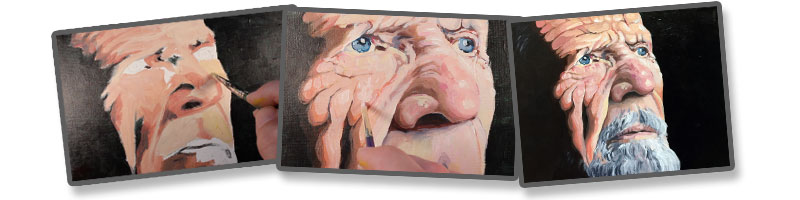
The image is developed through direct painting, applying colors as they are observed, mostly while the surface is still wet. Golden Open Acrylics are used so that the drying time is quite a bit slower. The following video demonstrates the process...

Skin tones or flesh tones are just like any other mixture of colors. There is a common misconception that one formula will work for mixing every skin tone. Artists usually find a formula that works for them based on color and the brand that they prefer. The number of variations of tones is endless.
A color called "flesh tone" really shouldn't exist, even though you can buy one at the store. Flesh tones are so varied that one color cannot possibly account for every tone out there.
While there isn't a magic formula for creating a skin tone, I've found that nearly every tone can be mixed using a combination of red, yellow, brown, and white. Some blues may be used for areas of shadow and ironically some areas of highlight. Colors like green and purple can also be used to enhance the light or create additional contrast.
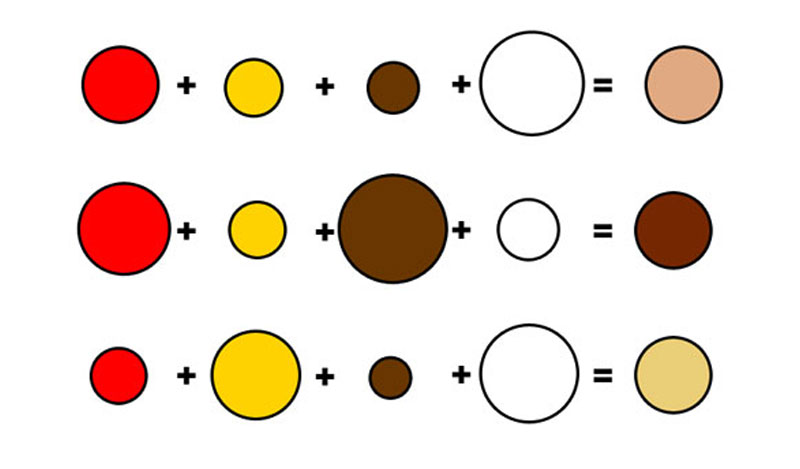
The exact type of red, yellow, or brown will vary depending on the brand and the desired tone. The quantity of each color in the mixture will also vary depending on the skin type and color. Some skin tones will require darker, more intense browns, while others will require more white and yellow.
It may be obvious, but I will point out that you will need to create multiple mixtures to create a convincing illusion. The value, chroma, and temperature of the color changes in different locations of the face, all depending on the location and strength of the light source. And while it may seem incredibly important to capture the absolute match of color that is observed, what's really most important is the value. Get the value right and it really doesn't matter what color you use.
In this lesson, we complete a relatively small painting. The stretched canvas measures just 10" by 8". We'll begin with a light sketch of the contours of the subject without any indication of shading or value. If it helps, you may decide to lightly sketch out locations where the value changes drastically. Making a note of these locations may take a bit of the "guesswork" out of the painting process.
We'll start the painting process by addressing the strongest areas of dark value. The subject is in direct light, so these locations exist in the background and on the side of the head. A few strong shadows are also located around the eyes, the cheek, and around the nose and nostril.
The color of the skin is warm and is mixed with a bit of red. To increase the contrast between the background and the face, a bit of Phthalo Green is used in the mixture. Specifically, Pyrrole Red and Phthalo Green are mixed to create a dark brown. The mixture is dominated slightly by the green and then mixed with Payne's Gray to darken the value. This color is applied with a large bright brush.

With the background and initial applications of darker values in place, we can begin to develop the skin tones. A variety of tones are mixed using a mixture of Pyrrole Red, Titanium White, Burnt Umber, and Hansa Yellow.
Colors are blocked in quickly with the larger brush and details are ignored. This application is considered a "base" from which to build additional tones.
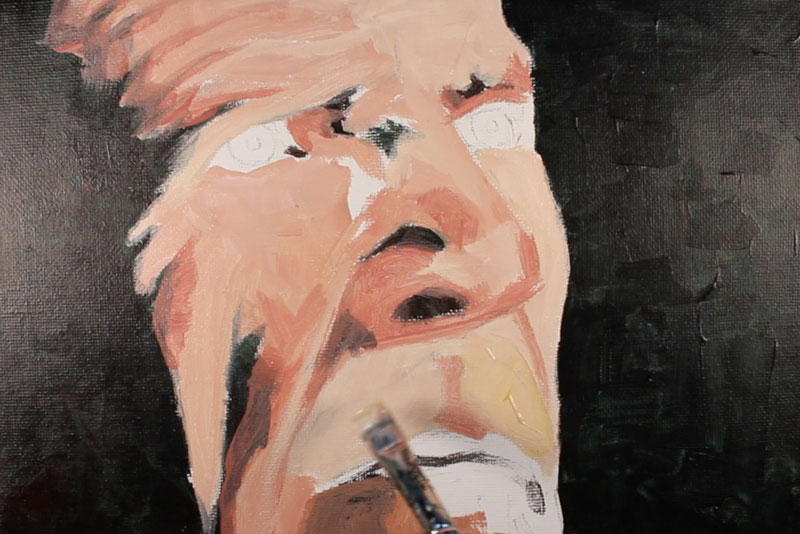
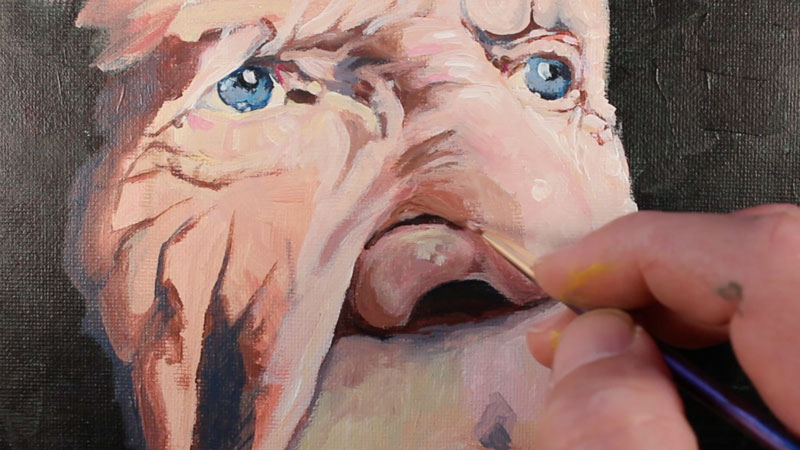
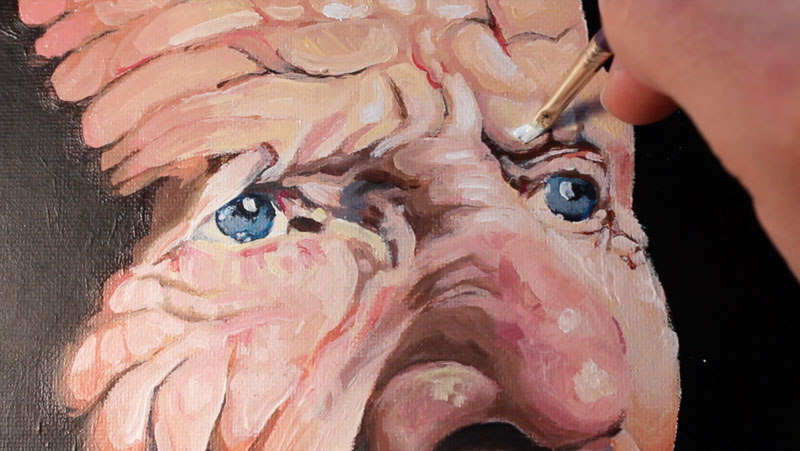
Switching to a smaller flat brush, the eyes are addressed with a mixture of Phthalo Blue and Titanium White. The pupils are added over the top with a dark mixture of Payne's Gray and Burnt Umber before highlights are delicately applied over the color.
Work continues on the details around the eyes and down the nose. Various mixtures of Pyrrole Red, Titanium White, Hansa Yellow, and Burnt Umber are used. Brush strokes remain strong and deliberate as the paint is applied with little water.
A bit of Magenta is introduced to the mixture and applied in areas such as the side of the nose and the corners of the eyes.
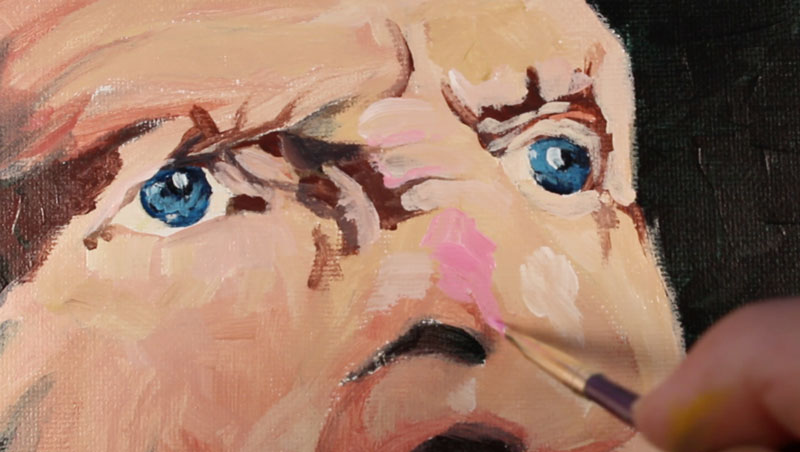
The development of darker and lighter values with slight variations in the color continues. Color is applied down the nose and on the side of the face. Some cooler tones are introduced by mixing a bit of Phthalo Blue, Pyrrole Red, and Titanium White.
This area is worked for quite a while before moving on to the areas around the mouth.
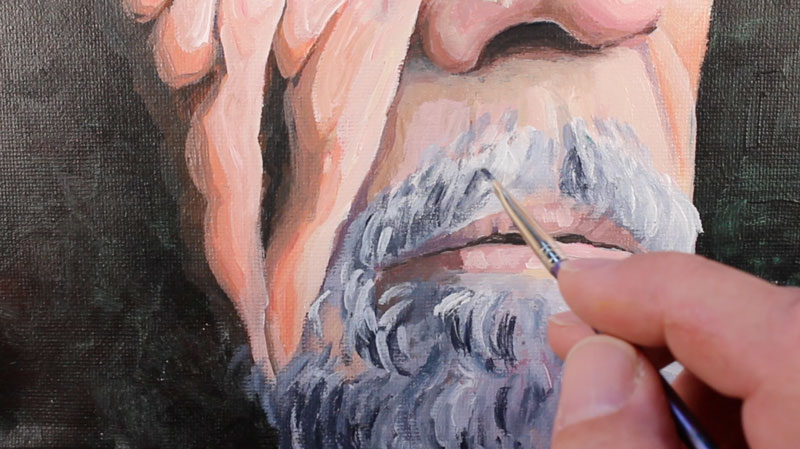
We continue to enhance the value relationships around the lower portion of the face, slowly developing the illusion of form and light. Over the top, variations of a mixture of Payne's Gray and Titanium White are applied to develop the facial hair. Here again, the brush strokes remain strong and visible.
The upper portion of the head is developed much like the areas around the eyes. Again various mixtures of Pyrrole Red, Hansa Yellow, Titanium White and Burnt Umber are used. Values are addressed progressively from dark to light. In other words, lighter values and warmer tones are layered on top of darker, cooler variations.
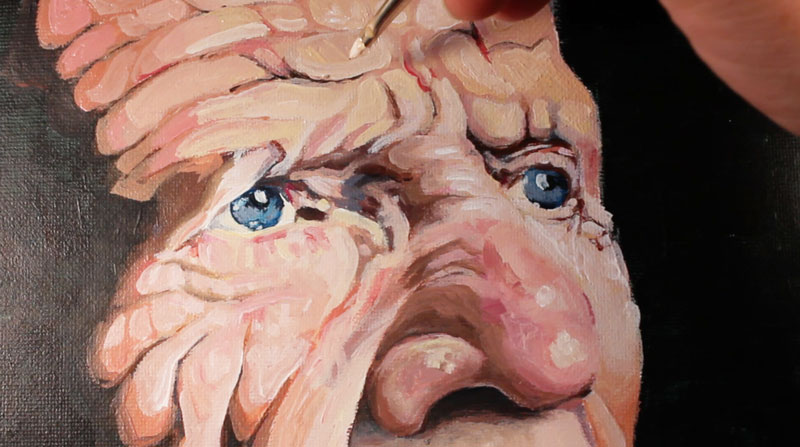
With the majority of the face addressed, the edges and transition areas are cleaned up with a heavier application of the original darker mixture using the larger bright brush.
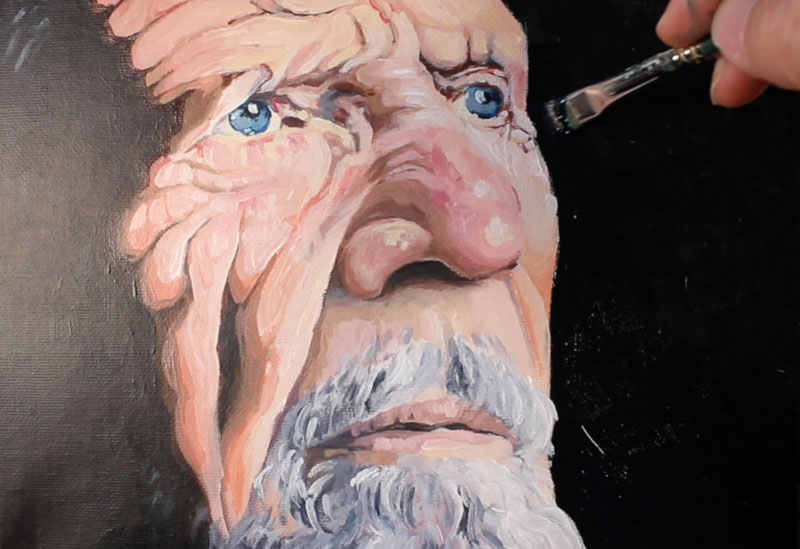
A few cooler highlights are added last. Just a touch of Phthalo Blue is added to Titanium White to create this color. It is added sparingly to selected locations on the forehead and cheeks.
The completed painting features defined brush strokes and obvious shapes of color and tone, yet still communicates the subject and the light within the scene.