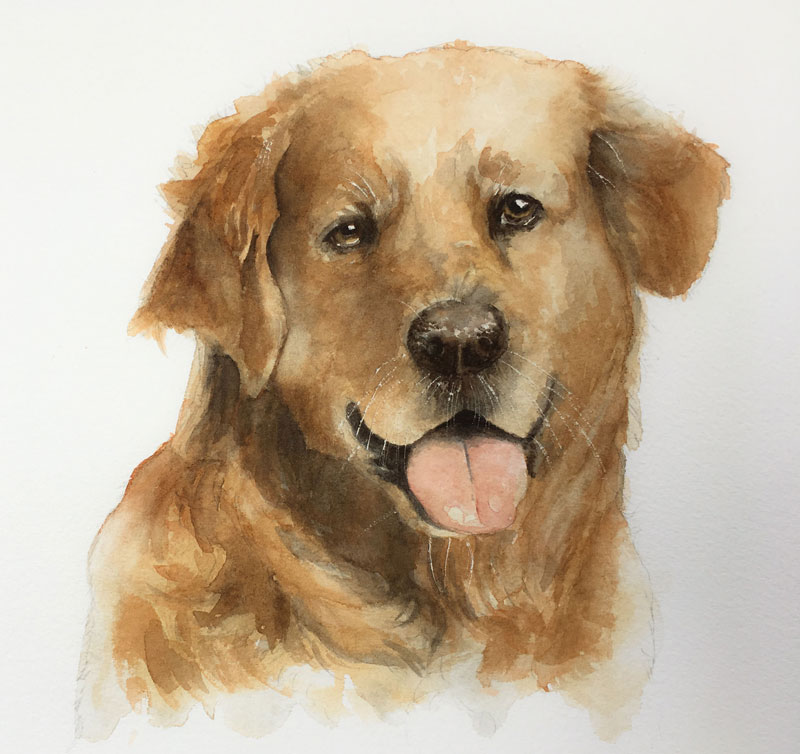
In this watercolor lesson, we'll take a look at painting a portrait of a Golden Retriever. While the painting progresses through many different stages along the way, we'll keep two important things in mind.
The first is patience. We'll patiently allow each layered application to increase the depth and interest in the subject. Each application is translucent, meaning the colors underneath will affect how the final color is perceived. Through layered applications, we can create complex colors.
The second thing we'll consider is the nature of watercolor. Watercolor wants to flow with its vehicle (water). We must allow it bleed and move freely at times in order to produce a painting that captures the aesthetic characteristics of watercolor. This doesn't mean that we can't control it to produce the results that we desire. It simply means that we should allow the watercolor a bit of freedom of movement.
(Some of the following links are affiliate links which means we earn a small commission if you purchase at no additional cost to you.)
I absolutely love my field watercolor set by Winsor and Newton. It features 12 cake Cotman watercolors and it's small and easily portable. I use it all of the time, even when I'm not on the go. Since the colors are layered and much of the mixing occurs optically, only a few essential colors are needed.
I also love working on Arches cold press watercolor paper. In most circumstances, the 140 lb. surface is suitable. If your painting is larger or if you're planning on creating lots of water-heavy washes, then a heavier paper may be better suited for you.
When it comes to watercolor painting, I prefer to use nylon brushes. My favorites are the Goldenedge brushes by Grumbacher. These brushes have a nice "spring", making them a little easier to control. All three brushes used in this lesson are round tips with sizes of 14, 4, and 00. (Keep in mind that different manufacturers measure the size of their brushes differently. A size 4 for one brush company may be different than a size 4 for another.)
Recommended Materials for This Tutorial
We'll begin with a loose sketch or transfer of the contour lines using an H graphite pencil. No value or shading is applied to the sketch.
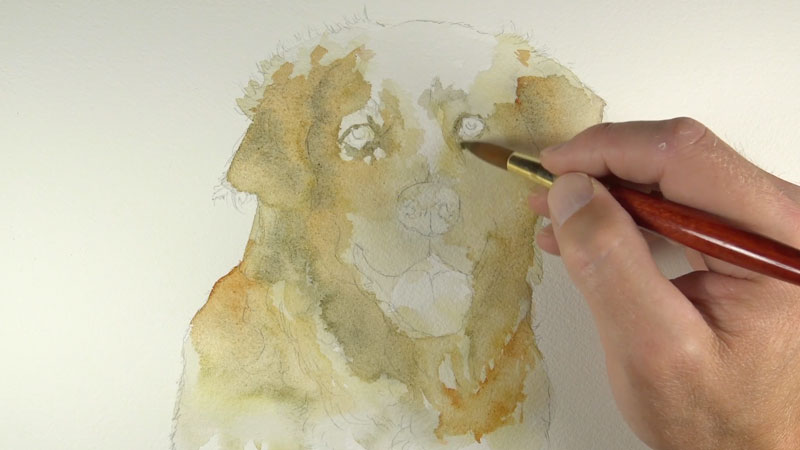
We'll apply a quick wash of water over the head, neck, and body of the dog. Then, we can begin adding our first washes of color. Yellow Ochre, a bit of Burnt Sienna, and a few touches of darker tones mixed Burnt Umber and Cobalt Blue, are added to the wet surface. This wet into wet application allows the colors to bleed together, establishing a nice base for us to build upon.
Watercolor painting is a process of developing darker values. As the painting progresses, the range of value broadens and the contrast between tones increases. This is can be a gradual process or a quick one, but either way - we should preserve the areas of lighter value as we go.
With our initial washes of color in place, we can begin darkening the areas of darker value. These locations include the eyes, the ears, the mouth, the nose and just underneath the head. Translucent applications of a dark mixture of Burnt Umber and Cobalt Blue are applied before being moved and shaped with the brush.
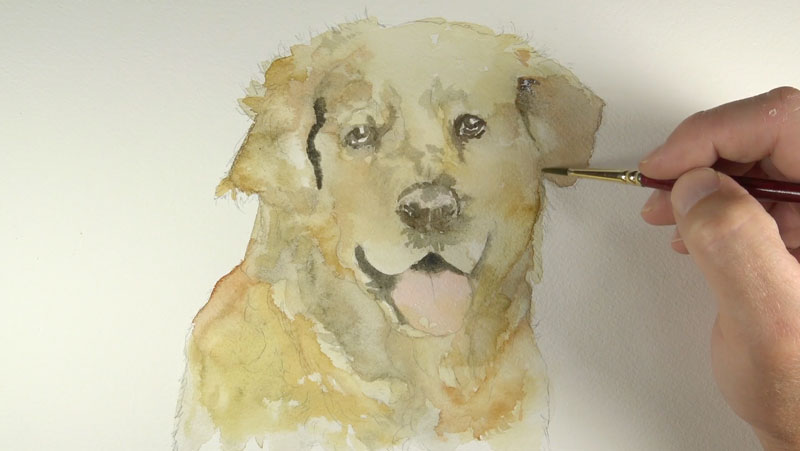
We'll continue to build washes of color. With each layer, the colors become more complex. We'll continue to apply Burnt Sienna and Yellow Ochre and mixtures of these colors as the main colors for the fur. As these colors overlap, they mix optically. As we go, we'll continue to darken the locations of darkest value and high contrast, working the entire painting.
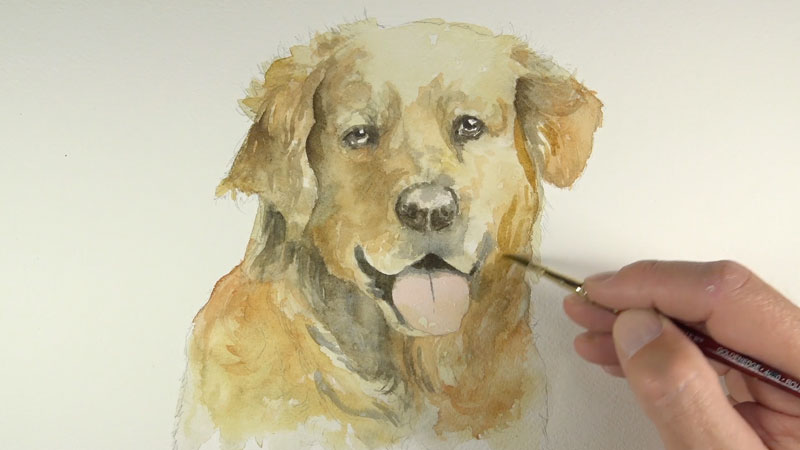

As the painting progresses, the form of the dog starts to take shape. The range of value is maturing at this point and we can begin honing in on the details, bringing the painting to life. We'll switch over to a smaller round brush and address the eyes, the nose, and the details of the mouth. Heavier concentrations of color are applied at this stage.
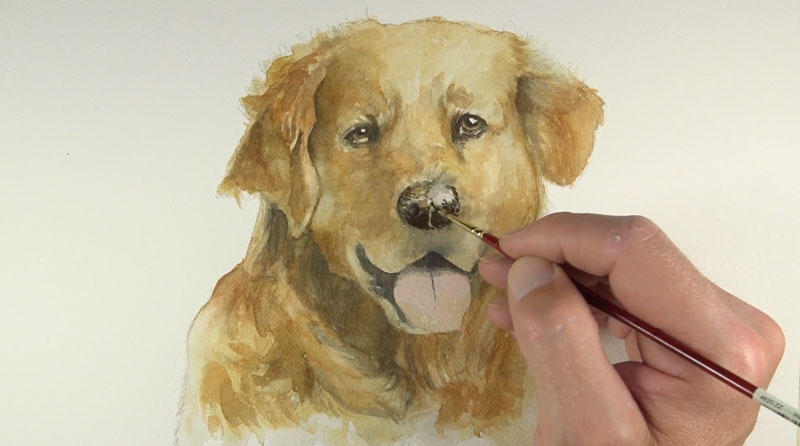
To finish the painting, we'll add a bit more color to the tongue and allow the painting to dry completely. For the whiskers, we'll use a scratchboard etching tool to gently remove a bit of pigment from the paper.
Watercolor painting requires a bit of patience and an understanding of the nature of watercolor. We must allow our paintings to patiently develop through layered applications of color, but allow the water to move the pigment as we go. We have to let go a bit and trust that the opportunity to refine details will present itself when the time is right.