 by Matt Fussell
In this lesson, we'll take a look at creating a portrait sketch with charcoal. Charcoal is a "loose" drawing medium. This doesn't mean that we can't use charcoal to create highly detailed and realistic drawings. It just means that we need to be aware of the behavior of charcoal and work within its boundaries. If we attempt to draw with charcoal as we do with graphite, pen and ink, or even colored pencils, we may encounter some frustration. But if we approach a charcoal drawing in stages - starting with broad shapes of value, gradually refining the details as we go - then we are much more likely to find success.

Although a broad range of materials are not required for drawing with charcoal, a few materials are considered essential. You will need both vine and compressed charcoal, a suitable drawing surface, and a kneaded eraser. Although blending stumps are not required, they are suggested for precision.
Recommended Materials for This Tutorial
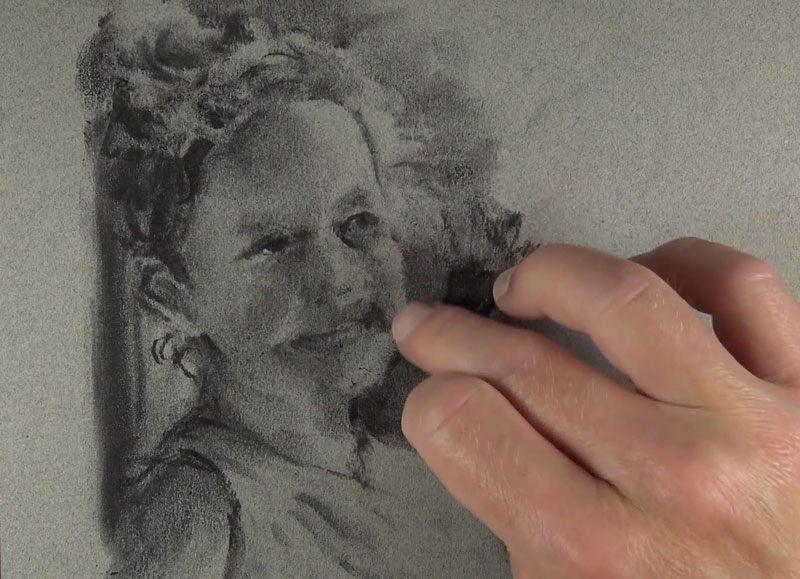
Vine CharcoalWe'll begin by focusing on the shapes of darker values. We'll block these locations in with quick applications of the vine charcoal. Much like with opaque painting, we want to get an ample amount of the material on the surface quickly. We can then alter the drawing easily with the kneaded eraser and subsequent applications of the vine charcoal.
Clearly, the locations of the facial features are important and we'll consider them in this early stage. But if we are too rigid and attempt to become too precise with the vine charcoal, we may become frustrated. Vine charcoal is simply too soft and powdery to be used in a similar manner as a more precise tool such as a pencil.

Once we have our initial locations of darker value in place, we can begin adding lighter values. Since we are working on gray paper, our lightest tones to this point match the value of the paper. Since we need to create a full range of value in the drawing, we'll need to add lighter values with white charcoal. In this case, the lighter values are addressed with a white charcoal pencil. The drawing is still very rough at this stage. Remember - we are developing the details over the course of the drawing, allowing them to develop as we manipulate the applications of charcoal.

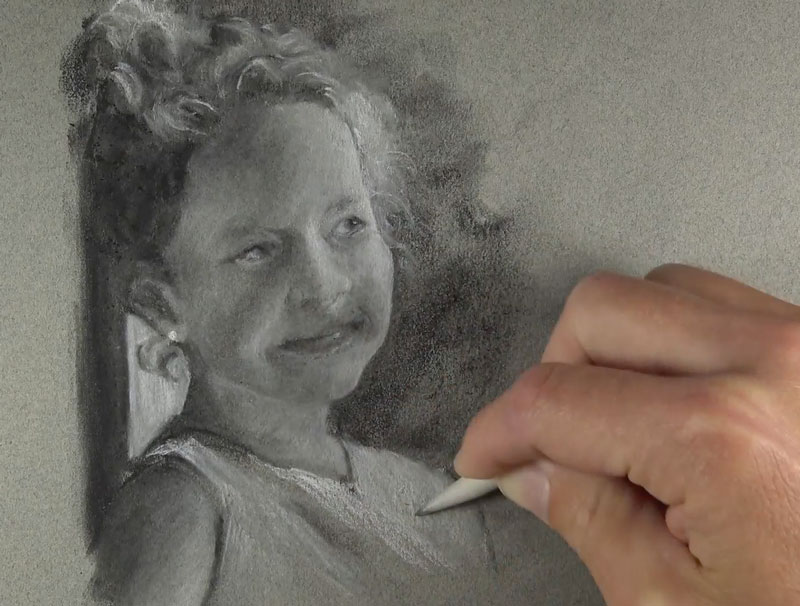
To smooth transitions of value and to create the illusion of realistic skin texture, we'll use a blending stump. The blending stump also softens the image. The smaller strokes made with the blending stump flow over the cross contours of the subject, further communicating the form.

We can continue to increase the range of value and the contrast with additional applications of charcoal. Lighter values are strengthened with additional applications of the white charcoal. As these additional applications are made, the details of the face, hair, and clothing are refined.

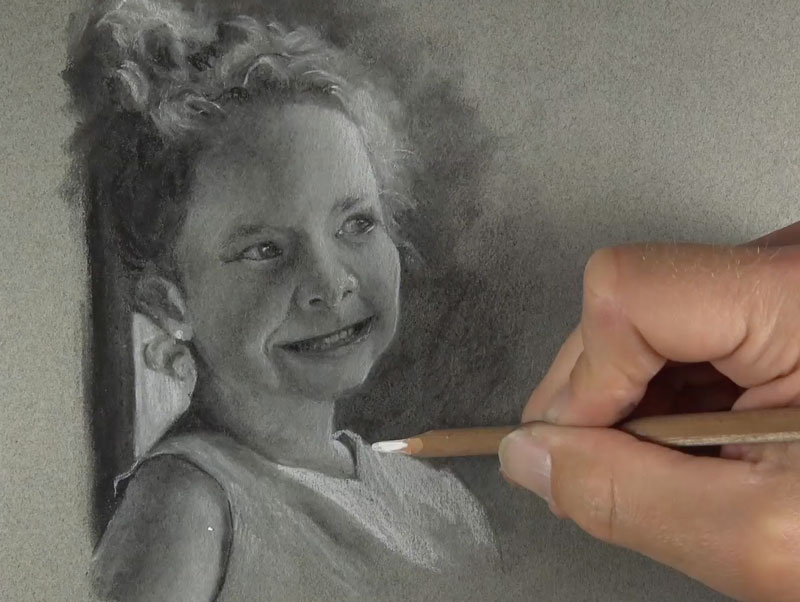
For additional contrast, a bit of darker value is added behind the face with vine charcoal and gently blended with a finger. The details of the background are purposely left out so that more focus is placed on the face.


Final adjustments are made to the drawing with the black charcoal pencil to increase the contrast. And after a few refinements to the details of the face, the portrait drawing of the young girl is complete.

In order to be successful with any drawing medium that we choose, we must understand how it behaves. We can't expect to approach a charcoal drawing in the same manner that we would approach a colored pencil or a pen and ink drawing. We must allow the details to develop as the drawing develops, instead of focusing on creating them from the start. If we focus our attention on the relationships of value - blocking them in during the earlier stages - and then focus on refining the details in the latter stages of the drawing, then we are more likely to find success with charcoal drawing.