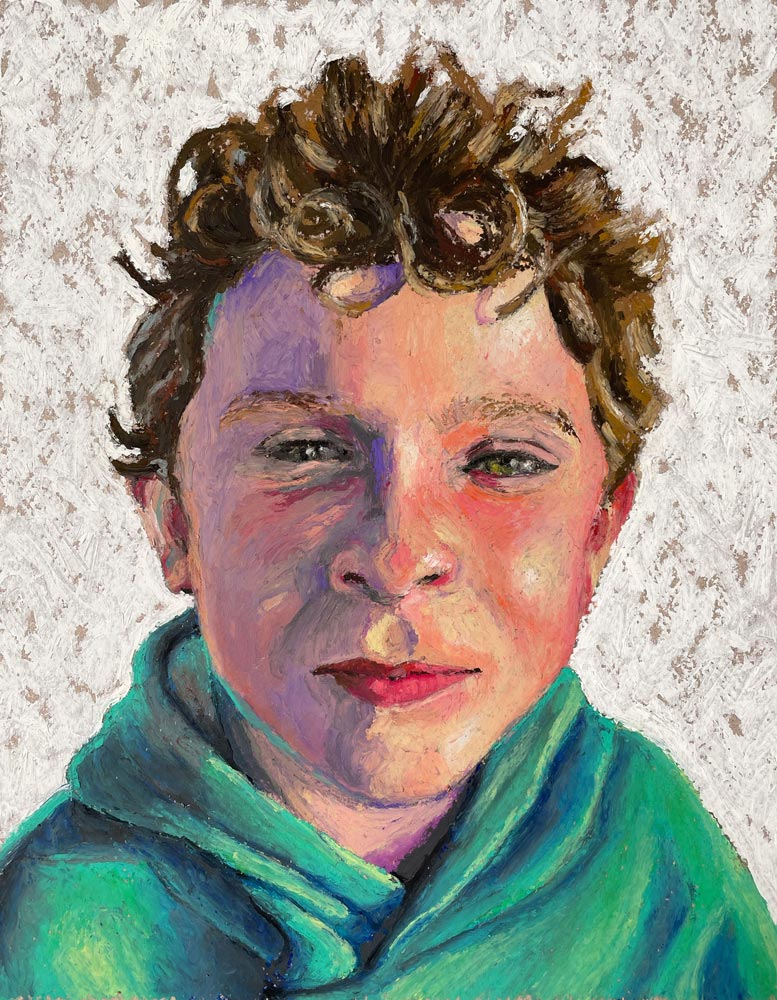
The Oil Pastel Course: Colorful Portrait
This course features:
Over 4.5 Hours of Instruction
22 Videos
7 eBooks
30 Day Money Back Guarantee
Course Curriculum
MODULE 1: INTRODUCTION AND MATERIALS
MODULE 2: APPLICATION TECHNIQUES
MODULE 3: THE BASICS OF COLOR
MODULE 4: BASIC FORMS
MODULE 5: BLACK-EYED SUSANS
MODULE 6: IMPASTO SKY
MODULE 7: COLORFUL PORTRAIT
Materials and Transfer (6:09)
Color Scheming (16:38)
Creative Skin Tones (18:13)
The Eyes and Lips (11:20)
The Hair (11:38)
Clothing and Background (15:08)
Lesson Description
In this module, we'll create a colorful portrait with oil pastels on toned paper.
Lesson 1 - Materials and Transfer
In this lesson, we take a look at the materials used for this series and use a graphite transfer to get our contours in place.
Lesson 2 - Color Scheming
In this lesson, we begin applying oil pastels to the face by using strong colors underneath more natural skin tones.
Lesson 3 - Creative Skin Tones
In this lesson, we continue developing the form of the face by increasing the contrast in value.
Lesson 4 - The Eyes and Lips
In this lesson, we add the eyes and the lips to the portrait.
Lesson 5 - The Hair
In this lesson, we concentrate on shapes of color and value to develop the hair.
Lesson 6 - Clothing and Background
In this lesson, we complete the drawing by addressing the clothing and the background.

Lesson Materials
- Canson Mi-Teintes Pastel Paper (Warm Gray)
- Oil Pastels
- 4B (or darker) 6B Pencil
- H-2H Graphite Pencil

Hi Matt! Is there a certificate for this course, as there was for the Secrets to Drawing and the Pen and Ink Experience?
Hi Dustin,
Sorry, I’m just seeing this comment. No – no certificate for this course. I’m not sure if we’ll continue offering the certificates with future courses. They are mostly used for teachers whose districts count credit hours towards renewal.
No worries Matt. I was just thinking it was fun to collect them.
Hi Matt,
Thank you for these wonderful tutorials. I’ve learned a lot. This portrait is beautiful. Watching you build the shade parts was scary for a little while, but it all came together in the end! I get to stages like that and think oh man this is not gonna work and I don’t know how to work my way through it. So thank you for that. I have a question though. I store my soft pastels by taping a piece of glassine to them and stacking them and they’re fine. How do you store oil pastels since they are textured and never dry? Thanks for any advice. 😊
Hi Faye,
I typically just keep the oil pastels in the box that I bought them in. The Sennelier oil pastels are held in cushioned holders within a box. I definitely do more damage to them when I handle them.
Hi Matt,
Thank you for these wonderful tutorials. I’ve learned a lot. This portrait is beautiful. Watching you build the shade parts was scary for a little while, but it all came together in the end! I get to stages like that and think oh man this is not gonna work and I don’t know how to work my way through it. So thank you for that. I have a question though. I store my soft pastels by taping a piece of glassine to them and stacking them and they’re fine. How do you store oil pastels since they are textured and never dry? Thanks for any advice. 😊
Oh no, I must have said that wrong sorry. 😆 Not the sticks themselves, the finished drawings/paintings. I protect the soft pastel ones by taping a piece of glassine over the top so it doesn’t get smeared since I don’t fix them. And just stack them on top of eachother and they don’t get damaged. I was wondering if you can do that with finished oil pastel paintings too, or if it would smoosh/smear them because they have texture and stay wet?
This was a great course! THANKS so much!
When you finish a drawing, how do you keep it from being smeared
When you finish a drawing with oil pastels, how do you keep it from being smeared?
Hi, Matt!
You are so calm and nurturing! Great video!
Hello Matt,
I am getting ready to start the portrait in this course. I only have Canson Mi-Tienes paper in buttercup, goldenrod, and steel blue.
Because Luke’s sweatshirt is a blue-green I was thinking the maybe the goldenrod would work best. Does that sound right?
If I don’t hear back as I know you are busy then I will use the goldenrod, or may ask in the live lesson if I remember – lol1
I hope you and your family are doing well. Greetings to all!
Teri