People are drawn to watercolor painting for a multitude of reasons. Some enjoy the soothing effect of the painting process itself. Others are attracted to the unique mark produced as the water interacts with the pigment, or the ease in which colors can be developed through multiple layers.
The portability of watercolor also makes it popular among many plein air painters and its ability to be used in conjunction with a variety of media makes it a staple for illustrators.
Because of its unique properties, watercolor must be approached in a different manner than opaque paints such as oils or acrylics. Watercolor paints are designed to be applied as translucent washes. Layering of colors is a must.
Some would argue that no other painting medium is as reliant on its solvent than watercolor. The amount of water used, the manner in which it is applied, and the surface it is applied to, all play a vital role in the appearance of the finished work. Watercolor painting is a delicate dance with water and pigment.
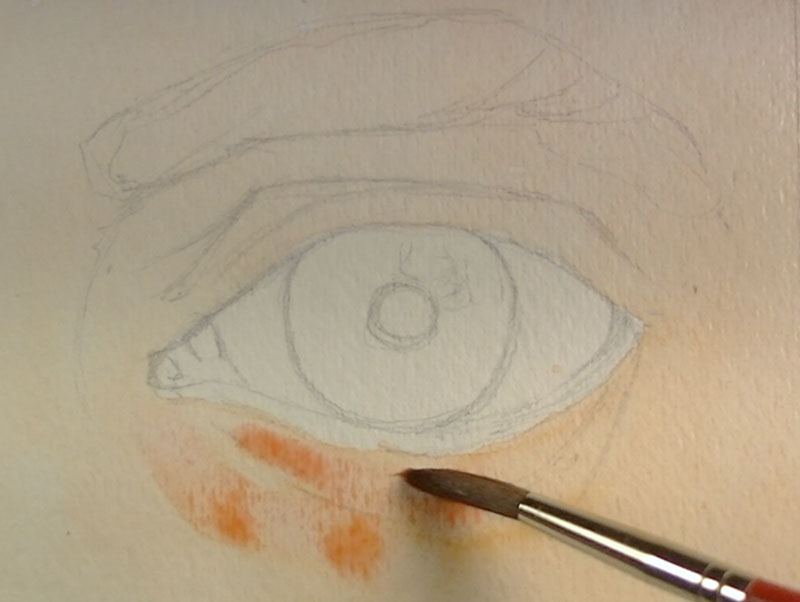
1. Use the proper surface. Watercolor paintings should be created on watercolor paper which is designed to absorb water.
2. Use the proper brushes. While any brush can be used to apply to watercolor paint, those designed especially for watercolor painting will perform the best. Natural hair bristles (Sable and Squirrel) and nylon brushes will fall into this category.
3. Preserve white areas. Painters that work with an opaque painting medium have the luxury of adding whites and light values at the conclusion of the painting. Watercolorists must consider and preserve white areas within the painting right from the start. These areas can be avoided during the painting process or protected using liquid masking fluid.
4. Allow the water to do the work (magic). Watercolor is capable of producing marks unlike any other medium. This is a result of how the water can be manipulated and behaves on the painting surface. Allow the paint to work its magic. Sometimes this means relinquishing some control.
5. Practice patience. Watercolor painting should be approached in stages, which will require a bit of patience. Developing layers of color may require allowing the layer(s) underneath to dry completely before proceeding. Working too quickly without allowing ample time for paint to dry could result in "muddied" or bleeding colors.
Recommended Materials for This Tutorial
(Some of the following links are affiliate links which means we earn a small commission if you purchase at no additional cost to you.)
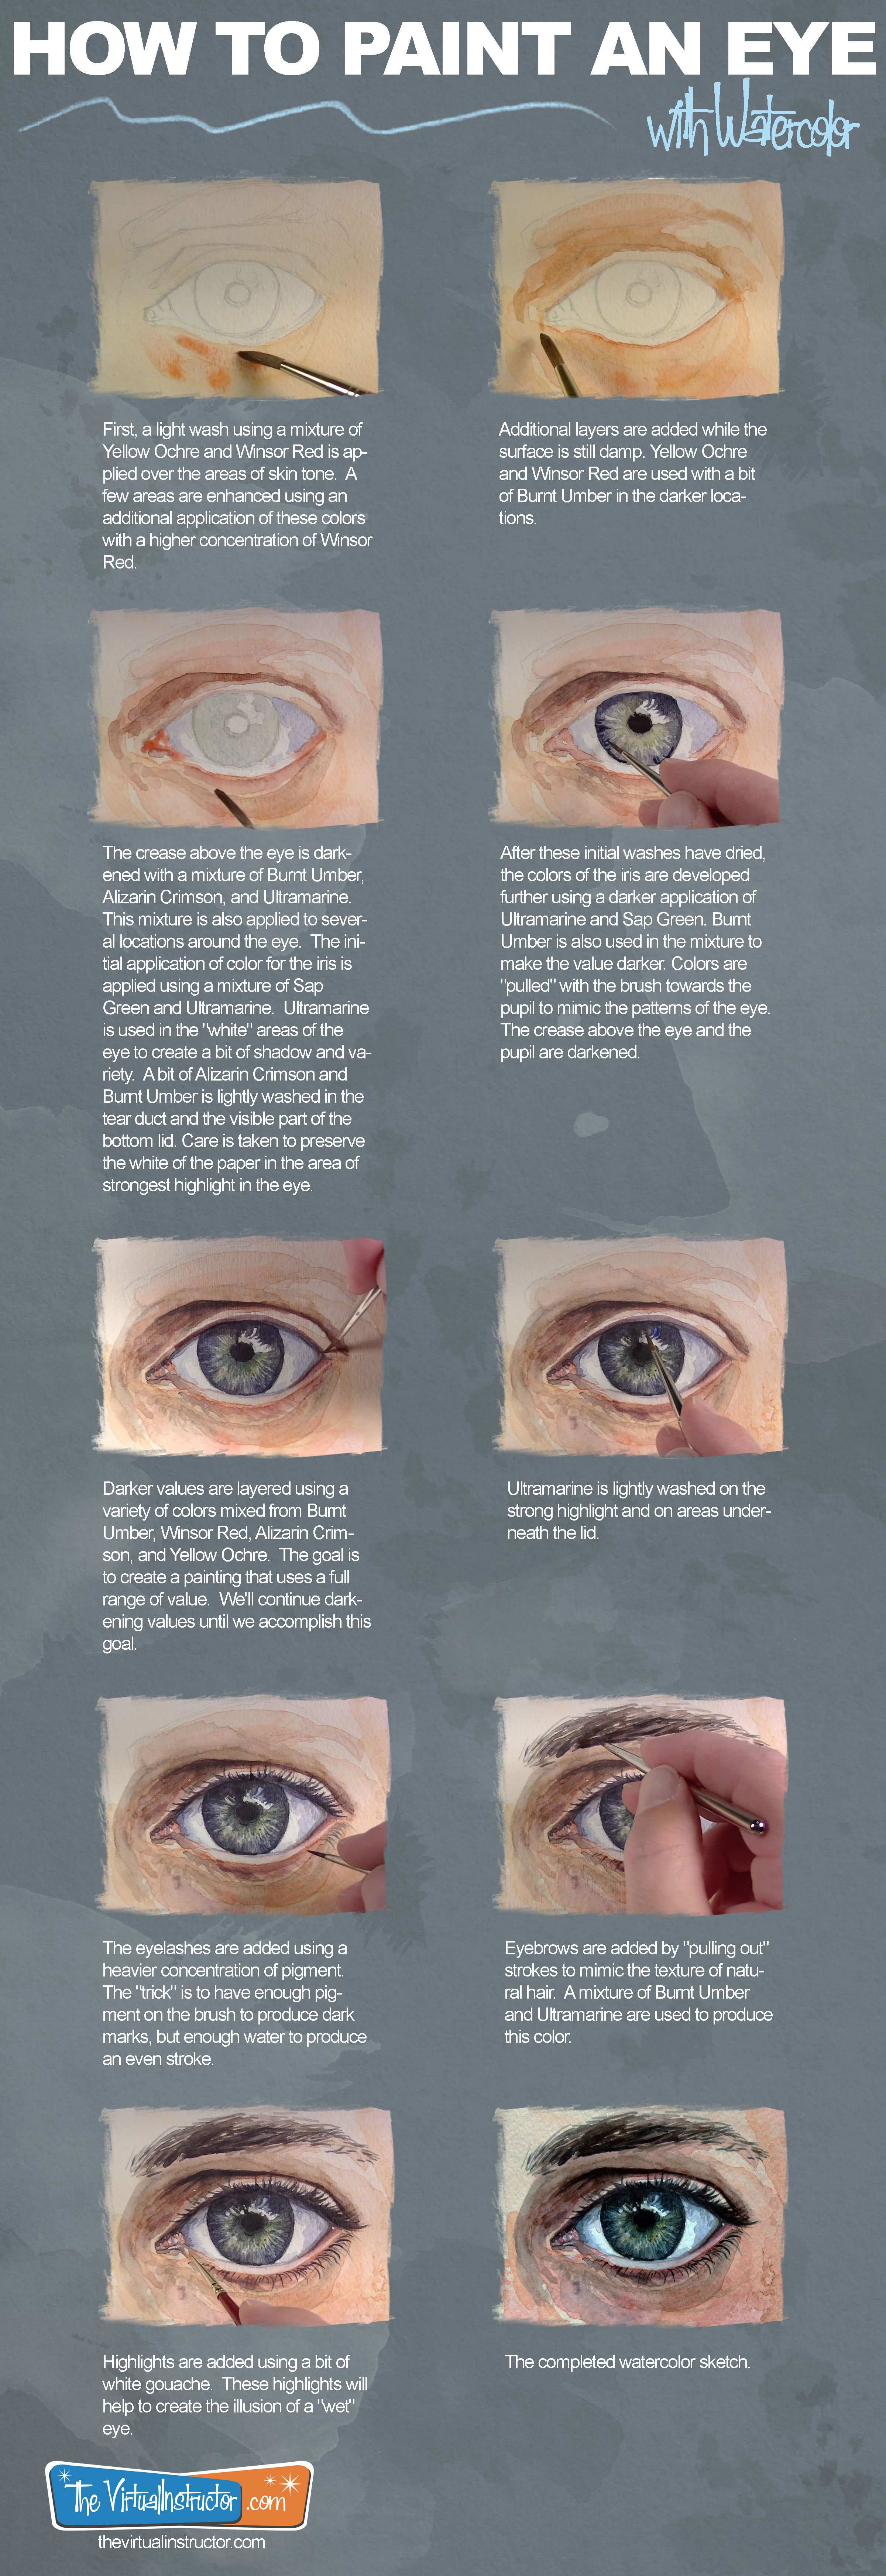
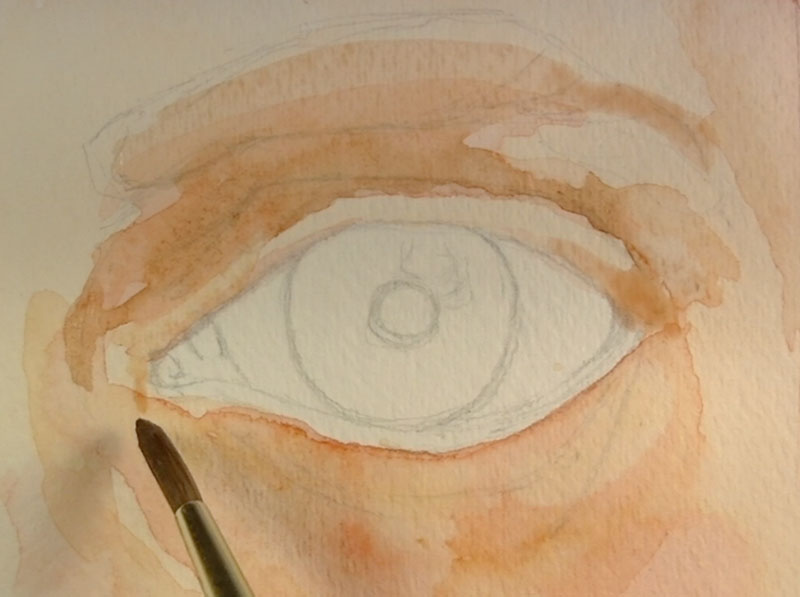
First, a light wash using a mixture of Yellow Ochre and Winsor Red is applied over the areas of skin tone. A few areas are enhanced using an additional application of these colors with a higher concentration of Winsor Red.
Additional layers are added while the surface is still damp. Yellow Ochre and Winsor Red are used with a bit of Burnt Umber in the darker locations.
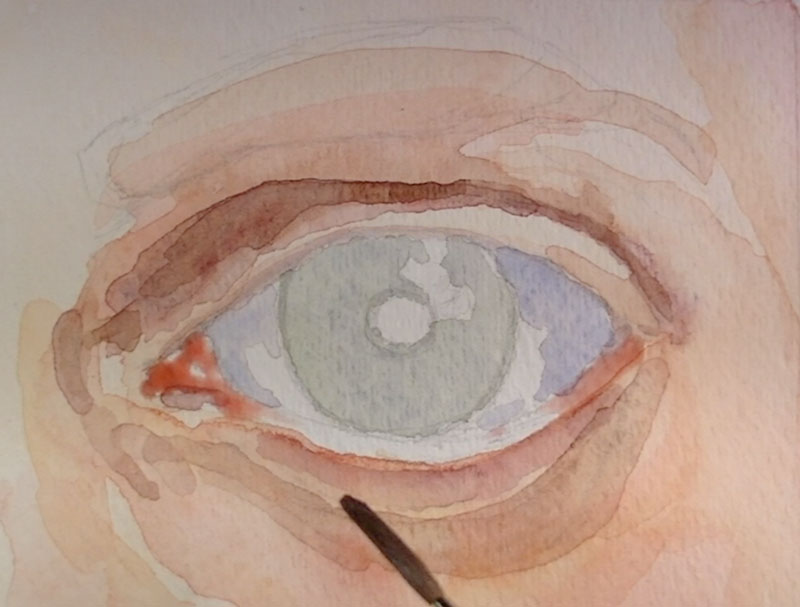
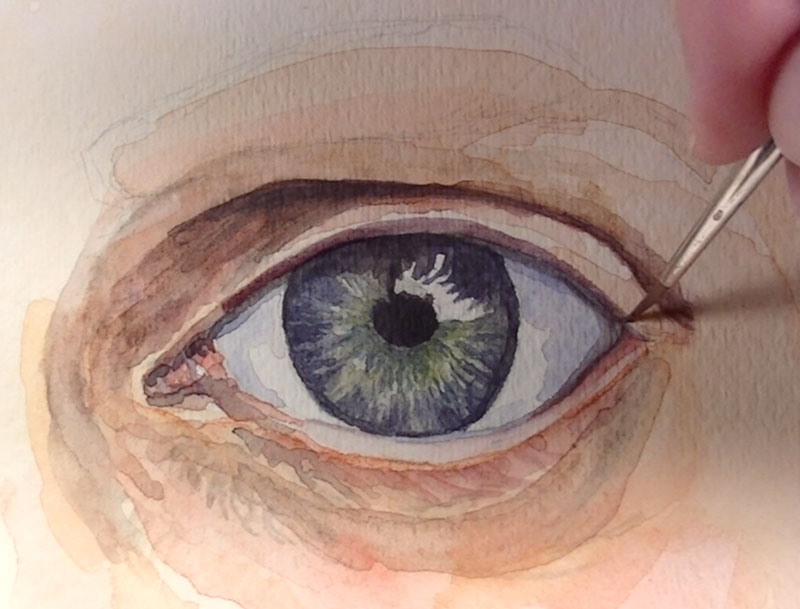
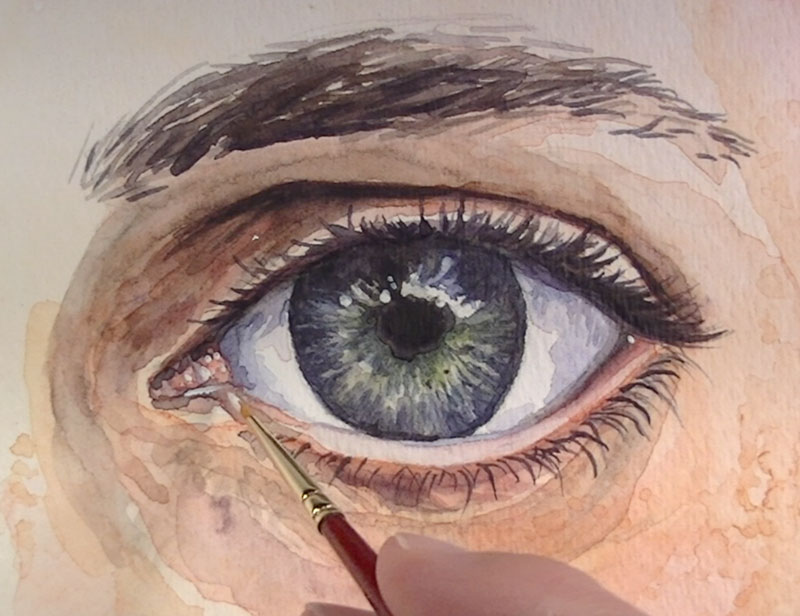
The crease above the eye is darkened with a mixture of Burnt Umber, Alizarin Crimson, and Ultramarine. This mixture is also applied to several locations around the eye. The initial application of color for the iris is applied using a mixture of Sap Green and Ultramarine. Ultramarine is used in the "white" areas of the eye to create a bit of shadow and variety. A bit of Alizarin Crimson and Burnt Umber is lightly washed in the tear duct and the visible part of the bottom lid. Care is taken to preserve the white of the paper in the area of strongest highlight in the eye.
After these initial washes have dried, the colors of the iris are developed further using a darker application of Ultramarine and Sap Green. Burnt Umber is also used in the mixture to make the value darker. Colors are "pulled" with the brush towards the pupil to mimic the patterns of the eye. The crease above the eye and the pupil are darkened.

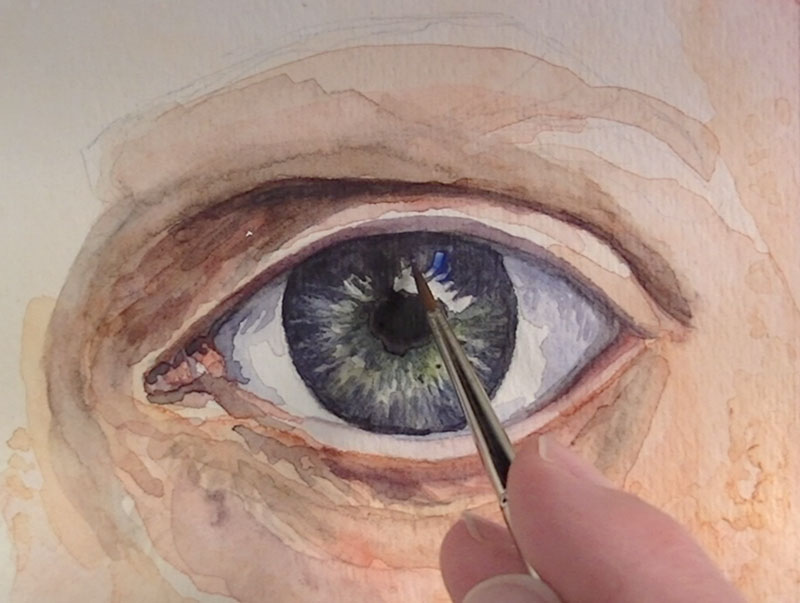
Darker values are layered using a variety of colors mixed from Burnt Umber, Winsor Red, Alizarin Crimson, and Yellow Ochre. The goal is to create a painting that uses a full range of value. We'll continue darkening values until we accomplish this goal.
Ultramarine is lightly washed on the strong highlight and on areas underneath the lid.

The eyelashes are added using a heavier concentration of pigment. The "trick" is to have enough pigment on the brush to produce dark marks, but enough water to produce an even stroke.
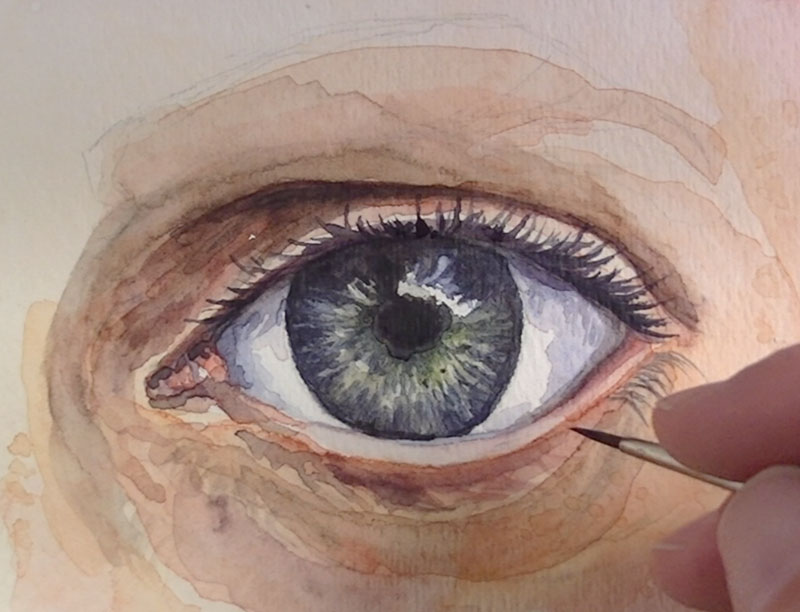
Eyebrows are added by "pulling out" strokes to mimic the texture of natural hair. A mixture of Burnt Umber and Ultramarine are used to produce this color.
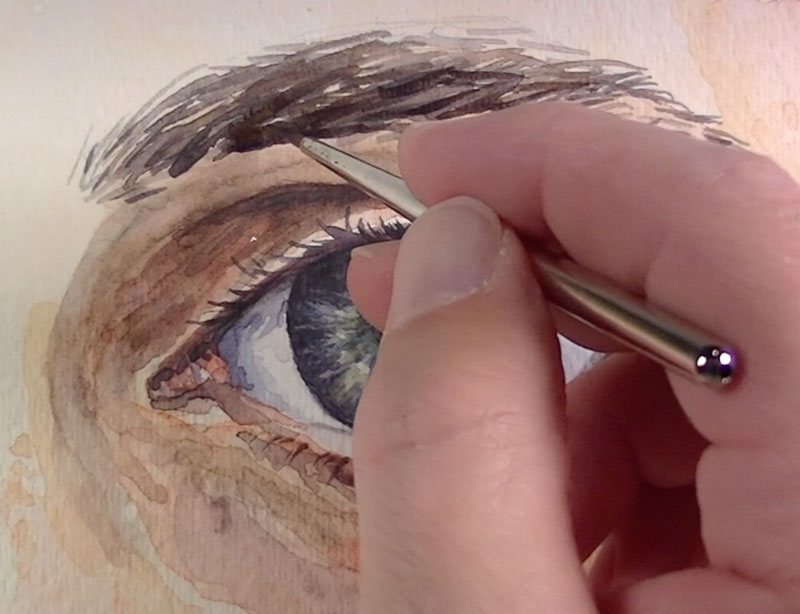
Highlights are added using a bit of white gouache. These highlights will help to create the illusion of a "wet" eye.
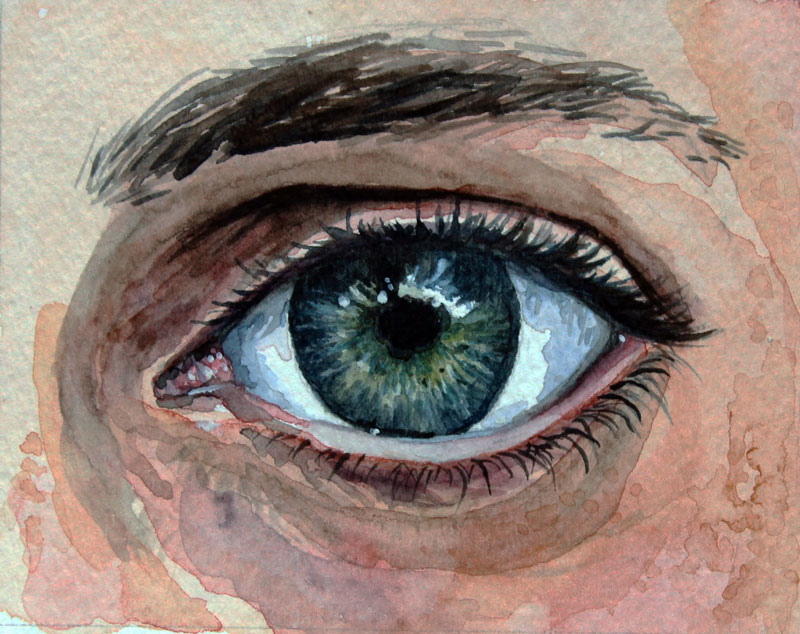
A look at the completed watercolor sketch...
Here's a "handy dandy" infographic of the process...
(Click to enlarge)