Light manifests itself in a drawing or painting through value. Value is the darkness or lightness of a color. In most circumstances, darker values are used for shadowed areas, while lighter values are used for highlighted areas. Values that are somewhere in between are commonly referred to as mid-tones.
It is crucial to create the illusion of light in a drawing or painting, since light is how we see and understand the world around us. If we are to create convincing illusions in our art, we must be able to create the illusion of light.
Light is inferred in a work based on the locations of shadows in relation to highlights and mid-tones. Our minds perceive the location and intensity of the light based on the location and intensity of the shadows.
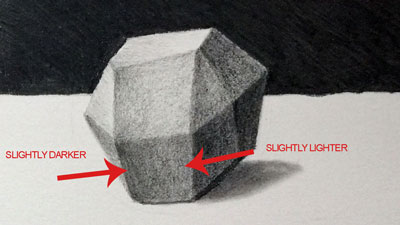
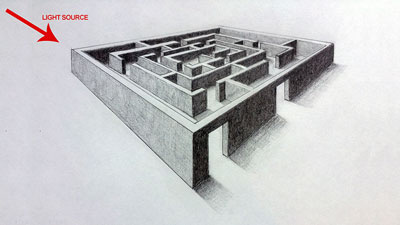
Shadows mostly can be categorized as either “core” or “cast”. Core shadows are shadows on the object itself, while cast shadows are the result of the light being blocked by the object. The shadow is then “cast” onto surrounding objects or surfaces.
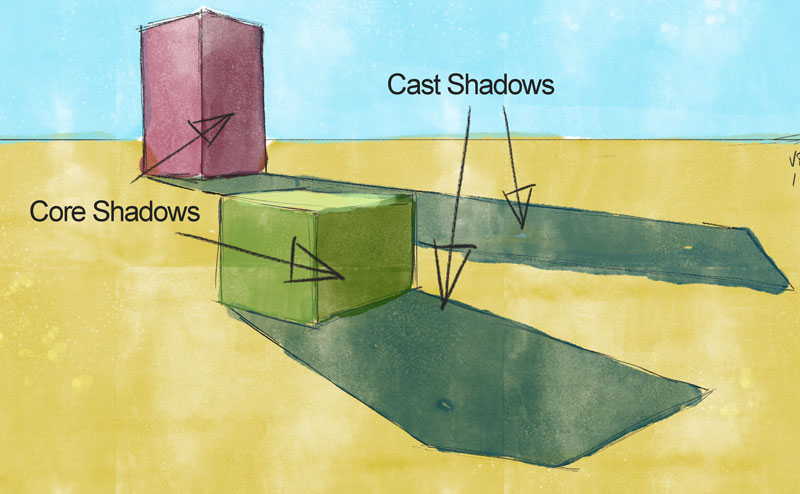
Core shadows can tell the viewer about the form of the object in the scene, while cast shadows imply the shape of the object and the direction of the light.
The shape of the cast shadow is important, as it can give your viewer clues as to the shape of the object. Some artists choose to create cast shadows that “seem to make sense” with the light source. In many situations, this is perfectly acceptable. There is, however, another approach that is much more technical and involves the principles of perspective.
For most observational drawing, the shapes of the cast shadows are clear and can be drawn or painted based on observed comparisons between positive and negative spaces. But for drawing or painting from imagination, this little “trick” can come in handy.
Let's take a closer look at each step from the video. We'll start by looking at cast shadows produced from the rectangular forms.
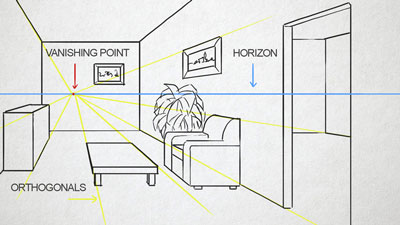
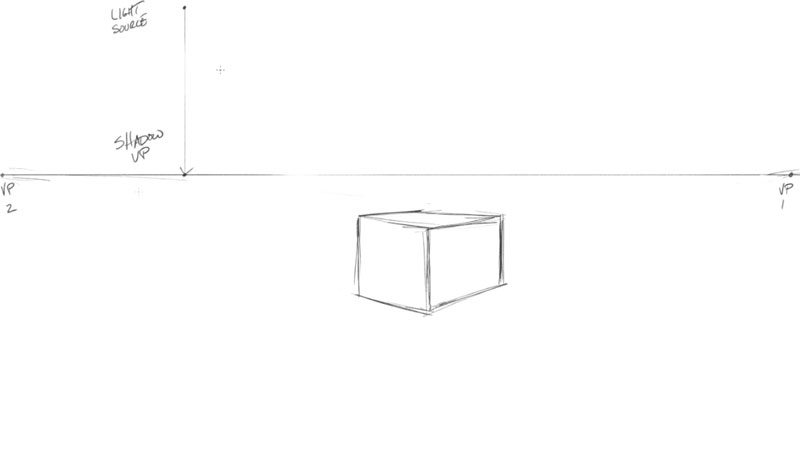
We'll start by drawing a simple rectangular form using 2-point perspective. It's important to include the horizon line within the picture plane since we'll be using it to define the "shadow vanishing point".
With our rectangular form drawn, we can define the light source somewhere above the horizon line. The closer the light source is placed to the horizon line, the longer the shadows will be.
A line can be drawn down from the light source to the horizon. The location where these two lines (line from the light source and the horizon line) intersect is the "shadow vanishing point".
Now we can draw lines from the light source outward and over the top corners of the form. Only the 3 corners that are closest to the viewer are relevant in this case.
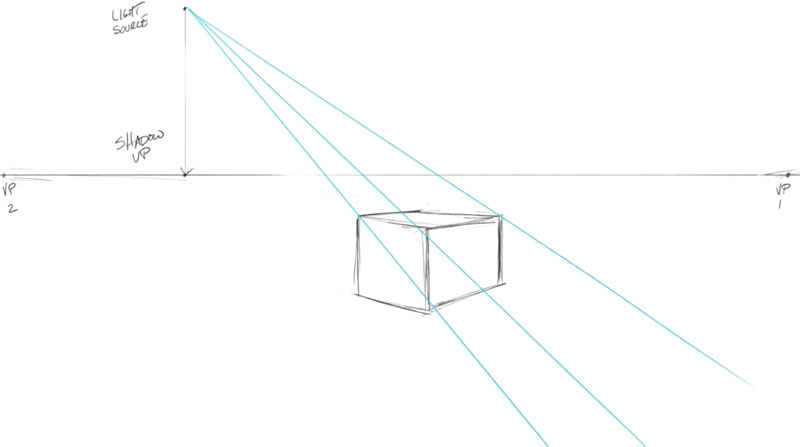
Next, we'll draw lines from the shadow vanishing point outward and over the bottom 3 corners of the rectangular form. Be sure to extend them so that they overlap the lines drawn in the previous step.
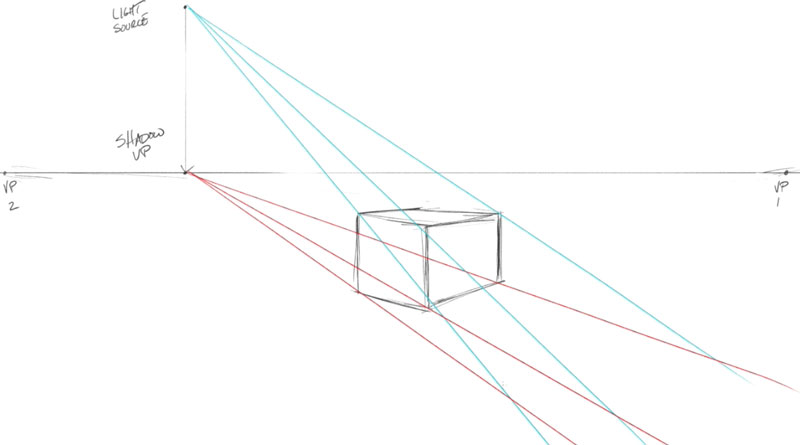
We can use the locations of intersection that result to define the shape of the cast shadow.

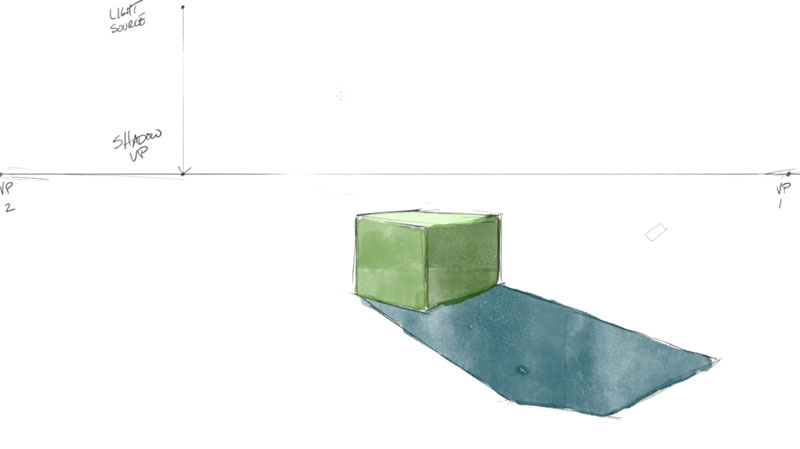
We can use the shape that is created as a guide to fill in the color of the shadow.

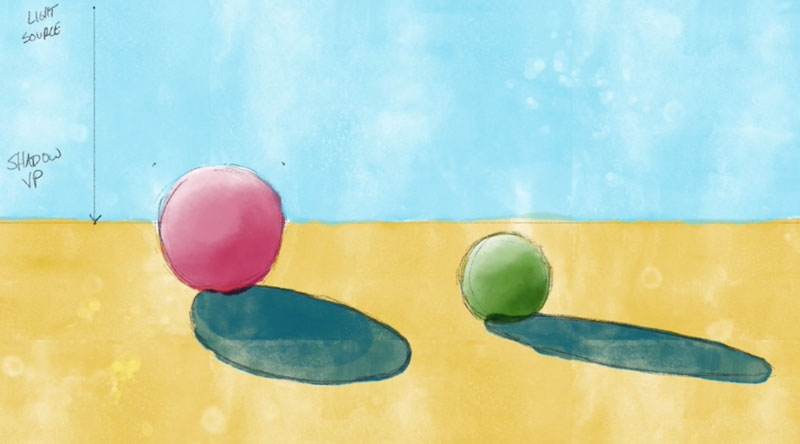
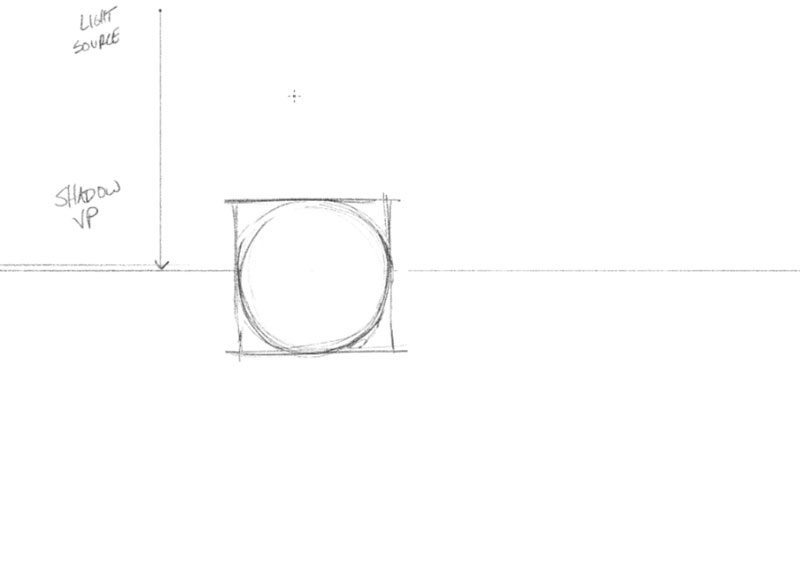
Now that we've had a look at creating cast shadows (using perspective) with rectangular forms, let's look at a strategy for handling spheres. (There are multiple ways to handle cast shadows from spheres. The method that I'm sharing here is one of the simpliest ways.)
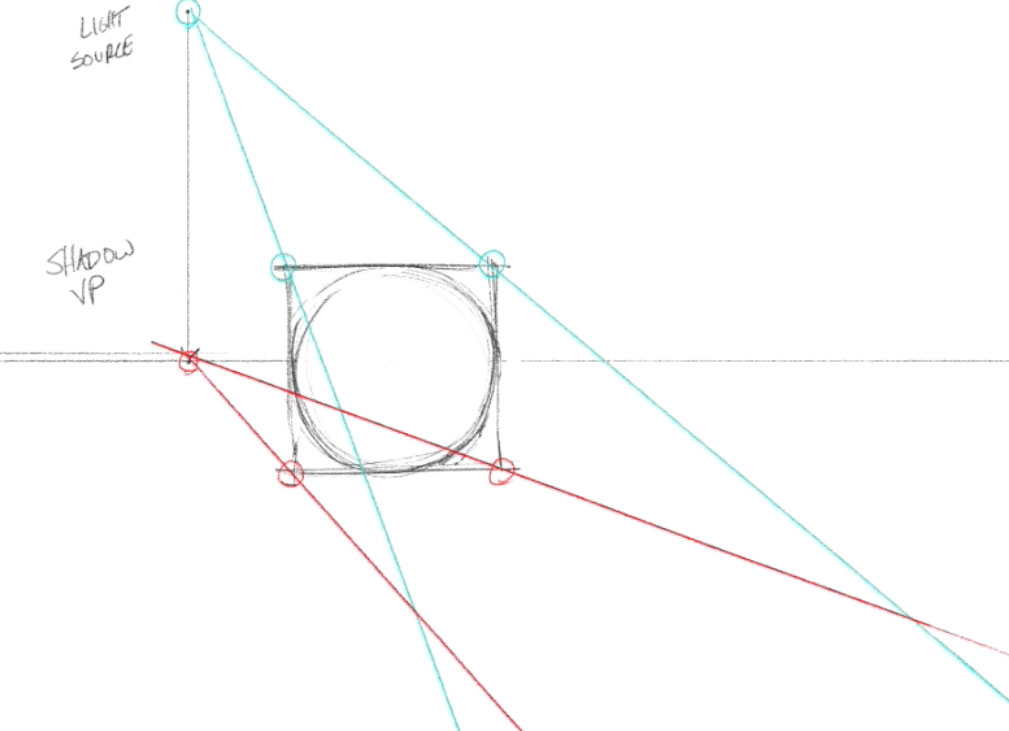
Just like with our previous example, we'll need to define the horizon line since it will be used to create the shadow vanishing point. We'll also define the light source and the shadow vanishing point.
Then, we'll draw a circle, which will become our sphere. To help us define the shape of the cast shadow, we'll also draw a square around the circle.
Next, we'll draw lines from the light source outward and over the top 2 corners of the square that surrounds the circle.
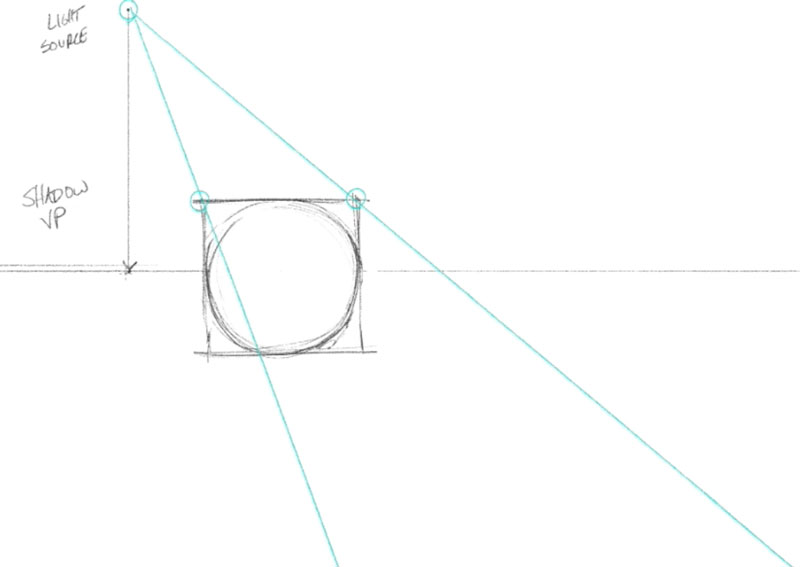
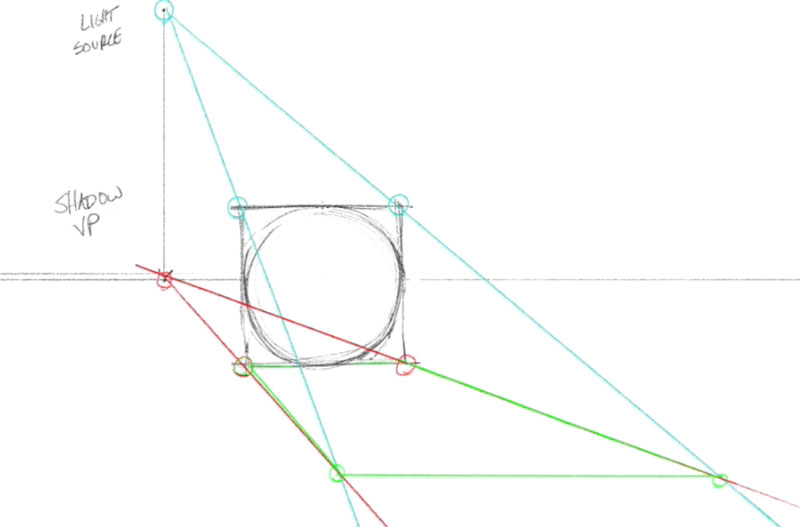
Now we'll draw lines from the shadow vanishing point outward and over the bottom 2 corners of the square.
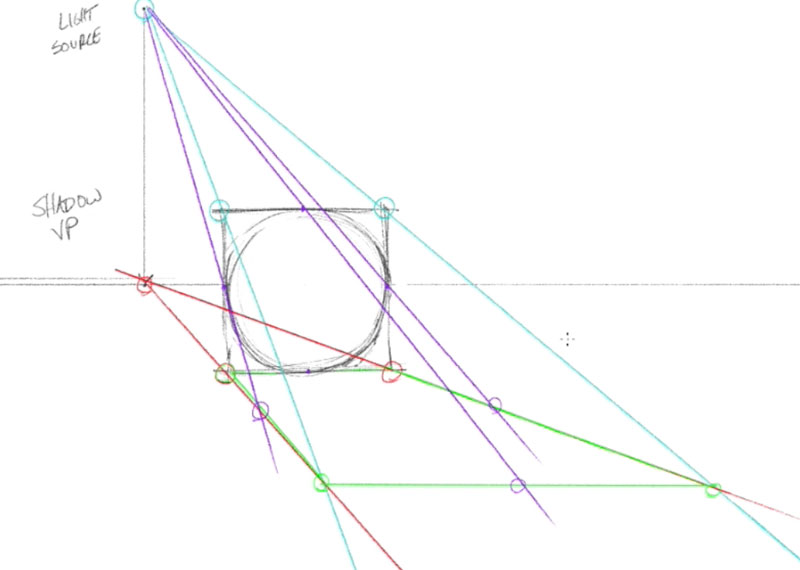
We'll create the elliptical shape of the cast shadow from the square cast shadow that we have created. But first we'll need to define where the curves will touch the edges. To find these locations, we'll draw lines from the light source over the midpoints of the square on the top portion of the square and on each side of it.
We can then use these locations of intersectionto define the shape of the cast shadow created from the sphere.
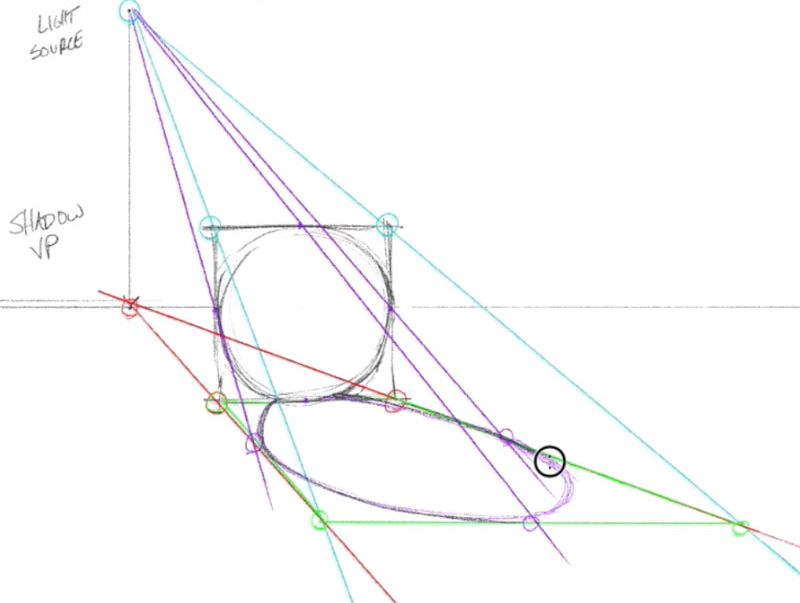
Now we can add color and value to the sphere and cast shadow to finish the image based on the guidelines that were created.