Charcoal is a traditional drawing medium that is capable of producing rich dark tones that can be easily layered and mixed. It's powdery consistency allows it to be manipulated on the drawing surface with a finger or a blending tool.
Although it is a "loose" medium, it is easy to control and refine. Mistakes or errant marks are easily removed or covered. Smooth transitions between values can be created quickly.
Some may find it difficult to control charcoal. But charcoal requires a different approach than other types of drawing media, such as colored pencils or graphite, that can produce details from the start.
Generally, charcoal is applied broadly and quickly in the early stages of a drawing. As the drawing progresses, the artist can refine details and become more deliberate with their marks.
The focus is to build up relationships of value first, rather than define specific details which can be added later in the drawing. Some compare drawing with charcoal to painting for this reason.
Charcoal is burnt organic material (wood) and commonly comes from the willow tree. Vine charcoal is soft and powdery. Commonly produced as round, brittle sticks, it is often used as an under layment for toning. It is easily erased using a kneaded eraser and smudged with a finger or blending stump.
Compressed charcoal is much darker than vine charcoal since it is a concentrated version of charcoal. For this reason, it is much harder to erase, but produces much darker values. Compressed charcoal is produced mostly as square sticks that are uniform in length. Compressed charcoal can also be encased within a pencil.

White charcoal is a pigmented version of compressed charcoal. When used in conjunction with "black" charcoal, a variety of midtones can be created. Typically when white charcoal is used, the drawing surface is toned.
A kneaded eraser is most commonly used for erasing charcoal. Kneaded erasers "lift" pigment from the surface, rather than removing it through friction. Charcoal adheres nicely to a kneaded eraser making it the most popular choice for removing the material.
Any drawing surface can be used for charcoal. Some manufacturers produce special charcoal papers, designed specifically for use with the medium. The surface used in the video above is Canson Mi-Teintes paper which features a heavy tooth conducive for accepting charcoal and other powdery media such as pastels.
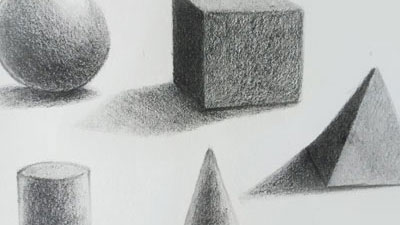
When drawing any object, our goal should be to create the illusion of light and form. This illusion is dependent on our use of value.
Light will manifest itself in a drawing through the placement of light and dark values on objects within the scene. The placement and intensity of the values will also communicate the form of the objects within the picture plane. So in essence, we define the light source through value.
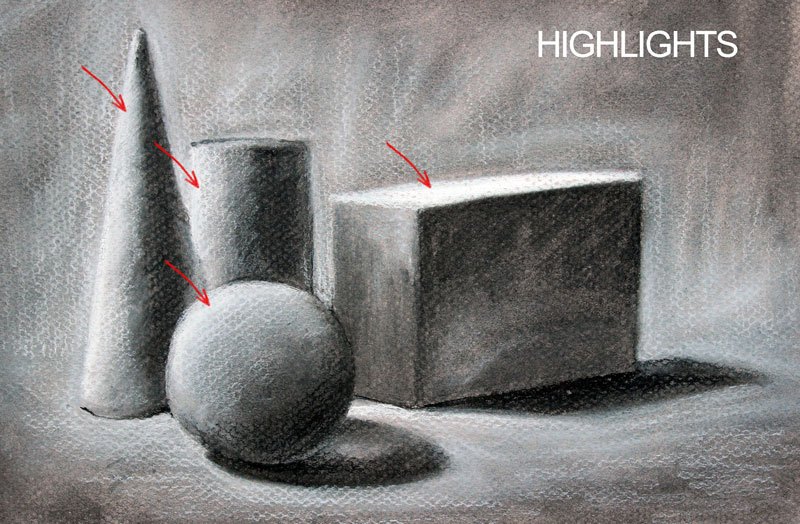
Let's take a closer look at the location of values and their specific functions in the drawing starting with highlights.
Highlights are locations within the picture plane where light is hitting the object. The stronger the light, the stronger the highlights.
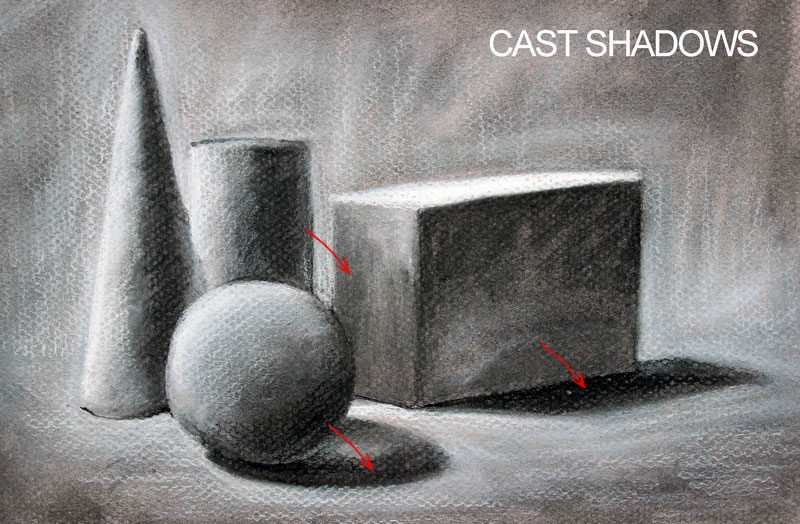
Shadows are the opposites of highlights and are areas within the picture plane where light is prevented from landing.
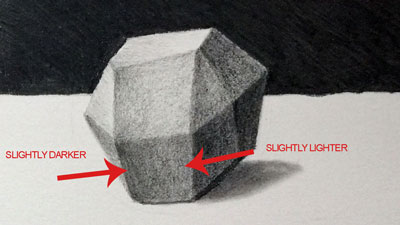
Shadows on the objects are referred to as core shadows.

Shadows that are created from objects blocking light are referred to as cast shadows.
Middle values or transition between highlights and shadows are referred to as midtones.

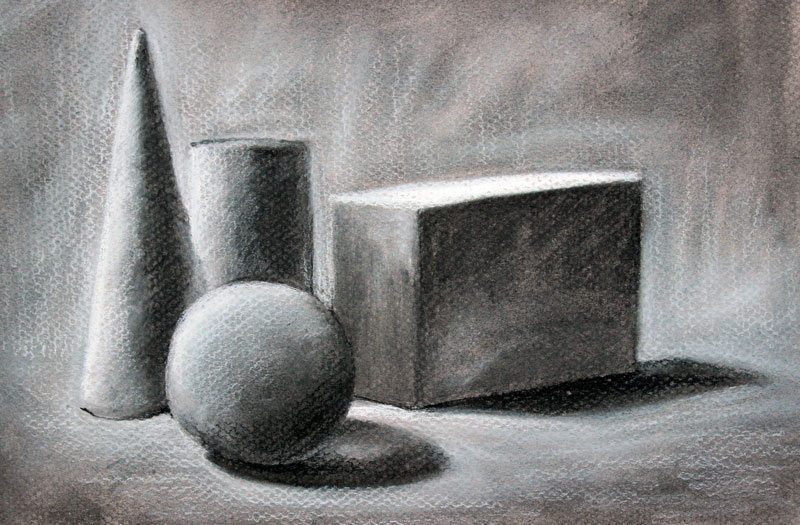
So now let's take a look at the main steps of the process.
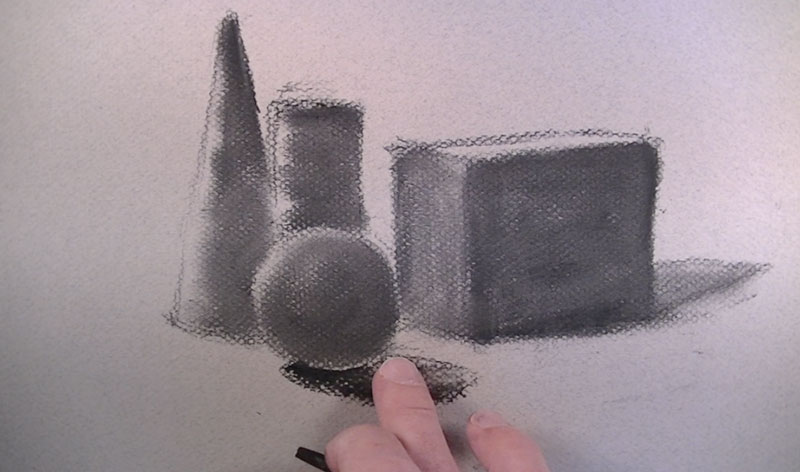
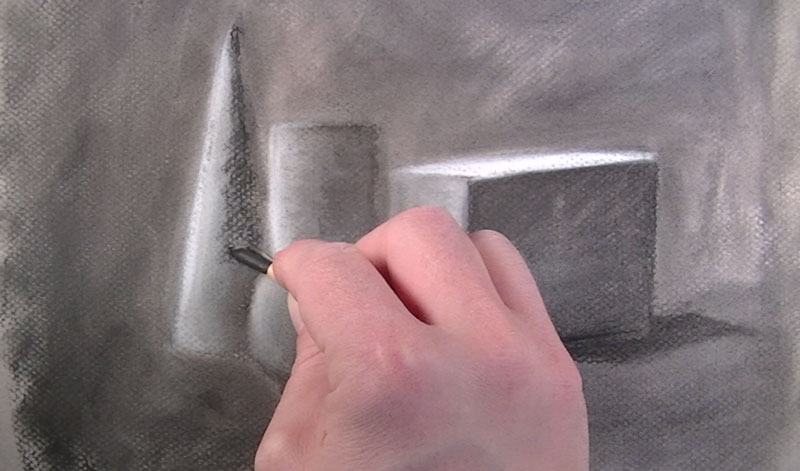
First the image is lightly sketched with a charcoal pencil and areas of core shadow are loosely added with vine charcoal. These areas are then smudged with a finger, working the material into the surface.
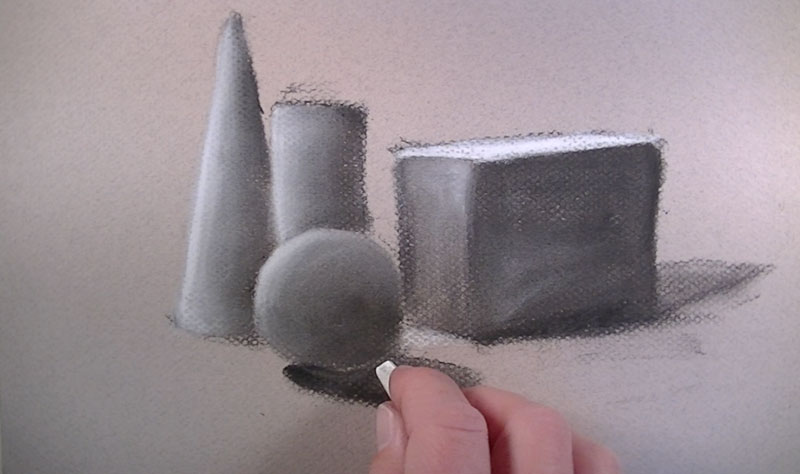
With the initial application of charcoal worked into the surface, the highlights and midtones can be developed with white compressed charcoal.
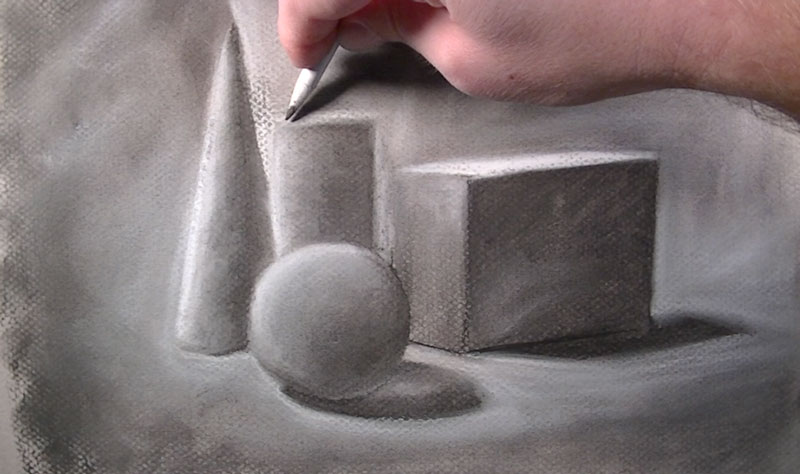
Next, a charcoal pencil is used to push the darker values found in the areas of core shadow on the forms. This application is also worked into the surface with a finger or blending stump.
To create contrast between the forms and the background, a bit of white charcoal is added around the forms and worked into the surface with a finger and a blending stump.
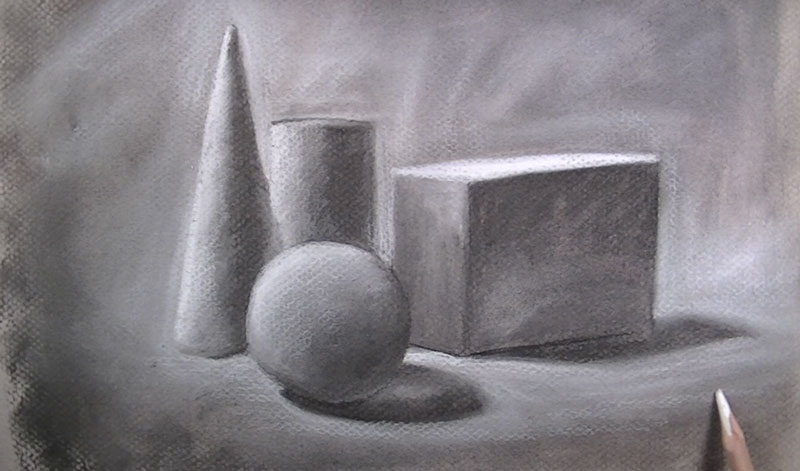
The completed drawing communicates the illusion of form and light through the use of value.