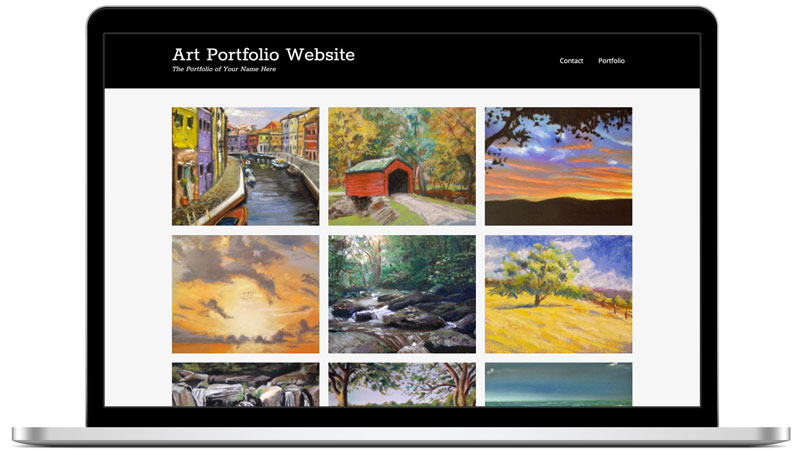
The good news is that building one is easier than you may think. Don’t worry, you don’t need to know any coding (or even have a clue as to what you are doing.)
I’ll show you how you can be up and running in a just a matter of moments. In fact, you can have your website up and running in under 5 minutes.
Customizing your site will take a little longer, but if you follow this guide, you can have your portfolio website completely set up in about 30 minutes.
This video will walk you through the entire process – from start to finish…
(Be sure to use the coupon code “TheVirtualInstructor” and get 25% off your hosting)
Here are the steps to building your portfolio website…
Step One – Purchase your domain and hosting (5 Minutes)
The cost will be about $20 for your domain and first month’s hosting. Then, hosting can be as cheap as $3.95 a month after that. If you purchase your domain and hosting through Hostgator.com, then you can use my coupon code “TheVirtualInstructor” and get 25% off your hosting fees. Hostgator.com makes the process of purchasing the domain and hosting seamless and easy. Click here to start. (This link will open in a new window so that you can continue to follow this guide.)
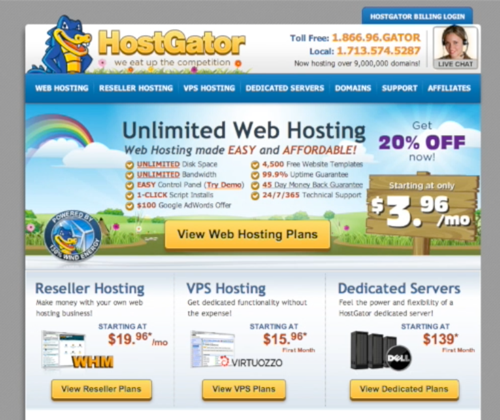
Click on the “View Web Hosting Plans” to view the available plans…
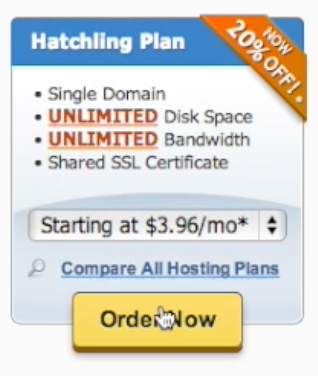
For most websites, the “Hatchling Plan” will be more than sufficient. Click on the plan that best suites your needs…
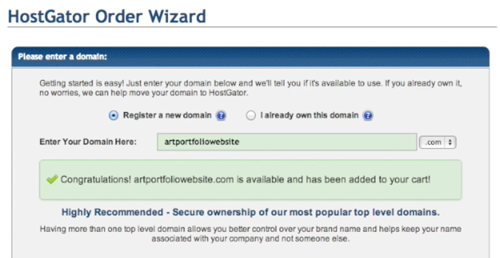
Next, you’ll need to choose your domain name, which is the “.com” or “.net”. (Not sure what a domain name is or what hosting is all about, I’ll explain it in just a moment.)
Your domain name might be “yourname”.com, but it can be whatever you want. Just type it into the box and HostGator will search and see if it is available.
 Next, confirm your plan.
 Next, you’ll be asked to put in your financial information…
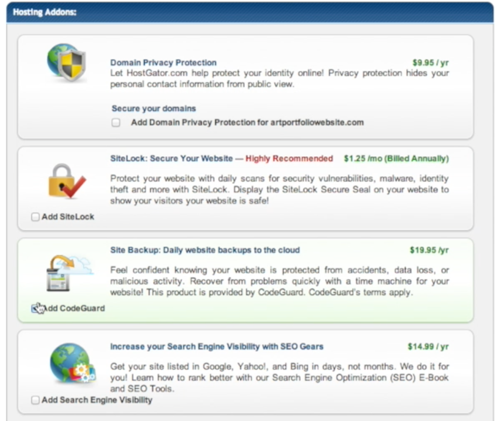
Uncheck all of the add ons that are automatically added. For a portfolio website, you really don’t need any of these things.
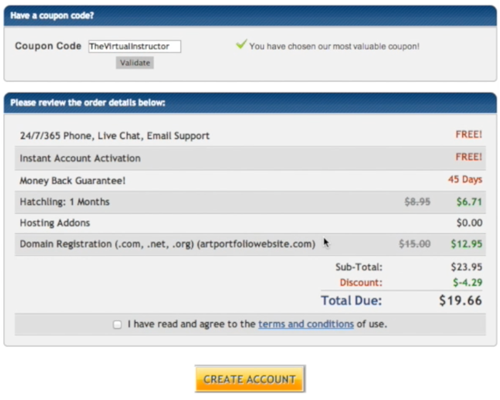
 You can put in my special coupon code, “TheVirtualInstructor” to receive 25% off of your hosting. Be sure to validate it by clicking on the “Validate” button.
Agree to the “Terms and Conditions” and click “Create Account”.
Next, check your email to receive your login information.

The email that you receive contains a link to your “C-Panel” (control panel), your username, and a password.
You’ll use this information to login to your “C-panel” which we’ll cover in the next step…
Since there are places that you can build free websites out there, you may be wondering why should pay for your domain and hosting.
There are several goods reasons why you should NOT use a free website…
1. You do not own or control the website – If you create a website at blogger.com for example, your site can be taken down without any notice. You do not control the website.
2. Unprofessional url – If you have a website at blogger.com, your url is “www.yourwebsite.blogspot.com”. The “blogspot.com” at the end tells viewers and potential clients that you don’t care enough about your own artwork to have your own website.
3. Customization Limitations – If you want to customize your website and have full control over how it looks and functions, then you need to own the domain. Free websites limit how much can be customized and even limit the sizes of files and content that can be included on your site.
4. It’s So Cheap and Easy to Be Professional – It’s simply so easy and cheap to set up and maintain your own professional portfolio website, it just doesn’t make sense to go the free route.
What is the Domain?
Your domain is the “www.yourwebsitename.com”, or the url. The domain that you choose is very important. Since you are building a portfolio website, it may be best to purchase a domain that is your name, for example – “wwww.yourname.com”. (My portfolio site is MattFussell.com) If the .com for name is not available, you can choose a .net extension.
What is Hosting?
Hosting is simply storage of information on a server. It is the act of storing the information (your website) in a location (on a server) so that it can be accessed by users of the internet.
Step Two – Install WordPress (2 Minutes)
(Here again, Hostgator.com makes this pretty darn easy for us.) Once you have paid for your domain and hosting, you’ll need to check your email. There you’ll find your username (admin name) and a password to use to log in to your C-Panel (Control Panel). You’ll also find a link to the C-Panel. Click on the link and use the information to log in to your site.
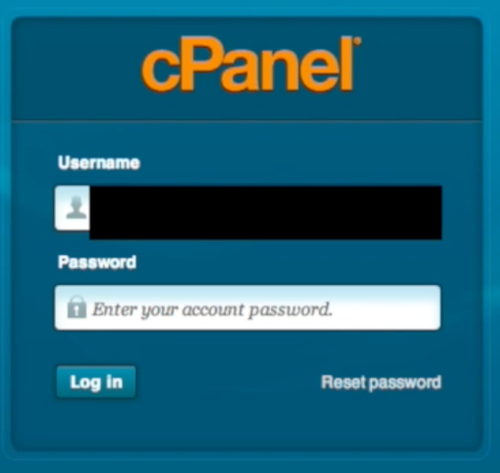
Tip: You can also access your C-Panel by going to www.yourwebsite.com/c-panel
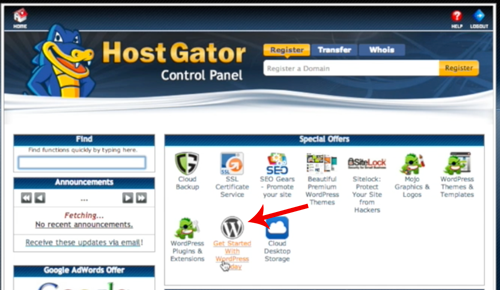
Once logged in, you can click on the “Get Started With WordPress Today” icon and start installing WordPress.
You’ll next be presented with a screen to install WordPress. Click on the “Continue” button.

You’ll need to enter an admin email address, name your website (can be changed later), pick an admin username, and put in your first and last name.
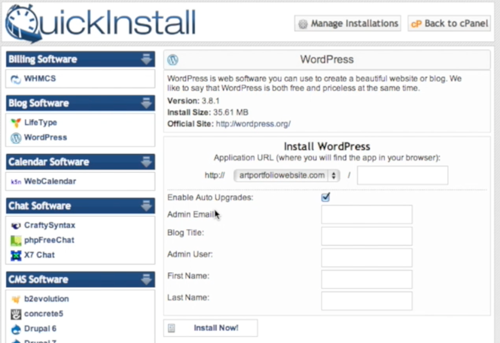
Then click Install. (It may take a few seconds to install – you can watch the progress bar underneath.)
When the install is complete, you will be provided with your admin username and a password. Write the password down exactly as it appears. There is also a link to access the admin area of your new portfolio website. Click on the link. (It may take a few minutes for the link to work and for your new website to show up. Don’t panic – this is normal.)
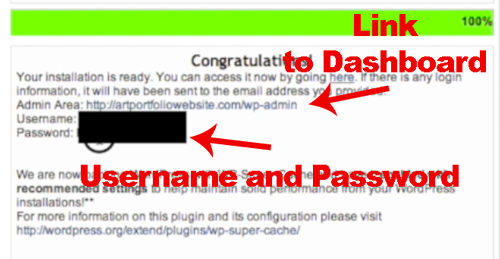
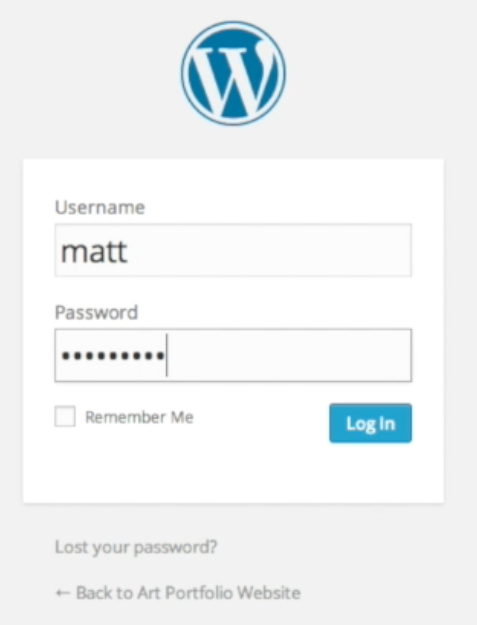
Enter the admin username and the generated password to access the admin area of your website.
Congratulations! You now have your own website! Next, we’ll customize it and turn it into a portfolio website.
WordPress is a CMS, or Content Management System. It was originally created to make blogs, but now WordPress can be used to create virtually any type of website.
Step Three – Customize Your Portfolio Website (15 Minutes)
Now that your site is up and running, the only thing left to do is to customize your portfolio.
Install a Theme
One of the advantages to using WordPress are the many themes that you can choose from. The theme is the way the site looks and behaves and choosing a good theme is important. Your theme makes an impression on your visitors and affects how they will interact with your content.
Many themes are free and will work just fine. (The theme that we’ll install in this demonstration is a free theme.) Paid themes, however provide more functionality and support. I like to use the themes over at ElegantThemes.com. It’s a minimal fee to have access to all of their themes. I use the “Divi” theme on my own portfolio site (MattFussell.com).
To install a new free theme, simply go to “Appearance” in the sidebar of the admin screen, and select “Themes” from the slide out menu.
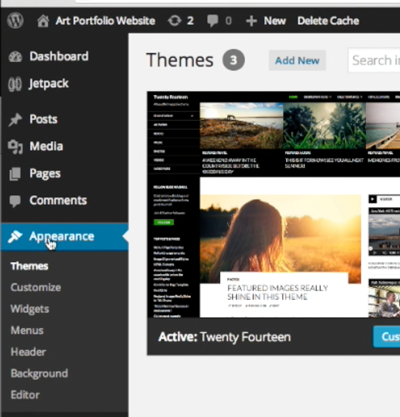
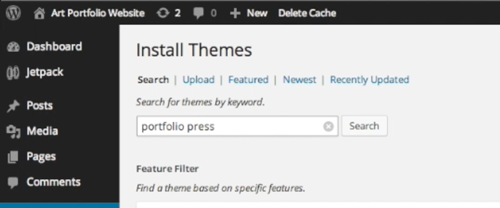
Select the “Add New” tab.

From here, you can search for keywords that may relate to a theme that you are looking for. You can also search for specific colors and layouts. For this example, I’ll search for “Portfolio Press” since I already know that this theme is good for a portfolio website.
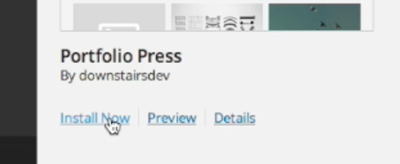
Click on the “Install Now” link under the “Portfolio Press” option.
Add the Images
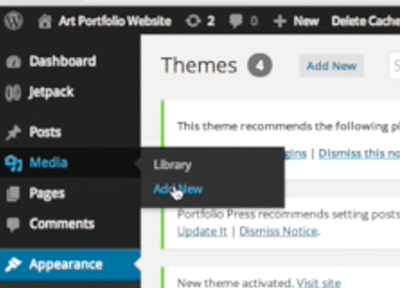
We’ll first populate our media library with the images that we’ll be including in our portfolio. To do this, go to “Media” in the dashboard of the site and select “Add New”. From there, you can upload all of the images that you would like to include.
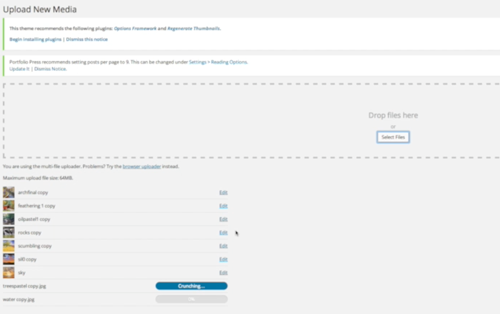
Select “Select Files” on the next screen, and select the files that you wish to include in your portfolio. Then double-click to upload.
Create a Portfolio Page
For this theme, we’ll create a page for our portfolio and posts for each individual work of art. (Pages are static webpages and posts are generally for dated material.)
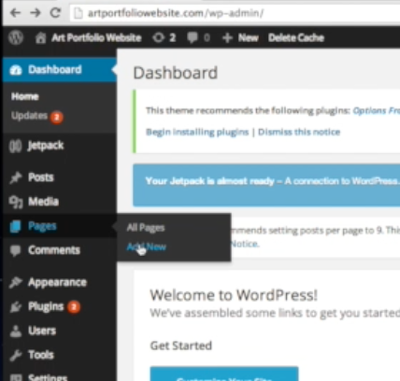
To create a page go to “Pages” in the dashboard area and select “Add New”.
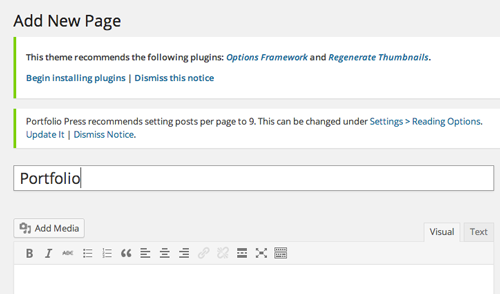
We’ll give this page a title of “Portfolio”.
Tip: Be sure to “Trash” the default “Sample Page”
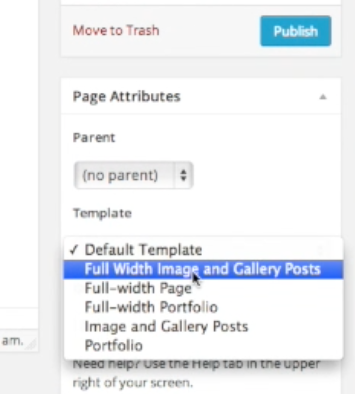
Next, we’ll need to format the page to function as a portfolio page. To do this, look on the right side of the screen and change the template setting from “Default Template” to “Full Width Image and Gallery Posts”. Then, click on the “Publish” button to publish the portfolio page.
Create “Posts” for Each Work of Art
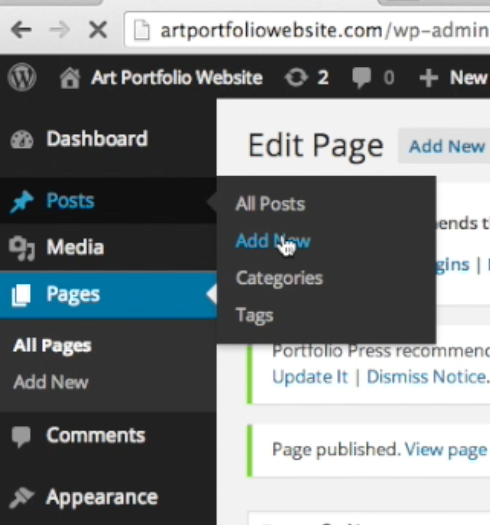
To create the posts, which will be used to each artwork within the portfolio, go to “Posts” in the dashboard and select “Add New”.
Add a descriptive title for your first artwork in the title box. You can add a description underneath in the main text box area if you like.
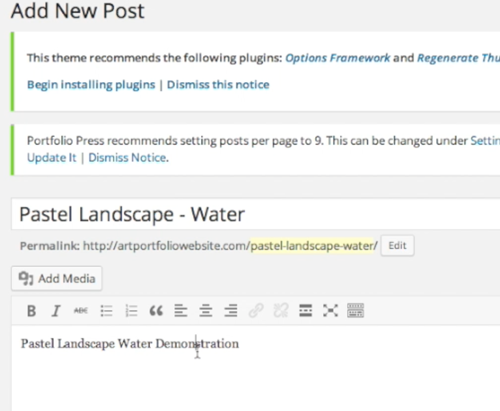
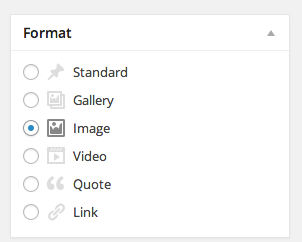
Next we’ll change the format of the post, so it will be presented as an image. To do this, look on the right side of the screen and change the “Format” from “Standard” to “Image”.
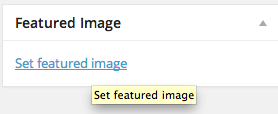
We also will need to set the “Featured Image”. Again, on the right side of the screen, look for the “Set Featured Image” link. Click on the link and choose the artwork or image that you would like to be shown.
Click the “Publish” button and you now have one work in your portfolio.
To add more art, we’ll simply repeat the process of creating posts for each piece. For this example, I’ll add 9 pieces to the portfolio, but you can add as few or as many as you would like.
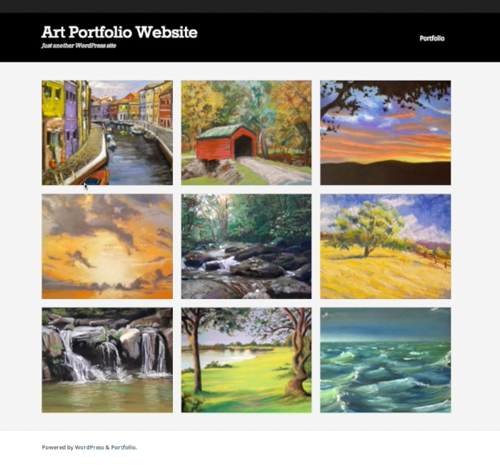
Once all of your artworks are added as posts, you can check out how your portfolio page looks by clicking on its link in the menu at the top of your website.
Further Customizations
Let’s make the site a bit more professional by changing the tagline and removing and editing some of the sidebar widgets.
Edit the Tagline
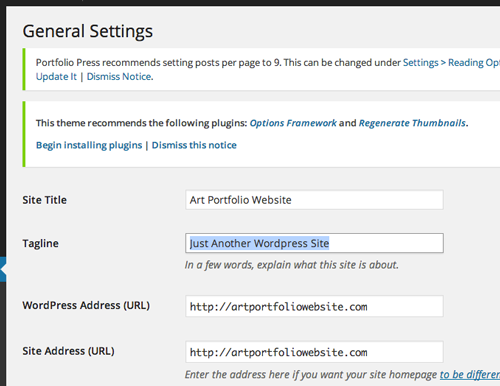
We’ll start with the tagline, which is the one line description under your website title. By default it reads “Just Another WordPress Site”. This is absolutely no good, so let’s change it.
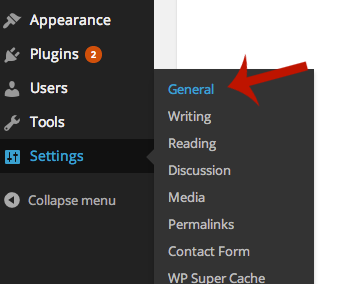
To change the tagline, we’ll go to “Settings” in the dashboard and select “General”.
On this page, you can change the tagline to read whatever you wish, or leave it completely blank of you like. Be sure to click the “Save Changes” button at the bottom.
When you return to your site, you’ll notice that the tagline has been changed.
Editing the “Widgets”
Next, let’s deal with the widgets – the list of the links in the sidebar on the right.
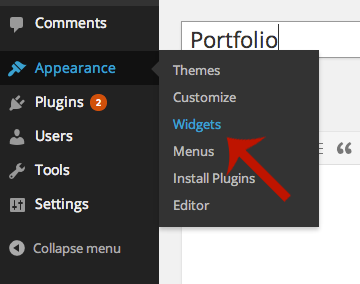
In the dashboard, select “Appearance”, then “Widgets”.
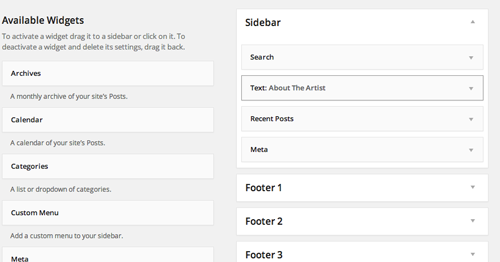
You can click and drag any widgets that you want to remove from the sidebar and add any widgets that you may want to include. It’s probably a good idea to include an “About the Artist” widget, so I’ll add one here.
To add this sidebar widget, select the “Text” widget from the “Available Widgets” section and drag it to the location that you want it in the sidebar. Then, you can give it a title and add whatever description that you want in the box below. You can also add HTML here too – or an image.
Tip: Developers have created tons and tons of widgets that you can add to your site. Just go to “Plugins” in the dashboard. Select “Add New” and search for a new widget.
Change the Home Page
The home page is the page that visitors will see when they visit your website. By default, WordPress creates your site with a list of blog posts, which may be perfect for you. But you may also want to direct visitors to a specific page, like the portfolio page that we have built.
Here’s how to change the home page to the portfolio page…
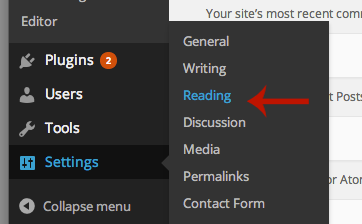
First, go to “Settings” in the dashboard and select “Reading”.
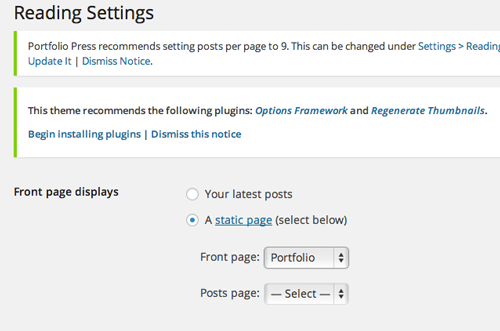
On the next page, change the “Front Page Displays” from “Your latest posts” to “A static page”. Then choose your portfolio page from the options under “Front page”.
Add a Contact Page
Sharing your portfolio is one thing, but it is also important to provide a way for people to contact you. So, we’ll add a contact page.
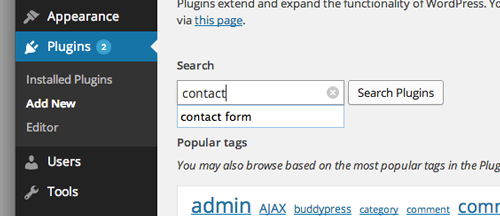
We’ll use a plugin for this, so go to “Plugins” and select “Add New”.
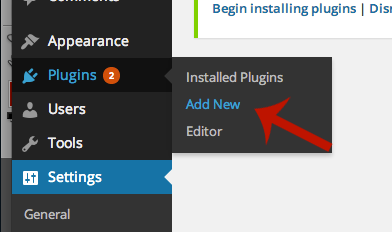
Search for “contact” and you’ll find quite a number of options.
I’ll choose the “Contact Form – Clean and Simple” plugin.

Go ahead and install and activate the plugin.
Next, we’ll edit the settings for our contact from. To do this, go to “Settings” and select “Contact Form”.
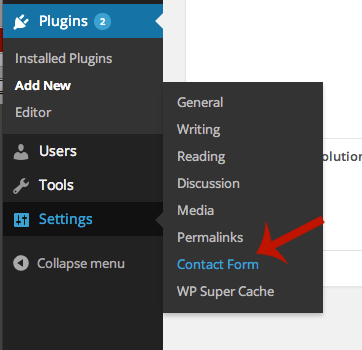
Make any changes on the settings page for the contact form…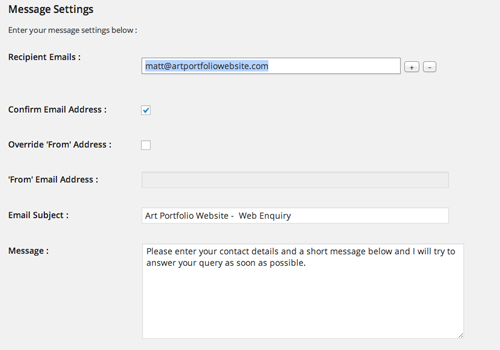
Copy the short code at the top of the contact form settings page.
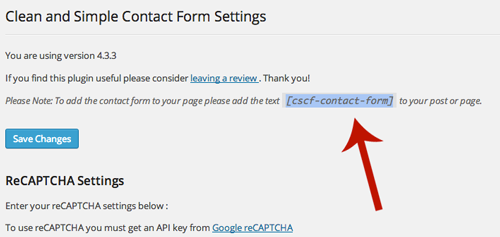
Next, create a new page and title it, “Contact”. In the text area underneath the title, paste the short code.
Then hit “Publish” and you can visit your portfolio site and check out your professional looking Contact Page.
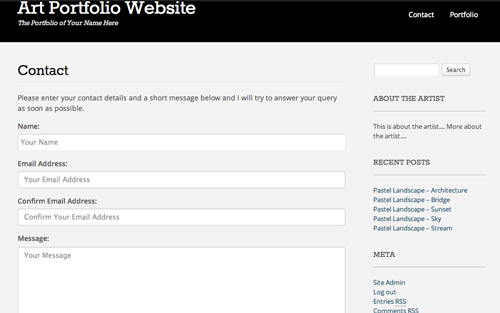
And there you have it – a professional portfolio website in under 30 minutes. Now, if you are new to things, it may take you just a touch longer.
Building your own portfolio website is easy and cheap! It used to be more difficult to create a website, but now it’s not – and anyone can do this!
So are you ready to get started? Just click on the link below to start building your portfolio and share your work with the world.
Get Started Building a Portfolio Website
(Be sure to use the coupon code “TheVirtualInstructor” and get 25% off your hosting)
If so, join over 36,000 others that receive our newsletter with new drawing and painting lessons. Plus, check out three of our course videos and ebooks for free.
Lesson Discussion
Comments are closed.







Hi Matt. Thank you for your explanations so complete and wonderful. Please, which is the coupon code “TheVirtualInstructor”?
I am grateful for your post to get me going with creating a website! Unfortunately, I think the website (Hostgator) has made some changes and your step-by-step instructions don’t apply anymore. Starting with the first “portfolio” to show images as a portfolio and also “Changing the Home Page”. The “Readings” section does not read the same as what you have posted. I am so un-savvy with computers. *sigh* But I guess I have to start somewhere.
UPDATE: Okay…I think I have been up too late. Everything I said was not the same as you described, is NOW exactly the same as you described above. I don’t know why or how they were not there before but….thank you very much for this helpful post. I now have a working website!