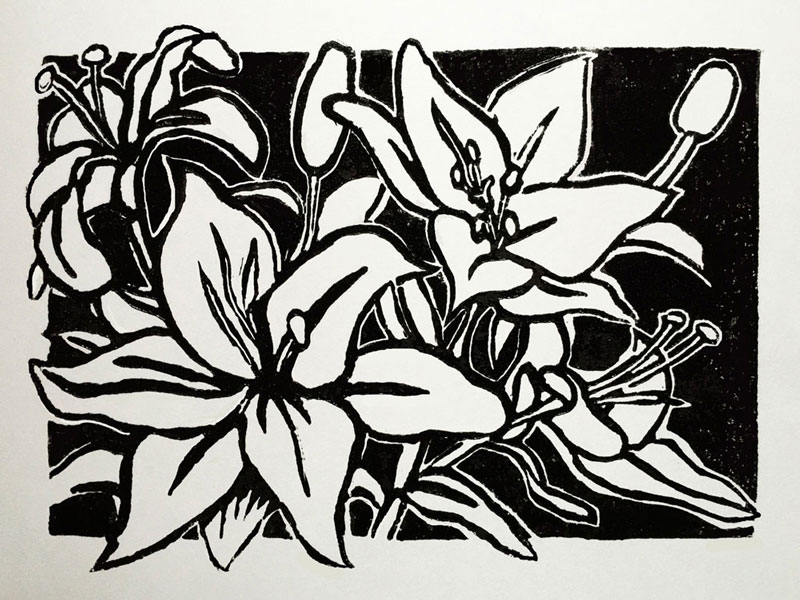
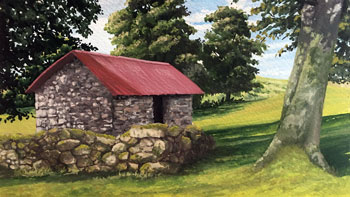
Relief printmaking is a form of printmaking in which the image to be printed is raised from the surface. Pieces of material are removed from the surface using sharp tools called gouges. This creates a surface similar to a stamp and is sometimes referred to as "block printing".
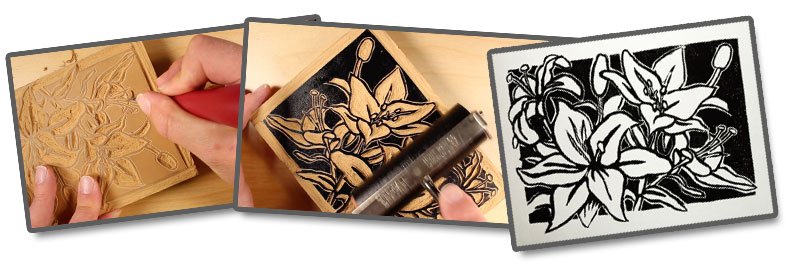
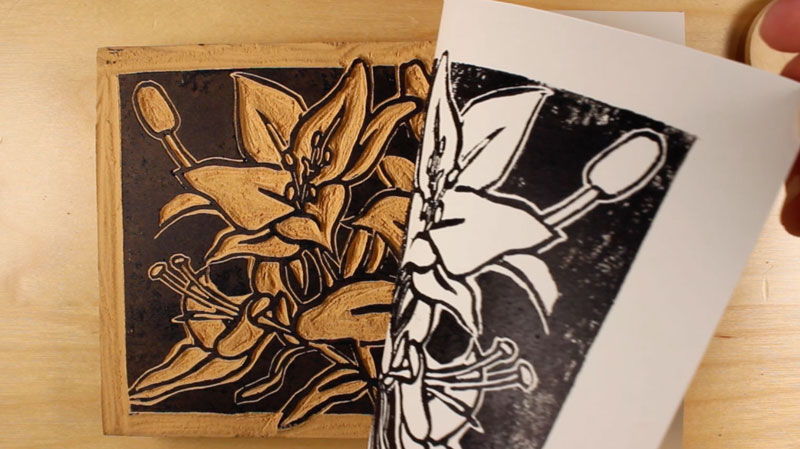
Water-based block printing ink is added to the raised surfaces with a roller called a brayer. Paper is placed on top of the surface and then either ran through a printing press or burnished using a wooden spoon or a baren. The result is a "mirror image" print of the texture of the block.
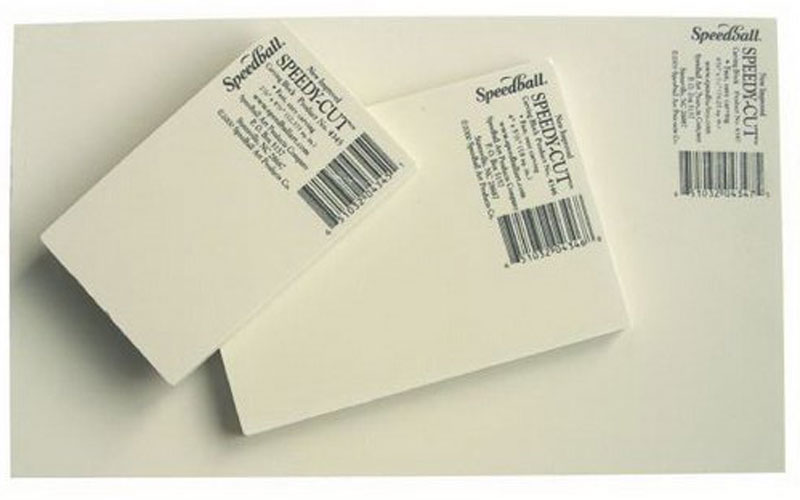
Relief prints can be made using a variety of material. Linoleum, wood, and rubber blocks are most often used. Linoleum is much easier to cut than wood. For this reason, linoleum is preferred among beginning printmakers - although many professionals also prefer linoleum. Linoleum allows the printmaker to easily carve curved lines and is able to accept impressions from sharp objects.
Wood can also be used to produce a relief print. Although more difficult to carve, wood is much stronger than linoleum.
Newer products on the market are made of rubber and are extremely easy to cut. However, these products often crumble easily, which can be frustrating.
A few tools are required for creating a relief print. Mostly, these tools consist of a variety of blades called gouges. Each gouge is designed to remove linoleum at different widths. Smaller gouges remove less material, but are more precise. Larger gouges remove more of the material, but are far less precise.
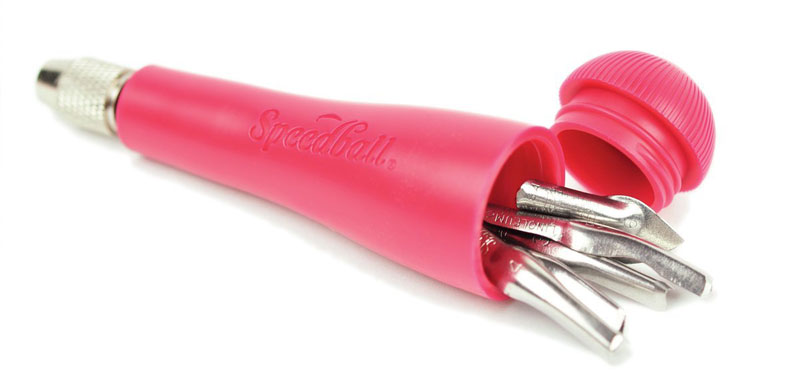
Manufacturers package gouges in sets that are fairly inexpensive. Some sets include interchangeable blades (gouges) that can be fitted and secured in a handle.
Everything You'll Need...
(Some of the following links are affiliate links which means we earn a small commission if you purchase at no additional cost to you.)
One of the benefits of creating a series of prints is that more than one "original" is created. Every print is its own unique "original". Inevitably, small differences between each print will exist, giving them each a bit of "character".
The process of preparing the linoleum, although slow and often tedious, is a rewarding and gratifying experience. Many printmakers enjoy this part of the process, even more so than the actual making of prints.
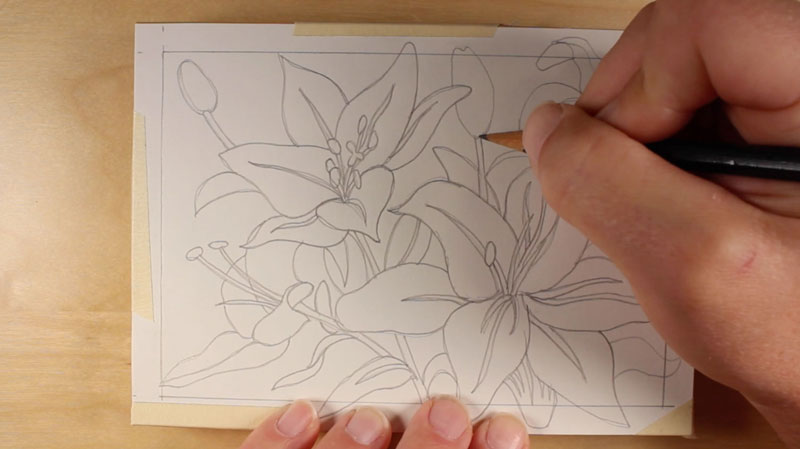
Although line drawings can be created directly on the linoleum surface, many artists prefer to create a drawing on a separate piece of paper that matches the size of the linoleum block.
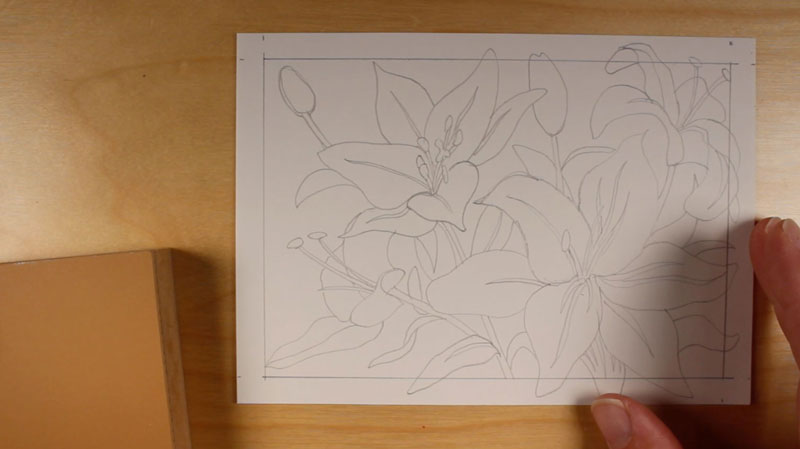
A drawing can easily be transferred to the linoleum surface using a graphite transfer. Soft graphite is first applied to the back of the drawing. The drawing is then adhered to the block with masking tape. A pointed tool, such as pen or pencil, is used to trace the lines of the drawing, forcing the soft graphite on the back of the drawing on to the linoleum surface.
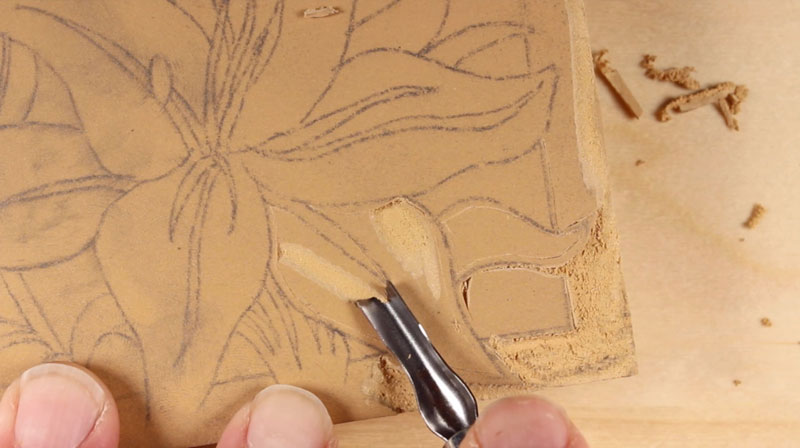
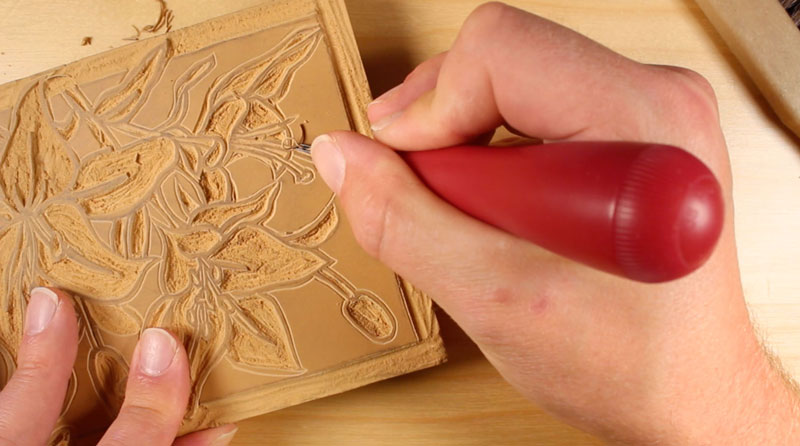
With the line drawing transferred, the process of removing the linoleum begins. Various gouges are used to cut away the linoleum in areas that are not to receive ink.
Cuts should be made away from the body and hands should be kept behind the blade at all times. It is not uncommon for the blade to slip, which could result in injury.
Relief printmaking sometimes requires the artist to think in reverse.
Most of us are accustomed to making dark marks on light colored surfaces. With relief printmaking, the artist must "work" the areas that are to be light, assuming the print is to be made on a white surface.
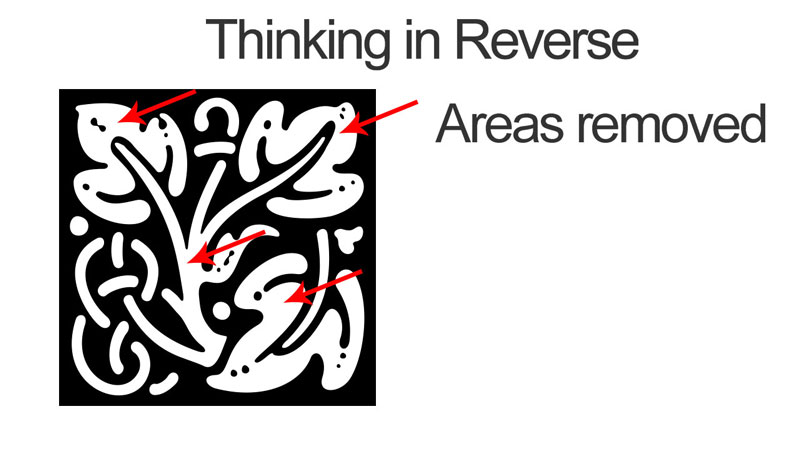
The parts of the image that are to be "white" must be removed from the surface of the material (linoleum, wood, or rubber), leaving the remaining, raised areas to accept ink.
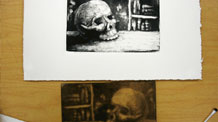
All of the required shapes are cut and removed from the linoleum block before printing begins. As pieces are removed, the artist can create a "rubbing" with soft graphite or charcoal to get an indication of how the finished print will look.

To begin the printing process, a small bead of ink is applied across the upper portion of a glass plane. Ink is pulled down in small amounts with the brayer and rolled on the glass plane until the brayer has picked up an even amount of ink.
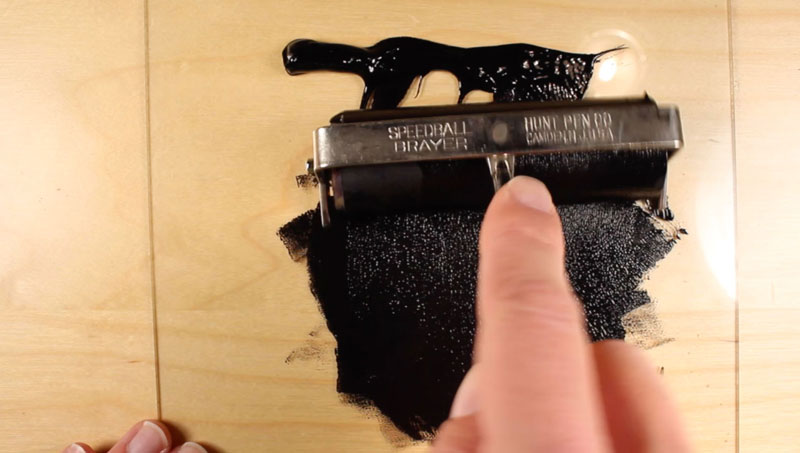
Using the brayer, ink is evenly applied to the linoleum block. It may require several "passes" with the ink to cover the block completely.

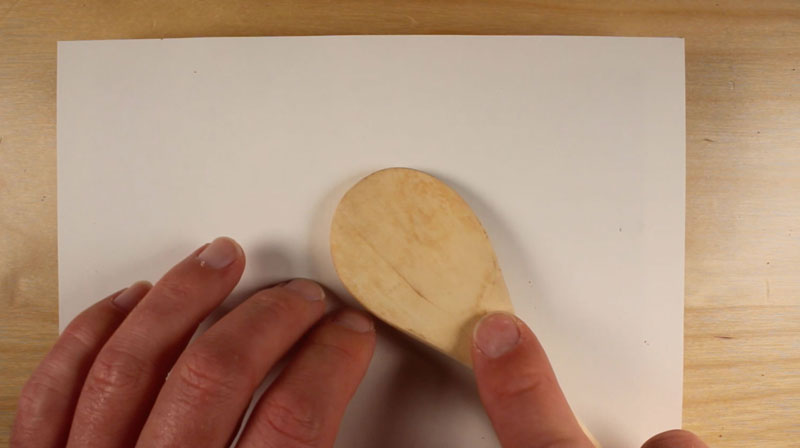
Next, a slightly larger sheet of paper is laid over the block. If creating a hand-pulled print, pressure is applied to the back of the paper with a wooden spoon or baren. A consistent circular motion is used to apply even pressure to the back of the paper. This process is referred to as "burnishing".
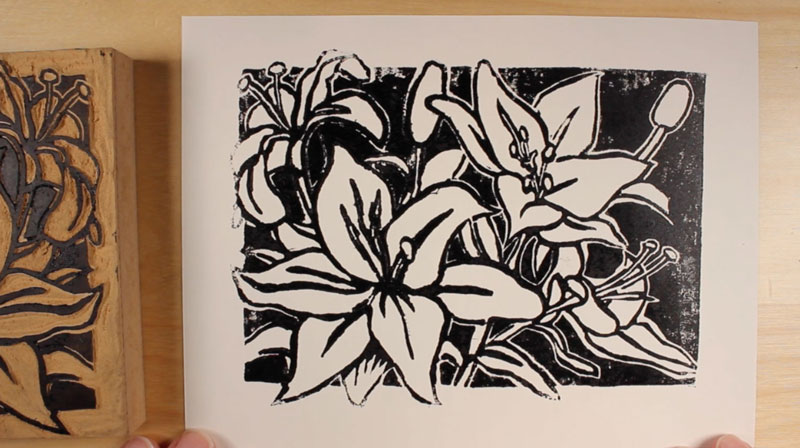
Pulling from the corner of the paper, the first print is lifted away from the block.
Usually the first print that is produced will not be perfect. Often, the first print is either over-inked or under-inked, or uneven pressure was applied during the burnishing process.
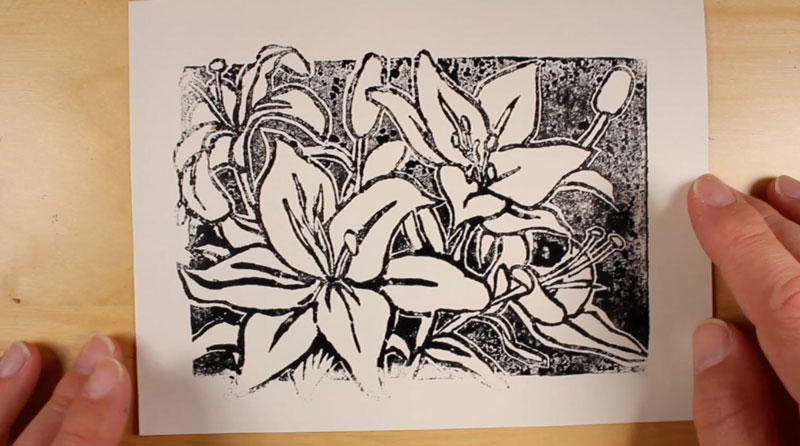
Below is an example of an over-inked print. Lines are less-defined and the ink is blotchy.
Below is an example of an under-inked print. Lines are defined, yet the ink application is inconsistent.
It may take a few prints to find the right combination of ink and pressure to produce a series of successful prints.