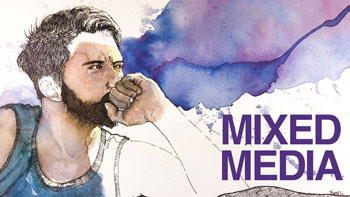
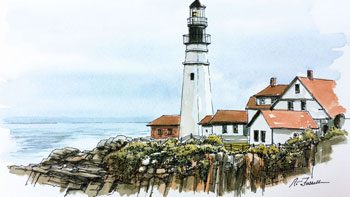
Line and wash is a drawing and painting process in which defined lines are used in unison with washes of color or value. The lines are usually developed with pen and ink applications, applied with technical pens or traditional nib or dip pens. The washes of color are typically developed with translucent watercolor or ink washes.
This combination of media allows the artist to take advantage of the strengths of both mediums. The lines are used to define edges and details while the washes develop the color and value range.
The line work can be developed before watercolor washes, after watercolor applications, or both before and after. It’s entirely up to the artist. An advantage to applying the ink before the watercolor applications is that it allows the artist to focus on developing the color with defined edges in place.
In some cases, the watercolor applications could cover the ink lines partially. This is especially true if the watercolor applications are heavy and less translucent. Some may prefer that the ink lines remain more defined. If this is the case, it may be preferable to develop the line drawing over the top of a dried watercolor painting.

Some artists prefer to draw the contours of the subject lightly with graphite before developing the ink drawing. This practice sparks some controversy among some artists who argue that only ink and wash should be used.
Skipping the graphite drawing produces a looser drawing that some artists may prefer. In all circumstances, the approach that is taken by the artist should be one that leads to the greatest chances of success. If a looser drawing drawing is what you’re after, then maybe skipping the graphite sketch is the best way to go. If you desire a more controlled drawing, then there’s nothing wrong with loosely sketching the contours with graphite.
The wash is usually applied with watercolor or translucent applications of diluted ink. If a grayscale image is desired, India ink may be diluted and applied to create a range of values. Just as with watercolor painting, ink is typically applied initially with lighter values, progressively becoming darker with additional washes.
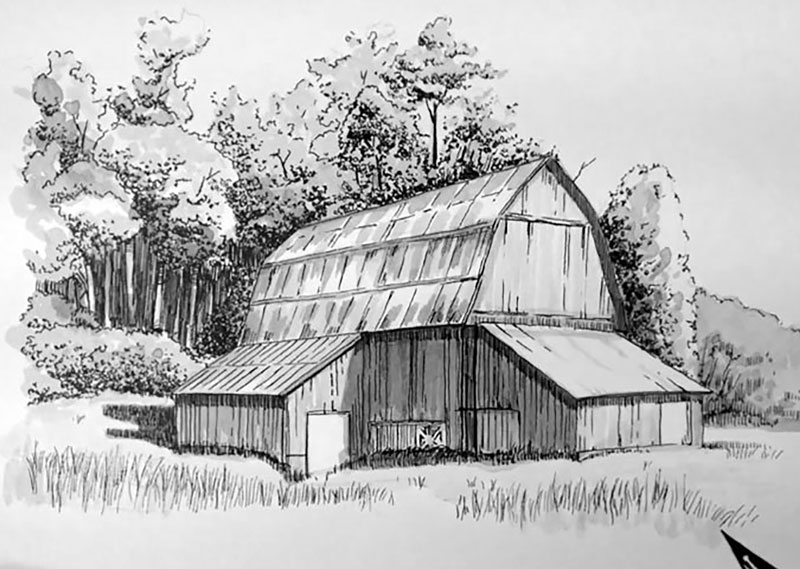
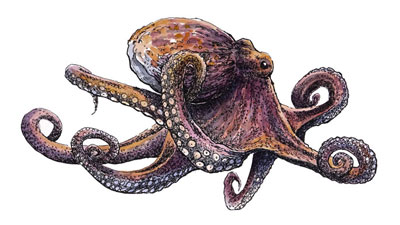
Above image from The Secrets to Drawing Course
If a color image is the goal, then watercolor or colored inks can be used. Washes can be applied quickly and loosely or with a greater level of control. Here again, it is entirely up to the artist as to which approach they take. There is not a “right” way nor a “wrong” way to apply the wash. Looser paintings may appeal to some, while more detailed and developed paintings will appeal to others.
Artists typically prefer surfaces that will accept multiple washes without degrading the quality of the line. This includes watercolor paper (both coldpress and hotpress surfaces), multi-media paper, Bristol paper, illustration board, and rigid surfaces such as gessoed masonite.
Most artists will find a surface that works best for their style after some experimentation. If a crisper line is desired, then a smoother surface such as Bristol paper, hot press watercolor paper, or illustration board may be the best solution. If multiple washes are to be applied, then coldpress watercolor paper, multi-media paper, or gessoed masonite may be the better option.
One of the appeals of the process of line and wash is how quickly a sketch can be developed. A quick line drawing is easily created and washes of color can be quickly applied. A good amount of information can be captured in a short period of time. Because of its immediacy, the process of line and wash is suitable for drawing and painting on location.
The materials required are also light and easily stored away - not to mention that clean up is a breeze. Only an ink pen, a light travel watercolor set, a sketchbook, a few brushes and water is required.
Recommended Materials for This Tutorial
(Some of the following links are affiliate links which means we earn a small commission if you purchase at no additional cost to you.)
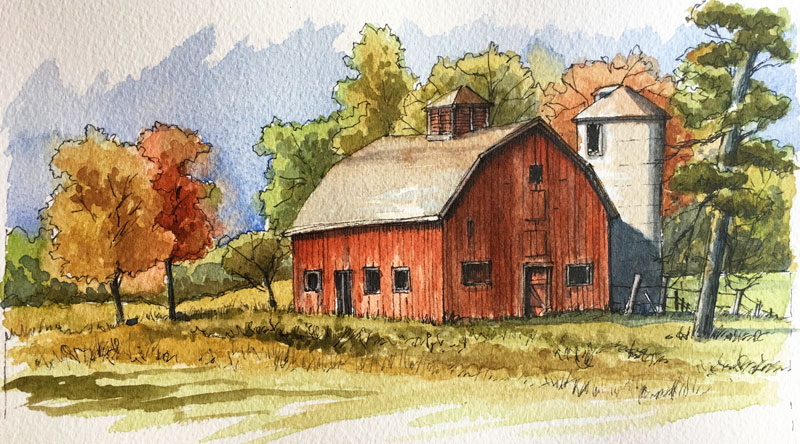
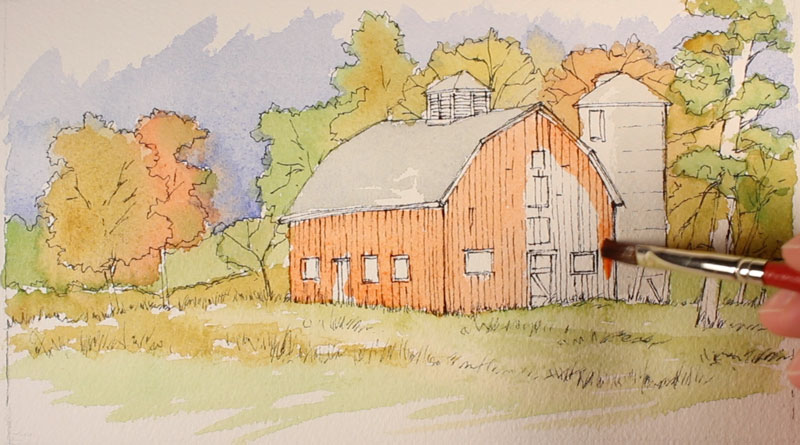
With the initial pen and ink applications in place and graphite applications erased away, we can begin the process of applying watercolor washes. Watercolor applications are light in the beginning but will become progressively darker and more intense with each wash.
Ultramarine is used for the sky. While the surface is still wet, colors for the distant trees are applied with Sap Green, Yellow Ochre, and Cadmium Red Pale Hue to encourage some bleeding. Various mixtures of these colors are used. In the field in front of the barn, Sap Green and Yellow Ochre are applied.
The barn receives a wash of a mixture of Cadmium Red Pale Hue and Alizarin Crimson. A darker mixture of Burnt Umber and Ultramarine is lightly washed over the roof of the barn and the silo. This mixture is also lightly applied on the shadowed side of the silo as well.
With initial washes of color in place, we can begin darkening values - increasing the contrast. Our mixture of Burnt Umber and Ultramarine is applied over areas of shadow. More intense versions of the colors used for the trees are also applied.
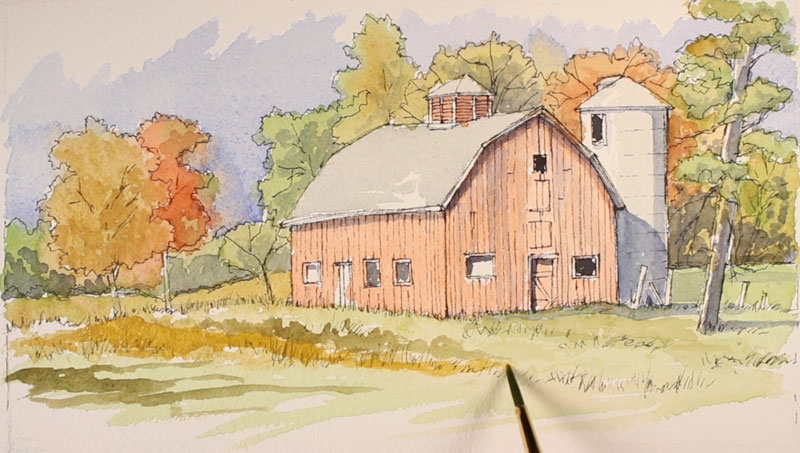
This process of increasing contrast and darkening values continues. This time with more emphasis on defining the shadows on the right side of the barn and silo. Since the light within the scene originates from the left, stronger and darker shadows are found on the right side of the barn and behind it.
Colors are also intensified as additional washes are applied. The barn receives several washes of a mixture of Cadmium Red Pale Hue and Alizarin Crimson. The trees and the field also receive additional washes of color. Additionally, shadows are strengthened even further.
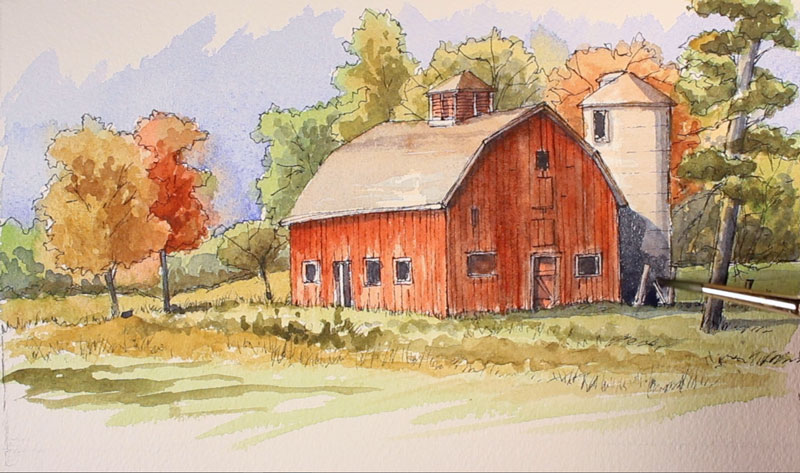

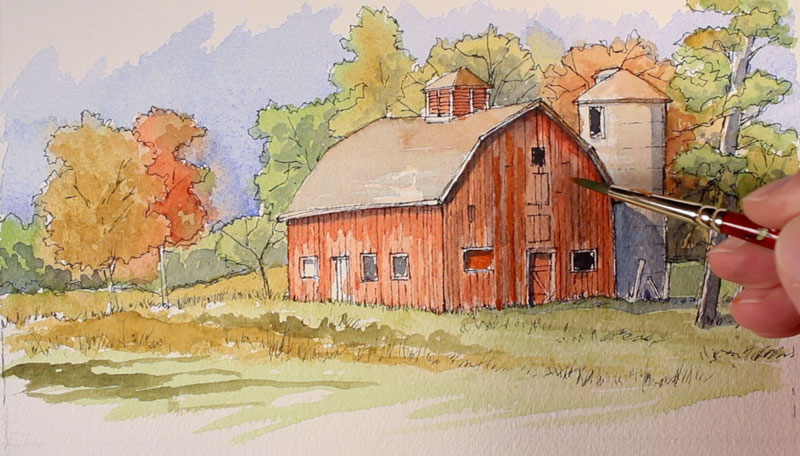
After the watercolor painting has dried completely, we can revisit areas with additional pen and ink applications. In this example, shadows are strengthened with a bit of hatching. A fence is added behind the barn and a few more indications of grass blades are added in the field.
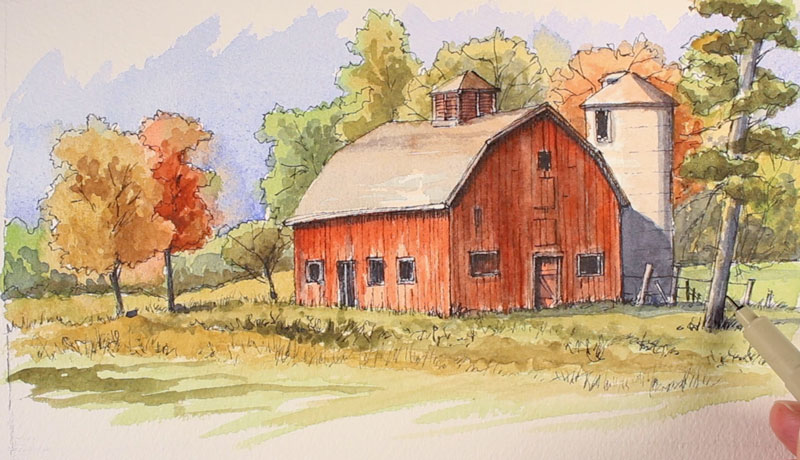
A few more branches are added to the tree closest to the viewer to complete the image.
The process of creating imagery with line and wash is quick, clean, mobile, and quite enjoyable. It is perfect for work in the studio or out in the field - while combining the "tighter" characteristics of pen and ink and the looser qualities of watercolor.