
It’s no secret that the way in which you hold your drawing pencil will affect the marks that you make on the drawing surface. By holding the pencil the same way – all of the time – in all of your drawings – you are limiting what is possible as far as mark-making goes.
It’s also no secret that variety is an important factor in our drawings. Variety, one of the eight principles of art, creates interest in our drawings. It keeps us exploring the picture plane and makes our viewers more engaged in what we produce. In fact, Plato even acknowledged the importance of variety in artistic composition.
By holding the pencil in different ways, we can instantly create variety in our drawings. Beyond this however, expanding the possibles of how the pencil is held will lead to new ways of making marks, expanding our drawing possibilities.
So, let’s look at a few ways that you can hold your pencil to create different marks in your drawing…
Pencil Grip #1 – Traditional
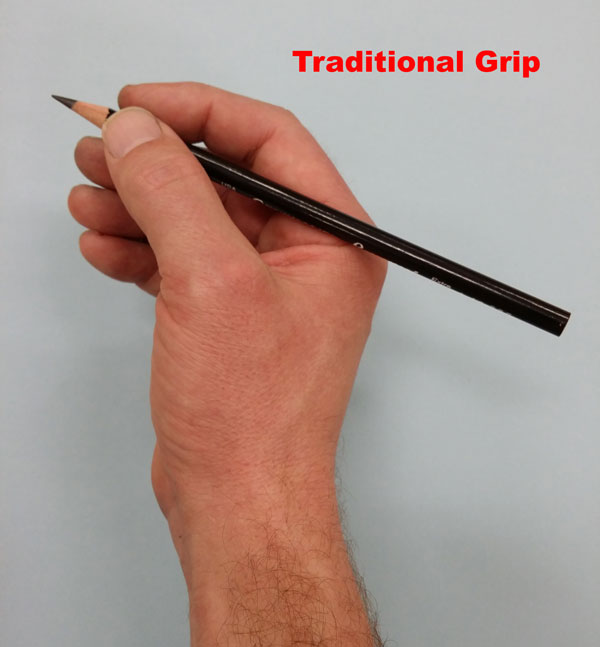 The traditional grip is exactly what the title suggests. This is the way that most of us have learned how to grip a pencil from the time we first started learning how to write. For many people, this is the only grip that is used for drawing. I’ll admit, this is still my “go to” grip. When I sit down to draw something, I’ll usually hold the pencil with this grip initially. It’s just natural to grab a pencil in the way that we are most familiar. But using this grip only limits what we can do with our drawings. The tip of the pencil is what makes contact with the surface. There is quite a lot of control with this grip, which makes it great for details.
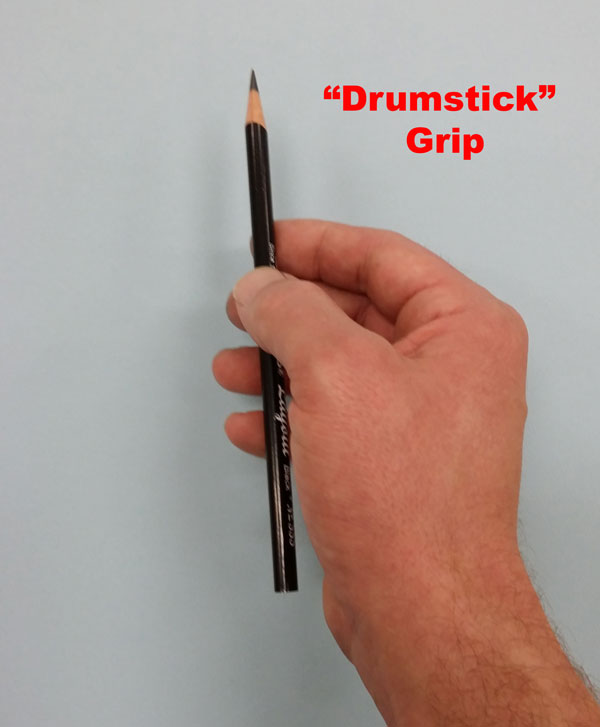
Pencil Grip # 2 – The Drumstick Grip (My Favorite)
Now this grip is favorite for a couple of reasons. It’s not the grip that I use most often, but it’s one that encourages better drawing. More on that in a moment.
I’m calling this grip “The Drumstick Grip”. Not many people know that I’m a drummer and this grip is very similar to how one should hold a drumstick. The pencil is held loosely between the index finger and the thumb, while the other fingers act to stabilize the pencil. Holding the pencil in this manner allows for the marks to originate from side of the exposed graphite (or charcoal, or colored pencil), instead of the just the tip.
Now, why is this grip my favorite? This grip forces you to draw with your shoulder instead of just your wrist. This is essential to “loosening up” with your drawing, which will actually lead to better drawing. This grip is perfect for loose marks and laying out drawing for this very reason. For drawing large, this grip is – by far, one of the best. You can also create the greatest variety of marks using this grip as well.
Grip #3 – The Paint Brush Grip
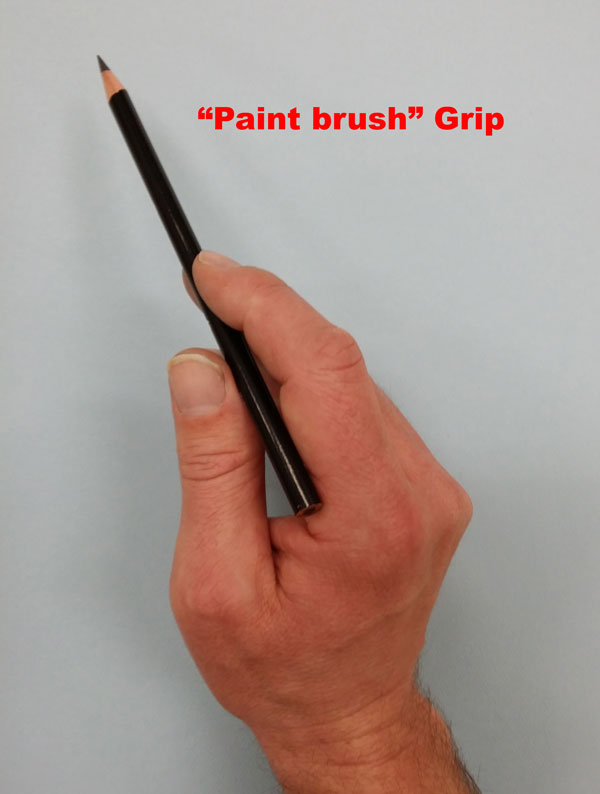
With the “paint brush” grip, the pencil is held in a similar manner to holding a paint brush. The pencil is held upright and the back edge rests on the crease between your index finger and the base of your thumb. This grip is perfect for creating light and delicate marks. It’s also great for when you are making visual comparisons on the surface and laying out the composition. Generally the tip of the pencil is what makes contact on the drawing surface.
Grip #4 – Tip Heavy Overhand Grip
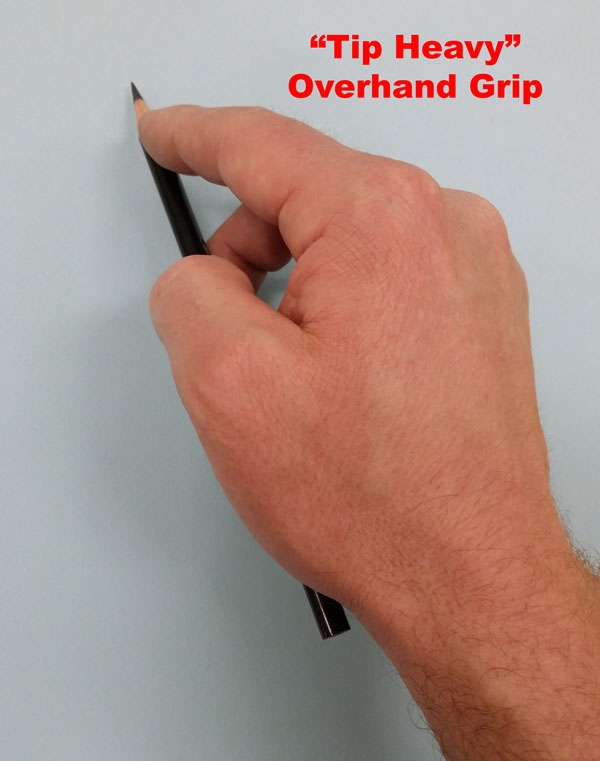
This grip is used for forceful applications of the material onto the surface. The midsection of the pencil is held between the middle finger and the thumb while pressure is exerted onto the tip of the pencil. The pencil lays almost parallel to the drawing surface, forcing the side of the tip of the pencil to make contact. The result is a strong mark that has potential for width variance. This grip is great for filling in large areas of the medium quickly. This grip also forces the use of the shoulder in the drawing process.

Grip #5 – The Inverted Grip
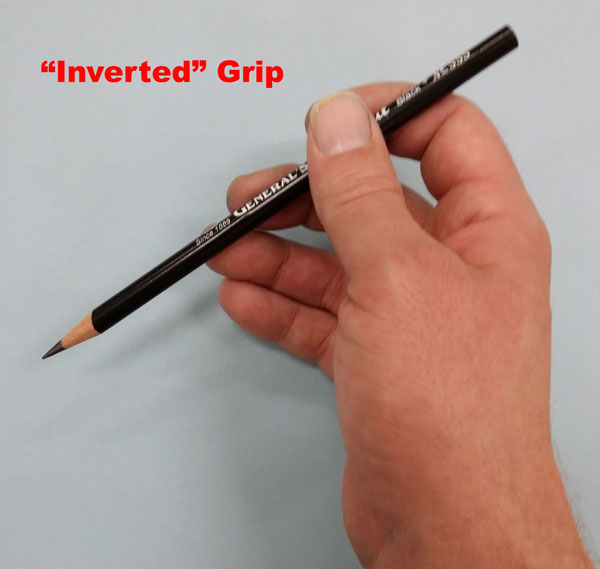 For this grip, the pencil is held by resting it upon the forefinger and stabilizing it with the thumb and lower fingers. The pencil should actually point back towards the artist. Marks are made with the tip and the backside of the tip of the pencil. This grip allows the artist to clearly see the marks as they are made since the hand and the fingers are out of the way.
Take Action
Which grip do you use most? Are you stuck with a particular approach? It’s time to take action and start experimenting with different pencil grips. I promise you that by trying out a few of these grips, you’ll start to see some improvement. It may feel a bit strange at first, but with a touch of practice you’ll start seeing the benefits of using these grips in your drawings.
If so, join over 36,000 others that receive our newsletter with new drawing and painting lessons. Plus, check out three of our course videos and ebooks for free.
Lesson Discussion
Comments are closed.
you didnt clean your nails ewww….
Clean your brain and your vision, idiotic person
I use all of my fingers
wait……….?
https://uploads.disquscdn.com/images/cbd946b20ad1b3e4ebe50f5c589f4402ba88aa6691fdfa5fe036ab6b85f41577.jpg https://uploads.disquscdn.com/images/7ec72498e6b9618964a49d0e820c09198eac999f575a24af3a20a13ee310c629.jpg https://uploads.disquscdn.com/images/c3575c9517c2393be4d313516186357a8b38640d2f28d353ca0da64ab6aa6a5f.jpg
This was very helpful, thank you!