
Live Lessons: The Art of Distortion
Lessons
About This Lesson Series...
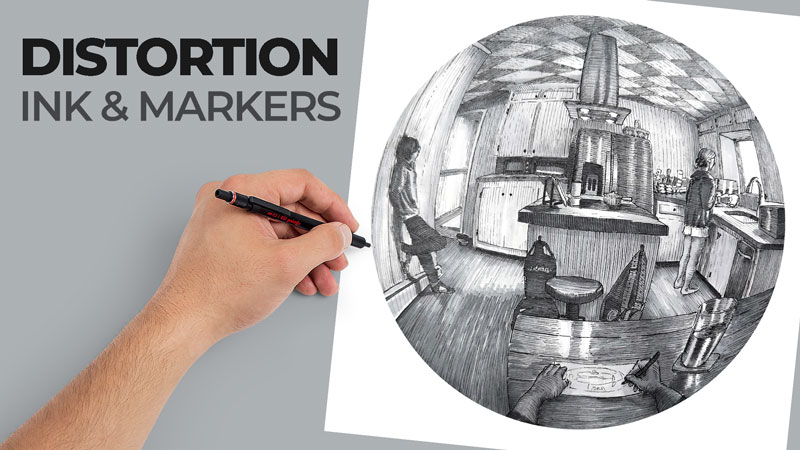
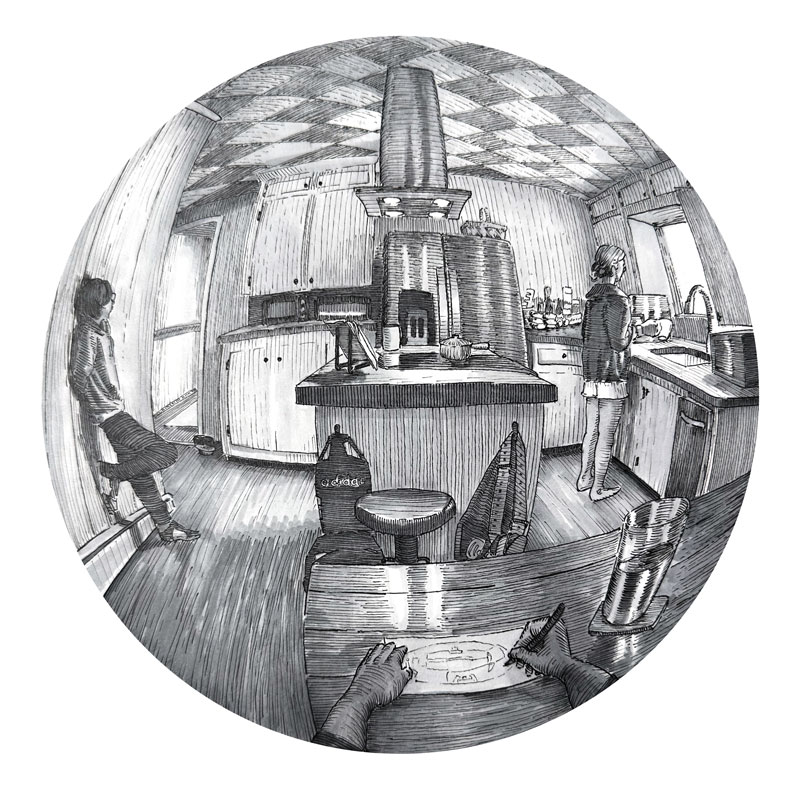
In this lesson, we create a distorted image, much like we would see with a convex mirror, using a special grid and grayscale markers.
Lesson 1 (1:21:50)
In lesson one, we develop a "rounded" grid which will be used to create the final drawing.
Lesson 2 (1:04:27)
In lesson two, we begin with the line drawing within the grid.
Lesson 3 (1:06:40)
In lesson three, we complete the line drawing within the grid.
Lesson 4 (1:05:55)
In lesson four, we begin with ink applications.
Lesson 5 (1:03:12)
In lesson five, we continue with pen and ink applications.
Lesson 6 (1:08:25)
In lesson six, we continue with pen and ink applications.
Lesson 7 (1:11:45)
Pen and ink applications continue in lesson seven.
Lesson 8 (1:04:17)
We finally complete the pen and ink applications.
Lesson 9 (1:05:26)
In lesson nine, we begin with marker applications.
Lesson 10 (1:12:36)
In lesson ten, we complete the drawing with markers.
Resources for this Lesson...
Distributing any content downloaded from this site is strictly prohibited and against the terms and conditions of use.
References
Here's what you'll need...
(Disclosure: Links to art materials are affiliate links which means we make a small commission if you purchase at no additional cost to you.)
Hello Ashley/Matt,
I have the Prismacolor Premier Markers with 3 each warm gray, cool gray & French in the set. Would those be acceptable or should I invest int the Copic set you showed in the first lesson?
Thanks,
Lenet
Hi Lenet,
Absolutely! You can use any brand of alcohol-based markers that you wish!
Thanks. Was wondering if I would have enough tonal range, since Ashley’s choice has 5 values. But I think I can add enough value even if I have to do multiple layers.
I’m scared of that drawing now
I’m nine years old so I used my pocket money to get access to this website 🙂🙂🙂🙂🙂🙂🙂🙂🙂🙂🙂🙂🙂🙂🙂🙂🙂🙂🙂🙂🙂🙂🙂🙂🙂🙂🙂🙂🙂🙂🙂🙂🙂🙂🙂🙂🙂🙂🙂🙂🙂🙂🙂🙂🙂🙂🙂🙂🙂🙂🙂🙂🙂🙂🙂🙂🙂🙂🙂🙂🙂🙂🙂🙂🙂🙂🙂🙂🙂🙂🙂🙂🙂