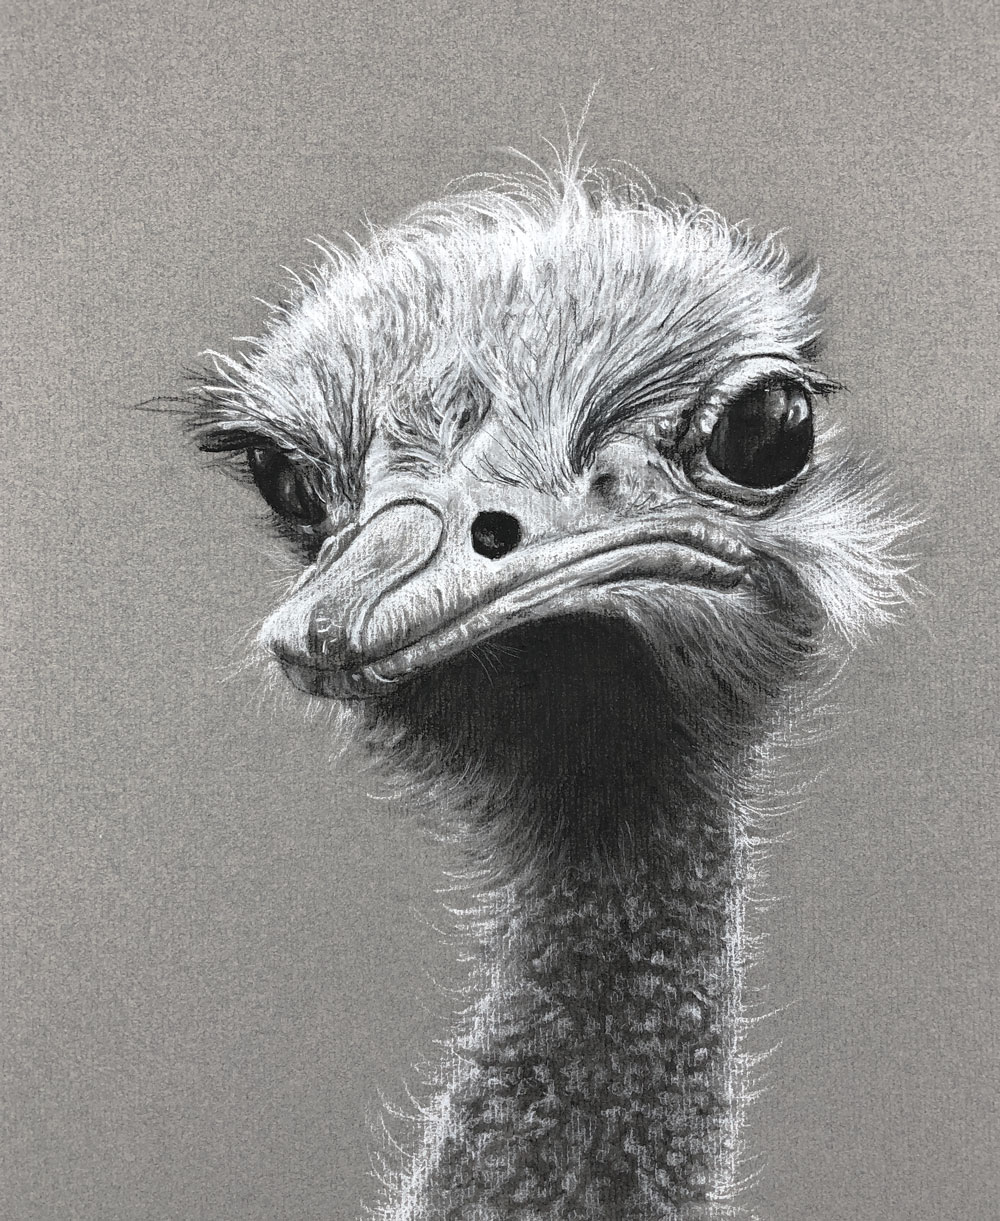
Live Lessons: Ostrich with Charcoal
About This Lesson Series...
In this lesson series, we draw an ostrich with charcoal on textured and toned Ingres paper with a variety of forms of charcoal including vine, compressed, and charcoal pencils.
Lesson 1 (1:14:23)
In lesson one, we draw the ostrich using a modified grid system and then begin loosely adding values and tones with vine charcoal.
Lesson 2 (1:03:10)
In lesson two, we switch over to charcoal pencils and begin working light and dark values to create the illusion of form on the head and the texture of the body.
Lesson 3 (1:03:24)
In lesson three, we continue with this approach of pushing the lights and darks as we work down to the face and beak, taking care not to push the contrast too far.
Lesson 4 (1:16:10)
In lesson four, we finish off the head and develop the textures on the neck, completing the drawing.

Here's what you'll need...
- Canson Ingres Toned Paper
- Charcoal Pencils (White and Black)
- Compressed Charcoal (White and Black)
- Vine Charcoal
- Blending Tools
- Kneaded Eraser
- Ruler or Meter Stick

I was just about to start to have a look at a charcoal live lesson, as I’ve not done one yet,I know I’ve been around a while but charcoal & pastels I’ve not attempted, plus I’m in the middle of a few projects, another dog portrait for a friend, it’s all practice.
I’m doing a while charcoal piece as well cos I happen to like them. I probably can’t post it or up on forum because it’s a star wars character, one of my favourites.
I remember I couldn’t send in my Spiderman cos of copyright.
I might even try and get to the 2nd live one 😁
I have a week to catch up lol, I would love to be there on the night.
I think it worked out at midnight in UK but now I’m usually up 😁
Hey Matt for lesson 2 what time do you stream in the US
I’m in UK
Cheers 😁
Hi Christine,
Currently, the live broadcast air on Wednesdays at 8:00 EDT. There is a countdown on the Live Lessons page to help you figure out what time this will be for your time zone.
Cheers Matt 😁
I went and forgot again !! This brain fog memory is terrible but I am going to do this ostrich, it’s a great photo. I’ll post it on forums as lessons I did with you.
One day I might be there on the night, in the year 2050 lol 😜
I absolutely LOVE this! Thanks Matt 😀
I heard Colin Bradley pronounce the Ingres paper un-gray. He is a Youtube artist from the UK.
Hi Kathy,
This is what I’m going on…https://www.youtube.com/watch?v=ea_v8kMuL5Y
I hear him as pronouncing it as “on-gray.” In the ear of the beholder!!
Cheers Matt 😁
Hi Matt, I would like to know the softness of the vine charcoal and hardness of the compressed charcoal that you used in this lesson.Thank you!
Hi Chinyi,
I wish I could tell you. The pencils have compressed charcoal so they are much darker obviously. When using charcoal, I don’t really think too much over the grade of the charcoal. If my marks are too dark, I can lift the material with a kneaded eraser or blend to make lighter.
That was so much fun!!! I’m a newbie, and I’m impressed with your teaching skills, my ostrich looks like an ostrich! Thank you!
Maybe a bit off topic, but in the beginning of this lesson you said that you can also use watercolor paper, but you’ve never saw gray watercolor paper. I have a block of paper, it’s gray. It’s PaintOn from Clairfontaine. Officially it’s mix media paper, but it can handle paint. I haven’t tried watercolor or inkwash on it, but I want to try it to see how it can handle water. And I have actual black watercolor paper too. Anyway, I love this charcoal lesson, I’m quite new to the medium and today I bought a charcoal pencil. Can’t wait to start using it.
Wow! My drawing turns out to look awesome! I didn’t even know that I would be able to create something like this. Thank you for the tutorial. I had so much fun drawing this ostrich!
Matt, am attempting to view this live lesson. It only buffers and will not load. Others worked just fine on my iPad Pro. Can you detect any sort of problem on your end. I have refreshed the site, logged out, and restarted the iPad on my end which exhausts my techie skill set. I would appreciate any advice or help you may have to offer. Many thanks, Fred Tinsley
Matt, never mind. Loaded finally and working fine.
The ostrich looks “like a Scottish elder rebuking sin from the pulpit.” ~ P.G. Wodehouse