This lesson is a step by step approach to painting (or drawing) an eye with pastels. If you're interesting in exploring the basics of drawing an eye with pencil, please have a look at the following lesson...
Pastels can be a difficult medium to control. The looser the medium, the harder it is to control on the surface. Sometimes, people will dismiss a medium because it is hard to use the first couple of times that they try it - expecting a professional result right from the start.
This is unfortunate because many miss out on the satisfaction that can come from a medium that might be "the perfect fit" for them. I say all of this, because this was true for me.
I shunned color media for a long time because it was uncomfortable for me. It wasn't until I found pastels and worked with them for a while that I changed my tune.
I know that there are others that limit themselves as well and are missing out as a result. So if you are new to pastels, or color media in general - keep working. Okay, enough about that, on to the tutorial...
(Some of the following links are affiliate links which means we earn a small commission if you purchase at no additional cost to you.)
For this demonstration, I used Rembrandt Pastels. These are premium pastels, but mid-level pastels can be used as well. Rembrandt pastels are vibrant in color, less dusty, and cover exceptionally well.
The set that I am using includes 30 half stick pastels and 15 full stick pastels.
The pastels come encased in a sturdy box that features foam grooves to hold the pastels. Having used mid-level pastels for quite a while, the quality of the Rembrandt pastels is noticeably different.
The surface that I am working on is Mi-Tientes pastel paper by Canson. The tone of the paper is a cool gray. This color is chosen since it will contrast nicely with the oranges that are present in the skin tones. This paper features a coarse side with a "heavy tooth", which is considered to be the "front" of the paper. The "back" of the paper is less coarse, but not by much. Either side of the paper can be used. (I am using the "front")
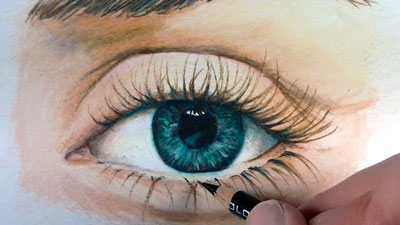
Here are the steps to painting an eye that were taken in this demonstration. Of course, there are more steps, but these are the major highlights...
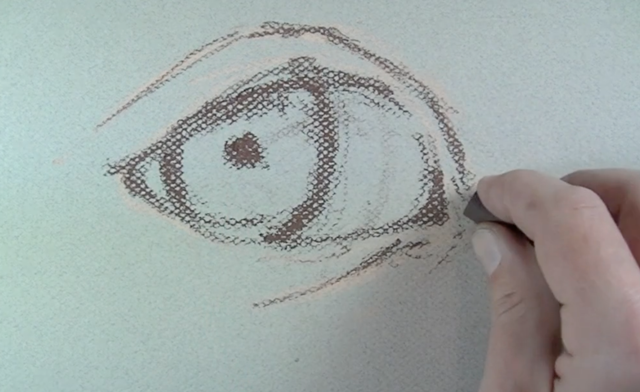
The first step is to lightly draw the contours of the shape of the eye. A skin tone color is used first, followed by a dark brown.
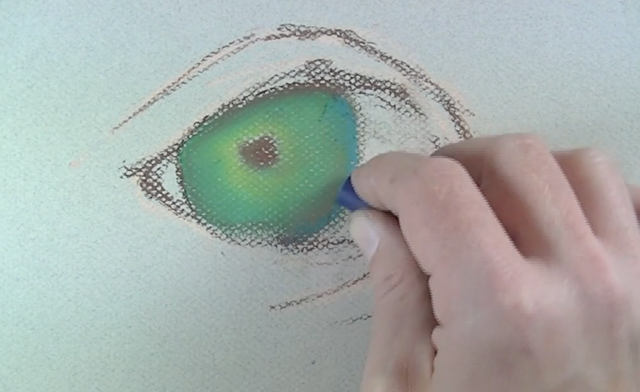
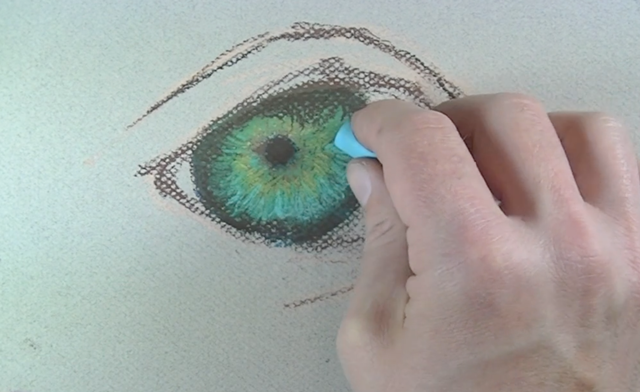
Next, the colors that are observed in the iris part of the eye are layered in. Blues, greens, and even yellow are all added and then blended in with a finger.
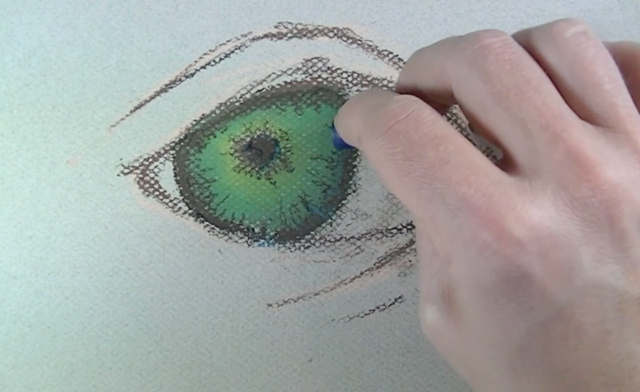
The next step is to layer some of the darker tones and values of the iris over the colors. A dark brown and blue are used for this. Layering is an important part of painting with pastels. By layering the colors, depth is created making colors become more realistic and believable.
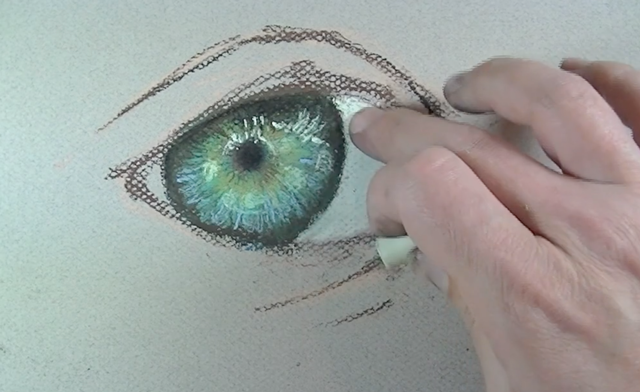
Additional colors are laid on top of the darker layer. This time, less smudging takes place. Instead, the color is layered directly on top without any mixing. Yellow-green and light blue is used for this.
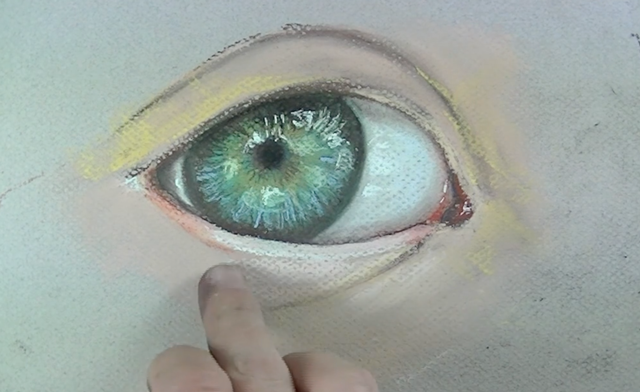
Highlighted areas are added on the iris using a light cream. This color is also used in the "white" parts of the eyes as well.
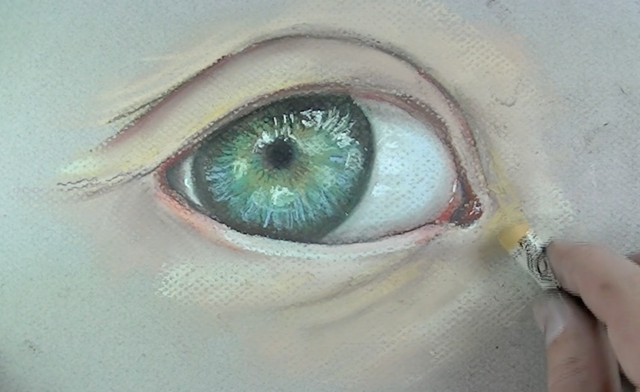
Next, marks are made with red-orange, red, and cream to begin to establish the edges of the eye.
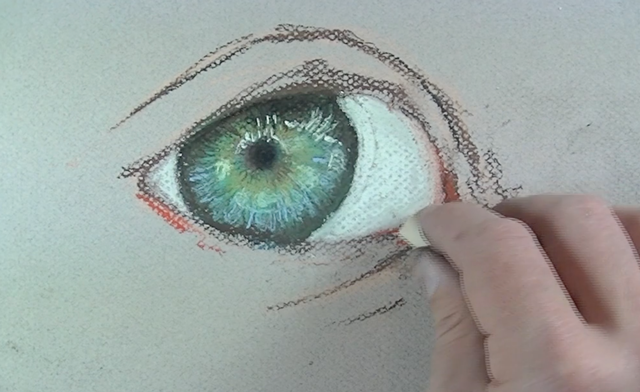
White is layered over the slightly darker "white parts" of the eye to create a highlight and make the eye appear "wet". White is also used over the iris as well for the same effect.
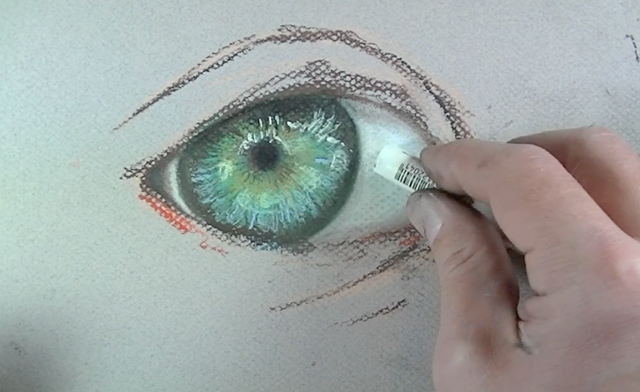

Skin tone colors are added around the eye and gently worked into the surface as they are applied.
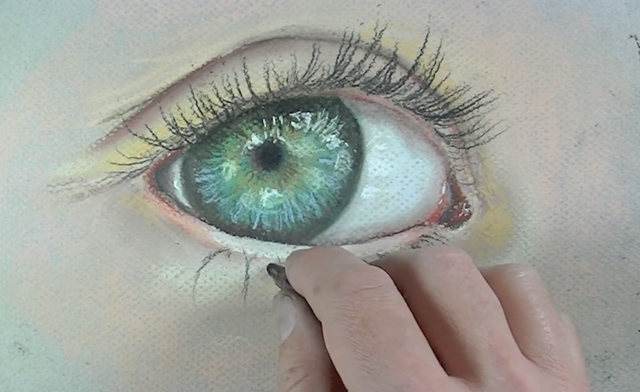
Observed colors of the skin tones continue to be added and blended into the surface.
Lastly, the eyelashes are added using a sharp black pastel pencil.
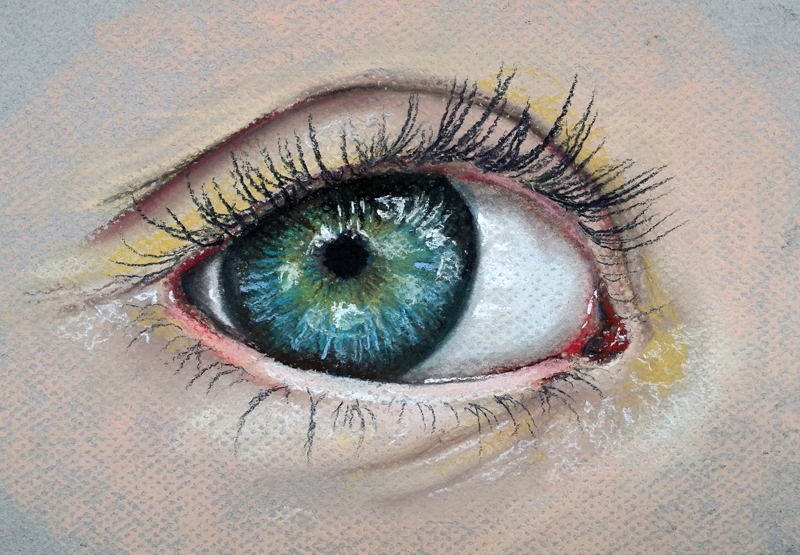
Here's a look at the completed image...
Working with pastels give you the best of both worlds. The finished result is definitely a painting, but the process is arguably very much like drawing.