The human figure has long been a traditional subject for drawings and paintings. Not only is the subject revered for its aesthetic qualities, but it also is a welcome challenge for artists. The ever-changing positions and postures of the figure remove the possibilities for formulas and force the artist to focus on pure observational drawing.
Because of its unique qualities as a subject, figure drawing is a staple of college art programs and local art workshops. General drawing skills are naturally developed through the practice of drawing the human body.
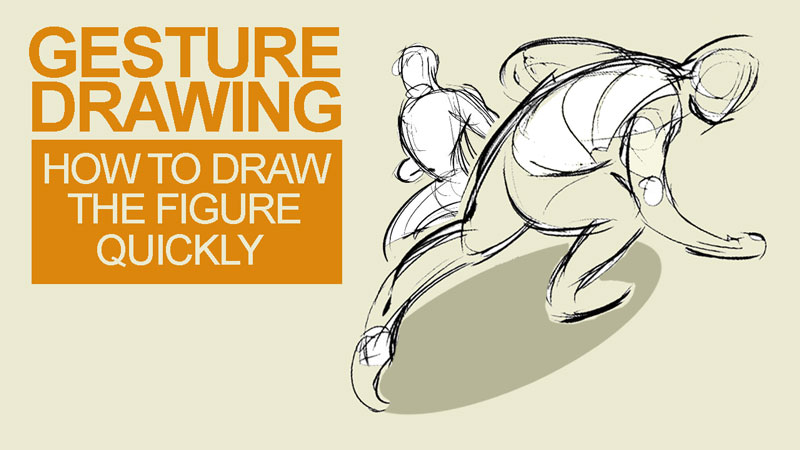
The term "gesture drawing" is most often used to describe a quick, loose drawing of the human figure. However, gesture drawing can also refer to any quick drawing of any subject. The purpose of a gesture drawing is not to complete a "finished" or refined drawing. Instead, it is more of a way to study the subject through loose marks, shapes, or values.
After completing a gesture drawing of a subject, the artist may later decide to turn the sketch into a finished drawing or painting, working from what they have learned about the subject during the sketching process. It is great for practice, making gesture drawings a suitable way to quickly fill up a sketchbook.
One of the primary functions of a line is to inform us where an object ends. These lines define the boundaries of the subject and are referred to as "contour lines". Lines that are drawn without variance are static. Static lines have "their place" in drawing, but for gesture drawing, dynamic lines do a better job communicating movement and interest.
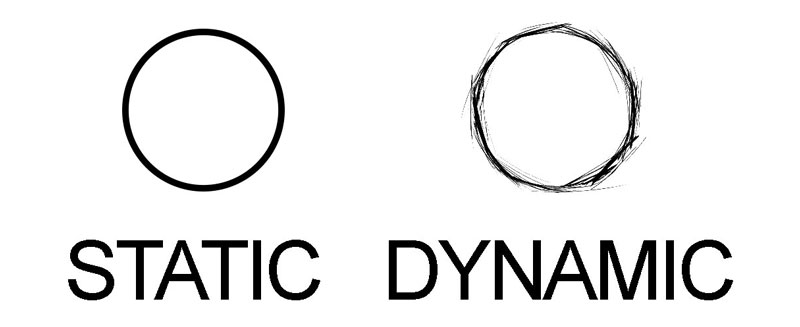
Dynamic lines are the result of "looser", quicker marks. It's logical to use dynamic strokes when creating a gesture drawing because of the nature of the practice. Gesture drawings are meant to be created quickly and do not require details.
Clearly speed is important in gesture drawing. Live models obviously cannot hold poses forever, so it falls on the artist to capture the pose and proportions of the figure quickly. Details can always be added after the initial pose and after proportions are defined.
By loosening up with our marks, we can greatly improve our speed. For some us, this means letting go of the desire to create intricate details from the start.
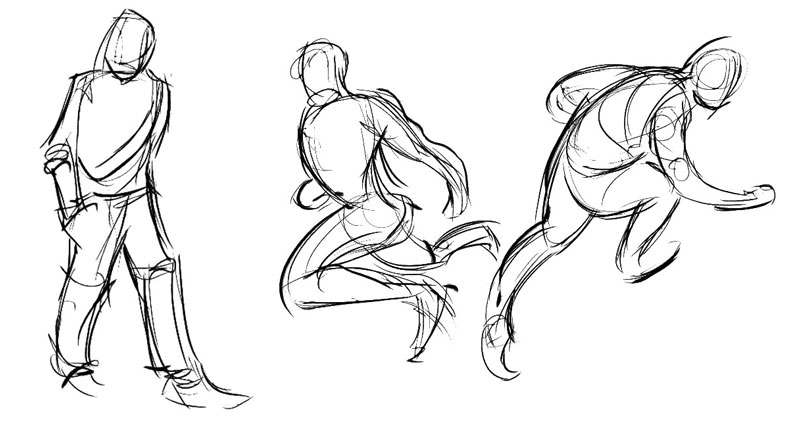
Instead, we should be concerned only with the overall form and posture of the subject. Capture this information first with many loose lines or even blocks of value. Gesture drawings are not about details but rather the pose, form, and movement of the subject.
If you're finding it difficult to loosen up with your marks, you may try changing your grip on the pencil or switch to a less detail-oriented medium. Allow your marks to originate from your shoulders or elbows instead of from your wrist.
Stray marks are likely to happen in the process. It's easy to be tempted to reach for the eraser to "fix" these imperfections as you work. I've found that the best approach is to let these marks stay on the drawing surface and clean them up, if so desired, after the gesture drawing is complete.
It's better to "stay in the flow" during the process. If you start erasing mistakes or stray lines as you work, you will lose this flow and become distracted. Remember, the point is not to create a finished drawing.
Keep in mind that there is no "right way" or "wrong way" to create a gesture drawing, but there is a step by step approach that I have found to be helpful. What's great about this approach is that it can be applied to any figure and it may be a good starting point for those of you that are struggling with knowing where to start.
We can first identify a line from the head to the feet of the subject and draw it quickly. This line will help to ensure that we position the figure within the picture plane of the drawing surface.
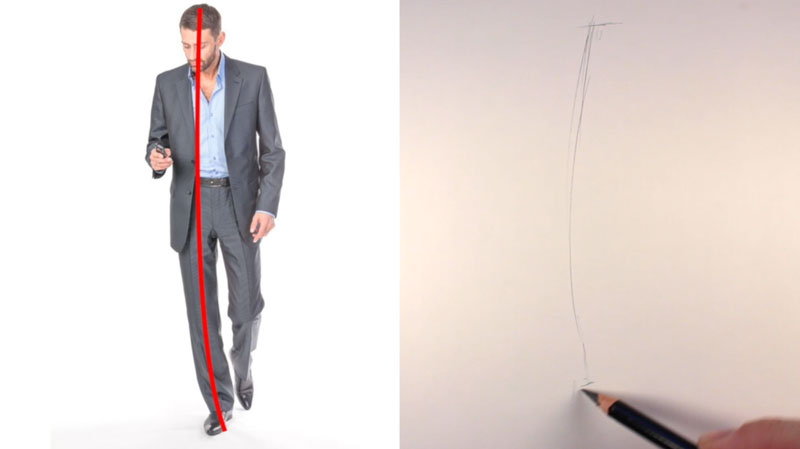
For many subjects, this line may curve or even bend sharply.
Using our initial line as a guide, we can next identify the shoulder line and waist line.
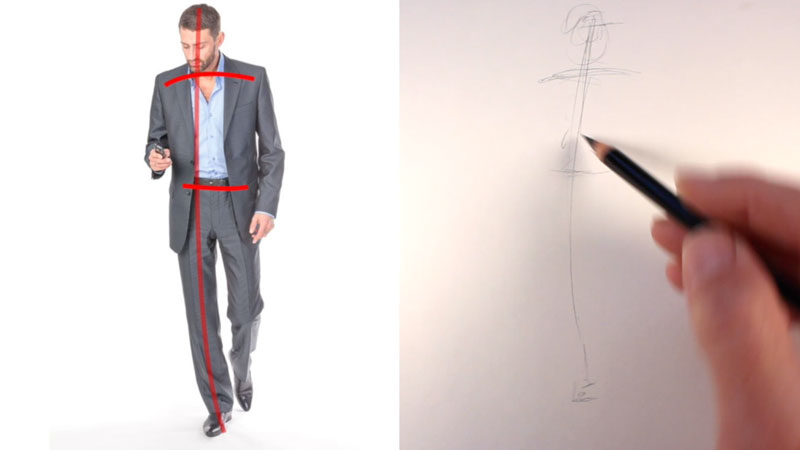
Depending on the pose and posture of the figure, these lines may also bend slightly or even be positioned at a strong diagonal.
Next, we can use the shoulder line and waist line to draw a "stick figure" indicating the bone structure of the subject.
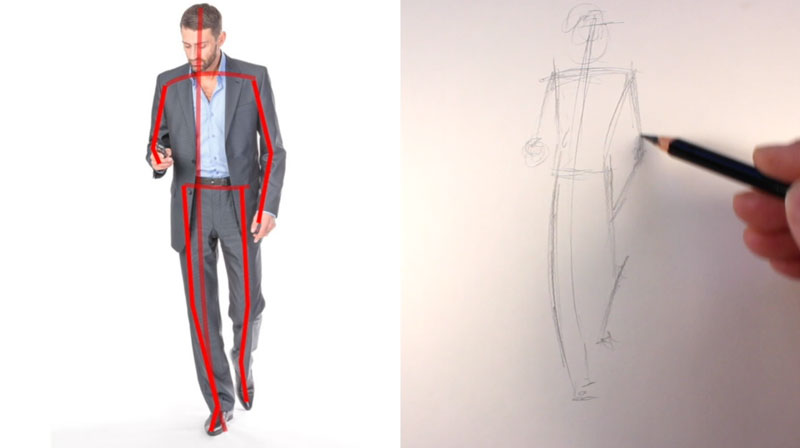
With a bit of practice, you can skip this step entirely and concentrate on the form. But if you are just starting out, the "stick figure" step can really help you get a solid foundation of the subject in place.
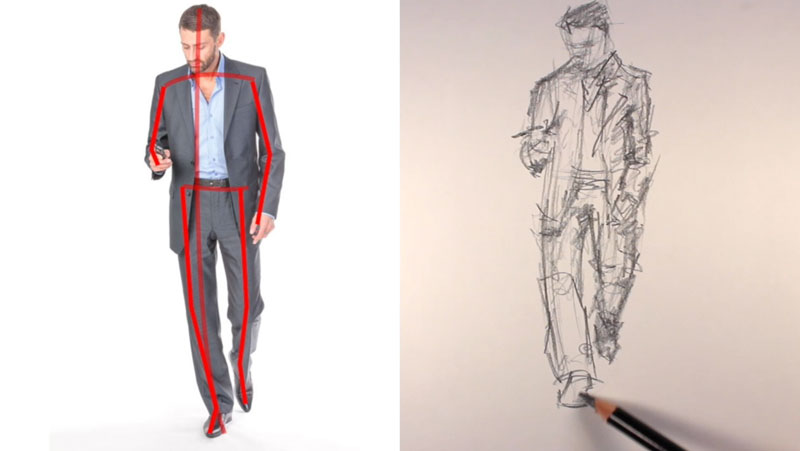
Now that a basic structure of the figure is in place, we can define the form of the subject by drawing shapes, loose lines, and hints of value. As we become more confident, the lines can become darker.
This four step approach will work for some, but others will find that a different approach works better for them, which is perfectly acceptable.

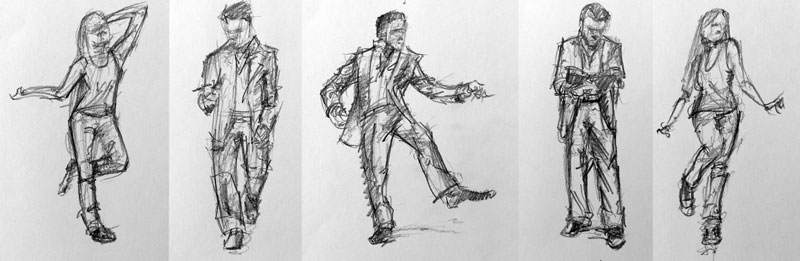
Gesture drawing is an exercise and while some gesture drawings can stand on their own as finished work, the point is to improve your understanding of the figure.
The more drawings that you create, the better you will get at it. Practice is clearly important. The problem is figure models aren't just waiting at your "beck and call". Or are they?
If you're looking for a great way to practice gesture drawing, try going to the park or local shopping mall. Any location where you can find people will work. Sit down with your sketchbook and start drawing. Because your subjects will be moving, the challenge is greater and you will be forced to draw faster (and looser).
If you prefer to draw from references, you may try taking a look at this free gesture and figure drawing tool. (Clothed and unclothed options.) You can set up the poses for as little as a few seconds to up to ten minutes.
Just about any drawing or painting medium is suitable for gesture drawing. You can block in large areas with charcoal or take a more linear approach with pen and ink. If you're wanting to work on loosening up, then a medium such as pastels may be a good fit.
What's most important with this exercise is developing your observational drawing skills. So any medium that you're comfortable with will do. Even though this exercise is meant to be completed quickly, we're still using the same skills of observation. Any form of practice that forces you to observe will improve your overall drawing skills.
Gesture drawing is the process of drawing the human figure quickly and loosely (but it can also apply to any subject as well). It is not about creating a finished drawing, but rather as a study of the human form or as a drawing in which a finished painting or drawing could be developed. Gesture drawings can be accomplished by using a variety of lines, shapes, or entirely blocked-in figures. These drawings can range in “completeness” and may take several minutes to just a few seconds to produce.
So grab that sketchbook and start creating some "gestures"!