
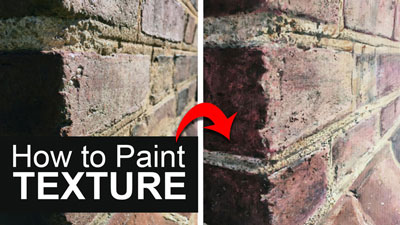
For many of us, these details can present a challenge that seems insurmountable. A challenge that is best avoided – at all costs! In fact, some of us may even choose to forgo a subject completely when these tiny details present themselves.
This doesn’t have to be the case. Even the smallest of details can be accurately captured in a painting. It’s simply a matter of surface choice, brush choice, and understanding how to manipulate the paint to conform to your demands.
The Problem with Painting Details
When we encounter small details in a subject, our first response is usually reaching for a smaller brush. Many times, this works out just fine. Smaller brushes are, of course, essential. But a smaller brush is not the only factor we should consider. Even with a smaller brush, if the consistency of the paint is too thick and/or the surface is too textured, then the mark we may create is flawed and may not translate into those intricate details that we’re after.
We therefore, have to consider the consistency of the paint, along with the surface texture in order to have full control over the marks that we can make. There’s more to it than just using a small brush.
Factors to Consider When Painting Small Details
We’ll first quickly take a look at the factors we should consider when tackling small details in an acrylic painting. Then, we’ll take a look at each of these factors a little closer.
Here’s what we should consider…
- The Surface – Using a smoother surface, like gessoed masonite or illustration board, will give us greater control over tiny details compared to that of canvas. Canvas is simply a coarser surface. While small details can absolutely be developed on a canvas surface, they’re easier to achieve on a smoother one.
- Brush Size / Type – Although a small brush is preferred, you may find that your smallest brush doesn’t produce the results that you’re after. Experiment with your smaller brushes to find which one will make the marks that you need to recreate in your painting. While any brush type can be used for detail work, most artists prefer one with a round tip. This type of brush can produce both small dots and clean lines.
- Viscosity – Viscosity refers to the fluidity of the paint. We’ll need to adjust the viscosity in order to create fine details in a painting. Often, heavy body acrylics are too thick to produce clean details. We’ll need the paint to be fluid enough to be spread, but remain opaque enough to be visible.
The Painting Surface
When many us think of creating an acrylic painting, we automatically think of canvas as our surface. While canvas is a great option, it’s far from the only choice we have. In fact, any surface that accepts acrylics can be used as a painting surface.

The texture of canvas is naturally coarse. Because it is so coarse, it easily accepts multiple layers of paint. It’s great for blending transitions or gradations of color and value and applying paint with thick applications. One drawback to working on canvas however, is how difficult it can be to create intricate details. They can be developed on canvas, it’s just a little more difficult. Other “canvas-esque” surfaces such as canvas board or canvas paper are even more challenging surfaces to create details.
Other smoother, more-viable, surface solutions exist. These surfaces make painting details a little easier, but lack some of the advantages of working on canvas. Let’s take a look at a few options…
Surface Option #1 – Watercolor Paper
Watercolor paper on its own, without any treatment, can be a suitable surface for acrylics. Both the cold press and hot press papers can be used. But if we want a little more rigidity, a light coat or two of gesso does the trick. This surface provides a smoother surface than canvas, but still does a fine job of accepting acrylic applications.
Surface Option #2 – Illustration Board
Illustration board is a heavier option over watercolor paper. The surface of the more popular, cold press illustration board, is similar to that of Bristol paper. Illustration board is quite a bit thicker than Bristol paper and it’s this rigidity that makes it a good choice for detail work with acrylics. One drawback of this surface is that it lacks much texture at all, but if your subject requires crisp, sharp details, this surface may be worth looking into.
Surface Option #3 – Gessoed Masonite
Masonite is an engineered wood that is rather light, but strong. When gesso is applied to the surface, it becomes an exceptional surface for painting with opaque paints like acrylics. Masonite can be purchased at a local hardware store and cut to any size you wish. You can apply gesso to the surface yourself with a sponge or large brush.
Because this surface is so popular among artists, it can be purchased as a manufactured product. The manufactured version can be purchased at most art stores. Most surfaces you’ll find are super smooth, but some companies have started to create versions with a faint tooth. The smoother version is fantastic for detail work, but will show obvious brush strokes. The slightly textured surface (used in the video above) allows for precise detailing, but also has enough tooth for gradations of value and color when the paint is applied with a thicker consistency.
Brush Size / Type
Clearly, if small details are what you’re after, you’ll need to consider the brush that you use to create them. Brushes are produced in a multitude of sizes and shapes. For tiny details, I recommend using a round brush. Round brushes are capable of producing both small dots and defined lines.
In some cases, a flat brush may be a better option. If you need to create rectangular shapes or very thin straight lines, a flat brush may work better.
The small, detailed tree branches in our example are best tackled with a round brush. We can vary the stroke with a round brush easily. With more pressure, our line is a little thicker. With less pressure, the line is thinner.
As we mentioned before, the smallest brush in your collection may not be the very best option. You’ll need to experiment with the brushes that you have in order to decide which is best for your details. In my case, my smallest brush simply did not hold enough paint and did not provide enough variety in the mark. The brush I used to create the tree branches in our example was still very small (size 0), but not the smallest round brush I own (size 18/0).
See also: Brush Types
Viscosity
Heavy body acrylics are great for solid coverage of color when used without any thinning. However, for details, these acrylics are hard to control and precision is difficult. If we are to have the upmost control over the details that we create in a painting, then we must adjust the viscosity of the paint.
By adding a little solvent (in this case, water) to our paint, we can adjust the viscosity and make the paint a little easier to spread and control. But we must be careful. If we thin the paint too much, it can become translucent. If we go even further than this, we can remove the adhesion properties of the paint all together. If this happens, the paint may not stick to the surface and may even pull up some of the applications underneath.
We need to find a balance. We need the paint to be fluid enough to be spread, but also opaque enough to be visible. Finding this balance can be tricky and requires a little practice and experimentation. But once you find the right balance, it can be a real “game changer”.
Painting Tiny Tree Branches
Let me conclude here by leaving you with a few tips for painting tiny tree branches, since this is what initially served as the inspiration for this lesson.
Tip #1 – Pull Strokes as the Tree Grows
Begin with the basic structure, or skeleton, of the tree by painting the trunk and largest branches. Pull strokes upward, just as the tree grows. Allow the strokes to taper as the larger branches and trunk becomes thinner.
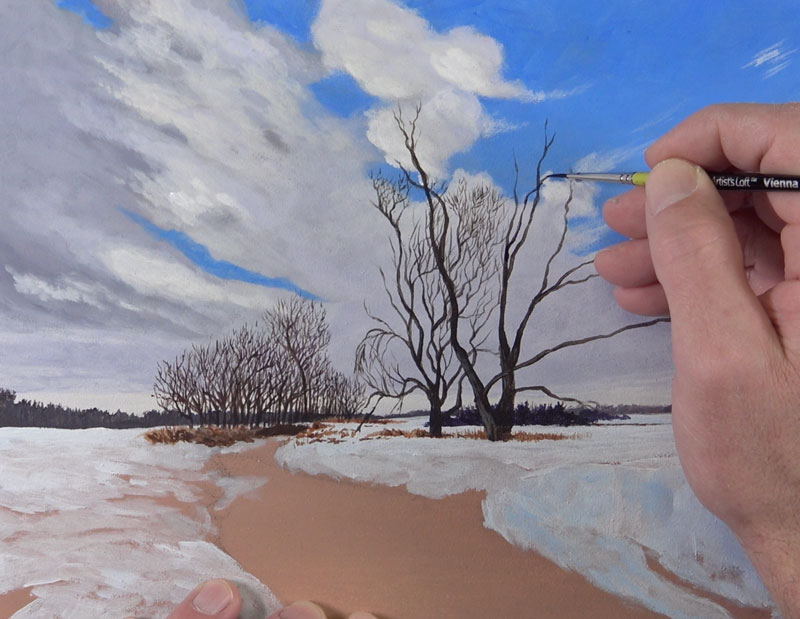
This same approach can be taken for even the smallest of branches. For the smaller branches, start your stroke from the trunk or larger branch and pull outward.
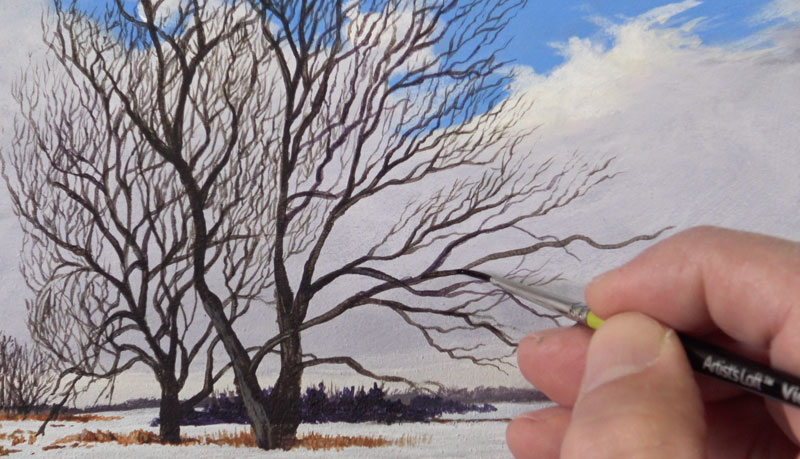
Tip #2 – Avoid “Scrubbing”
Scrubbing refers to the action of moving the brush back and forth to apply the paint. Scrubbing is best reserved for creating textures or covering larger areas. The branches on a tree are best developed using a deliberate stroke that flows in one direction. Resist the urge to move the brush back and forth.
Tip #3 – Create Organic Lines
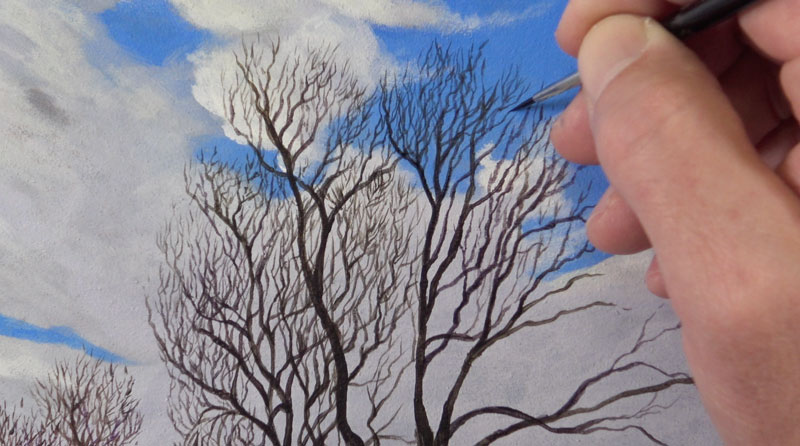
A tree is a living, organic subject. Organic subjects are best depicted in a painting with organic marks. Your strokes should move and change direction in an unpredictable manner. Perfect, straight lines should be avoided. A little “wiggle” in the stroke will lead to a more realistic appearance.
Tip #4 – Don’t Paint Every Branch, But Include More Than You Think
A mistake that some beginners make is including too few branches. This doesn’t mean that you need to include every single branch that you observe. Including every branch may make the painting look confusing or busy. Instead, we nee to find a balance between what we observe and what we include in the painting. Many times, we need to include more branches than we think, but be careful not to include too many. Evaluate your painting as you work to find that perfect balance.
Tip #5 – Branches Are More Concentrated Closer to the Outer Edges
If we closely observe a tree, we’ll notice that the branches are more heavily concentrated near the outer edges. This should also be reflected in our painting. The core of the tree will likely have a lesser concentration of smaller branches and may even be completely open.
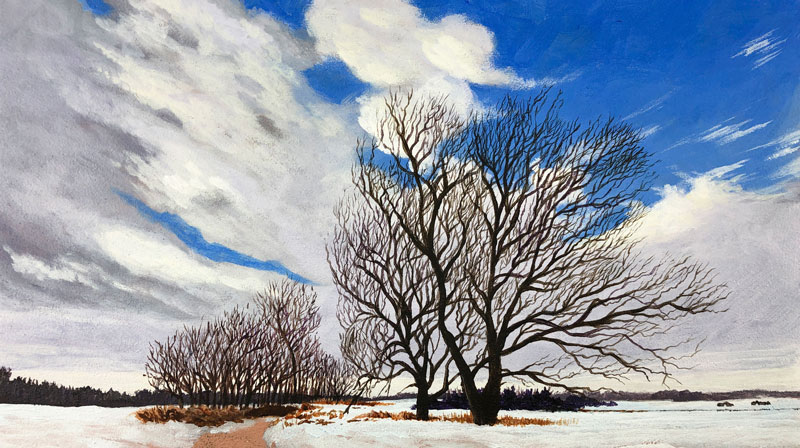
Conclusion
Hopefully, you can see that tiny details are completely achievable in a painting. We just need to consider a few things if we are to find success. The surface, brush size and type, along with the viscosity of the paint makes all the difference.
If so, join over 36,000 others that receive our newsletter with new drawing and painting lessons. Plus, check out three of our course videos and ebooks for free.


Lesson Discussion
Comments are closed.
Thank you. This is just the quickie lesson I need right now. I am painting a winter home scene. This is helping me a lot. I am practicing the trees before I start my final painting. Thanks, again. 😊