
I invite you to a new artistic journey. Today, we’ll dive into the world of sketching with tinted graphite pencils. Along the way, we’ll explore the advantages of textured paper and using toned paper instead of the customary white! We’ll also discuss ways to make your artwork more believable by including cooler and warmer colors.
Also, I’m going to show you some useful tips and tricks on transferring your sketch to your final drawing surface and dealing with any unexpected issues that may arise with this technique.
The main goal of this project is to capture the essence of the subject we’re drawing and creatively use our knowledge of color and light to create a fun drawing!
The Art Supplies for this Project
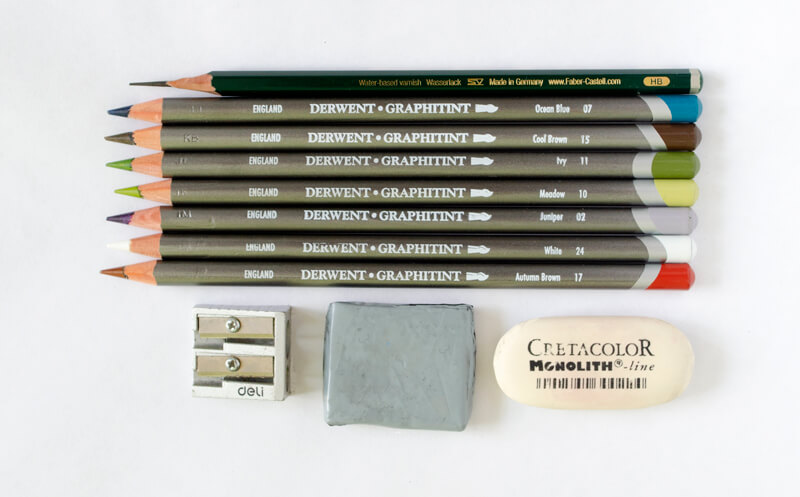
Let’s first take a quick look at the pencils.
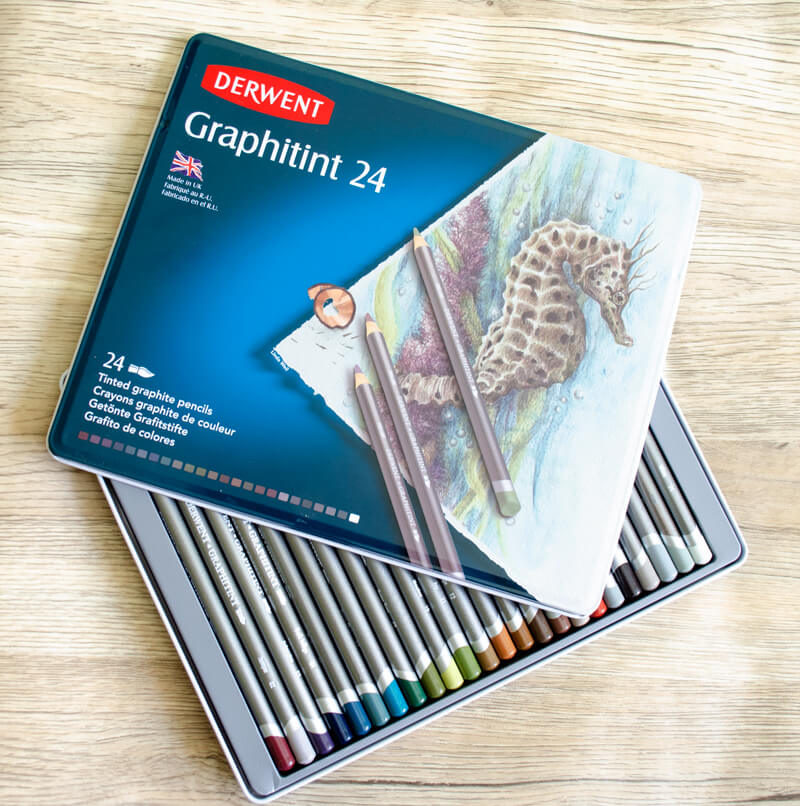
I’ll be using pigmented graphite pencils made by Derwent – Graphitint pencils. I’ll be using several pencils from a set of 24 colors. These pencils are best described as a combination of colored pencils, watercolor pencils, and graphite drawing pencils.
Here are some of the unique characteristics of Graphitint pencils…
- As opposed to ordinary graphite pencils, which are various shades of grey, each pencil is pigmented with color.
- The colors are quite muted.
- The pencils are water soluble – in other words, they can be activated with water, so the colors become richer and more intense.
After applying water or “activating”, the mark becomes very difficult, almost impossible to erase (unless you use a rough eraser that removes the paper as well). We’ll need to keep this in mind moving forward.
Although erasing after activating with water is nearly impossible, you can soften the intensity of the covered area by applying water once again and dabbing it with a paper towel or a brush.
The choice of paper also affects the behavior of the pencils. Thin papers tend to soak too much and may create unpleasant wrinkles.
If you think that activating with water may add some charm and vibrancy to your artwork, but the paper you use is relatively thin, it’s still possible to intensify the colors with a slightly wet brush. The paper won’t get too much water and the colors will become more intense. You can wet your brush and then slightly dry it with a paper towel before applying to areas of color. A damp brush will still activate the color.
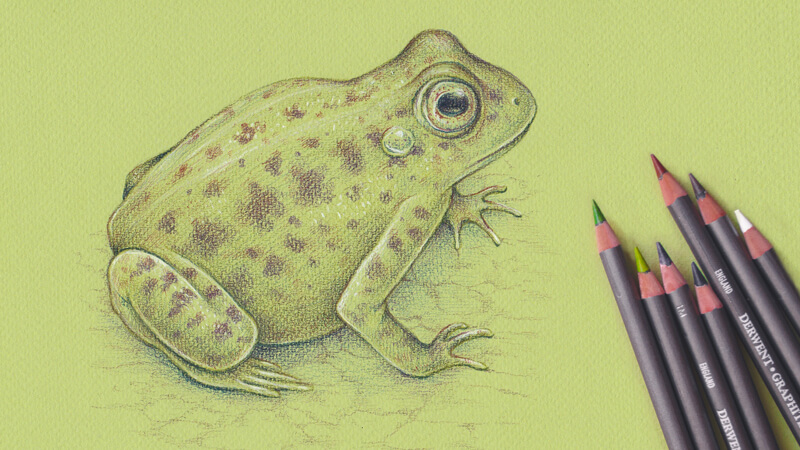
I personally admire the range of colors that Graphitint pencils provide. There are definitely some wonderful greens and browns to choose from! This palette is perfect for creating animal and nature-inspired illustrations.
By the way, this is one of the reasons why I decided to draw a frog for this project, but we’ll touch upon this topic later.
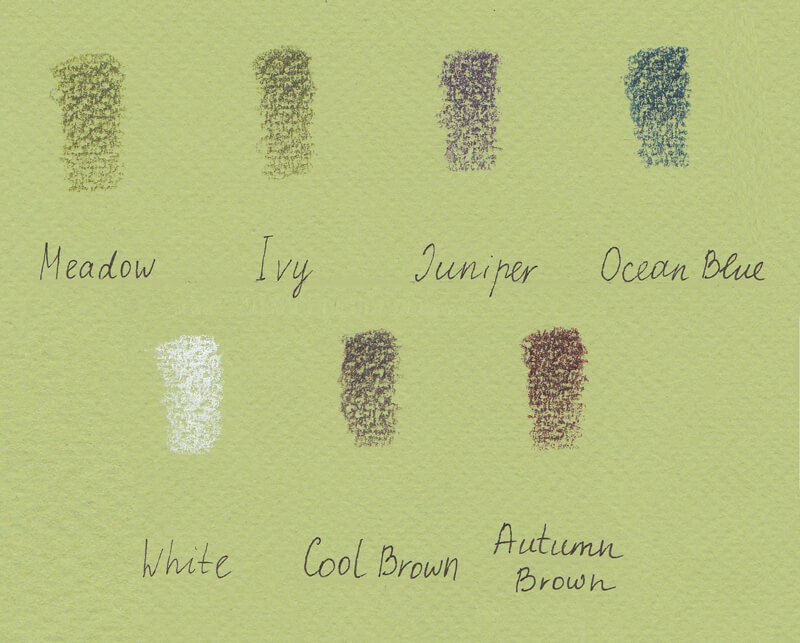
I’ve chosen just seven pencils from the set to limit myself and keep a sketchy appearance. The names of the colors we’ll use are:
- Meadow
- Ivy
- Ocean Blue
- Autumn Brown
- Juniper
- Cool Brown
- White
Of course, you can choose more pencils for your drawing, if you wish!
Please note that the indications of color on the body of Graphitint pencils may not correspond to the actual colors we get on paper. That’s why it’s useful to test all of your pencils before applying them to an actual drawing.
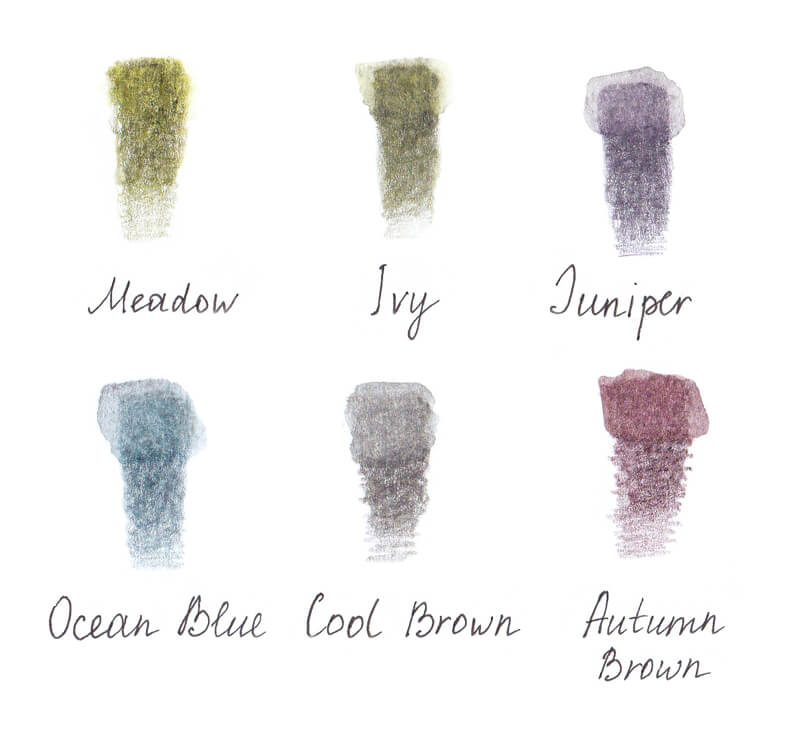
Below you’ll find a sample of strokes made with the selected pencils. The strokes demonstrate the changes in pressure (lighter at the bottom, heavier in the middle) and the effect created by this variation. The top parts of the color swatches are activated with water.
I didn’t show the White pencil because the strokes are almost invisible in the scanned image.
This sample (above) was created on a relatively thick, textured watercolor paper. This sheet had a creamy-colored tint. Just a moment ago, we were talking about the difference in how the strokes look on various types of paper, so I thought that I’d share another example.
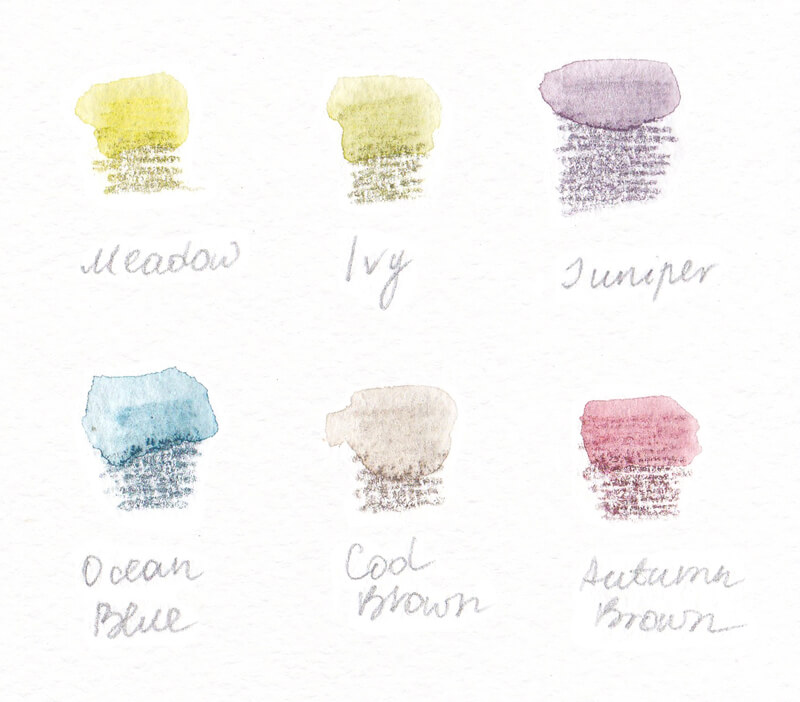
The sample below is made on a sheet of thin drawing paper that is more suitable for ink liners, ordinary graphite pencils, or any other dry media. As you may notice, the colors are less intense after applying water (in the upper portions of the color swatches), compared to the samples created on a thicker watercolor paper.
The color of paper affects the perception of the color. In the image below, you’ll find samples made with the same Graphitint pencils but now on green paper.
Derwent pencils are soft and require frequent sharpening. That’s why I recommend keeping a mechanical or an electric sharpener at hand.
A kneaded eraser is an excellent tool for softening lines and removing excess graphite. It may be useful to lighten the general contour lines of our final artwork but we’ll discuss this in detail in a moment.
We’ll also need an ordinary graphite pencil for sketching and creating a preparatory drawing.
It’s a wonderful idea to have some drawing paper for sketching, just in case you choose to play around with a few ideas.
For our final drawing surface, I’ve chosen Daler-Rowney Murano A4 paper (“Apple”). It has a very pleasant green tint and a subtle texture.
This paper may be found at your local art supply store. You can buy sheets of various colors and try many different options. The possibilities are truly endless!
I’m going to use only a portion of the paper. The remaining areas can be cut off and be used for sample sheets.
The Idea
My goal was to find something that has a greenish, greyish or brownish color. I also wanted a subject that features an interesting texture and has a connection to the theme of summer and nature.
A frog isn’t the only subject fitting the requirements, but I find it especially promising. The combination of the tinted green surface and beautiful, muted colors of Graphitint pencils create a perfect color for the pattern of the frog’s skin.
In this case, we get a great ready-made green background. The tinted paper sets the basic tone, we’ll just add the darker and lighter values!
See also: Six Reasons to Draw On Toned Paper
The subtle texture of this paper produces a sketchy look which works well for this drawing. You can focus on other aspects other than just creating details and convincing textures. That’s why I recommend using this set of art supplies for drawing on location, directly from life. You may just find a real frog to draw!
I’ve already created a couple of drawings of a frog using the same tools – Graphitint pencils and tinted paper. Below you’ll find the examples…
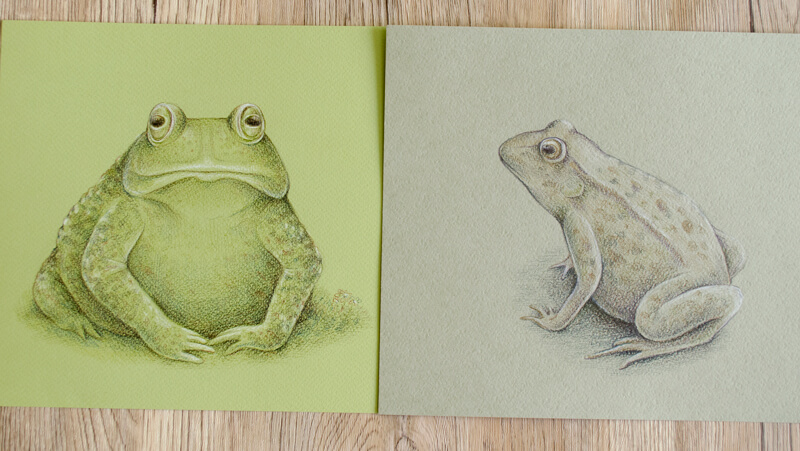
The drawing we’ll create here will make a nice addition to the series that I’ve already begun.
Since I’ve already explored this subject in the past, I can choose the pencils with more confidence. One of the previous artworks was made on paper of this greenish tint (“Apple”), so I already know that warm browns work just fine.
The subtle inclusion of the reddish brown and purple should make this drawing more interesting and different from the existing artworks.
Exploring the Subject and Creating a Final Version of Your Sketch
I start the work with some abstract, conceptual sketching. This step is especially useful if you’re drawing an object that is not familiar to you. In these cases, reference photos may help greatly.
I create quick sketches of poses and anatomy studies using the HB graphite pencil. I’d like to find an interesting pose that is easily recognizable and not too complex.

A frog is a relatively simple animal to draw. It has a large head with big round eyes, a bulky body, and relatively thin limbs. The best approach is to draw the rough shapes first while imagining each shape as a three-dimensional form.
Even if your drawing isn’t perfectly accurate, thinking in terms of three-dimensionality adds to the believability of your art.
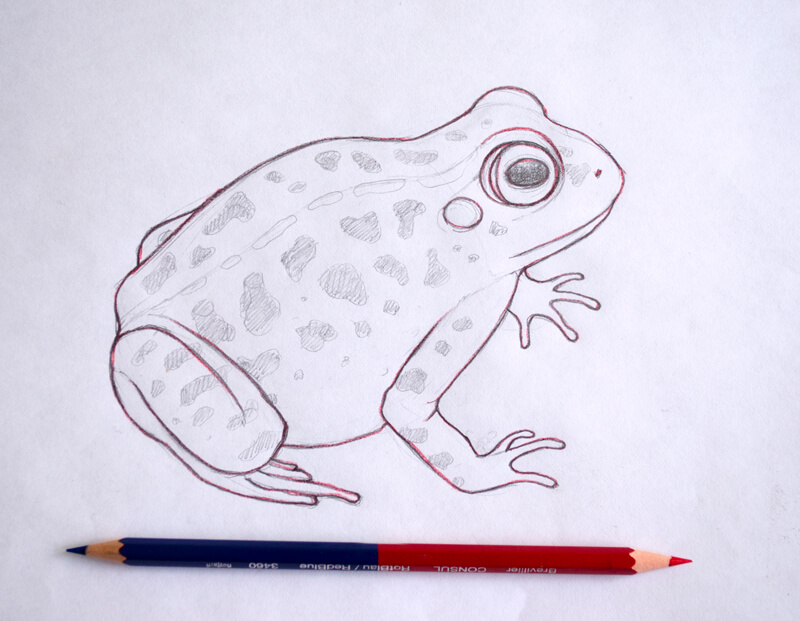
When I have a general idea of how my frog should look, I start a final sketch that will be transformed into the tinted graphite artwork.
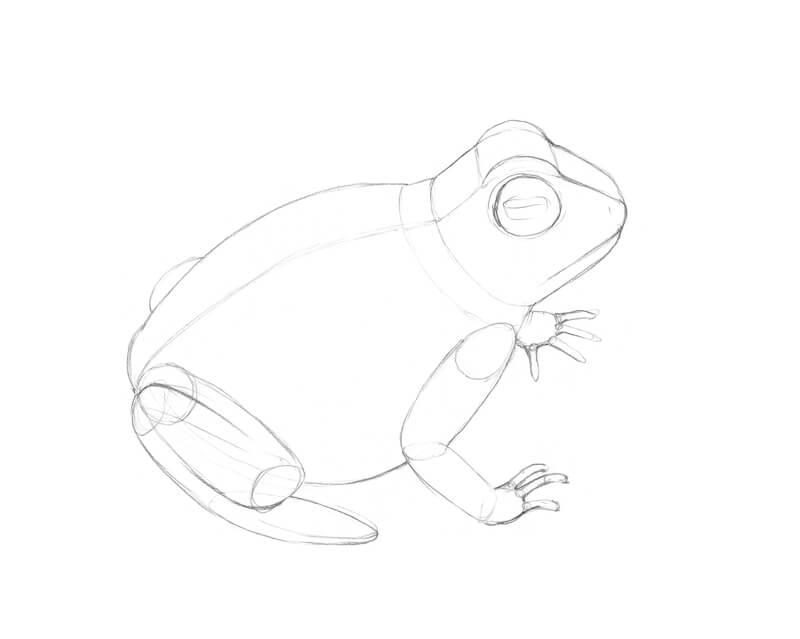
After the general lines are drawn, I accentuate the significant contours and erase the marks that are no longer needed.
I also add a pattern of the frog’s skin. This allows me to consider where I should place the spots in advance.

The final sketch is complete, but how do we transfer it to our green paper?
The first option is to redraw it from scratch. However, the lines should be light and limited. That’s why this method may not be the best for everybody.
In the next part of the tutorial, we’ll explore a couple of ways to overcome this obstacle.
Basic and Advanced Tracing Tips: How to Transfer the Sketch to a Clean Sheet of Paper
There are several ways to copy a line drawing if we need to duplicate, improve, or create a new artwork.
1) Use carbon paper – This is a special paper that you may be able to pick up at a local craft or stationery store.
Put this paper under your sketch and place your finial drawing paper underneath the carbon paper. Outline your sketch once again on top of the existing lines and you’ll get a nice transfer on the final paper.
Usually this kind of paper creates a print that consists of dark lines, but there are also colorful copying paper variations (yellow, red, green, etc.).
The main advantage of carbon paper is the ease of use. The main drawback is that sometimes it leaves unpleasant marks that are difficult to erase and conflict with the materials you’re applying.
2) Use a light board or window – Another great way to transfer your line drawing to another piece of paper is using a window pane during the day or a light table.
First, put a new sheet of paper above the sketch and place them on top of the plane that lets the light go through. This makes the lines visible and you can trace them.
This method works perfectly if the light is strong enough and the upper sheet of paper is not too dark or too thick. In my case, I have a great lighting but my green paper is quite thick and its tone makes the lines of the sketch barely visible. Alas, I have to find another solution!
3) Punching – Let’s talk about a way to trace a drawing called punching or denting (however, I feel like there may be other names for it).
Punching works best with thick textured paper; you put the paper under your sketch and outline the drawing once again, applying heavy pressure. It’s possible to use something like a stick with a sharp tip or a ball-point pen with an empty cartridge to trace the drawing.
After you’ve finished outlining, remove the sketch and study final surface. If the pressure on the tracing tool was heavy enough, you’ll see some dented lines. Most probably, they will be barely visible, which makes this method suitable for very demanding situations and creating a delicate copy (for example, if you need an extra clean outline with no graphite marks).
Please note that sometimes the dents you get by using this tip may cause some issues. For example, softer pencils may cover all the areas but not fill in the indentions.
If you prefer having a defined underdrawing before diving into the process, it’s possible to the redraw the drawing once again, following the pattern of dents. Or you can leave the dents as they are and proceed to creating applications of any medium you are going to use!
4) Graphite transfer – There is another method left. I’ll share my process of making a sort of copying paper with improvised means.
The first step is to turn over the paper with your final sketch; then, apply a layer of soft graphite to this side.
In the image below, you can see how I mimicked the contours of the frog, using the 4B pencil. Softer lines work better because they leave darker marks, but you can use any (preferably soft) graphite pencil you have.
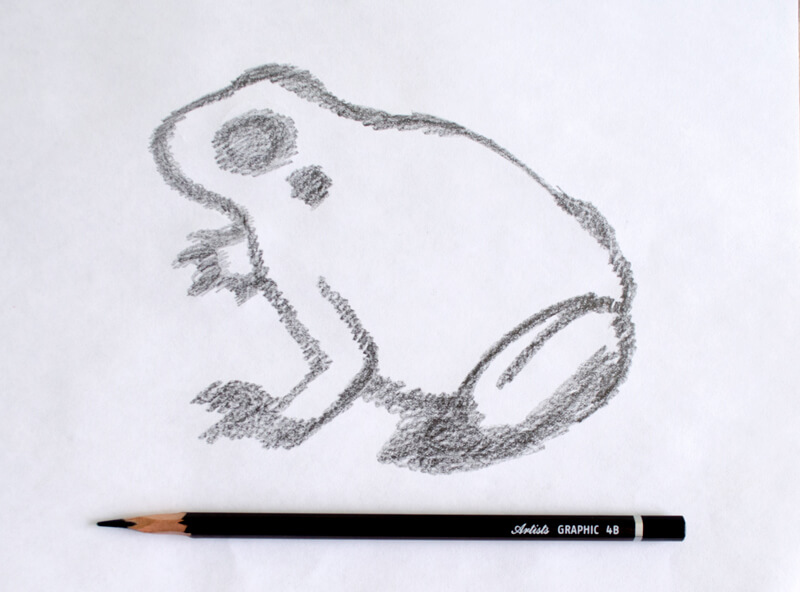
I applied the graphite stokes only to the contours because they are visible through the back of the paper. If your sketch is drawn on thick paper, you can just cover the whole area.
Now flip your sketch once again. Your drawing (the frog) should be on top and the graphite strokes on the underside. Put the clean copy sheet (in my case, it’s the green paper) underneath and trace the necessary lines using any tool you like. I used a red pencil to make new lines that contrast so I know where I’ve already made the outline.
It works like magic! After you’ve finished tracing, you get a nice imprint on your clean copy paper.
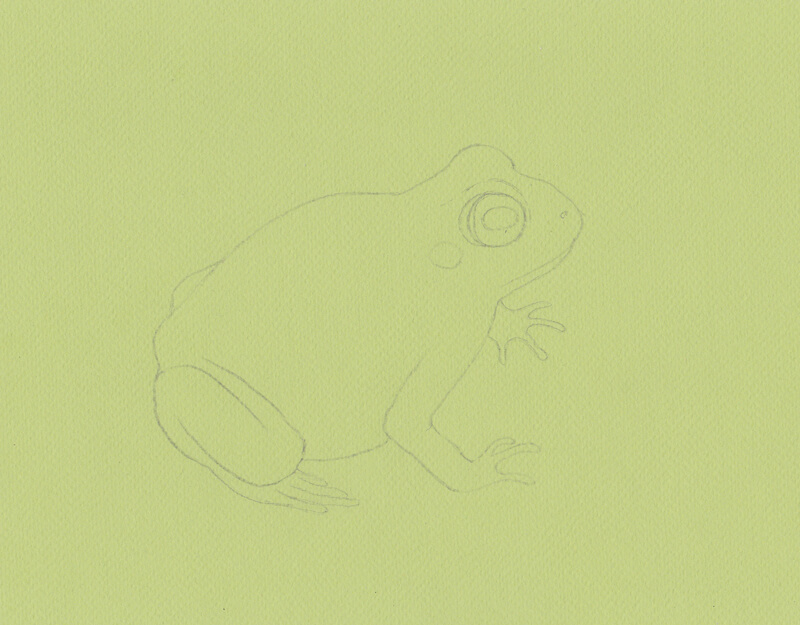
The resulting outline isn’t as elaborate as the preparatory sketch. The lines are slightly rough, but that’s not a problem. We now have something to work with – without guessing where the contours should be!
I didn’t copy the pattern of the frog’s skin in order to avoid overloading the underdrawing with information. My sketch will be at hand, so I’ll be addressing it any time I need.
Let’s proceed to the fun part – drawing with tinted graphite pencils!

How to Draw a Frog with Graphitint Pencils
First, I soften the graphite marks with a kneaded eraser. If the lines are too dark, they may conflict with further applications and create a ‘muddy’ feel.
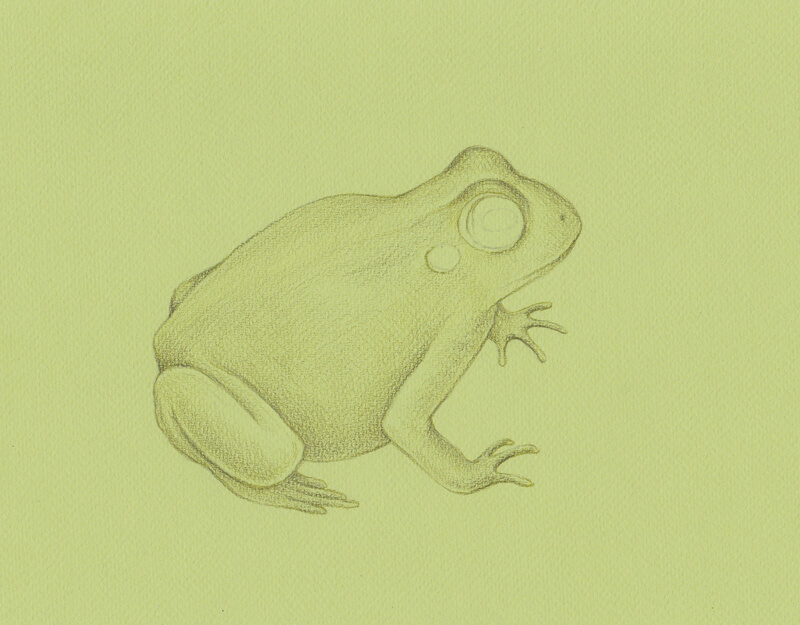
With the Meadow pencil, I create a base for our tinted graphite sketch. I accent the contours of the frog’s body and create the illusion of a three-dimensional form by varying the pressure placed on the pencil. Since the back of the frog catches more light, I apply less pressure here.
I keep the pencil covering relatively light and transparent. This preserves the tooth of paper for the further applications. I mix application techniques, combining light hatches and soft circles that accentuate the texture of the paper.
It should also be noted that my pencil is sharpened, but not to a precise, pointed tip. I allow it to be slightly dull to produce smooth, soft strokes and cover more surface with less effort. However, feel free to sharpen your pencils as often and as much as you find necessary.
Meadow works so well with this tint of paper – it feels like they are designed to be together!
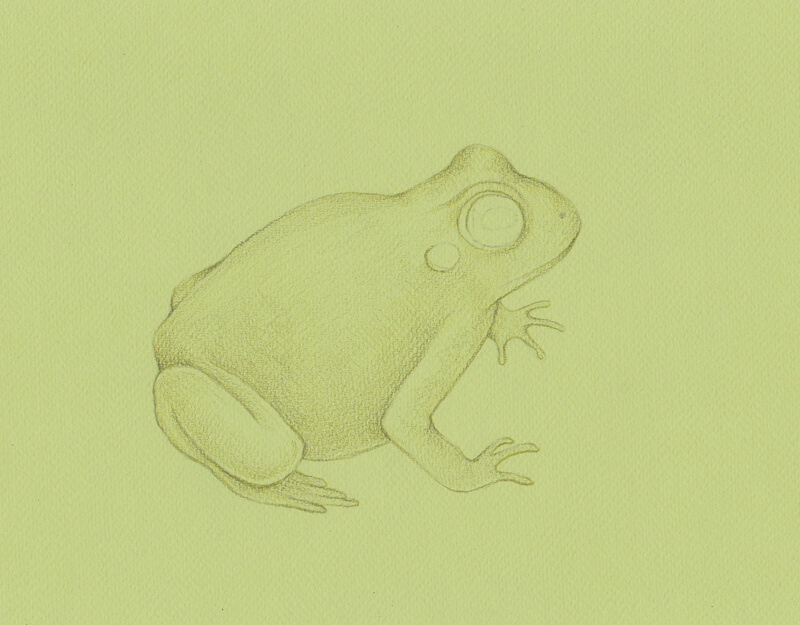
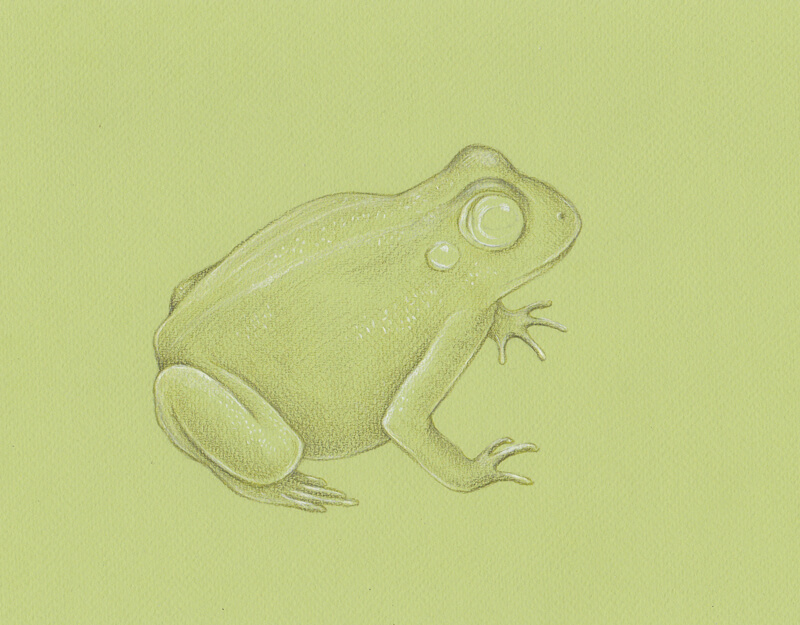
Now I apply Ivy to make the frog appear more solid. I accentuate the darker areas of the frog’s body, making sure that the new strokes blend smoothly with the existing ones.
You don’t necessarily need any blending tools. Just make your pencil applications soft and keep the pressure from light to medium.
The texture of the paper becomes clearly visible and adds to the believability of the frog’s skin texture.
It’s time to add some highlights and reveal the lighter values. With White, I create a few highlights in the frog’s eye, on the head, and back. It’s also a great idea to add a few highlights to the limbs with this pencil.
I use both hatching and dots. Graphitint pencils are soft which makes creating dots (and short marks in general) an easy and enjoyable task.
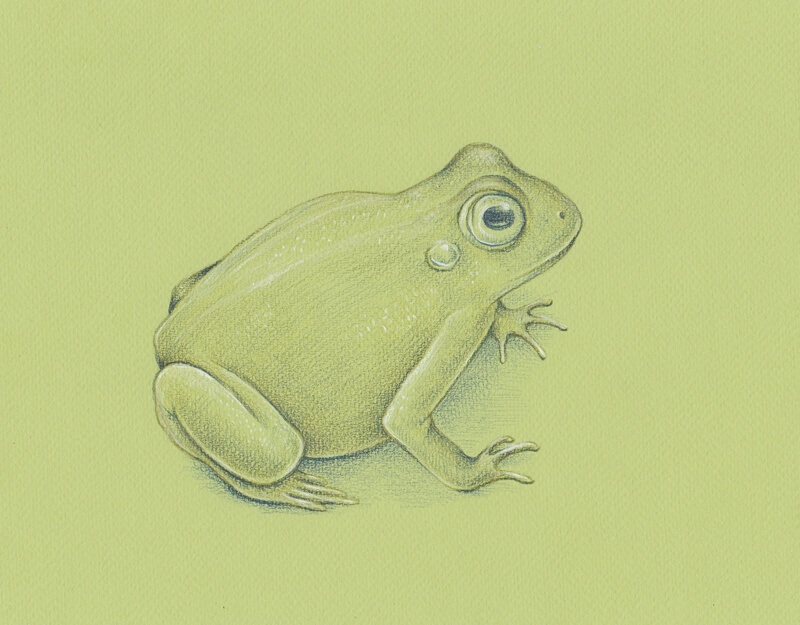
I apply some dark blue strokes with Ocean Blue. This color will serve as the darkest pencil for this drawing.
I avoid using black lines. Dark blue, mixed with other colors, will be much more interesting than just plain black.
I draw the pupil with Ocean Blue, accent the contours of the body and create a hint at a drop shadow. It’s important to be flexible with the pressure you apply.
I add some strokes with a very light pressure to the back of the frog. The back should reflect light from above (the sky) and it often has a blue nuance, especially in the late spring or summer.
I use both Autumn Brown and Juniper to create beautiful spots on the frog’s skin. Since we’re addressing the details, I sharpen the pencils to get a precise tip.
At this step, it is useful to use the preparatory sketch as a reference. We can use it to transfer the pattern of the spots.
I use Juniper, which is a purple shade, mostly in the bottom part of the body, and Autumn Brown, which is reddish brown, in the upper part. Bigger spots feature a combination of both colors. I apply soft, smooth strokes in a circling technique.
With Autumn Brown, I also add some dots and short hatches to the eye of the frog to make it more interesting. To add depth to the pupil, I cover the existing dark blue applications with this reddish brown hue.
To make the cast shadow more varied, I lightly touch it with Juniper.
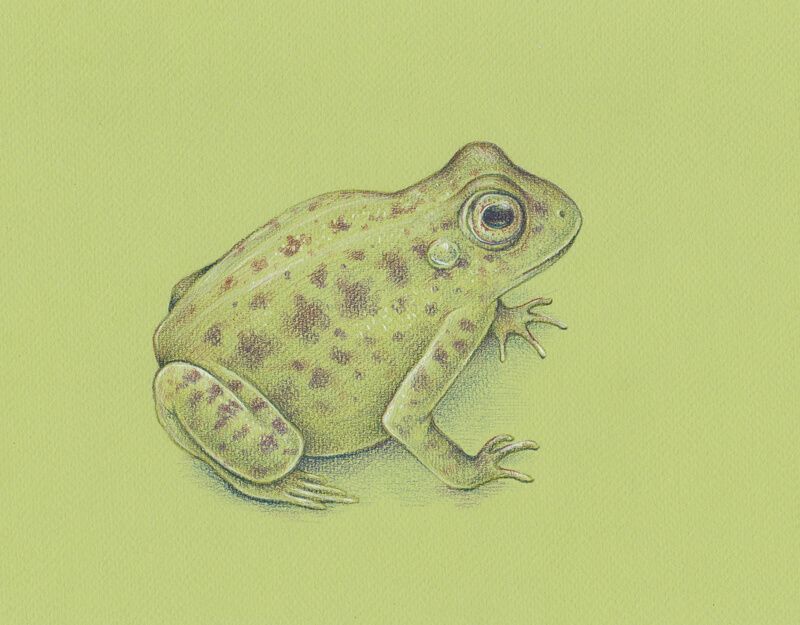
I use Cool Brown to draw the stones under the frog. I don’t want the pattern of stones to be too stark, so I avoid single lines. Instead, I develop the shadows between the stones with soft pencil strokes.
I also add dots and short hatches to the belly and the limbs of the frog. The light that is reflecting from the ground or soil often leaves a warm, brownish tint on the objects. Having the stroke of the same color on the frog and in its environment helps to unite the artwork and make it more harmonious.
Our quick Graphitint sketch is complete!

The Conclusion
It was a wonderful adventure! We’ve covered a lot of topics: working with tinted graphite pencils, several options for transferring a drawing onto another sheet of paper, playing with colors to make the artwork more believable. I hope you’ve enjoyed the process and become inspired!
It is said that a quick sketch a day may make life a little happier. This tutorial is an example of how something can be easy, expressive, and fulfilling at the same time. You need just a sheet of paper and several pencils!
Thanks for your attention! Have fun and please share your creations!
If so, join over 36,000 others that receive our newsletter with new drawing and painting lessons. Plus, check out three of our course videos and ebooks for free.


Lesson Discussion
Comments are closed.
A delightful and encouraging presentation!
Thank you, Sarah! It’s so wonderful if this tutorial inspired you. Happy creating! 🙂