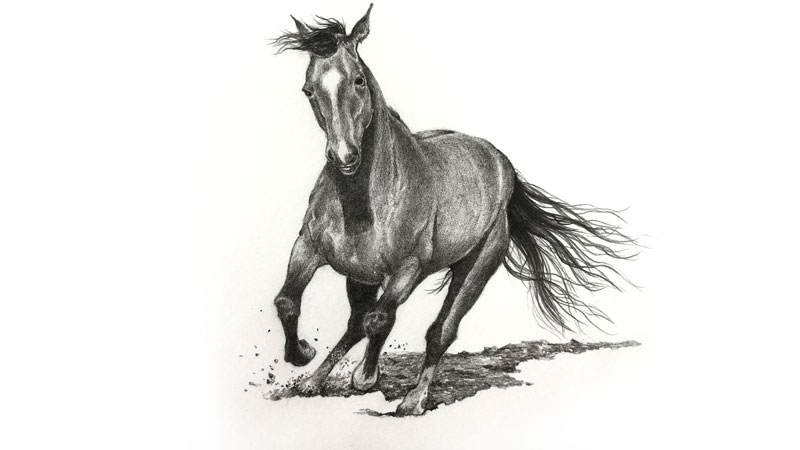
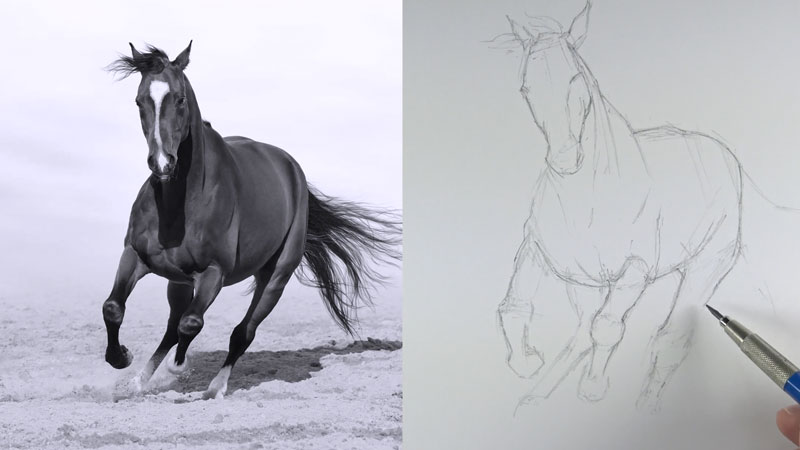
In this lesson, we'll take a look at drawing a horse in motion with graphite pencils. Although this drawing may seem intimidating for a beginner, we'll break the process down into two simple steps.
The first step will focus on drawing the basic shape of the horse with loose, light lines. We'll only be concerned with finding the contours of the subject in this step of the process. This first step is quick, but essential. We are concerned with finding the correct proportions along with the shape.
The second step will focus on developing the tone and value of the horse. This is often referred to as "shading". This time consuming step will bring the form of the horse to life and create the necessary illusion of surface texture.
Drawing with pencil doesn't require a huge investment in materials. A high quality drawing surface and a couple of drawing pencils are all that is needed to create a successful work. While many pencil manufacturers sell pencil sets with a variety of graphite hardness, most artists will find that only a few pencils will suffice. In this lesson, only two graphite grades are used - "HB" and "2B".
(Some of the following links are affiliate links which means we earn a small commission if you purchase at no additional cost to you.)
We'll begin by lightly and loosely sketching out the contour lines or outlines of the horse. A light touch is used to prevent any indentations from marring the surface of the paper. Even though the shape of the horse is curved, mostly straight lines are drawn. By drawing straight lines, we can concentrate on the angles of the lines as they are drawn. We are also concentrating on finding the overall shape of the horse. It may be helpful to look for smaller shapes within the larger one to build up the larger shape.
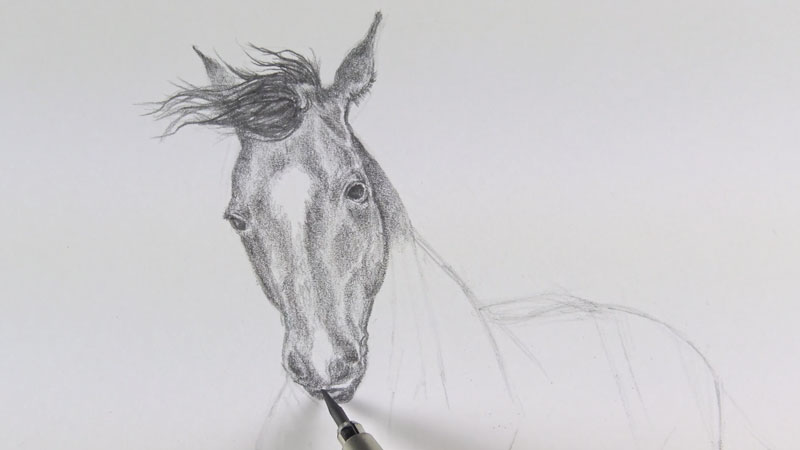
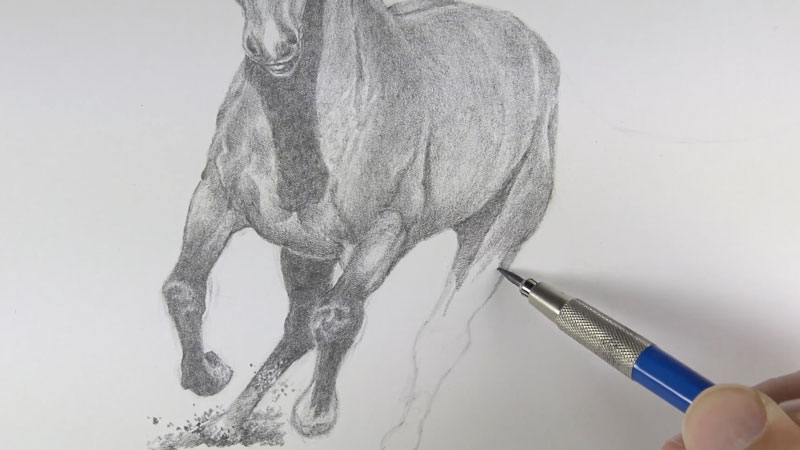
Once the basic contour lines are in place, we can begin the process of developing the tone and value. This part of the drawing process is usually referred to as "shading", even though we are considering both the light and dark values. We'll start with the head of the horse and work our way to the left of the body to prevent smudging (for right handers). We begin with light applications that flow over the cross contours of the form of the horse. We can darken these applications easily, but if we go too dark too quickly, it's a bit harder to fix.
We'll gradually and patiently work our way down the body of the horse with even applications of graphite. By paying attention to subtle changes in tone and value, we can develop the illusion of the muscles of the horse, just underneath the skin.
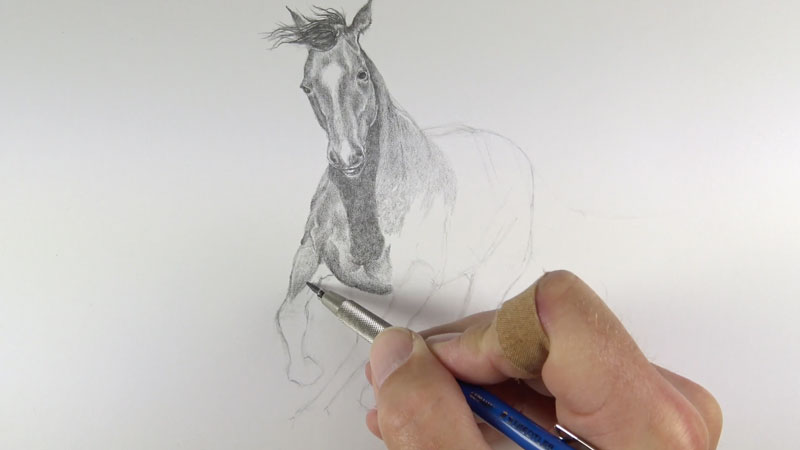
In areas where the cross contours are a bit harder to identify, we can apply the graphite by circling. Circling refers to making small circular strokes with the pencil to create even transitions of tone and value. Since we are not using a blending stump to smooth transitions, we must rely on the pressure placed on the pencil. Circling does not mean that we are drawing small circles, instead it simply means that we are pressing with the graphite in a circular motion. The pressure is not necessarily heavy, but it is consistent. This produces an even transition of value.
The environment that the horse is in plays a role in how we approach portions of the drawing. The horse is outside, which produces a strong shadow underneath the head, body, and portions of the rear leg. Including these locations of strong contrast help to create the illusion of natural sunlight. The horse is also running through a field of loose dirt. This motion is causing portions of the dirt to fly up, overlapping the body. The slant of the horse helps to create the illusion of movement, but including the flying dirt accentuates it even further.

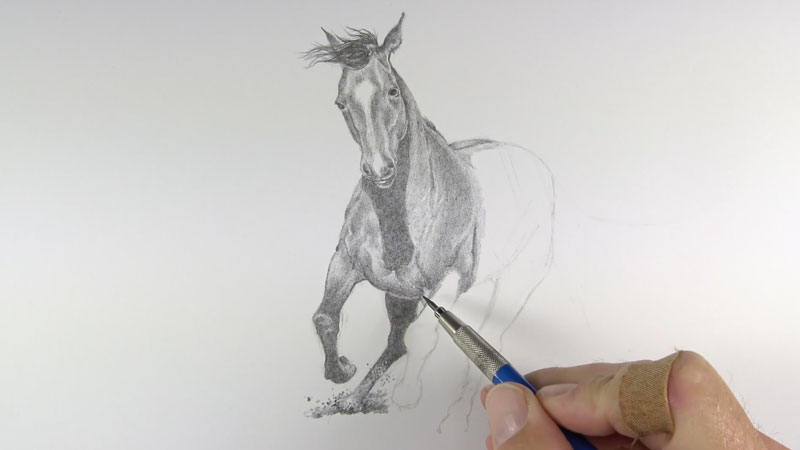
We can continue developing the value through graphite applications down the rear of the horse. For each section of the body, we are still paying close attention to the form. The form of the horse dictates the directional strokes applied with the pencil. The tail of the horse is drawn with deliberate strokes of the pencil. These marks taper as they are made and include some variety.
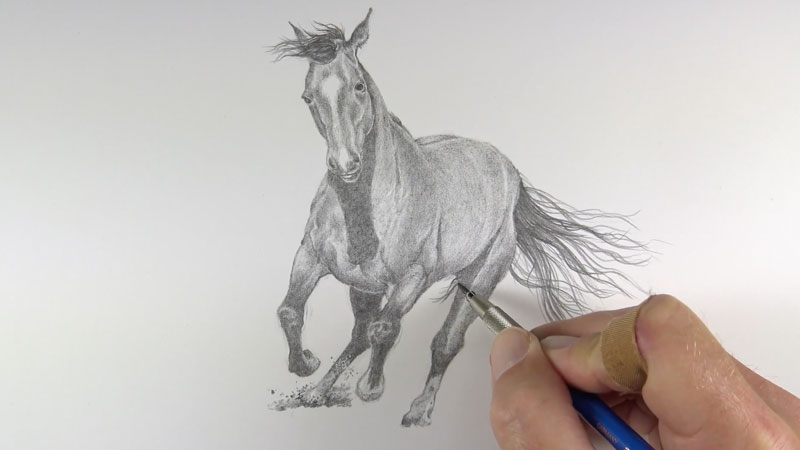
Another factor for creating the illusion of natural light in the scene is the cast shadow below the horse. We need to include it to strengthen the light, but in this case, we want to exclude the rest of the surrounding background information. By excluding the background information, we place more emphasis on the horse and its motion. For this reason, we'll include textural details only in the location of cast shadow.
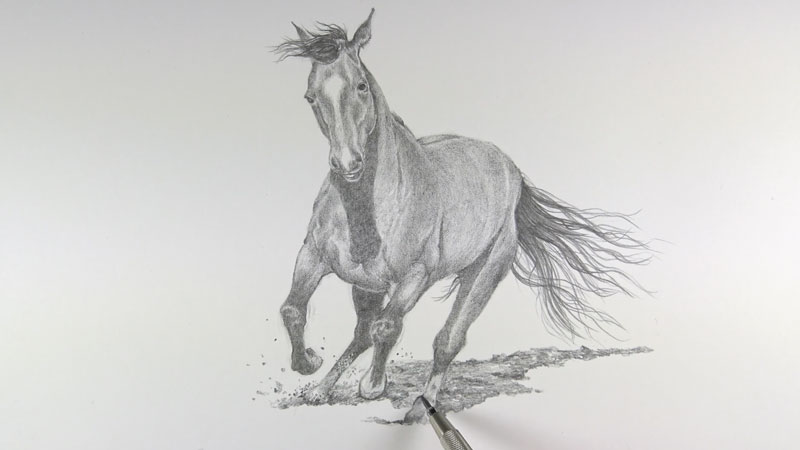
Up to this point in the drawing, we have only used the HB graphite. It's now time to increase the contrast a bit and broaden the range of value. To do this, we'll go over the darkest locations within the drawing with a 2B graphite.
Once all of the graphite applications have been made, we can use a kneaded or vinyl eraser to clean up the drawing and remove any stray marks or smudges left by the graphite.
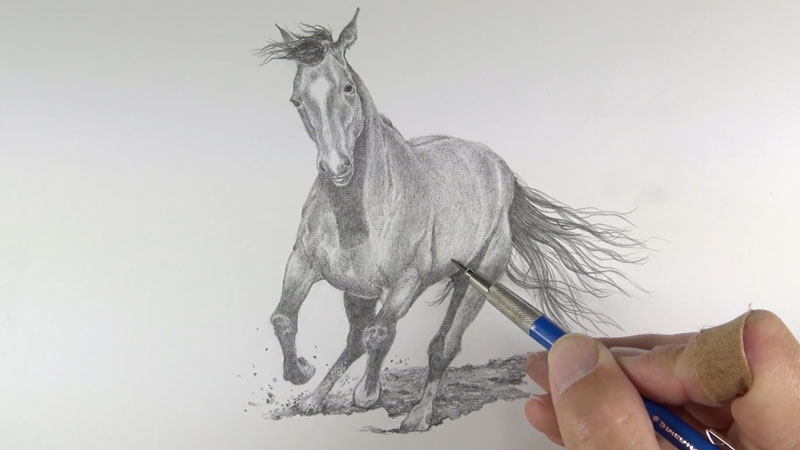
Like with any drawing media, success with graphite or pencil requires patience and attention to subtle changes in value. By working slowly, we have full control over the marks that are made. No matter what subject you are trying to tackle, try starting loose with lighter marks and become more precise when it's time to develop the tone.