In this lesson, we'll take a look at one approach to drawing a realistic bird, but we'll also look at using Derwent Studio colored pencils to do so. The medium and brand that you use for your subject matters greatly. The approach that you take in your drawing is clearly different across various media, but the brand that you use can also play a role in your level of success.
New artists have a tendency to grab the cheapest materials for creating their art and unfortunately, this sometimes leads to frustration. Quality materials simply perform consistently, while less quality materials can hinder your success. It is recommended to use the best materials that your budget can muster.
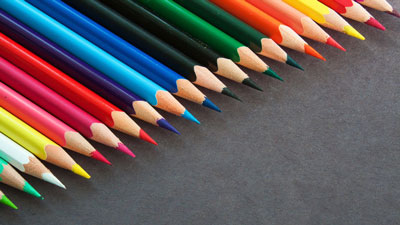
When it comes to colored pencils, there are several quality brands out there and it can be hard to choose which brand is best for you personally as an artist. The best approach is to experiment, but this can easily get very expensive.

Sometimes it is best to see the results of certain brands and make comparisons of how they perform so that you can make a better decision. For this reason, I have created several tutorials that use various brands of colored pencils to help you better understand how they perform and how they are different. I have also created a colored pencil comparison chart which includes the factor of price.
Other Colored Pencil Brands:
(Some of the following links are affiliate links which means we earn a small commission if you purchase at no additional cost to you.)
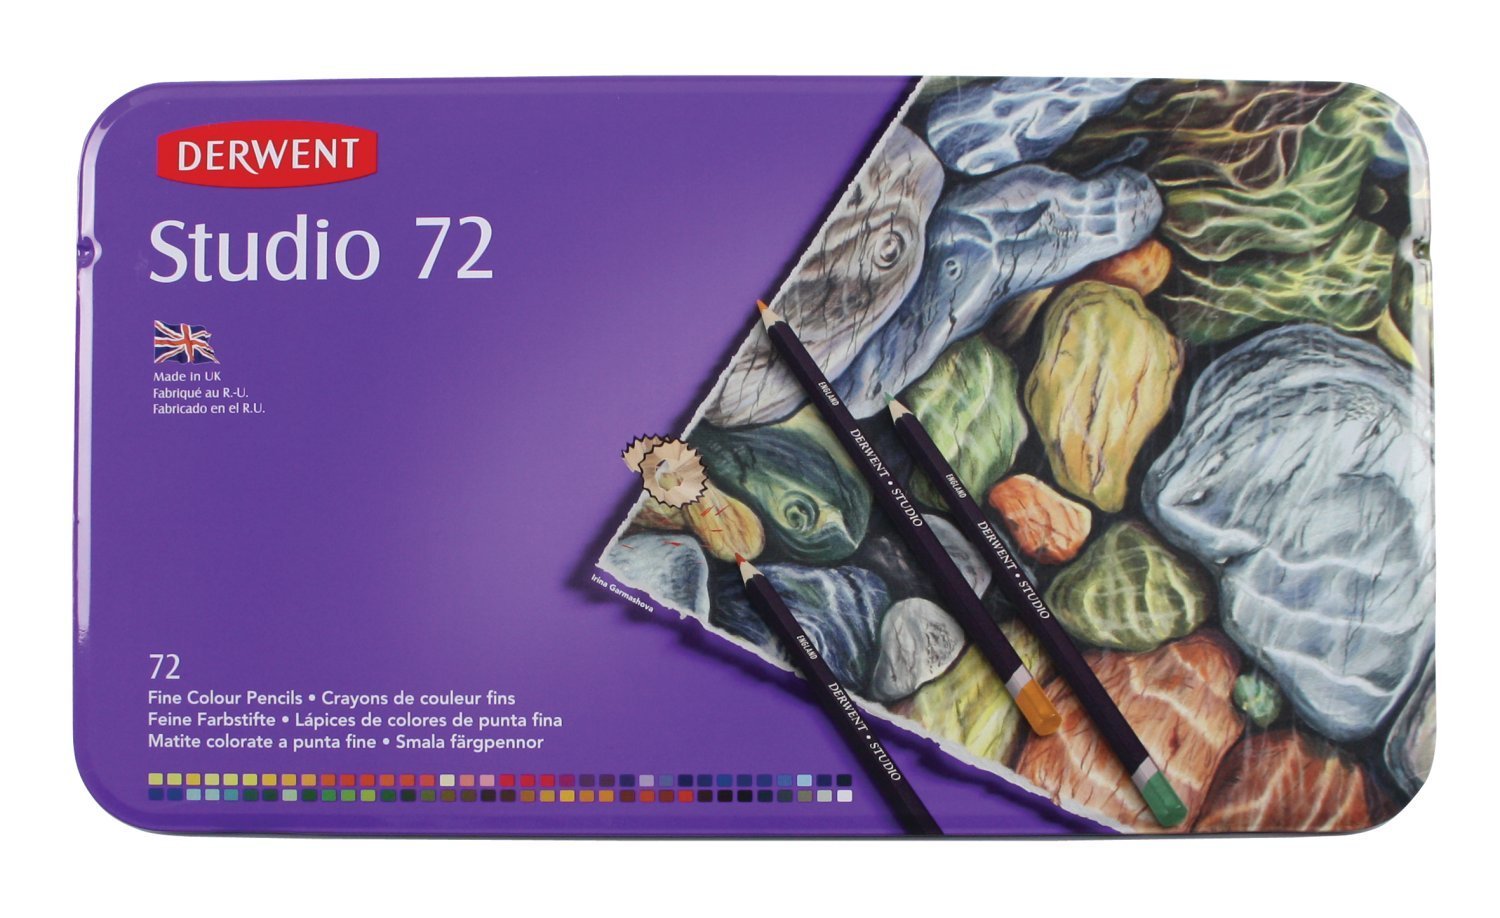
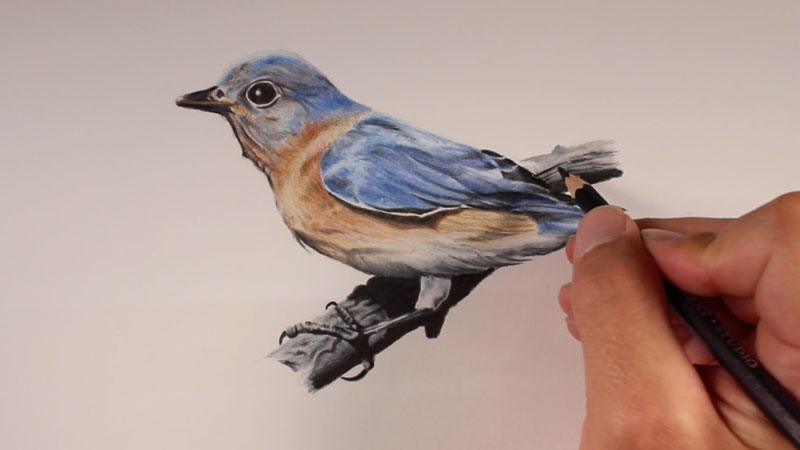
The brand of pencil used in this lesson is the Derwent Studio brand. I must say that I am particularly fond of the Derwent brand. In fact, I rate them the highest of all graphite drawing pencils in my comparison chart.
The Derwent Studio colored pencils are wax-based pencils encased in a hexagonal wooden shaft. The wood is strong and so is the pigmented "lead". For this reason, the Derwent pencils sharpen to a well-defined point which they can hold for a long period of time without sharpening. This makes them perfect for precise detail work.
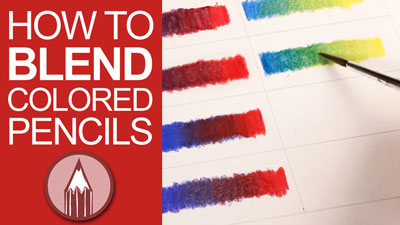
Because the lead is strong, they are somewhat restricted in the amount of material that is applied to the surface. Multiple applications are necessary. Layering colors, of course, is an integral part of drawing with colored pencils so this isn't a huge issue.
The pencils are easy to grip and marks are produced with relative ease. These pencils are best in the hands of the artist that requires controlled layering of color with gradual increases in depth.
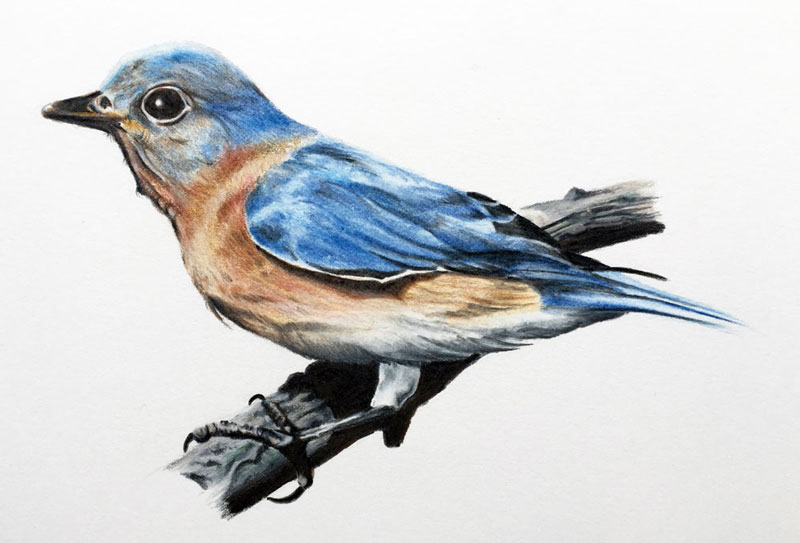
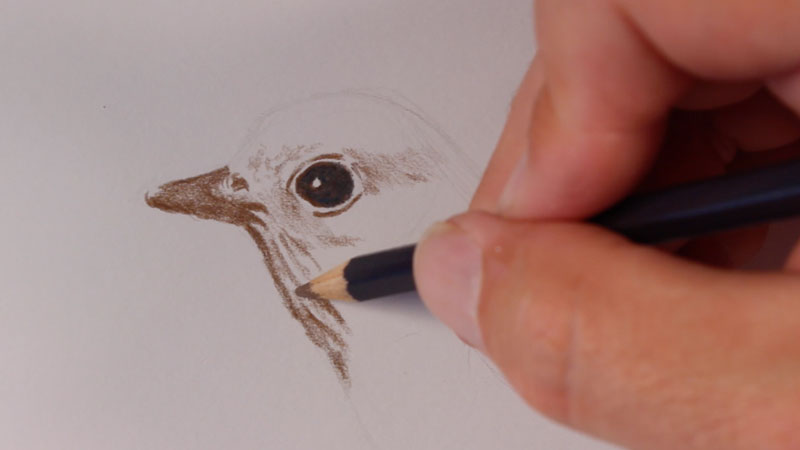
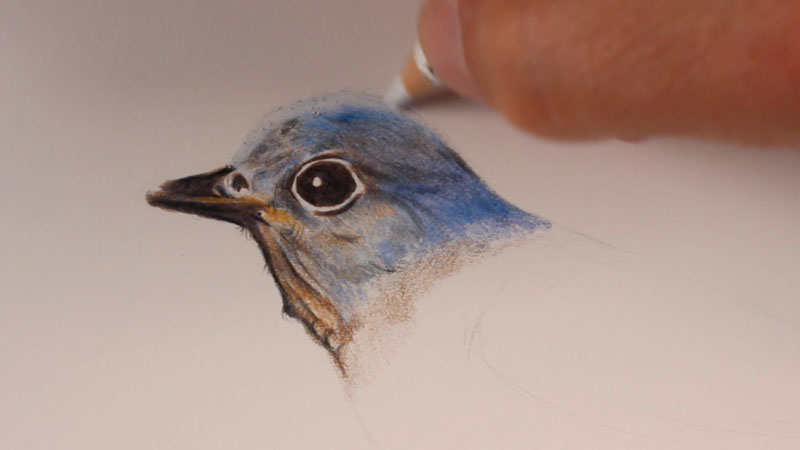
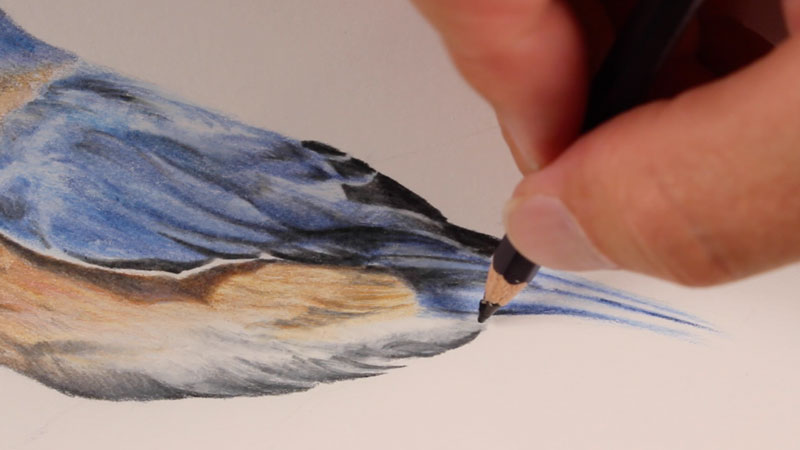
The basic shapes of the bird are drawn with a light application of graphite. The initial sketch is lightly erased with a kneaded eraser. Initial applications of colored pencil are applied using Copper Beech and Prussian Blue. Copper Beech and Prussian Blue are layered to create natural blacks.
Additional colors are layered. Spectrum Blue is applied to the head of the bird, leaving lighter applications around the top. Values are darkened on the head with additional applications of Prussian Blue. A bit of Golden Brown is applied to the beak and just underneath the eye. The entire application is then burnished with a colorless blender.
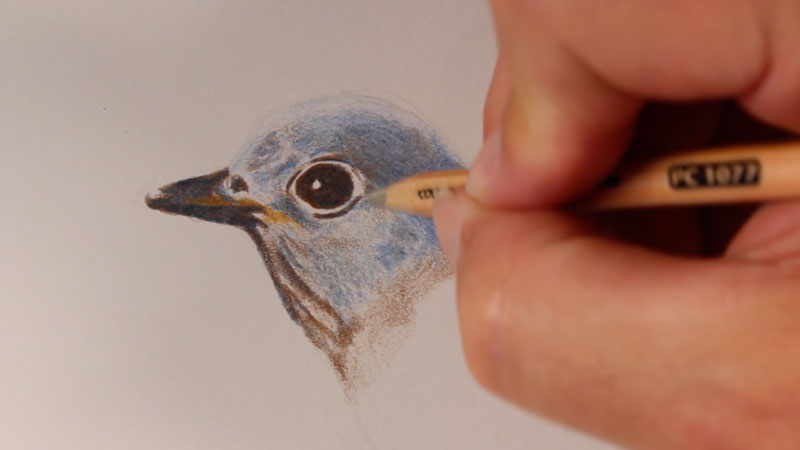
White is applied on the top of the head creating a smooth transition to the darker values. Black is used to darken the values on the eye, the beak, and the front side of the bird. Black is also used to add a bit of texture to the head.
The body of the bird is developed next using Copper Beech layered with Crimson Lake and Golden Brown. This application is then burnished using white and the colorless blender. Shadowed areas are developed with Copper Beech, Prussian Blue, and Ivory Black.
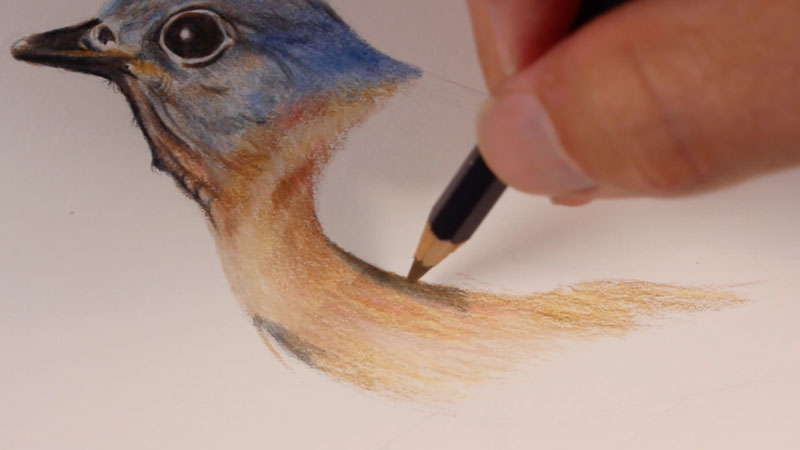
The underside of the bird is developed by layering a creamy application of white before darkening with Ivory Black. This creates a gray area that translates as shadow. Marks are pulled throughout the drawing according to the form of the bird. Strokes are made to follow the cross contours.
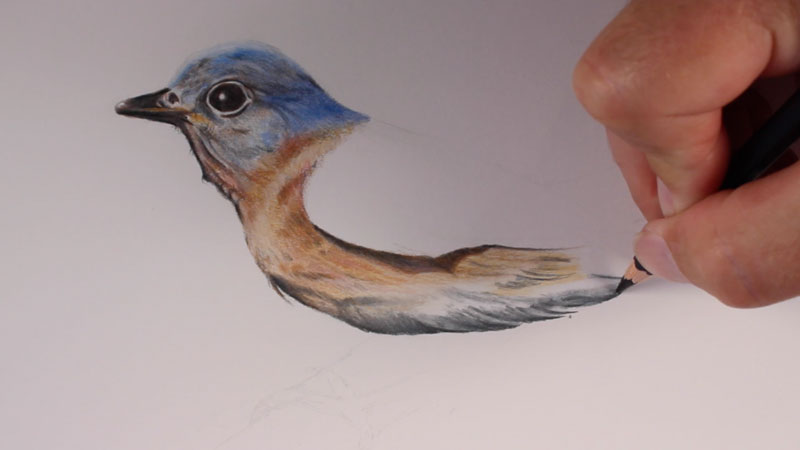
The wing of the bird is developed by layering Spectrum Blue and Prussian Blue. After burnishing with a colorless blender, shadows and textures are defined with applications of Ivory Black.
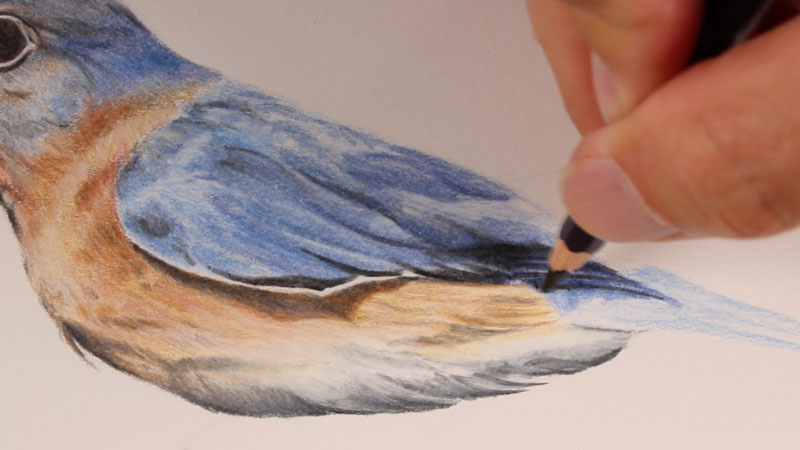
Darker values contrast with lighter values on the last bit of the tail feather. This contrast is enhanced with Ivory Black.
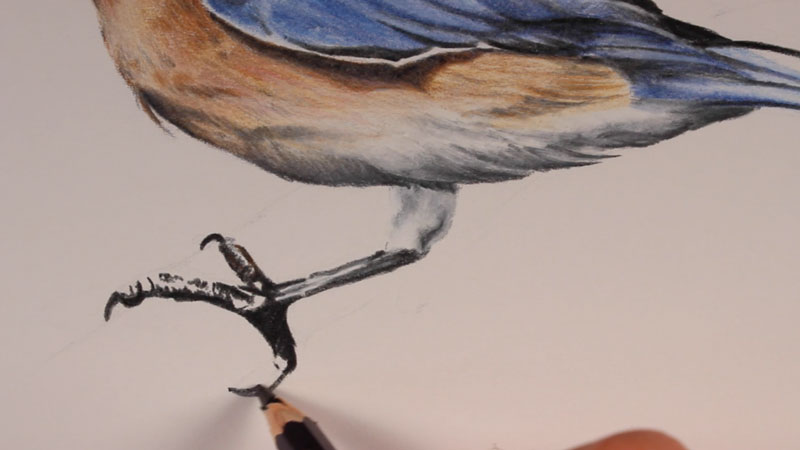
Work begins on the legs of the bird. The upper portion of the leg is addressed with a layered application of Ivory Black and white. For the talons, Ivory Black is applied first, followed by a light application of Copper Beech to "warm" the color. This application is then burnished with white.
Shadows on the branch are created with Ivory Black and Copper Beech. Applications are lighter on the side of the branch closer to the light source.
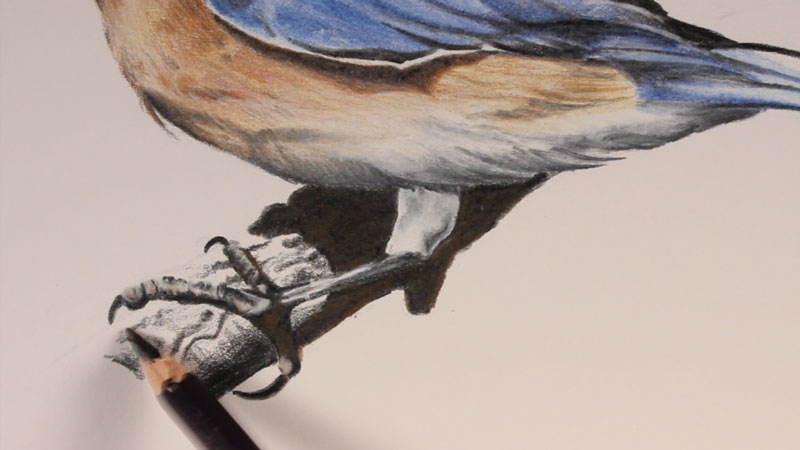
After burnishing the application with white, shadows are darkened with Ivory Black. A light application of Mineral Green is applied to make the branch appear more realistic and to add a bit more depth to the color.
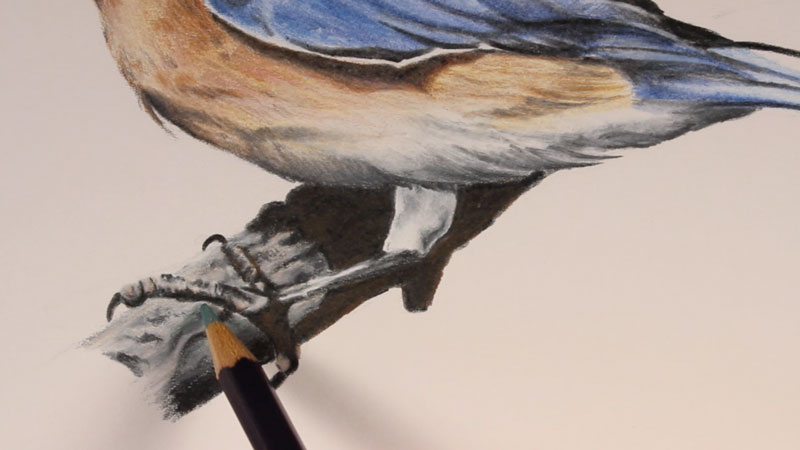
The other side of the branch is addressed in the same manner by layering darker tones first, burnishing the application with white, and then lightly applying Mineral Green.
The completed drawing...