He simply replied, “I use the stair technique.”
When asked what the stair technique was he said, “I find a flight of stairs and assign each stair a letter grade. The bottom stair might be an “F”, the next stair up, a “D”. The next stair up may be a “C”, then “B”, and the highest stair- an “A”. I then take all of the student artwork, and while standing on the flight of stairs, I throw them into the air. Whichever stair the artwork lands on is the grade the student receives.”
Sometimes grading artwork can feel like this when there is not a standard procedure in place.
Grading artwork has traditionally been a subjective activity. This can cause problems for art teachers, especially when questions arise about where the grade came from. Opinion sometimes creeps into the art teacher’s grading process and as you can imagine, wreak havoc on a student’s grade.
This should never be the case. Grading artwork doesn’t have to be subjective. Students should have a clear idea where the grade has originated from and understand completely why they received that particular grade for the assignment.
So how do we give students a clear idea of where their grade will come from in art? The first answer is simple. We provide a clear rubric. A rubric is essentially a guide that explains the requirements to receive a certain grade. For example, an “A” project may meet more requirements than a “C” project.
In a rubric, the requirements are clearly spelled out. That way when grading time comes, there is no question as to why a student received a “C” instead of an “A”. Rubrics are pointless unless they are given to a student before the project begins. This way, the student is clear on what is required to make the grade that they desire from the start.
In my opinion, rubrics should should be specific for each project assigned. Click here for a look at a generic rubric
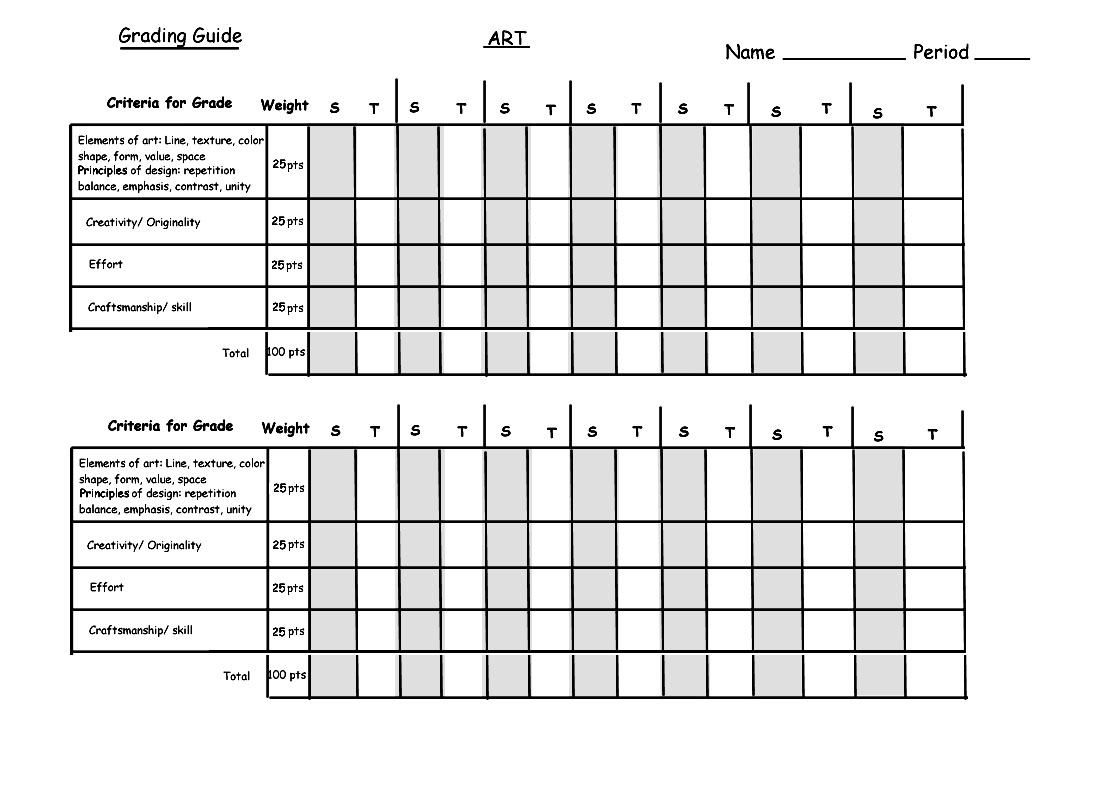
Another way to remove the subjectivity in grading artwork is to provide students with what I call a “grading guide”. As students finish their artwork, they fill out their grading guide which has a place for them to evaluate themselves. After all, self-evaluation is incredibly important in the development as an artist.
These grading guides show the students the numerical values for each of the properties that I will be grading them on. They evaluate themselves first and turn in their artwork with the grading guide. On the grading guide there is a “S” column for “student” and a “T” column for “teacher”.
When I grade their artwork, I consider what grade they have given themselves. When students receive their artwork back from me, they also receive their grading guide. This way, I can clearly explain on each section why they received their grade and what they can improve upon on the next assignment.
You are welcome to download the grading guide that I use below. (Right click on the image and select “Save as”)

The easiest question you should ever have to answer as a teacher is, “Why did I get this grade?”
If so, join over 36,000 others that receive our newsletter with new drawing and painting lessons. Plus, check out three of our course videos and ebooks for free.


