To keep your brushes performing at their best, you need to clean them. This may seems fairly obvious, but many overlook its importance. But how do you clean your brushes properly?
Below we will explore the best practices of brush care so that you get the most out of every brush, how to clean and store them. First, let’s take a look at the parts of a brush.
Parts of a Brush
Properly caring for a brush starts with brush anatomy. There are three parts to a paint brush – the bristles, the ferrule and the handle. Each of these parts require a measure of care to maximize the life of any brush.
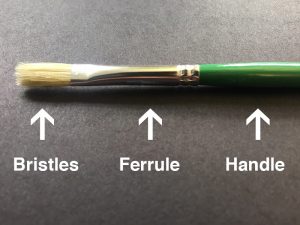
Bristles are either natural or synthetic. Natural bristle brushes are made from the hair and fur of animals including sable, hog, goat, camel and others. Synthetic bristles are typically nylon. They are cheaper and easier to care for because of their durability but many artists still prefer the feel of painting with natural bristle brushes.
The ferrule is the metal part of a brush found between the handle and bristles. Using glue and crimped ends, the bristles and handle are fixed inside of the ferrule. Thicker gauge metal indicates a higher quality brush.
Handles are probably the easiest part of the brush to care for. They are usually made from painted wood. Sometimes they are plastic. Wipe away wet paint and solvents from your handles as you paint to keep them in good shape.
Nothing Lasts Forever
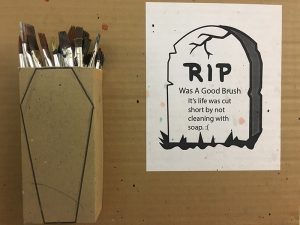
No matter how well you care for a paint brush it will expire with regular use. Brushes are damaged primarily due to our painting technique and secondarily by our washing and storage habits. By learning to better preserve our brushes we can avoid extra trips to the supply store, saving both money and time.
Don’t Wait to Clean Your Brushes
For some of us, shifting from producing art to “cleaning up” can be a difficult mental transition. After you’ve poured yourself into a work, it can be tempting to just get up and admire your work for a while and leave the clean up for “some other time”. But waiting to clean up your brushes can wreak havoc on them. It’s best to clean them up immediately after you’ve finished using them. The longer you wait, the harder it will be to clean your brushes and it may even ruin them.
Using Water and Soap to Clean Your Brushes (Water-Based Paints)
If you paint with watercolor or acrylics, then your solvent is water and it will not damage your bristles. Cleaning your brushes after painting with a water-based medium is as simple as using a bit of soap and water.
Dishwashing liquid is preferred by some artists, while others prefer a specialized soap. When choosing a soap for cleaning brushes, manufacturers of art materials are your best bet, since they produce specialized soaps that won’t harm the bristles of the brush.
(Some of the following links are affiliate links which means we earn a small commission if you purchase at no additional cost to you.)
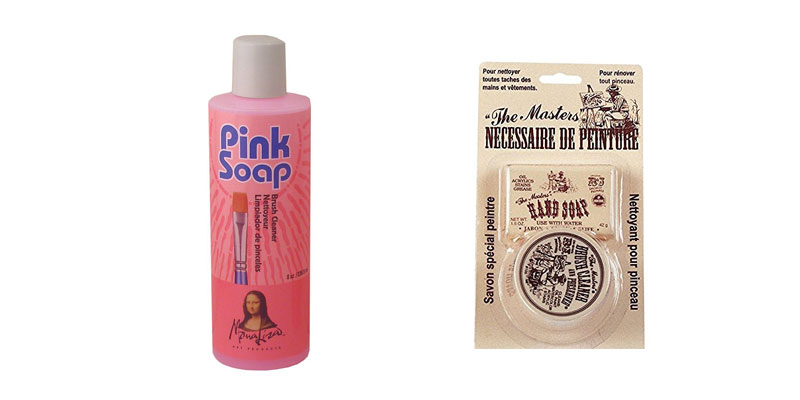
One option is to use “Pink Soap” by Mona Lisa. Pink Soap not only cleans the wet and dry paint from your brush, but it also conditions it bringing it back to its original condition.
Another option is to use Masters Brush Cleaner and Preserver. This hand soap and preserver combination is a popular choice for many artists that want a hand soap as well – after all our hands get dirty too!
Using Solvents to Clean Your Brushes (Oil-Based Paints)
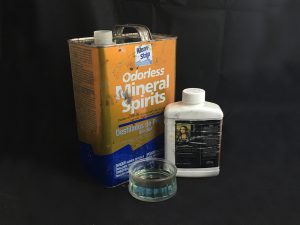
If you are an oil painter then you have some flexibility. Historically, artists have used turpentine or mineral spirits to clean oil brushes. These solvents are harsh and could, over time, contribute to brittleness and breakage of natural bristles. So after using solvents for your initial cleaning, take an extra moment and wash the solvent from your brushes using soap and and water. The brand, Dove, is a good choice as it has a built-in moisturizer.
Beside the traditional solvents, some art supply companies such as Mona Lisa offer top tier cleaning solutions that both clean and condition natural bristles (see soap options above).

Washing Technique For Cleaning Brushes
The proper technique for washing brushes is to make strokes through a container of cleaner. For water-based paints, water will suffice. For oil-based paints, use the solvent of your choice.
Too often I see student artists take a fist-full of dirty brushes and attempt to clean them all at once by pounding them into the bottom of a cleaning jar. Haste makes waste and this type of action forces the bristle to splay out in every direction and may even push paint up into the ferrule – big mistake. Doing this to a round brush may cause the bristles never to go to a point again.
For cleaning water based paints, I like to swirl the bristles into the cup of my hand while water gently runs over them.
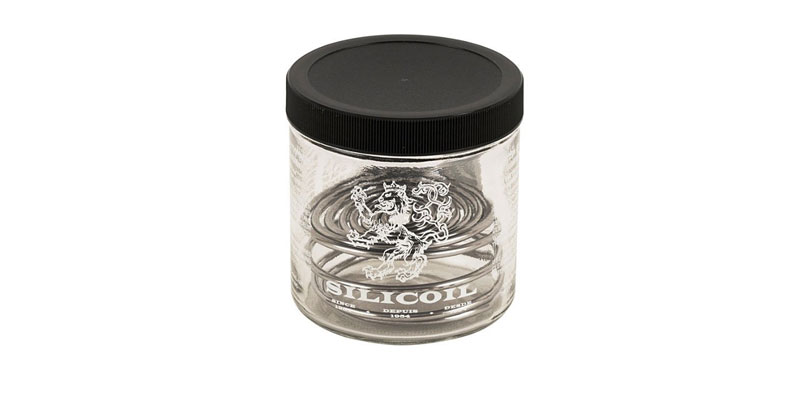
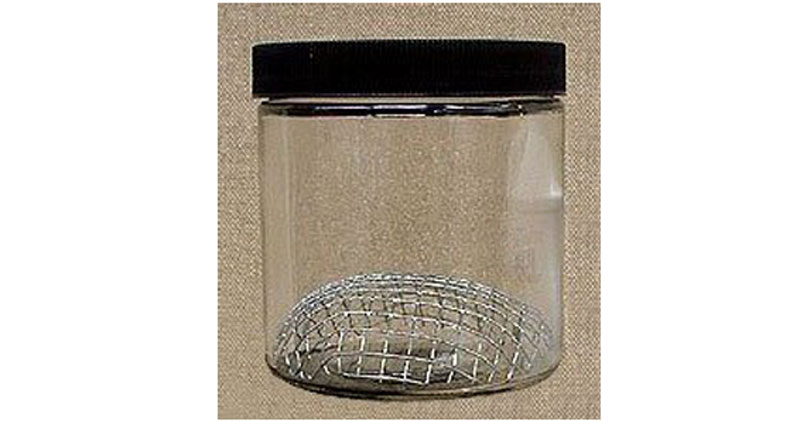
For oil based paints, invest in a brush cleaning jar with a metal screen inside. Such a cleaning jar makes clean-up a breeze. The paint falls through the screen and settles at the bottom of the jar allowing you to use the same jar of solvent for an extended period of time.
There are several “cleaning tank” options for artists. Winsor and Newton makes a Silicoil Brush Cleaning Tank which provides a smooth aluminum coil that won’t damage the bristles of your brush while keeping them safely away from the paint sediment at the bottom.
Another option produced by Mona Lisa is a simple tank with a galvanized screen. This cleaning tank provides a rigid surface for cleaning your brushes while keeping the sediment safely away from the bristles.
Storing Your Art Brushes Properly
Proper storage is imperative to extending the life of your brush. Placing brushes into a container with the bristles down will cause wet bristles to dry out of shape, making them harder to use the next time.
I was taught to store brushes upright after cleaning so that the bristles dry in their proper shape. However, storing clean, wet brushes upright will cause the ferrules to become loose. Moisture runs down into the ferrule and causes wooden handles to first swell and then, as the wood dries, shrink. The glue inside of the ferrule separates from the handle due to this cycle of swelling and shrinking. Painting with a loose brush is frustrating.
So after washing a brush, shape the tip with either your fingers or, if it’s a soft brush, a quick flick. Then lay it flat to dry. Now gravity will not draw moisture into the ferrule. Once dry, you can store the brush upright without the ferrule loosening.
For long term storage of natural bristle brushes throw in some moth balls or you might find gaps in your bristles the next time you are ready to paint. Don’t worry about the nylon bristles – apparently they are not on the menu.
How to Fix Broken Bristles
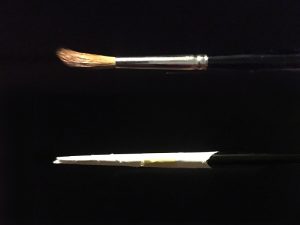
Despite our best efforts we sometimes get in a hurry and, through carelessness, allow a brush to dry out of shape. Now you have a brush with bristles shaped like a banana. Not to worry, we can fix this!
Simply re-wet your bristles and tape a small strip of paper around your bristles to hold them in place. This will retrain your bristles to take their former, preferred shape.
Painting Technique
Our painting techniques contribute greatly to the longevity of a brush. Do you mix oil paint with your brush? Do you load paint onto your brush like you are scooping peas onto a fork?
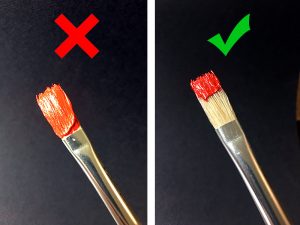
If so, you may get paint onto areas it doesn’t belong. In a perfect world we would only load paint on the bottom half of our bristles. Keeping paint away from the ferrule is important. Here’s why…
When we clean our brushes, the paint is worked out of the brush by the action of the flexing bristles and by the swishing of solvent between those bristles. Near the ferrule, the bristles don’t bend as much and the solvent doesn’t penetrate as well. Over time, small particles of paint build up in the tops of the bristles. This spreads the bristles apart enough to keep the brush from closing to a tight point or edge.
The best way to keep paint from creeping up the bristles is to mix your colors with a palette knife and to use larger brushes whenever possible.
Our “mark-making” may wear out a brush as well. Some artists make light, gentle strokes in the direction of the bristles. Others (myself included) scrub back and forth as we paint. A scrubbing motion is harder on bristles and forces them to bend farther and more quickly. The bristles are more likely to break.
That being said, your personal “mark-making” is a unique part of your art and should take precedence over the life of your brushes. Sure, we all want our brushes to last as long as possible, but our priority must remain the artwork itself. If you never have to replace your brushes then you are not painting enough.
If so, join over 36,000 others that receive our newsletter with new drawing and painting lessons. Plus, check out three of our course videos and ebooks for free.