
Art, unlike baseball, is always in season but spring training reminds me that it is okay to practice, even if you are in the major leagues. Drawing practice looks quite a bit different than baseball practice but there are some commonalities. These commonalities extend to other disciplines as well – music comes to mind.
What makes practice effective?
Effective practice has both a goal and a targeted exercise to realize that goal.
Whether performing drawing or sports exercises, practice doesn’t always look like the real thing. Take batting practice for example. A coach may throw the same curve ball over and over so that a player can learn to hit that one pitch. However in a game, the batter does not know which pitch is coming.
Basketball practice often targets a specific skill as well – three players may repeat a passing and shooting sequence at half speed to perfect their timing and position before attempting the same maneuver in a game.
Likewise, art training does not always result in a piece of art but it does hone our skills. This article showcases some of the skill building exercises that have helped me and countless others improve our drawing skills. A version of these exercises may even become a part of your standard drawing process, as they have mine.
4 Exercises To Improve Your Drawing
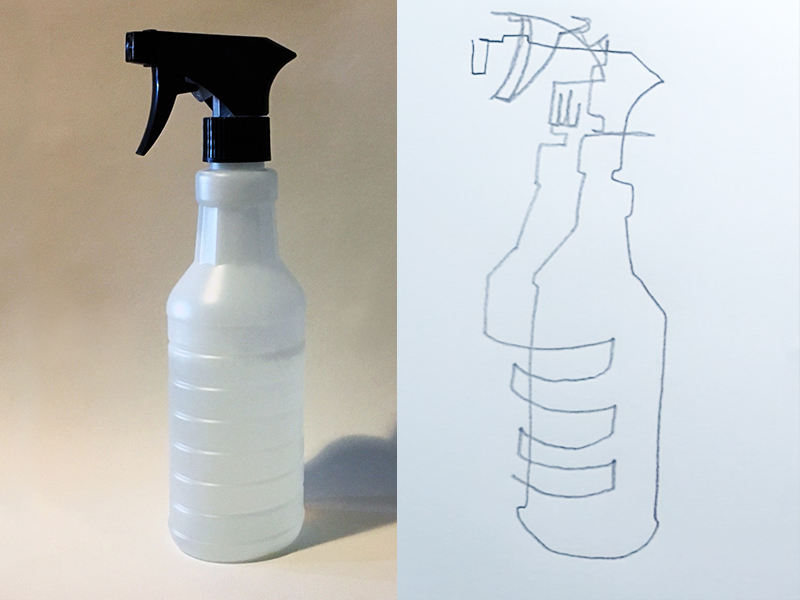
Blind contour drawing is an important exercise. It is the most well-known of all the exercises we will cover and requires the least amount of skill to perform. Blind contour drawing benefits artists of all skill levels.
The Process
At first, blind contour drawing is uncomfortable. There are a few rules to follow:
- Don’t look at your paper.
- Only look at your subject.
- Keep your pencil on the paper for the duration of the drawing.
The drawing is made from one continuous line. Since the pencil stays in contact with the paper, there should be only one beginning and one end to your line. You may have to retrace your line to move around in the drawing or simply leave out parts of your subject. It doesn’t matter. What your drawing looks like is not the point of this kind of practice.
The Benefits
Blind contour drawing does two things. First, Blind contour drawing develops eye-hand coordination. Not the type of coordination used to catch a ball out of the air. That type of action depends on coordination between the eye and gross-motor functions. Blind contour drawing coordinates fine-motor function with the eye. It tethers the hand and eye like a wagon is tethered to a horse. The eyes are the horse and the hand just follows along.
The second benefit of blind contour drawing is the breaking of a bad habit. Novice artists are in the habit of looking at their artwork too much and looking at their subject to little. The answer to all our drawing problems is right there in front of us. If we would only look at our subject more often, we would find more success. Blind contour drawing trains us to look at our subject more, constantly checking what we see against what we are drawing.
I remember the first time I was asked to make a drawing using only straight lines. It was a figure drawing class and our model that day was a portly man in his golden years. He was all curves and wrinkles – no straight lines to speak of. This straight-line approach to drawing became my standard mode for beginning any drawing, not just when practicing.
The Process
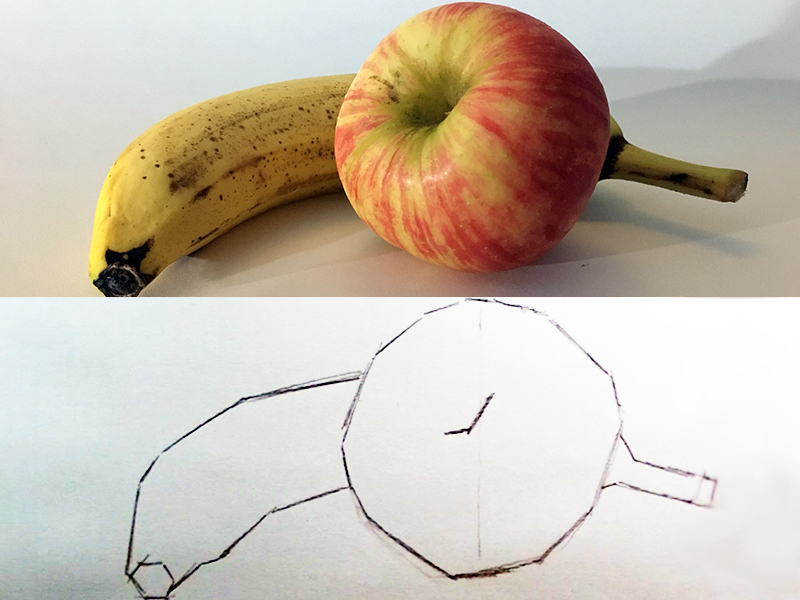
Some subjects have truly straight edges, but even an organic shape has some segments along its contour that bend at greater and lesser degrees. The more gently bowed segments of a curve are changed to straight lines while strongly curved segments become corners. This process results in a useful simplification of the subject.
The Benefits
When we change the curves to straight lines we are forced to analyze each curve to determine where along that curve the corners should go. Each straight line is a conscious, meaningful decision about the subject.
Once a straight-line drawing is made, the artist can then change those straight lines and corners to curves. The result is a drawing that accurately captures the nuance of each curve.
Before describing the process of a plane-analysis, it’s worth noting that the exercises described in this article gradually increase in challenge level. Plane-analysis is suitable for intermediate through advanced level artists.
The Process
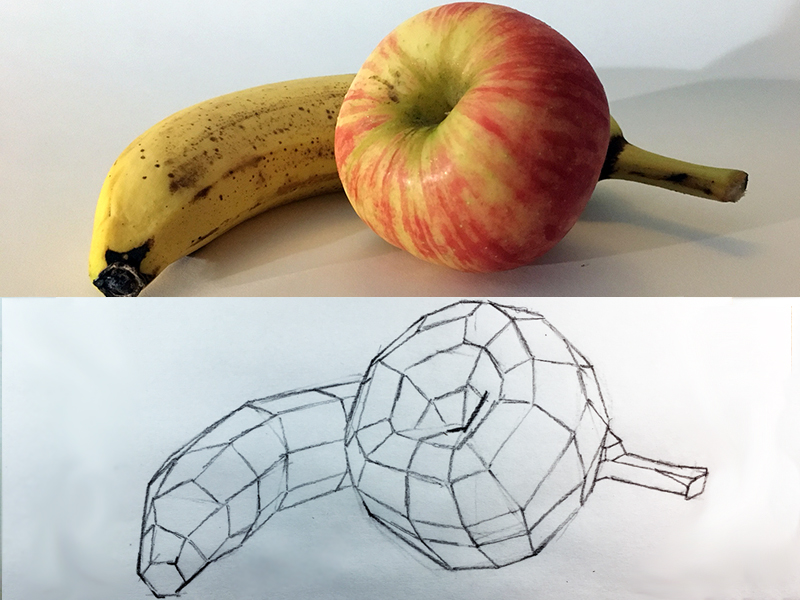
Begin by making a contour line drawing of an organic subject using only straight lines. The subject may be simple, like a piece of fruit – or complex, like a self-portrait from a mirror. After finishing my straight-line shape, I ask myself, “If this form had a corner, where would it be?”
Try to identify the shape of generally flat planes. Most of the shapes I use in this exercise have 3-5 sides. Make an edge or corner where the various planes seem to change direction.
When done correctly, the subject will appear as though it is made of facets like a cut diamond. Similar to the straight-line drawing, this exercise results in a stylization of the subject.
The Benefits
This mode of drawing helps the artist to internalize a subject’s form. By purposefully drawing each plane, the artist will likely memorize the form and be able to draw it from imagination after the exercise.
A plane-analysis improves the artist’s shading as well. It helps us to see subtle plane distinctions that might otherwise go unnoticed. There is no denying that each plane should have a unique value since each plane is uniquely tilted in space. My own drawing and painting acquired a more solid, sculptural quality after completing a few plane-analysis drawings.
The Process
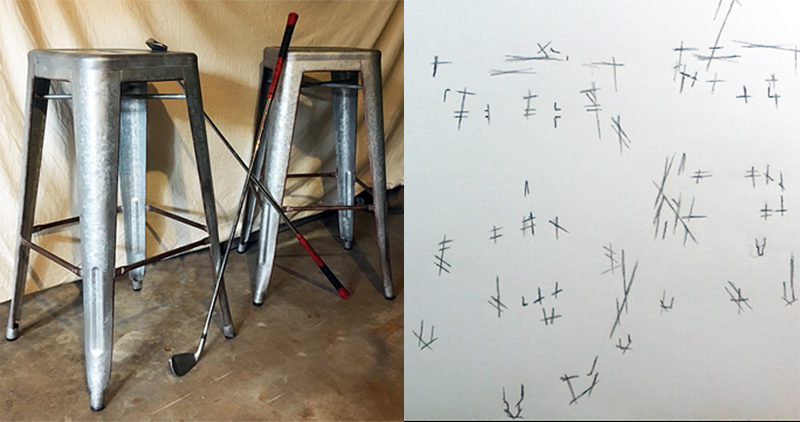
Set up a still life with lots of empty space. Use long, thin items and be sure that everything overlaps and is visually connected (see video example).
Now draw the parts of the still life where edges meet – where they visually intersect. Include any hard corners that may be a part of the objects. Do not draw whole contours but instead work to arrange the “intersections” so that the missing portions of the drawing are easily imaginable as implied edges/lines.

The Benefits
Have you heard the phrase, “can’t see the forest for the trees?”. It is a colloquial expression meaning that a person is only focused on an individual thing and cannot understand how that thing is part of something greater.
Intersection drawing trains the artist to see the whole forest and not just the individual trees. When the artist is capturing an intersect he/she is capturing a relationship of two or more parts at once. The result is a more accurate, unified drawing in which the space between and around the subject is part of the subject too.
Conclusion
Make these drawing exercises a part of your warm-up routine and it won’t even seem like practice. If you don’t have a warm-up routine, then now you do.
If so, join over 36,000 others that receive our newsletter with new drawing and painting lessons. Plus, check out three of our course videos and ebooks for free.


Lesson Discussion
Comments are closed.
I love this. The explanation was great and so was the video